

Size the cone, pace the increases, and flatten the brim
A wearable witch hat is a fit problem and a growth-rate problem at the same time. The opening has to stay on the head, the tall cone must widen slowly enough to look pointed, and the brim must widen quickly enough to lie flat. This free crochet witch hat pattern calculates those three jobs from your head measurement and washed gauge instead of assuming one fixed list of rounds will fit everyone.
Witch Hat Cone and Brim Pace Calculator
Open the tool in a separate page. The article also retains the manual formulas and worked checks.
JavaScript is optional: use the manual calculation method and worked examples in the article.
What This Pattern Makes
This is an adult wearable hat, not a three-inch ornament, doll accessory or soft tube that happens to end in a point. It is worked from the tip down in continuous single-crochet rounds. Eight increases are added only on scheduled rounds, so the cone grows slowly. The same eight sectors continue into the brim, where increase rounds occur much more often.
The method is called the Cone–Brim Pace Map. It gives you:
- a legal lower-cone count that fits the wear line;
- the number and positions of the cone increase rounds;
- the number and positions of the brim increase rounds;
- the estimated fit and brim overhang after legal-count rounding;
- a return point for each visible failure.
This pattern covers the complete costume silhouette. For a broad hat designed around shade performance, use the Crochet Sun Hat Pattern. For choosing or repairing a brim on an existing hat body, use Crochet Hat With Brim. For volume created by rear drop rather than a radial cone, use the Crochet Slouchy Beanie Pattern.
Project Overview
- Skill level: confident beginner to intermediate
- Construction: tip-down, continuous single-crochet rounds
- Sector system: eight equal sectors
- Yarn: #4 medium/worsted yarn that makes a dense, resilient washed fabric
- Starting yardage: approximately 300–450 yd / 274–411 m for an adult hat with a 14–16 in cone and 2.5–3 in brim; swatch and record actual use
- Hook: size needed to produce the washed gauge and fabric behavior you selected; 4–4.5 mm is a starting range, not a requirement
- Notions: tape measure, yarn needle, one distinct beginning marker and eight matching removable sector markers
- Optional finishing aid: a flexible millinery support made for hat brims, used only according to its manufacturer’s directions and fully enclosed
The Craft Yarn Council’s Standard Yarn Weight System gives yarn categories and suggested ranges, but the label cannot predict your finished cone or brim. Use the washed fabric measurements below.
US Abbreviations
- ch: chain
- inc: work 2 single crochet in the same stitch
- rnd: round
- sc: single crochet
- sl st: slip stitch
- st(s): stitch(es)
This pattern uses US terminology. The Craft Yarn Council crochet abbreviations list provides the standard abbreviations and corresponding terminology.
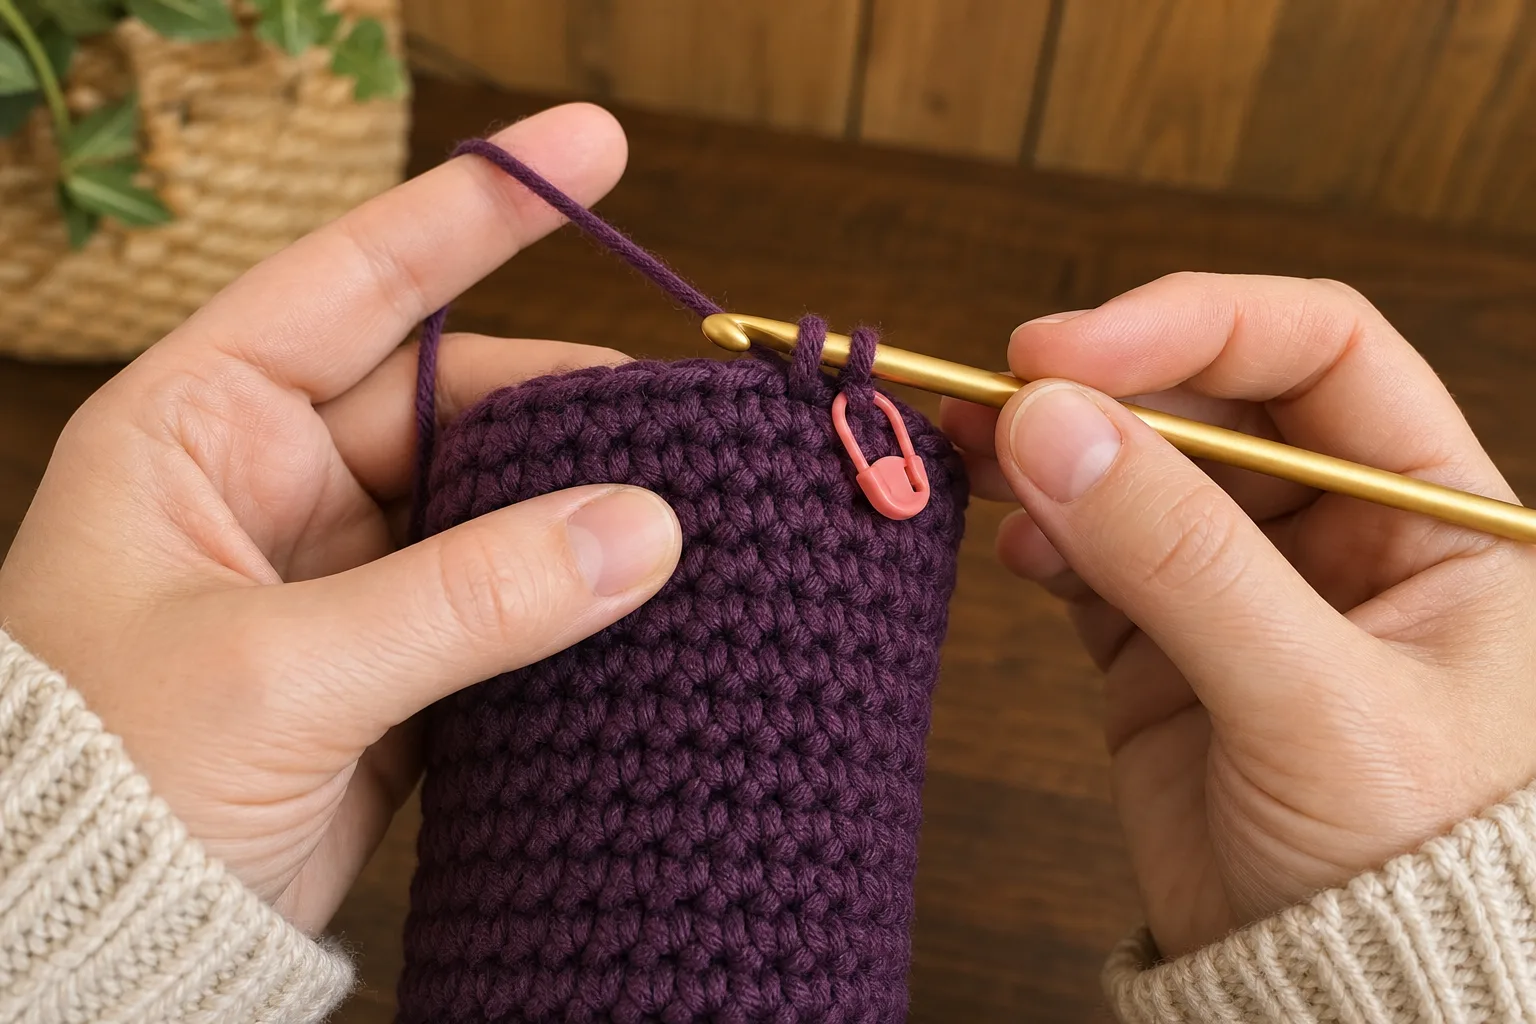
Rounds are worked continuously unless stated otherwise. Do not join or turn. Place a distinct marker in the first stitch of every round and move it as you work.
Measure the Actual Wear Line
Measure where the lower cone will sit: across the forehead, above the ears and around the fullest back point. Keep the tape level and comfortably close without pulling it into the skin. Record the result as H.

Choose a starting negative ease e. For a dense single-crochet fabric with useful recovery, 3–6% is a practical trial range. It is not universal. Hair volume, fiber, stitch density and sensitivity at the forehead may require a different value. The base-fit gate overrides the percentage.
Make and Wash a Continuous-SC Gauge Tube
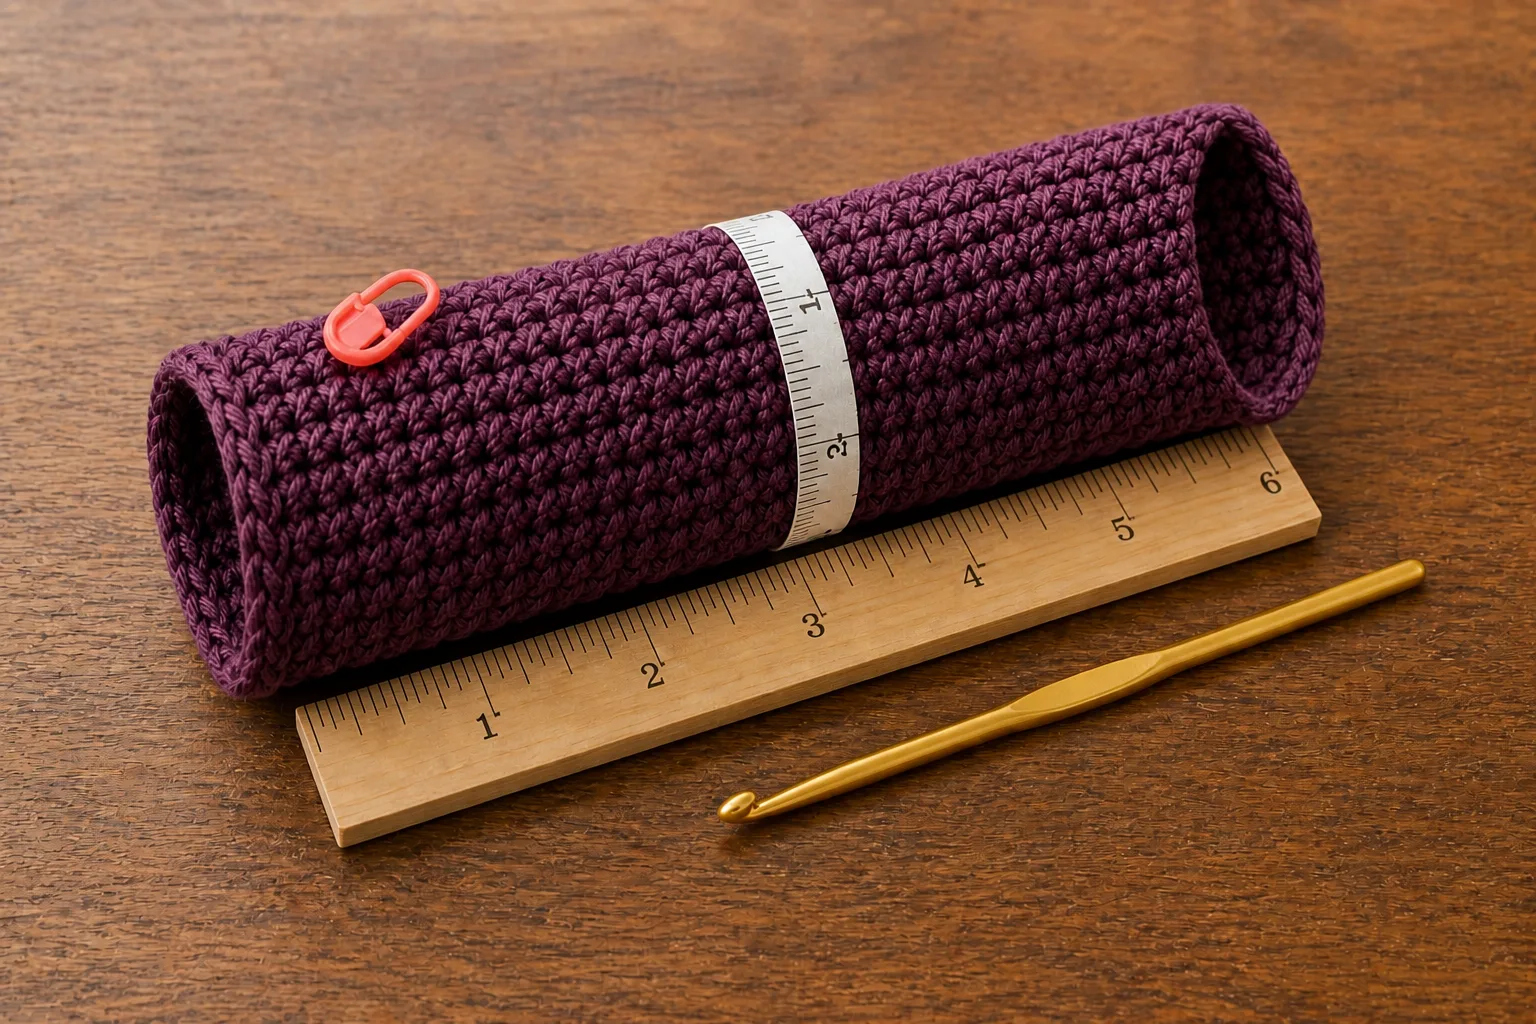
A flat square does not perfectly reproduce a continuous spiral. Make a tube large enough to measure away from the starting ring or edge—32 stitches around and at least 24 rounds is a useful minimum.
- Work the tube with the planned yarn and hook in continuous sc.
- Mark the first stitch so you do not accidentally add or lose stitches.
- Wash and dry it exactly as the finished hat will be treated.
- Measure stitches across several inches around the fabric and record g_s, washed sc per inch.
- Measure rounds along the fabric and record g_r, washed rounds per inch.
- Bend the sample. Reject a fabric that collapses when you need a crisp cone, or becomes too rigid and uncomfortable at the wear line.
The Cone–Brim Pace Map
The map uses eight sectors from tip to outer edge. Every planned increase round adds exactly one stitch in each sector, or eight stitches total.
For all round-number calculations, round to the nearest whole number; an exact .5 rounds up.
Calculate the lower-cone count
Target opening circumference
B_target = H × (1 – e)
Raw stitch count
N_base_raw = B_target × g_s
Round the raw count to a multiple of eight. Compare the legal count below and above the raw result; do not choose blindly.
B_actual = N_base / g_s
estimated negative ease = (H – B_actual) / H
A negative result means the hat has positive ease. Reject a count that is too loose to stay stable or too tight to pass over the widest part of the head.
Convert vertical height into cone rounds
Choose the vertical height C from the wear line to the point. The crochet follows the cone’s sloping surface, not a straight vertical ruler. Approximate the lower-cone radius and slant length:
r = B_actual / (2π)
L = sqrt(C² + r²)
R_cone = round(L × g_r)
Starting with eight tip stitches, the number of increase rounds is:
q_cone = (N_base – 8) / 8
Schedule increase round k at:
p_k = round(k × R_cone / q_cone)
Calculate that for k = 1 through q_cone. All other cone rounds are plain sc rounds.
Round 1 is the eight-stitch foundation and cannot also be a scheduled increase round. If any scheduled position is Round 1, if two positions collide, or if R_cone – 1 is smaller than q_cone, the requested cone is too short for this eight-sector plan. Increase the cone height, change the washed gauge/sector plan, or revise the legal base count. Never place two full sets of increases in one round just to rescue an impossible schedule.
Calculate the brim
Choose the projected brim overhang O, measured from the lower cone wall to the outer edge.
N_outer_raw = N_base + 2πOg_s
Round to a multiple of eight, then calculate:
q_brim = (N_outer – N_base) / 8
R_brim = round(O × g_r)
Schedule brim increase round k at:
b_k = round(k × R_brim / q_brim)
Verify the finished planning values:
D_base = B_actual / π
D_outer_actual = N_outer / (πg_s)
O_actual = (D_outer_actual – D_base) / 2
The head is not a perfect circle and crochet fabric is not rigid geometry. These calculations create a disciplined starting path; the wearer and washed-brim gates make the final decision.
How to Use the Cone–Brim Calculator
Use the accompanying calculator when you change head size, ease, washed stitch gauge, washed round gauge, cone height or brim overhang. It compares both legal base-count neighbors, creates the cone and brim schedules, calculates estimated ease and overhang, and warns when two increases collide or the requested geometry is impossible under the eight-sector plan.
Copy the calculator’s round ledger into your project notes before crocheting. The output is a planning result, not a fit guarantee: the base-fit, cone-line, brim-flatness and movement-and-visibility gates remain authoritative.
Worked Example: 22-Inch Head
The default example uses:
- H = 22 in / 55.9 cm
- e = 0.05
- g_s = 4.25 sc/in
- g_r = 4.25 rounds/in
- C = 16 in / 40.6 cm
- O = 3 in / 7.6 cm
Base calculation
B_target = 22 × 0.95 = 20.90 in
N_base_raw = 20.90 × 4.25 = 88.83
The neighboring legal counts are 88 and 96. Choose 88 for this example.
B_actual = 88 / 4.25 = 20.71 in / 52.6 cm
Estimated negative ease is (22 – 20.71) / 22 = 5.88%.
Count 96 would measure 22.59 in / 57.4 cm and create positive ease, so it is not the better wearer choice simply because it is also legal.
Cone calculation
r = 20.71 / (2π) = 3.30 in
L = sqrt(16² + 3.30²) = 16.34 in
R_cone = round(16.34 × 4.25) = 69 rounds
q_cone = (88 – 8) / 8 = 10 increase rounds
The increase rounds are:
7, 14, 21, 28, 35, 41, 48, 55, 62, 69
That count path is:
8 → 16 → 24 → 32 → 40 → 48 → 56 → 64 → 72 → 80 → 88
Brim calculation
N_outer_raw = 88 + 2π × 3 × 4.25 = 168.11
Choose the legal outer count 168.
q_brim = (168 – 88) / 8 = 10 increase rounds
R_brim = round(3 × 4.25) = 13 rounds
The brim increase rounds are:
1, 3, 4, 5, 7, 8, 9, 10, 12, 13
The calculated overhang is approximately 3.00 in / 7.6 cm.
Complete Crochet Witch Hat Pattern
Use your own calculated counts and schedules. The parenthetical counts below follow the 22-inch example.
Part 1: Start the point
Make an adjustable ring.
- Round 1: Work 8 sc in the ring. Do not join. Pull the ring closed and mark the first stitch. 8 sts
- Rounds 2–6: Sc in each stitch around. 8 sts
- Round 7 — scheduled increase: Work 2 sc in each stitch. 16 sts
Keep the initial six rounds only if they make a narrow, flexible point in your yarn. If they form a rigid peg, undo before continuing and use a slightly larger hook or fewer initial plain rounds, then recalculate the total plain-round distribution while preserving the ten increase rounds and final count.
Part 2: Pace the cone increases
On every scheduled increase round, divide the current count into eight equal sectors. If each sector currently contains m stitches, repeat:
sc in next m – 1 stitches, 2 sc in next stitch
Repeat that sequence eight times. The round gains exactly eight stitches. On every unscheduled round, sc once in every stitch.
For the default example:
| Increase round | Instruction repeated 8 times | New count |
|---|---|---|
| 7 | inc in each existing sector stitch | 16 |
| 14 | 1 sc, inc | 24 |
| 21 | 2 sc, inc | 32 |
| 28 | 3 sc, inc | 40 |
| 35 | 4 sc, inc | 48 |
| 41 | 5 sc, inc | 56 |
| 48 | 6 sc, inc | 64 |
| 55 | 7 sc, inc | 72 |
| 62 | 8 sc, inc | 80 |
| 69 | 9 sc, inc | 88 |
Once the cone is wide enough to handle easily, place exactly eight matching markers at the sector boundaries. Keep the separate beginning-of-round marker visually distinct.
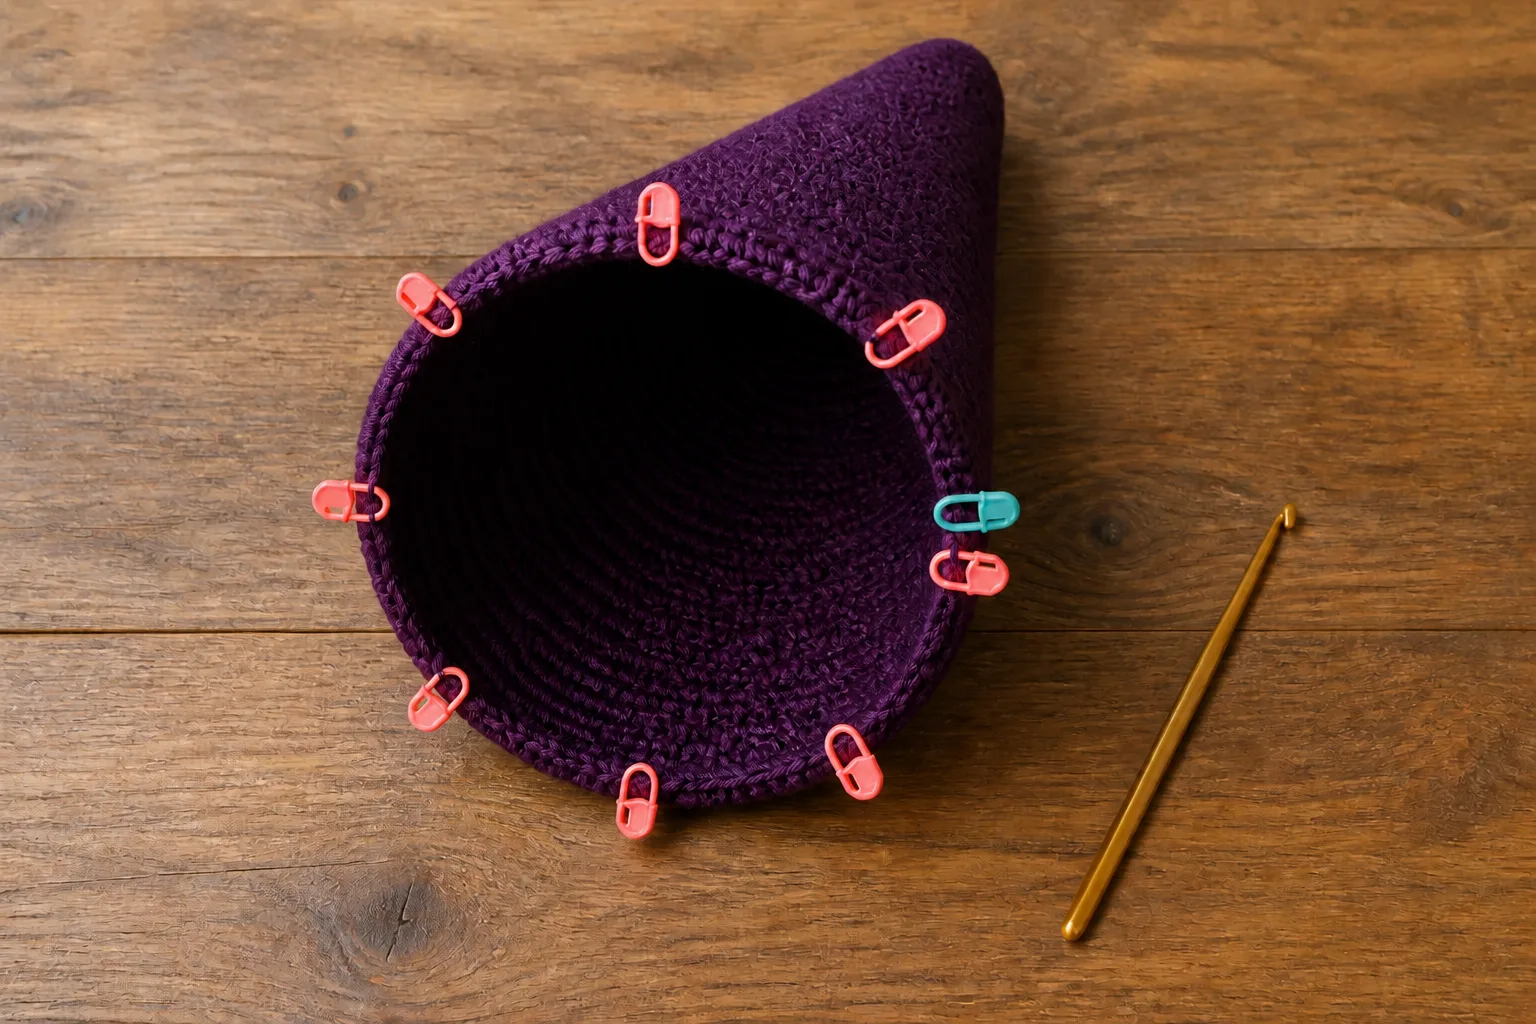
If a strong diagonal ridge develops, shift each increase one stitch clockwise within its sector on the next scheduled increase round. Keep the sector total and exactly eight increases unchanged.
Cone-line gate
Pause near one-third and two-thirds of R_cone, then again at N_base.
Pass: the side line expands smoothly from point to base. The tip is not a long cylinder, and the lower cone has no sudden shoulder.
- Cylindrical tip: the first increase occurred too late for this yarn. Return to the earliest intervals and redistribute the same number of increases.
- Blunt or short cone: increases were packed too early, or the vertical-height input was too small. Return to the first crowded interval.
- Stepped side: scheduled rounds were skipped, duplicated or unevenly distributed. Recount the round ledger before adding length.
Part 3: Test the base before the brim
At N_base, let the fabric relax and place the unfinished cone on the wearer. It should pass over the widest head point and settle at the measured wear line. Wear it for 30 seconds.
Pass: it stays in position, feels comfortably close and leaves no persistent pressure mark.
If it is too tight or too loose, correct the legal count or washed gauge now. Adding brim rounds changes the outer edge, not the fit of the lower cone.
Part 4: Grow the integrated brim
Reset the round counter to Brim Round 1. Keep the same eight sectors. On each scheduled brim increase round, work one increase per sector using the same m – 1 sc, inc rule. On every other brim round, sc around without increasing.
For the default 13-round brim:
| Brim round | Action | End count |
|---|---|---|
| 1 | 8 increases | 96 |
| 2 | plain | 96 |
| 3 | 8 increases | 104 |
| 4 | 8 increases | 112 |
| 5 | 8 increases | 120 |
| 6 | plain | 120 |
| 7 | 8 increases | 128 |
| 8 | 8 increases | 136 |
| 9 | 8 increases | 144 |
| 10 | 8 increases | 152 |
| 11 | plain | 152 |
| 12 | 8 increases | 160 |
| 13 | 8 increases | 168 |
Relax the hat on a flat surface every three or four brim rounds. Mild movement directly off the hook can settle, but a developing cup or repeated wave is a structural warning; use the brim-flatness gate before continuing.
Part 5: Finish the edge and shape the point
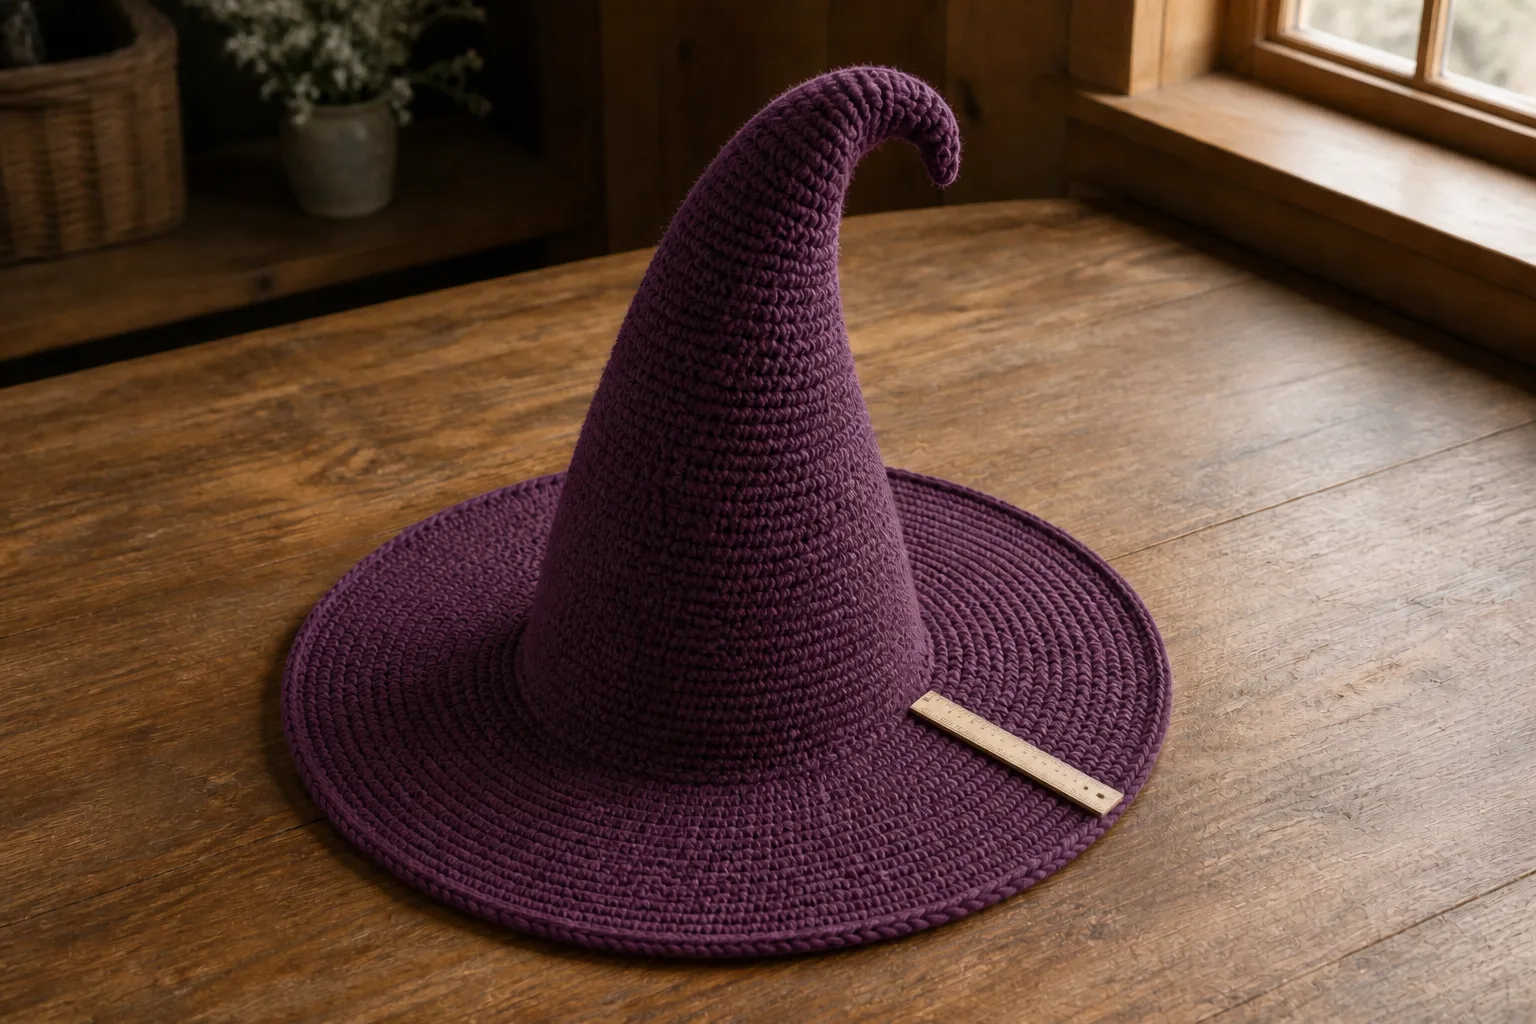
After the last brim round, slip stitch into the next two stitches to soften the spiral step. Fasten off and weave the tail through several direction changes without pulling the edge inward.
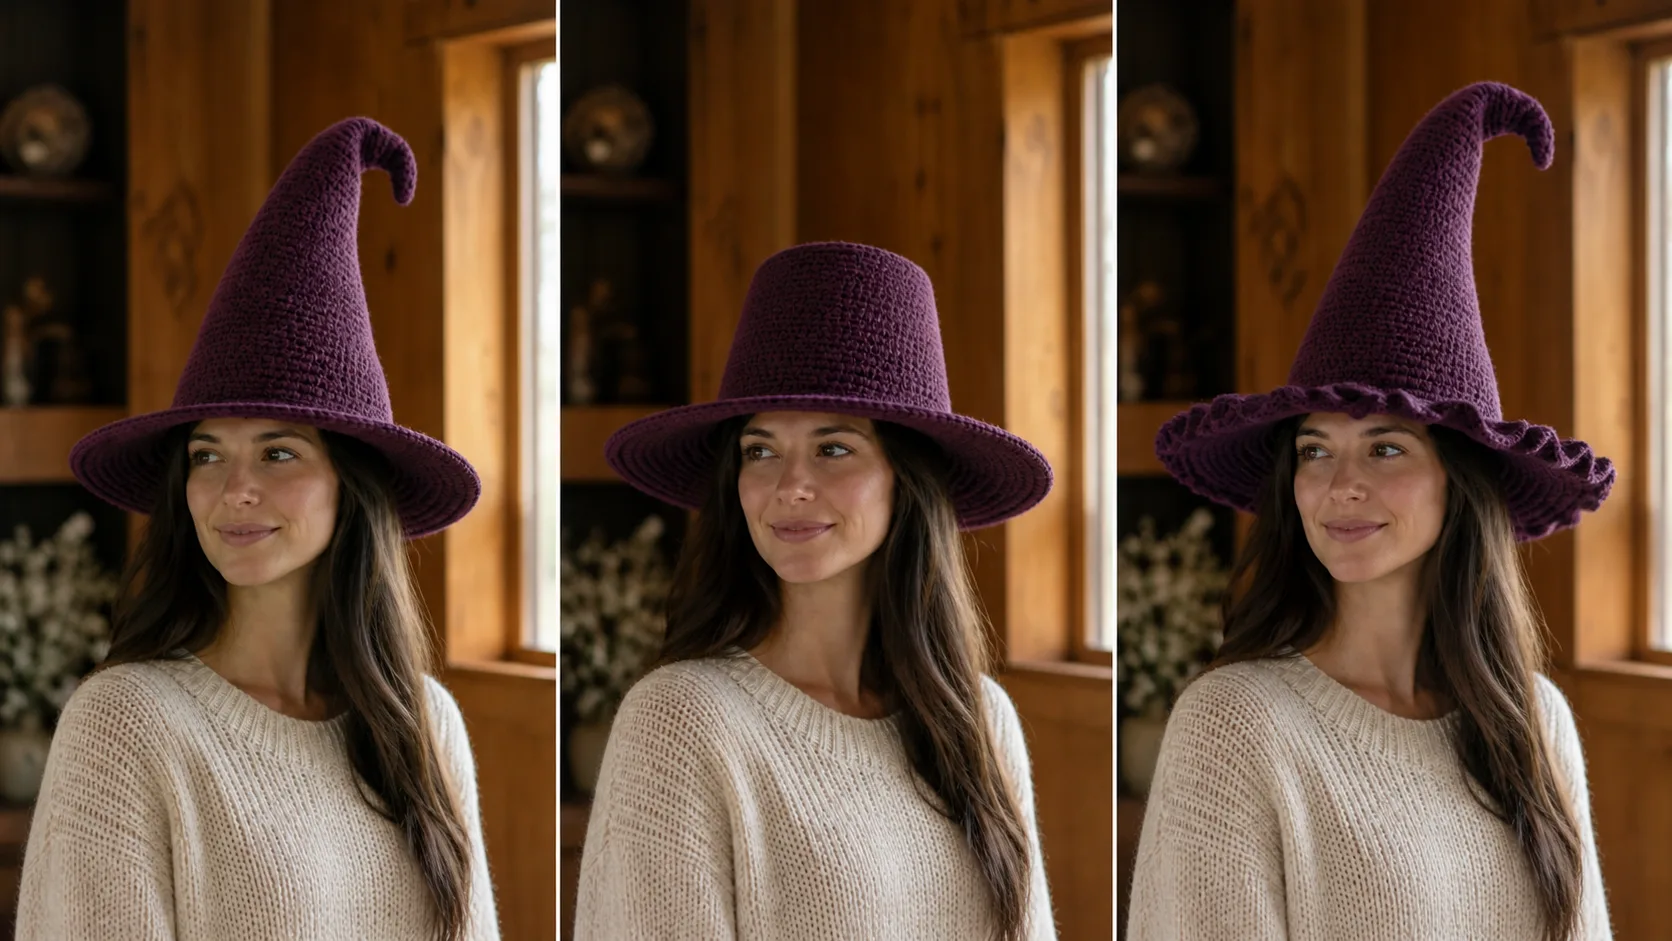
Wash and dry the hat as the gauge tube was treated. For a gentle crook, support the upper 5–7 in / 12.7–17.8 cm of the damp cone in a soft curve until fully dry. This changes presentation, not stitch count. Do not use heat or steam beyond the yarn manufacturer’s care instructions.
Test the wire-free brim first. If the chosen yarn and width cannot pass the visibility/support gate, either reduce the overhang or use a flexible support specifically made for hat brims. Follow the product instructions, secure and cover the join completely, and never leave a cut or sharp end exposed.
Four Acceptance Gates
Base-fit gate
Pass: the hat crosses the widest head point, stays at the measured line for 30 seconds and remains comfortable.
Minimum correction: return to N_base, estimated ease or gauge. Do not add extra cone height to repair circumference.
Cone-line gate
Pass: the side widens smoothly from point to lower cone, with no cylindrical peg, abrupt shoulder or skipped step.
Minimum correction: undo to the first wrongly placed increase round and restore the schedule from there.
Brim-flatness gate
After finishing and washing, place the brim on a flat surface without stretching it.
Pass: it rests substantially flat. A slight styled tilt is acceptable; repeated waves or a persistent bowl are not.
Minimum correction: a cup needs an earlier/additional legal increase interval; repeated waves need a later/removed interval. Return to the first round where the behavior became persistent.
Movement-and-visibility gate
Put on the dry hat, turn the head in both directions, look down and nod.
Pass: the base stays stable and the brim remains clear of both eyes.
Minimum correction: correct base recovery first, then reduce brim overhang or improve appropriate brim support before adding decorative weight.
Worked Example: 20.5-Inch Head
This second case uses:
- H = 20.5 in / 52.1 cm
- e = 0.04
- g_s = 4.6 sc/in
- g_r = 5.0 rounds/in
- C = 14 in / 35.6 cm
- O = 2.5 in / 6.4 cm
The target base is 20.5 × 0.96 = 19.68 in. The raw count is 19.68 × 4.6 = 90.53.
The legal neighbors are 88 and 96. At this gauge:
- 88 stitches measure 19.13 in / 48.6 cm and create 6.68% negative ease;
- 96 stitches measure 20.87 in / 53.0 cm and create about 1.80% positive ease.
Choose 88 only if the washed tube and base-fit gate confirm that 6.68% remains comfortable. Otherwise change the hook/fabric or recalculate; do not accept 96 merely because it feels easier to reach.
The 88-stitch base produces a radius of about 3.05 in. The slant length is:
sqrt(14² + 3.05²) = 14.33 in
At 5 rounds/in, use R_cone = 72 and ten increase rounds:
7, 14, 22, 29, 36, 43, 50, 58, 65, 72
For the brim:
N_outer_raw = 88 + 2π × 2.5 × 4.6 = 160.26
Choose 160 stitches. That requires nine eight-stitch increase rounds across 13 brim rounds:
1, 3, 4, 6, 7, 9, 10, 12, 13
The calculated overhang is about 2.49 in / 6.3 cm. This case proves why both legal neighbors and the physical base gate matter after rounding.
Troubleshooting by Return Point
| Symptom | Likely cause | Minimum correction | Return point |
|---|---|---|---|
| Tip looks like a narrow tube | First increases scheduled too late for the fabric | Redistribute early plain rounds while preserving total increases | Early cone |
| Cone looks short or blunt | Increases packed too early or C too small | Recalculate height/schedule; undo to first crowded interval | Cone schedule |
| One hard diagonal ridge | Increases stacked at identical positions and tension tightened | Shift each increase within its sector without changing total | Next scheduled increase |
| Lower cone is tight | Legal base count or washed gauge is too small | Change count/hook/gauge before the brim | Base calculation |
| Lower cone slides | Positive ease or weak recovery | Use adjacent legal count or a recovering fabric | Base calculation |
| Brim cups upward | Too few increases for width/gauge | Add or move an eight-increase interval earlier | First cupping round |
| Brim forms repeated waves | Too many increases too soon | Remove or delay the first excessive interval | First waving round |
| Outer edge draws inward | Edge finish is too tight | Undo only the finish and rework at relaxed tension | Final edge |
| Brim falls into eyes | Excess overhang, unstable base or insufficient support | Correct base, then width/support | Movement gate |
Final Checklist
- H was measured at the actual lower-cone line.
- The continuous-SC gauge tube was washed and measured in both directions.
- N_base and N_outer are multiples of eight.
- Both legal base neighbors were checked after rounding.
- Cone slant length, not vertical height alone, set R_cone.
- Every scheduled increase round added exactly eight stitches.
- Exactly eight sector markers were used; the round marker stayed distinct.
- The lower cone passed the wearer gate before the brim began.
- The brim was checked on a flat surface during growth and after washing.
- Both eyes remain clear when the wearer turns and nods.
- Final yarn, hook, gauges, counts, schedules and corrections were recorded.
Frequently Asked Questions
How do you crochet a witch hat?
Start with a small tip count, add evenly spaced increases slowly to form a tall cone, test the lower cone at the wear line, then increase more frequently to make a flat brim. This pattern uses eight sectors so every scheduled increase round adds exactly eight stitches.
How do I make a crochet witch hat fit a larger head?
Recalculate N_base from the larger head circumference and your washed stitch gauge, round to a legal multiple of eight, and then regenerate both schedules. Adding random plain rounds changes height, not opening circumference; adding unscheduled increases changes cone pitch.
Why is my crochet witch hat cone too short and wide?
The increase rounds are probably too close together for the chosen height and gauge. Increase C or redistribute the required increase rounds across more cone rounds. Undo to the first crowded interval instead of extending a blunt cone with a narrow tube at the bottom.
Why is my crochet witch hat brim wavy?
A repeated wave usually means the brim gained circumference faster than its radius grew. Remove or delay the first excessive eight-increase interval. Do not rely on blocking to erase a structural ruffle.
Can I make the point crooked?
Yes. Shape a gentle curve into the damp upper cone and support it until fully dry. That preserves the stitch count and lets the fiber determine how much curve it holds. Avoid heat beyond the yarn-care directions.
Do I need wire in the brim?
Not always. A dense, resilient fabric and moderate overhang may hold well enough. Test the washed hat first. If it fails, reduce the width or use a flexible millinery support designed for hat brims, following the product instructions and fully enclosing the join.
Record H, e, washed gauges, chosen C and O, both legal counts, both schedules and all four gate results. Those values make the next witch hat reproducible instead of accidental.