
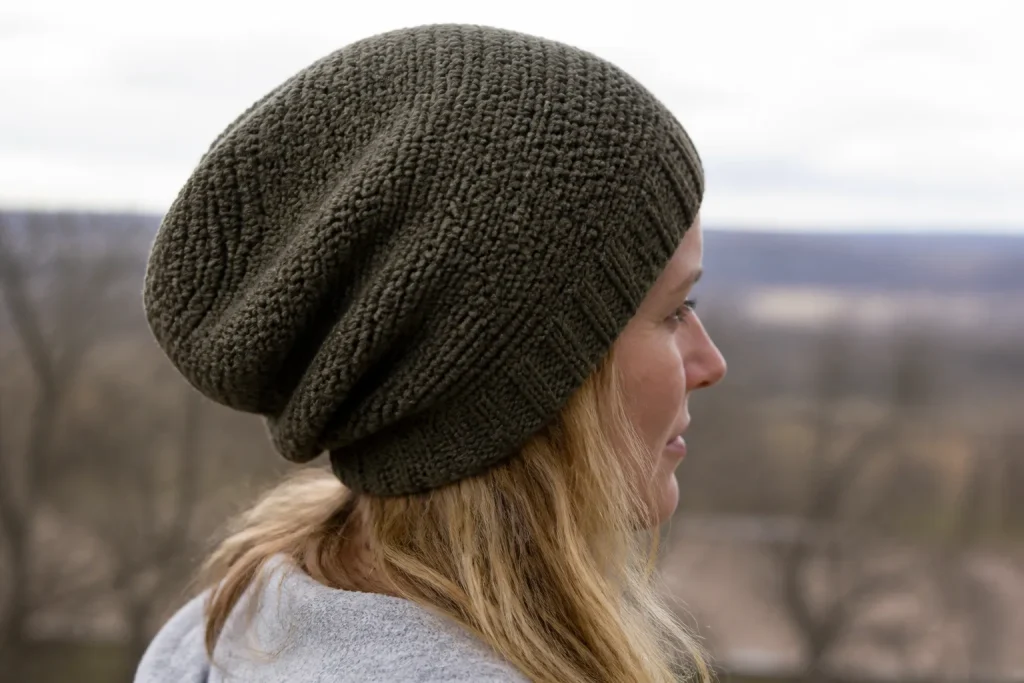
A measurement-adaptive slouchy crochet beanie that separates a secure band, controlled body width and intentional back drop—then reserves enough height for a smooth crown.
A slouchy beanie can have the correct head circumference and still stand upright, flare like a bucket, collapse over the eyes or finish with a gathered lump. The missing information is usually not another fixed stitch count. It is the relationship between three different dimensions: the opening that holds the hat, the body circumference that allows movement, and the extra vertical depth that becomes the visible drop.
This pattern calculates those dimensions separately. It also uses the washed row gauge to decide where the crown taper must begin. That means the maker does not crochet an arbitrary number of extra rounds and discover too late that the crown consumed the intended slouch.
Slouchy Beanie Drop and Taper Planner
Open the tool in a separate page. The article also retains the manual formulas and worked checks.
JavaScript is optional: use the manual calculation method and worked examples in the article.
Quick answer
Measure the actual head at the intended wear line. Make and wash an HDC swatch. Record both stitch gauge and row gauge, then hold the swatch from its top center. A fabric that falls into a soft U-shaped fold can support a visible slouch; a fabric that remains plate-like will usually make a taller hat rather than a softer drop.
Choose slouch depth from the wearer’s preference and the washed fabric’s drape. Use the separate band, body and taper calculations below, then judge the physical silhouette. For the worked example below, assume a 22-inch head, 8% band negative ease, 2% body flare and a gauge of 16 HDC and 12 rounds per 4 inches. With 8.5 inches of fitted depth and 2.75 inches of extra slouch, the plan gives:
- a 20.24-inch / 51.4-cm band target;
- an 84-stitch body measuring about 21 inches / 53.3 cm relaxed;
- an 11.25-inch / 28.6-cm total finished depth;
- a taper start at about 7.92 inches / 20.1 cm from the lower edge;
- one four-decrease alignment round followed by nine taper rounds.
Those values belong to that head, swatch and silhouette choice. Change any of the inputs and the useful stitch count or taper point can change.
What creates slouch—and what does not
The back drop is produced by extra vertical depth in a fabric that can bend. Extra circumference can help the body move, but width alone does not create a controlled slouch. Too much width often produces side bulk, a bucket-like silhouette or a hat that slides.
Think of the hat as three connected zones:
| Zone | Its job | What controls it |
|---|---|---|
| Band | Holds the wear line above the eyes and around the ears | Head measurement, band ease, stretch and recovery |
| Body | Carries the fabric toward the back without ballooning sideways | Washed stitch gauge, selected stitch multiple and limited flare |
| Drop and taper | Creates the visible slouch and closes the crown smoothly | Fitted depth, extra depth, washed row gauge and decrease schedule |
One number cannot do all three jobs. A larger body count cannot repair a band that slides. A tighter band cannot make stiff fabric drape. Extra rounds cannot compensate for a taper that begins too late.
Why common slouchy-hat instructions fail
Many patterns give a fixed finished length, a fixed number of body rows or the instruction “add rows for more slouch.” That is simple to follow, but it hides several decisions.
First, two makers can work the same stitch count with different row gauges. Ten rounds may add 3 inches for one person and 4 inches for another. Second, the crown itself has height. If the taper needs ten rounds and the row gauge is three rounds per inch, the crown consumes about 3.33 inches. Beginning that taper only after reaching the desired total depth creates a hat that is far too long.
Third, yarn weight does not describe drape by itself. A thick yarn can be soft, and a lighter yarn can make a firm fabric when worked tightly. The washed swatch is the useful evidence.
This guide solves those problems in order: test the fabric, calculate the two circumferences, select a compatible count, calculate total depth, calculate taper height, and subtract taper height to find the taper-start measurement.
Measure the wearer at the actual wear line
Place a flexible tape around the forehead where the band should sit, continue above the ears and around the fullest part at the back. Keep the tape level. It should touch the hair without compressing it.
Record the actual circumference rather than choosing “small,” “medium” or “large.” The Craft Yarn Council publishes broad head-circumference references, but a measured head is more useful for a fitted opening. Adult heads often fall roughly within the 20–24-inch / 51–61-cm area, yet the pattern calculation should use the real value available to you.
Also measure a fitted depth if the wearer is available. Start at the intended lower edge near one ear, pass the tape over the top center, and stop at the matching lower edge on the other side. Divide that measurement by two. This gives a personal crown-to-edge fitted depth before extra slouch is added.
If the wearer is not available, compare a soft beanie that fits: measure its relaxed opening, flat width and crown-to-edge depth. A labelled size is less informative than those physical measurements.
Build a washed swatch that answers three questions
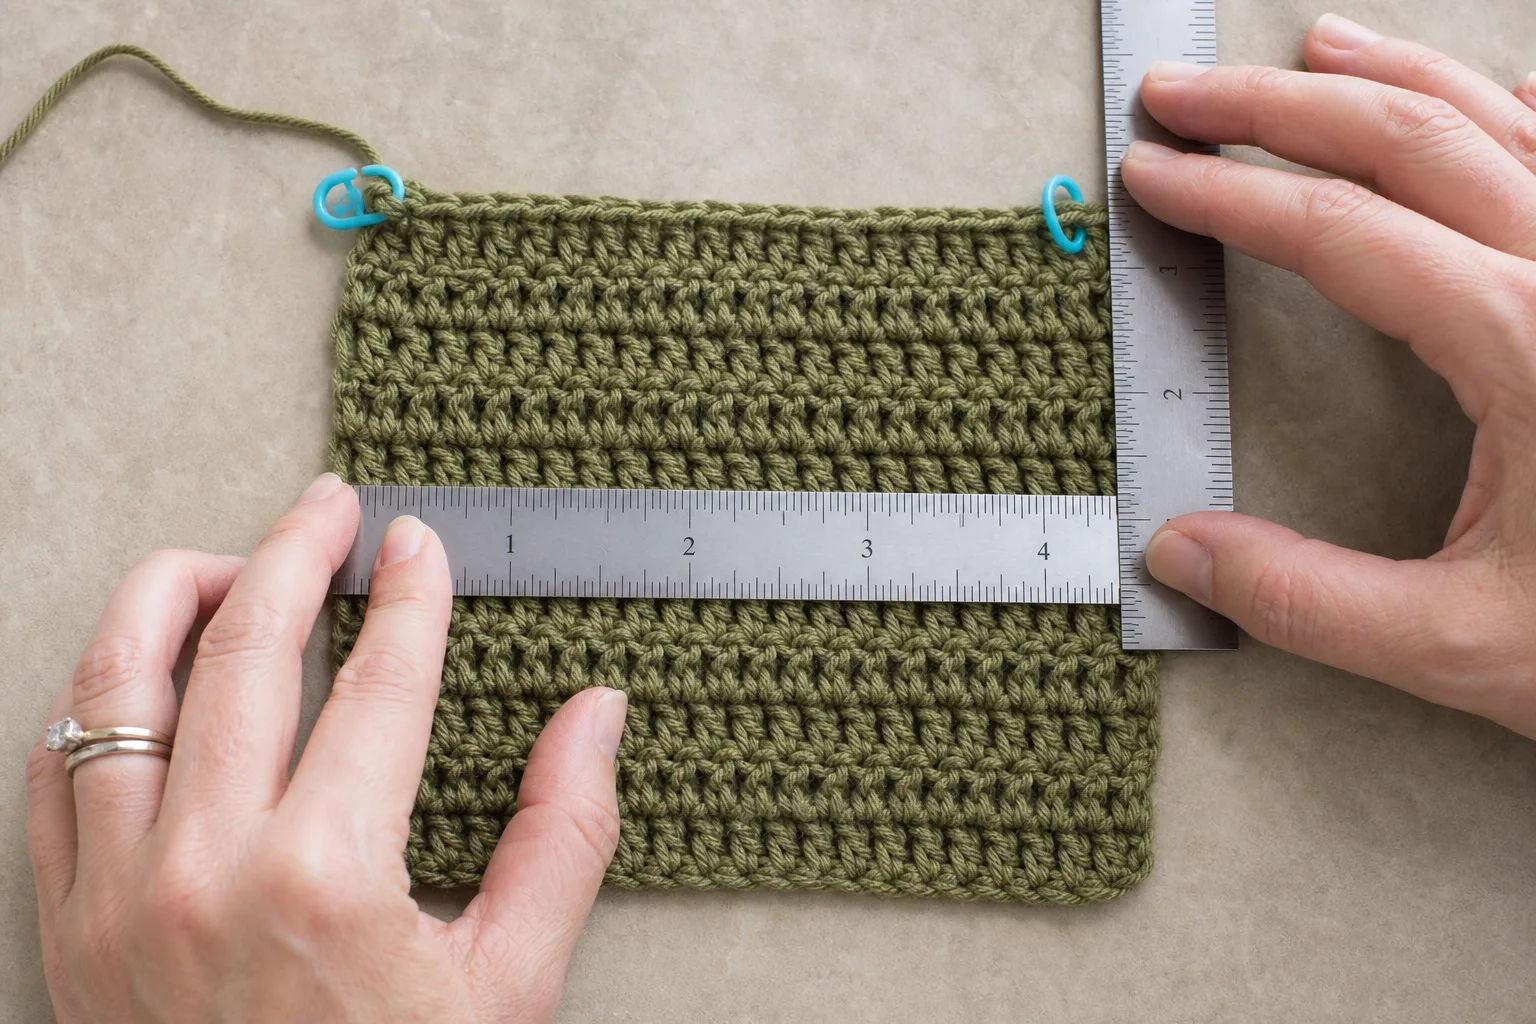
Crochet an HDC swatch at least 6 inches / 15 cm square using the yarn, hook, joining method and turning method planned for the hat. Wash and dry it as the finished hat will be cared for. Let it rest before measuring.
1. Stitch gauge: how wide will the body be?
Count stitches across the central 4 inches / 10 cm, away from the side edges. Divide the stitch count by the measured width.
The example has 16 HDC across 4 inches, or 4 stitches per inch. If the selected body has 84 stitches, its predicted relaxed circumference is:
The circumference is therefore a result of the actual fabric, not a universal adult count.
2. Row gauge: how much height will the taper use?
Count complete HDC rows or rounds through the central 4 inches / 10 cm. The example has 12 rounds across 4 inches, or 3 rounds per inch.
If the decrease plan uses ten rounds, its approximate height is:
Row gauge is often omitted from hat sizing, but it is essential here because it determines where the taper begins.
3. Drape gate: will added depth fall or stand?
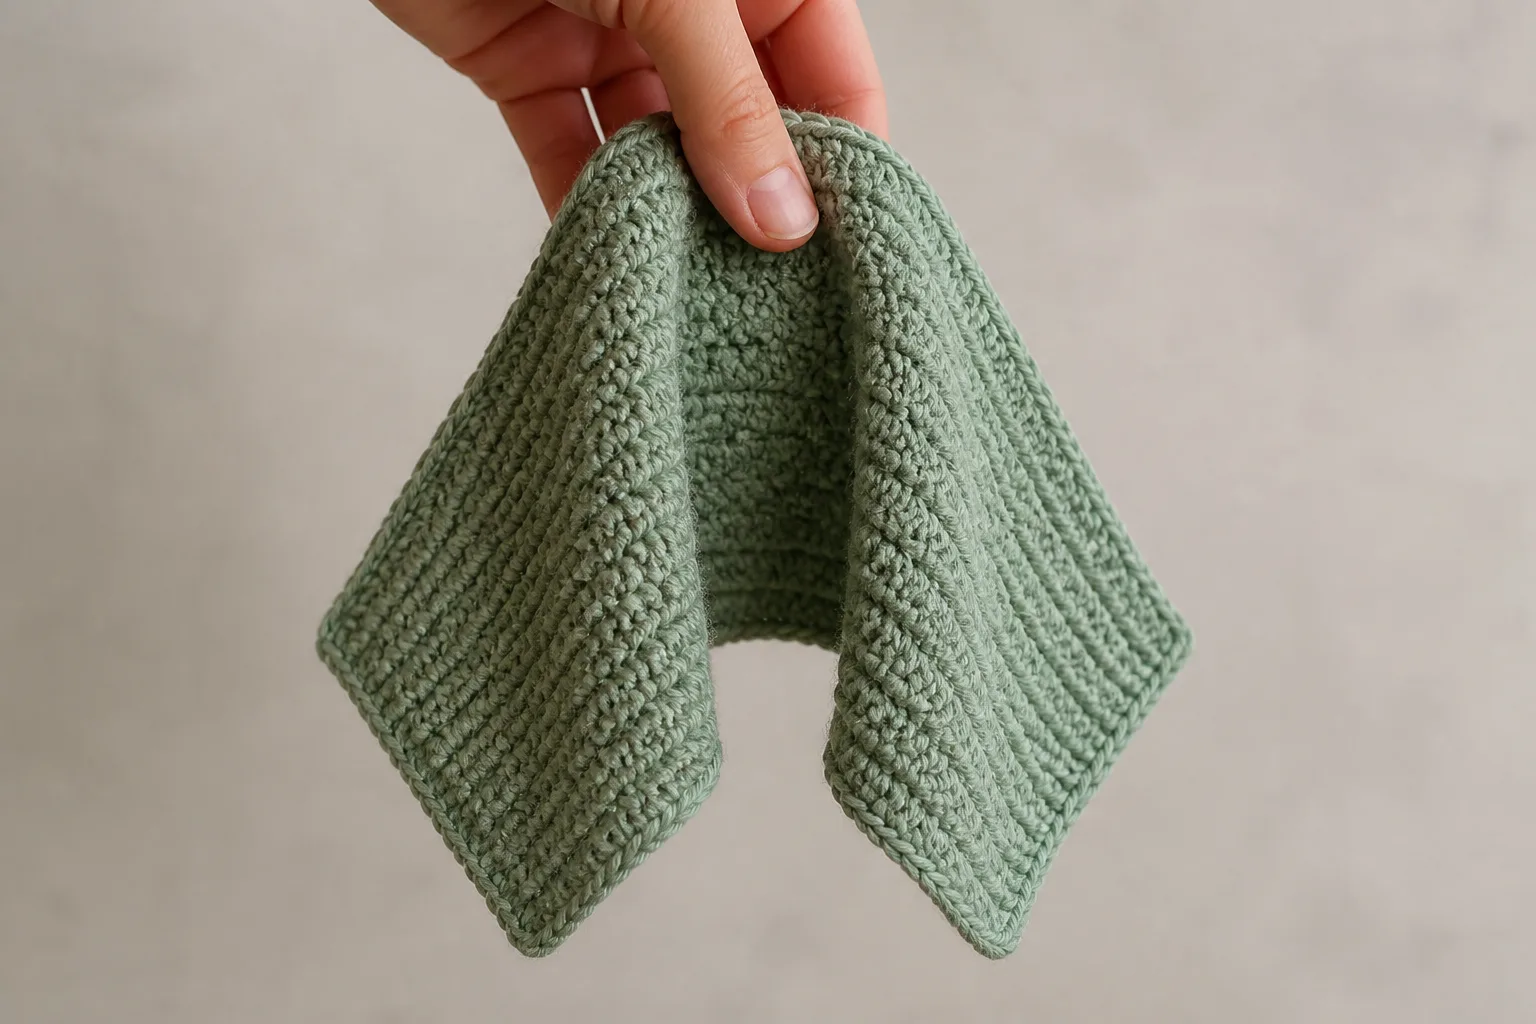
Hold the washed swatch gently at its top center and let gravity act on it. Do not shake or stretch it.
- Soft U-fold: the lower portion drops inward and the two sides hang freely. The fabric can support light, everyday or deeper slouch depending on the other measurements.
- Shallow bend: the swatch bends but stays broad. It may support a light drop; a deep profile is likely to look wide or tall.
- Plate-like: the swatch projects outward and resists folding. Change the hook, yarn or stitch fabric before adding substantial depth.
This is a practical gate, not a laboratory rating. It prevents a common mistake: solving a fabric problem by adding more height.
Choose an extra-depth profile
Start with a visual intention, then adjust after a try-on or comparison with a well-fitting hat.
| Profile | Starting extra depth | Expected silhouette |
|---|---|---|
| Light drop | 1–2 in / 2.5–5 cm | Small relaxed fold close to the crown |
| Everyday drop | 2–3.5 in / 5–9 cm | Clear back slouch without excessive length |
| Deep drop | 3.5–5 in / 9–12.5 cm | Pronounced back volume requiring soft drape and a secure band |
These are planning ranges, not promises. Hair volume, head shape, stitch texture, fiber, washing and the way the wearer positions the hat all affect the visible drop.
Total finished depth is:
In the example, 8.5 + 2.75 = 11.25 inches.
Calculate the band and body separately
The band target uses negative ease so it can stretch around the head and hold the extra fabric. The example uses 8%:
The body does not need the same amount of hold. The example adds a controlled 2% flare to the band target:
At 4 stitches per inch, the raw body count is:
The crown plan needs a multiple of four, so the nearby usable counts are 80 and 84. The nearest is 84. Its relaxed body circumference is 21 inches, which remains about 4.5% smaller than the 22-inch head. That gives movement without making the body wider than the head.
Apply the Slouch Profile and Taper Method
Enter:
- actual head circumference;
- band negative ease;
- optional body flare;
- washed stitch and row gauge;
- required body multiple;
- fitted depth and extra slouch depth;
- finished band height;
- washed swatch drape result.
The worked method reports the band target, body target, raw count, nearby multiples, selected body circumference, effective body ease, total depth, taper height, taper-start measurement and approximate even-body rounds. Measurement remains the final checkpoint: round counts are estimates derived from row gauge.
The worked method also refuses combinations that defeat the silhouette. It flags excessive body width, excessive tightness, a taper that would begin inside the band, or substantial extra depth paired with a plate-like swatch.
Complete worked example
| Field | Example value | Why it matters |
|---|---|---|
| Actual head | 22 in / 55.9 cm | Measured at the wear line |
| Band negative ease | 8% | Provides holding tension |
| Band target | 20.24 in / 51.4 cm | Finished relaxed band length |
| Body flare | 2% | Allows controlled movement above the band |
| Body target | 20.64 in / 52.4 cm | Before stitch-count rounding |
| Washed stitch gauge | 16 HDC per 4 in / 10 cm | 4 stitches per inch |
| Raw body count | 82.58 | Body target × stitch gauge |
| Nearby multiples | 80 and 84 | Both divisible by four |
| Selected body count | 84 | Nearest usable count |
| Estimated body circumference | 21 in / 53.3 cm | 84 ÷ 4 |
| Effective body ease | about 4.5% negative | Recalculated after rounding |
| Fitted depth | 8.5 in / 21.6 cm | Personal or provisional base depth |
| Extra slouch | 2.75 in / 7.0 cm | Everyday visible drop |
| Total depth | 11.25 in / 28.6 cm | Fitted depth + extra depth |
| Washed row gauge | 12 rounds per 4 in / 10 cm | 3 rounds per inch |
| Taper plan | 1 alignment + 9 taper rounds | 84 aligns to 80, then reduces to 8 |
| Taper height | about 3.33 in / 8.5 cm | 10 rounds ÷ row gauge |
| Begin taper | about 7.92 in / 20.1 cm | Total depth − taper height |
| Band height | 1.75 in / 4.4 cm | Included in the taper-start measurement |
| Even body above band | about 6.17 in / 15.7 cm | Taper start − band height |
| Approximate even rounds | 19 | Measurement overrides this estimate |
The important output is not merely “84 stitches.” It is the complete construction profile: 20.24-inch band, 21-inch body, 11.25-inch total depth and taper beginning at 7.92 inches.
Pattern overview
Skill level: confident beginner / intermediate
Terminology: US crochet terms
Construction: ribbed band worked flat and joined; HDC body worked upward; gradual eight-sector crown taper
Stitch multiple: four for the body count; the taper aligns a count ending in four to the next lower multiple of eight
Materials
- soft, washable #3 DK or light #4 yarn with a relaxed drape; approximately 220–360 yards / 200–330 m depending on size, depth, gauge and swatching;
- hook that creates the selected washed fabric; begin around 4.5–5.5 mm only as a trial;
- a smaller hook if desired for the SC ribbed band;
- flexible tape measure;
- eight removable sector markers plus one contrasting round marker;
- yarn needle and scissors.
Choose the yarn by the washed fabric rather than the label alone. A very dense bulky fabric may be warm but can resist the soft fold this silhouette needs.
Abbreviations
- BLO = back loop only
- ch = chain
- HDC = half double crochet
- hdc2tog = half double crochet two together
- SC = single crochet
- sl st = slip stitch
- st(s) = stitch(es)
The beginning chain does not count as a stitch. Unless otherwise noted, join each round to the first HDC and turn before the next round. Turning helps keep the body surface balanced and reduces directional spiraling.
Make the ribbed band to its measured target
Choose the finished band height. The example uses 1.75 inches / 4.4 cm. Chain enough stitches to produce that height after washing, plus one turning chain.
Band Row 1: SC in the second chain from the hook and in each chain across. Ch 1, turn.
Band Row 2: SC in the BLO of every stitch. Ch 1, turn.
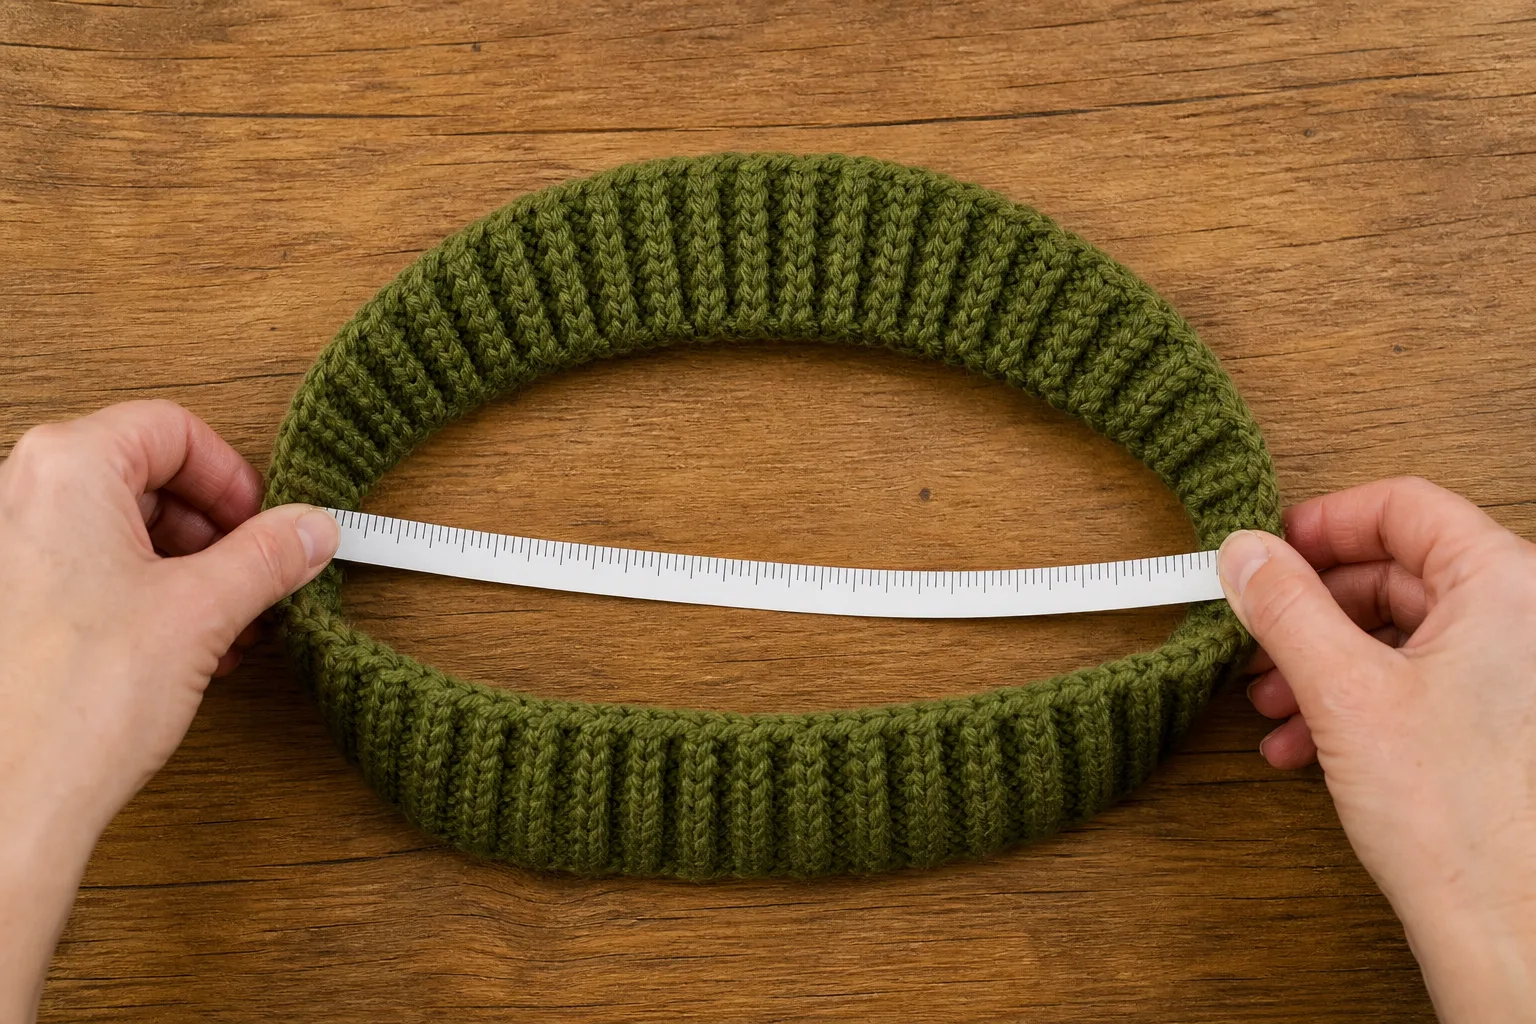
Repeat Row 2 until the relaxed strip reaches the calculated band target: 20.24 inches / 51.4 cm in the example. Lay it flat without stretching and measure along the long edge. Row count is secondary; finished length controls the fit.
Bring the short ends together without twisting. Slip stitch through corresponding loops or sew the ends so the join has similar stretch to the surrounding ribbing. Re-measure the ring relaxed. If the join shortens it substantially, correct the seam before attaching the body.
Band gate
Stretch the joined band around the intended wear line or around a measurement form matching the head. It should expand smoothly and return close to its relaxed length. It should not need force to pass over the widest part of the head, and it should not fall downward when released.
If the band is loose, do not make the body narrower to compensate. Correct the band. If the band is tight, do not rely on a larger body to make the opening comfortable.
Attach the body count evenly
With the band right side facing, join yarn at the seam. Work 84 HDC evenly around the long edge for the example. Place one stitch near each band-row end as a starting rhythm, then adjust spacing gradually so the total is exact. Avoid placing several extra stitches together; that creates a local ruffle.
Join to the first HDC, turn, and work even HDC rounds. Count the first several rounds. The body should rise from the band without pinching or flaring sharply.
Lay the body flat after several rounds and measure across. Twice the flat width should be close to the worked example’s relaxed body circumference. For the example, the flat width target is 10.5 inches / 26.7 cm.
If the actual width is materially different while the stitch count is correct, the working gauge has changed from the washed swatch. Measure the live fabric, update the worked calculation and decide whether to adjust now rather than carrying the error upward.
Work even to the calculated taper-start line
Continue in joined, turned HDC rounds until the hat measures about 7.92 inches / 20.1 cm from the lower band edge in the example. Measure with the hat relaxed on a flat surface. Place the lower edge on the zero point and measure vertically to the working round without stretching.
The worked example estimates about 19 even body rounds above the band for the default gauge. That number is a convenience, not the stopping rule. Stop at the physical taper-start measurement.
Before decreasing, put the unfinished hat on the wearer if possible. The open top should extend beyond the crown because the reserved taper has not been worked yet. Pinch the top gently into the intended back direction. If the fabric still stands upright despite passing the drape gate, reduce extra depth or change the fabric before closing.
Align the body for an eight-sector taper
An 84-stitch body is divisible by four but not by eight. The pattern first removes four stitches evenly so the crown can be divided into eight equal sectors.
Divide 84 stitches into four groups of 21. Place four temporary markers if helpful.
Alignment Round: *HDC in the next 19 stitches, hdc2tog; repeat from * four times. Join and turn. (80 sts)
If the selected count is already divisible by eight, skip the alignment round. If it is four more than a multiple of eight, use the same four-group method: divide the body into four equal groups and decrease over the final two stitches of each group.
Work the gradual eight-sector crown
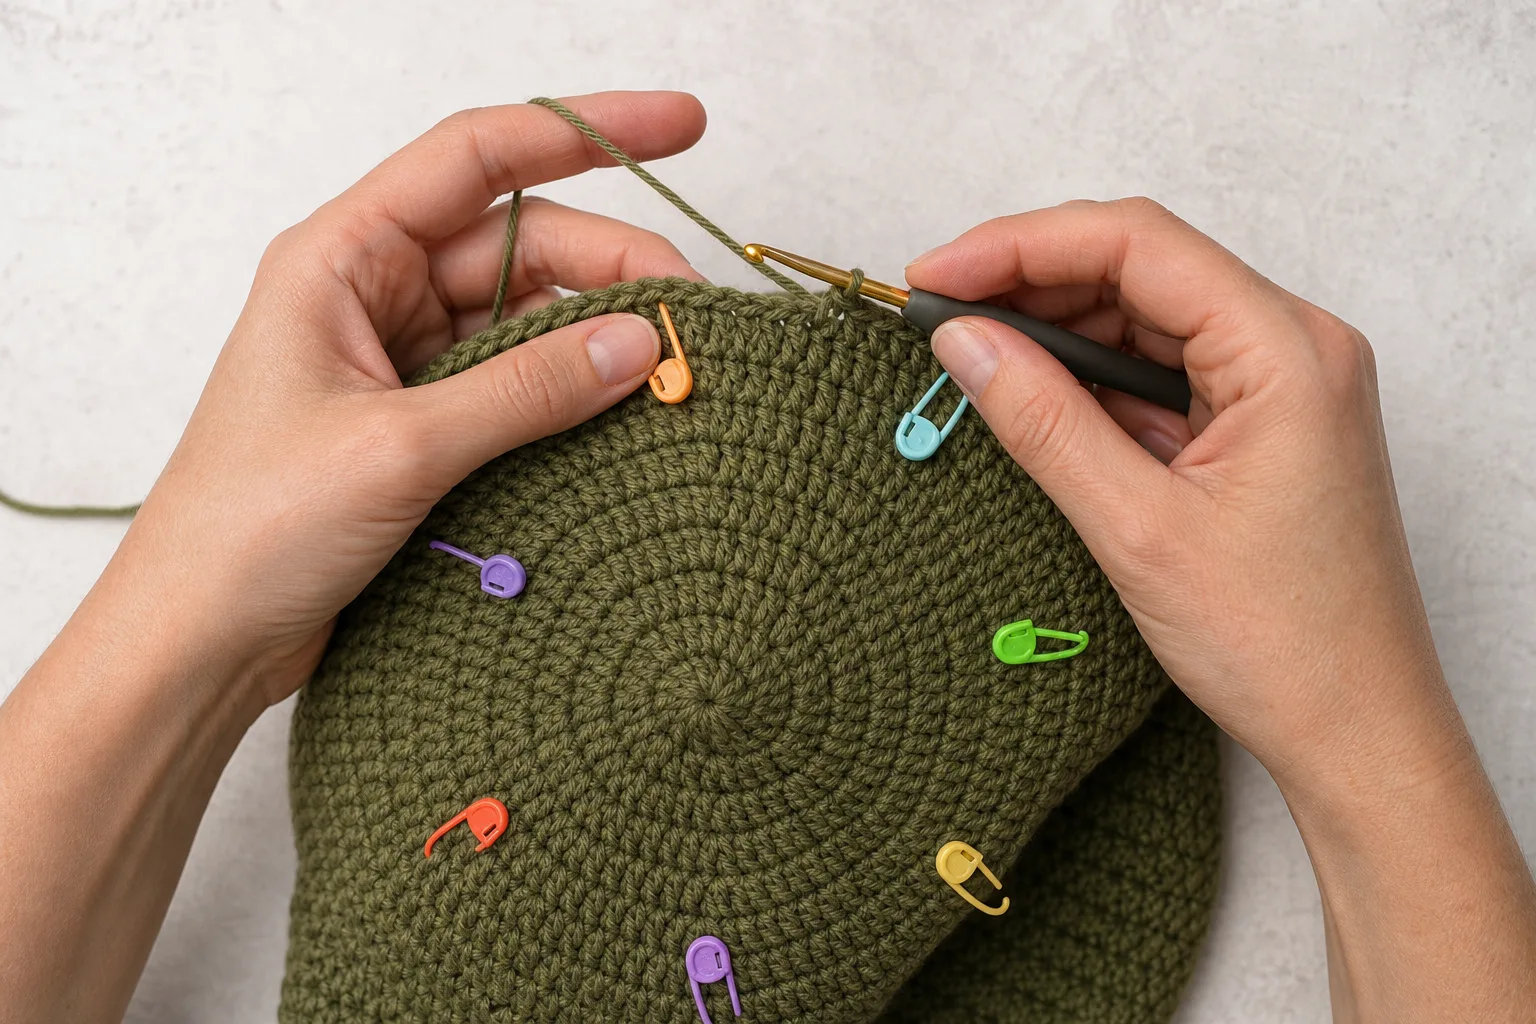
After alignment, divide the remaining stitches into eight equal sectors and place a marker at each boundary. The example has 80 stitches, so each sector begins with 10 stitches.
On each taper round, work one hdc2tog in every sector. That removes eight stitches per round. Keep the decreases near the same sector boundary, but shift them by a stitch on alternating rounds if a strong diagonal ridge begins to form.
Taper Round 1: HDC to the final 2 stitches of the sector, hdc2tog; repeat in all eight sectors. (72 sts)
Continue the same rule:
- Taper Round 2: 64 stitches;
- Taper Round 3: 56 stitches;
- Taper Round 4: 48 stitches;
- Taper Round 5: 40 stitches;
- Taper Round 6: 32 stitches;
- Taper Round 7: 24 stitches;
- Taper Round 8: 16 stitches.
Final Taper Round: hdc2tog around. (8 sts)
The example therefore uses nine eight-sector taper rounds after its alignment round, ten decreasing rounds in total. At three rounds per inch, the expected taper height is about 3.33 inches / 8.5 cm.
Cut a tail long enough to finish securely. Thread it through the front loops of the remaining eight stitches, tighten the opening smoothly, take the tail through the center and weave it through several directions on the inside. Do not pull so hard that the crown forms a sharp knob.

Four checkpoints before calling the hat finished
1. Band checkpoint
Measure the relaxed band circumference and compare it with the band target. Then check that it passes over the head comfortably and returns to the wear line.
2. Body-width checkpoint
Measure the relaxed flat width through the even body. Compare it with the worked calculation. The body may be slightly wider than the band, but it should not project outward like a brim.
3. Total-depth checkpoint
Lay the hat so the back drop is extended without stretching. Measure from the lower band edge to the crown center. It should match the total finished depth, about 11.25 inches / 28.6 cm in the example.
4. Silhouette checkpoint
Wear the hat at the intended line and guide the crown backward once with the hand. Then move normally. A successful everyday profile keeps the band in place while the crown settles behind the head. If the wearer must repeatedly push the opening upward, diagnose the band and total depth before changing the body count.
Troubleshooting by visible symptom
The hat is tall but will not slouch
Repeat the drape gate with the washed swatch. If it remains plate-like, extra rows are adding a column of fabric. Try a larger hook, a softer yarn, a lower-profile stitch or a lighter yarn weight. Rewash and recalculate gauge before restarting.
The band fits, but the body balloons outward
Measure the body circumference and compare it with the head. Positive body ease or excessive flare can create width instead of back drop. Choose the lower usable count or reduce flare. Also verify that the body-attachment stitches were distributed evenly.
The hat falls toward the eyes
Check the band relaxed circumference first. If it is larger than planned or has poor recovery, correct the band. If the band is accurate, the total depth may be too long for the chosen profile, or the body may have positive ease. Shorten the extra-depth choice rather than tightening only the final round.
The hat is too short even though the round count matches
Measure the current row gauge. The maker’s working height may differ from the swatch or the pattern example. The physical taper-start and total-depth measurements override approximate round counts. Add even rounds before the taper if the crown has not begun; if already finished, reopening the crown and adding height before the taper preserves the decrease shape.
The crown gathers into a puckered lump
Too many stitches may have been left for a final drawstring closure, or the decreases may be concentrated in one round. This pattern gradually reaches eight stitches before closing. Confirm that every taper round reduced exactly eight stitches after alignment.
The crown forms a long point
The taper may be too gradual for the row gauge or the decreases may stack in rigid vertical lines. Shift the decrease positions on alternating rounds. If the measured taper height is still too large, use a slightly faster schedule while maintaining even distribution, then enter the revised taper-round count when planning the start point.
The back drop is deeper than expected after washing
Compare the washed total depth and row gauge with the original swatch. Some fibers lengthen under their own weight. Shorten the extra-depth plan by the measured change, and wash the larger swatch the same way next time.
The body twists toward one side
Check whether every round was worked in the same direction and whether the join migrated. Joined, turned rounds reduce directional bias. Keep a contrasting round marker, turn consistently and shift the start point occasionally if the seam becomes prominent.
How to adjust the design without losing the calculation
Use a different stitch
Make the entire washed swatch in that stitch and enter its stitch and row gauge. Keep the body multiple compatible with the stitch repeat and the taper plan. A lace repeat may need a plain HDC transition before decreasing.
Add a textured panel
Swatch the full repeat, not only its background stitch. Texture can narrow the fabric or reduce drape. Enter the measured gauge of the actual panel fabric and choose a multiple that satisfies both repeat and taper.
Make a lighter or deeper slouch
Change only the extra-depth input first. The worked calculation updates total depth and taper start while preserving the band and body calculations. Recheck the drape gate before choosing a deep profile.
Make the body straighter
Set body flare to zero. The body target then equals the band target before rounding. Check the effective body ease because rounding can still make the body slightly larger or smaller.
Make a surprise gift
Ask for a head measurement if possible. Otherwise measure a currently fitting beanie: relaxed band circumference, relaxed flat body width and total depth. Include those finished measurements with the gift so the recipient can compare them without relying on a size label.
Frequently asked questions
How many stitches do I need for a crochet slouchy beanie?
Multiply the target body circumference by the washed stitches per unit, then round to a multiple compatible with the crown. In the worked example, 20.6448 inches × 4 stitches per inch = 82.58, rounded to 84. Another gauge or head measurement produces a different count.
How much longer should a slouchy beanie be?
Use extra depth as a selectable range rather than one fixed answer. Light slouch often begins around 1–2 inches / 2.5–5 cm, everyday slouch around 2–3.5 inches / 5–9 cm, and deep slouch around 3.5–5 inches / 9–12.5 cm. The washed drape gate decides whether the fabric can support the choice.
Can I make more slouch by adding stitches?
Usually the cleaner adjustment is extra vertical depth, not large positive ease. A small controlled body flare can help movement, but a substantially wider body tends to balloon sideways. Keep the band secure and compare body circumference with the head.
When should I begin decreasing?
Subtract the taper height from the desired total finished depth. Taper height equals taper rounds divided by washed rounds per unit. The example uses ten rounds at three rounds per inch, so it begins tapering 3.33 inches before the 11.25-inch total: approximately 7.92 inches from the lower edge.
Why does the calculation show 84 instead of the raw 82.58 stitches?
Crochet needs whole stitches and the construction needs a multiple of four. The worked method compares the nearby 80- and 84-stitch choices, selects according to the user’s option and recalculates the real circumference and ease after rounding.
Is a ribbed band required?
No, but the opening needs controlled stretch and recovery. If using a different band, swatch it separately and make its relaxed length to the band target. Do not assume the body gauge describes the band’s behavior.
Why is my deep profile flagged even when the math works?
Geometry can be internally consistent while the fabric cannot form the silhouette. The worked calculation treats a stiff or shallow-bending washed swatch as a separate decision gate. Change fabric or reduce extra depth.
What makes this article different
This is not a fixed-length pattern with optional extra rounds. It gives the reader a diagnosis and decision system:
- the band and body receive separate circumference targets;
- a washed swatch supplies both stitch gauge and row gauge;
- a visible drape gate checks whether extra depth can actually fall;
- rounding shows lower, nearest and upper usable stitch counts;
- effective body ease is recalculated after rounding;
- taper height is reserved before the body is crocheted;
- eight decrease sectors turn a wide slouch body into a controlled crown;
- measurements, not copied row counts, decide each stopping point.
The result is useful even when the maker changes yarn, hook, head size or preferred drop. When the silhouette is wrong, the reader can identify whether the cause is band hold, body width, fabric drape, vertical depth or taper timing—and change the correct variable.
References