
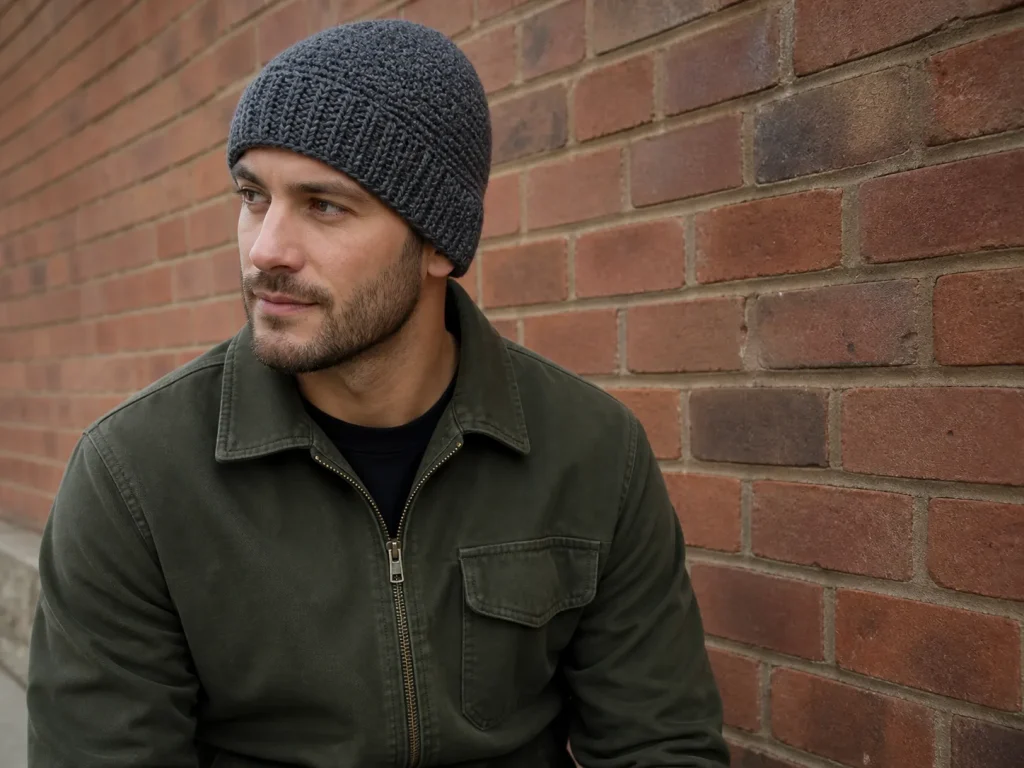
Use the wearer’s measured hat line, the washed band swatch and the crown reserve shown in the worked example. The open-top try-on remains the final decision gate.
Men’s Beanie Wear-Line and Crown Planner
Open the tool in a separate page. The article also retains the manual formulas and worked checks.
JavaScript is optional: use the manual calculation method and worked examples in the article.
Quick answer
There is no single men’s crochet beanie size. The Craft Yarn Council lists 22-24 in (56-61 cm) as an adult man planning range, but a pattern should use the intended wearer’s actual head whenever possible. Head circumference controls the band and body width. A separate crown-to-lower-edge measurement controls whether the hat sits above, across, or below the ears.
For the complete example in this guide, a 23 in (58.5 cm) head begins the band fit check at 77 rows, uses 80 body stitches, and starts crown shaping when the hat measures 6 in (15.2 cm) from the lower edge. Those numbers belong to the example swatches; the worked calculation replaces them with numbers from your own measurements.
What this pattern solves
Many men’s beanie patterns answer only one question: how many stitches did the designer use? A successful fit requires three separate decisions.
- How firmly should the band hold around this head?
- Where should the lower edge sit around the ears?
- How much vertical space should be reserved for a rounded crown?
The Wear-Line + Crown Reserve system keeps those decisions separate. It prevents a common chain of mistakes: enlarging the circumference to gain ear coverage, adding random body rounds that create unwanted slouch, or beginning crown decreases too late and gathering excess fabric into a peak.
This is also a different construction from the other beanies in this series. The beginner beanie is worked from the top down, and the ribbed rectangle beanie is worked flat from side to side. This version begins with a fitted band, builds the body upward in continuous rounds, and shapes the crown last.
Men’s size is a planning range, not a guarantee
The adult man range of 22-24 in (56-61 cm) is useful when no measurement is available. It is not permission to label one finished hat “men’s one size.” Heads outside that range are normal, and two hats with the same finished circumference can feel different because the fabrics stretch and recover differently.
Use information in this order:
- A current measurement of the intended wearer.
- Measurements from a beanie the wearer already finds comfortable.
- The 22-24 in (56-61 cm) planning range, with two adjacent options rather than one promised fit.
If the beanie is a surprise, measure an existing hat laid flat without stretching it. Double the flat width for its relaxed circumference. Measure from the center top to the lower edge for depth. Record whether that edge sits above the ear, across it, or at its base.
Choose the wear line before choosing the height
“Men’s beanie” describes an audience, not one silhouette. Decide where the lower edge should sit before making the band.
| Fit profile | Lower-edge goal | How to measure | What it changes |
|---|---|---|---|
| Close workwear fit | Above or around the upper ear | Center top to the chosen edge line | Shorter total depth; no extra circumference |
| Classic ear-covering fit | At the base of the ear | Center top to the base of the ear | More total depth; same head fit |
| Relaxed fit | Base of ear plus intentional extra depth | Measure classic depth, then add the chosen drape | Adds vertical length, not band rows |
| Folded cuff | Edge position after folding | Add the intended fold depth to the measured finished depth | Adds band/body depth, not circumference |
Glasses, hearing devices, headphones, hair volume, and personal pressure preferences can change the most comfortable edge position. Measure the line the wearer actually wants instead of forcing the hat to a generic ear-coverage number.
Materials and fabric choices
- Medium/worsted-weight yarn with comfortable stretch and recovery.
- Crochet hook that produces a flexible, opaque fabric; the worked example uses the gauge rather than requiring one hook size.
- A second hook 0.5-1 mm larger for the foundation chain if the chain edge feels tight.
- Flexible measuring tape.
- Eight removable stitch markers plus one contrasting round marker.
- Yarn needle and scissors.
For a fitted adult beanie, have roughly 200-260 yd (183-238 m) available as a planning range. A deep folded cuff, dense stitch, large head, or low yardage-per-ounce yarn can require more. Record yarn remaining after the band and first inch of body instead of treating a yardage estimate as a guarantee.
The forehead and ear area stays in contact with the fabric for long periods. Choose fiber for the wearer’s comfort, not for a gender label. Wool blends often provide warmth and recovery; acrylic can be easy to care for; cotton and plant-heavy blends may relax more and recover more slowly. Make the actual band swatch before deciding the fit.
Abbreviations and pattern language
- ch: chain
- sc: single crochet
- hdc: half double crochet
- hdc2tog: half double crochet two together
- BLO: back loop only
- st(s): stitch(es)
- rnd(s): round(s)
- rep: repeat
US crochet terminology is used. The turning chain for the band does not count as a stitch. The body and crown are worked in a continuous spiral unless stated otherwise.
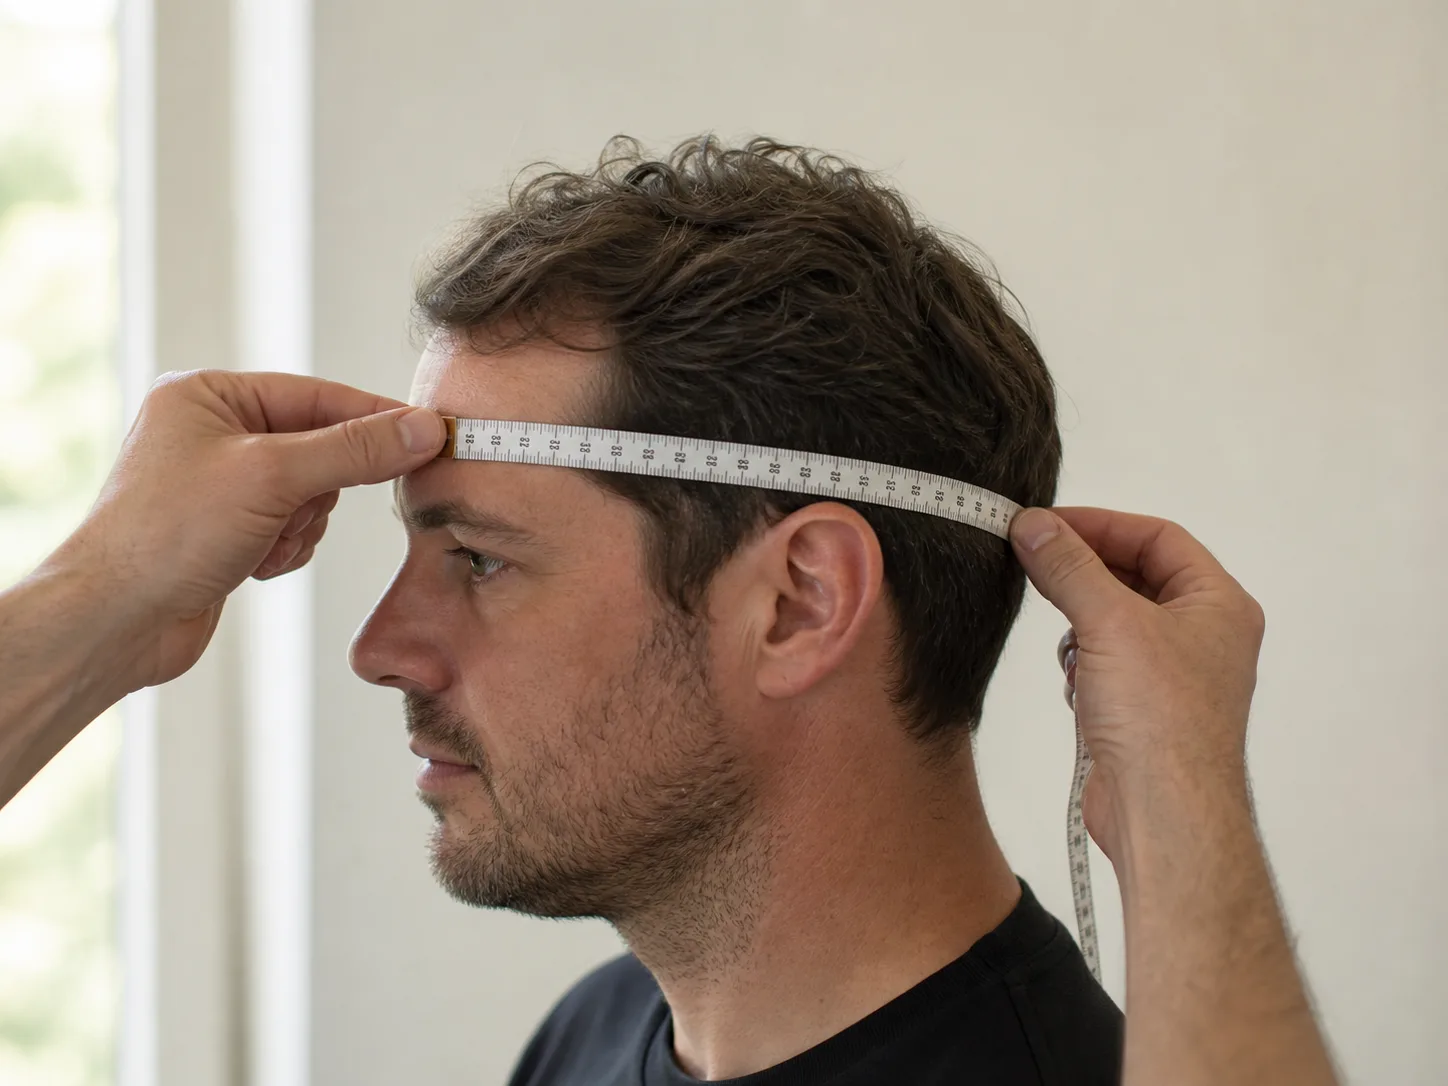
Step 1: measure the head and wear-line depth
Head circumference
Place a flexible tape around the fullest part of the head, normally above the eyebrows and ears. Keep it level and comfortably snug. Record the actual measurement; do not subtract ease yet.
Desired finished depth
Place the tape at the center top of the head and follow the head contour to the chosen lower-edge position. This is the desired finished depth D.
If a folded cuff is planned, decide whether D describes the hat after the cuff is folded. Add enough construction depth for the fold, but keep the final visible edge at the measured line.
Check the choice in a mirror
Mark the intended lower edge lightly with a finger at the ear while the wearer looks forward. This catches a common measurement error: pulling the tape straight down beside the head instead of following the curved path from the crown.
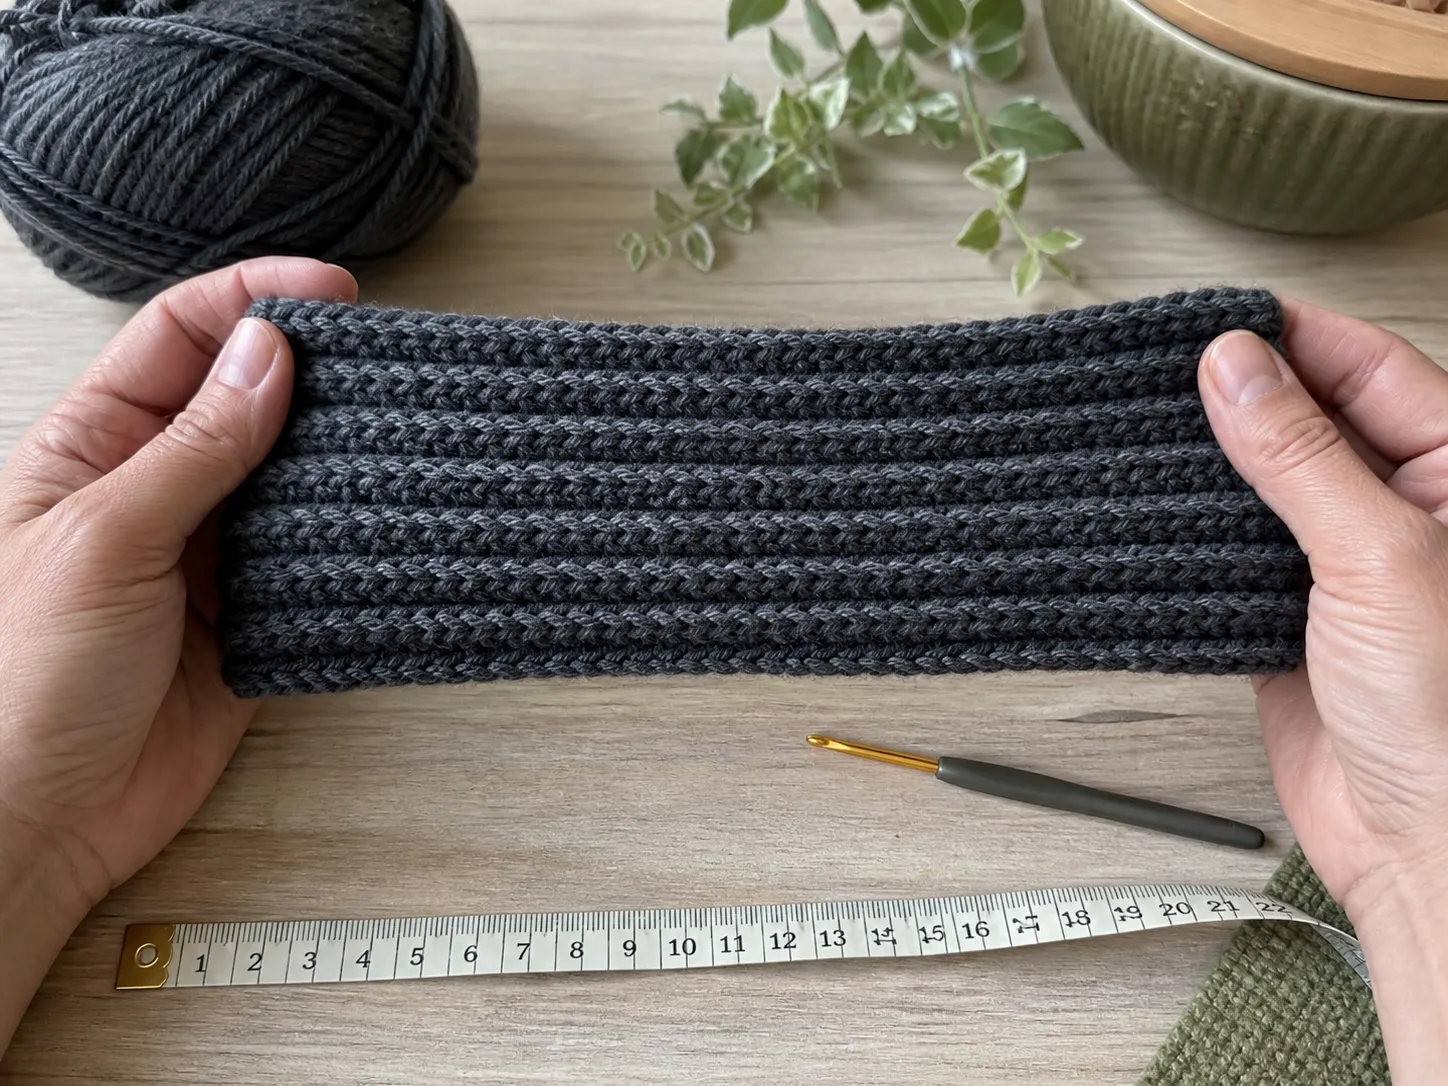
Step 2: make the ribbed band swatch
The band determines wearing pressure. Do not choose a universal negative-ease percentage before seeing how the ribbing behaves.
- Chain enough for a band about 2 in (5 cm) deep, or for the chosen cuff depth.
- Work sc BLO rows until the sample contains at least 10 rows.
- Mark R complete rows in the center of the sample.
- Measure their relaxed width Wr.
- Stretch the same marked rows only until the pressure resembles the desired fit. Measure that width Ws.
- Release the swatch for 30 seconds. Confirm that the ribs return close to Wr.
For a close fit, use a firm but comfortable stretch measurement. For a more relaxed fit, stop stretching earlier. Do not pull to the fabric’s maximum limit; maximum stretch predicts discomfort and poor recovery, not normal wear.
Step 3: use the Wear-Line and Crown Method
The worked calculation on this page performs the arithmetic. Use:
- head circumference H;
- band swatch rows R;
- relaxed band width Wr;
- comfortably stretched band width Ws;
- body stitches measured across a known width;
- body rounds measured across a known height;
- desired finished depth D.
It returns the target band rows, predicted relaxed band circumference, nearby body counts divisible by eight, edge-distribution adjustment, crown rounds, crown reserve height, and exact crown-start depth. Switch between inches and centimeters at any time.
How the band calculation works
After rounding to a whole row and checking the temporary fit:
The negative-ease percentage is reported as a result of the chosen swatch pressure. It is not imposed before the swatch is measured.
How the body count is chosen
The body should begin close to the relaxed band circumference. The worked calculation converts that circumference through the body stitch gauge, then compares the two nearby multiples of eight.
Choose the option whose calculated circumference and fabric behavior best match the band. If the lower option is much tighter and the upper option is slightly more relaxed, the upper count is usually the safer candidate. The first checkpoint still decides.
How the crown-start depth is chosen
An eight-sector crown removes eight stitches per decrease round. For a body count divisible by eight:
This prevents a pointy or overly gathered top caused by working too much straight body before decreasing.
Worked example: 23 in / 58.5 cm head
- Actual head circumference H: 23 in (58.5 cm)
- Band swatch R: 10 rows
- Relaxed width Wr: 2.75 in (7.0 cm)
- Comfortable stretched width Ws: 3.00 in (7.6 cm)
- Body stitch gauge: 15 stitches per 4 in (10.16 cm)
- Body round gauge: 12 rounds per 4 in (10.16 cm)
- Desired finished depth D: 9 in (22.9 cm)
Band calculation:
Begin the temporary fit check at 77 rows.
The predicted relaxed band is 21.18 in (53.8 cm), about 7.9% smaller than the measured head because that is the pressure chosen on the swatch.
Body calculation:
The nearby multiples of eight are 72 and 80. At this gauge, 72 stitches would produce 19.2 in (48.8 cm), while 80 stitches produce 21.33 in (54.2 cm). The worked example selects 80 stitches as the closer starting option.
The band has 77 row ends and the body needs 80 stitches, so the first body round distributes 3 additional stitches around the band edge.
Crown calculation:
At 12 rounds per 4 in, nine crown rounds require about 3 in (7.6 cm).
Begin crown shaping when the hat measures 6 in (15.2 cm) from the lower edge.
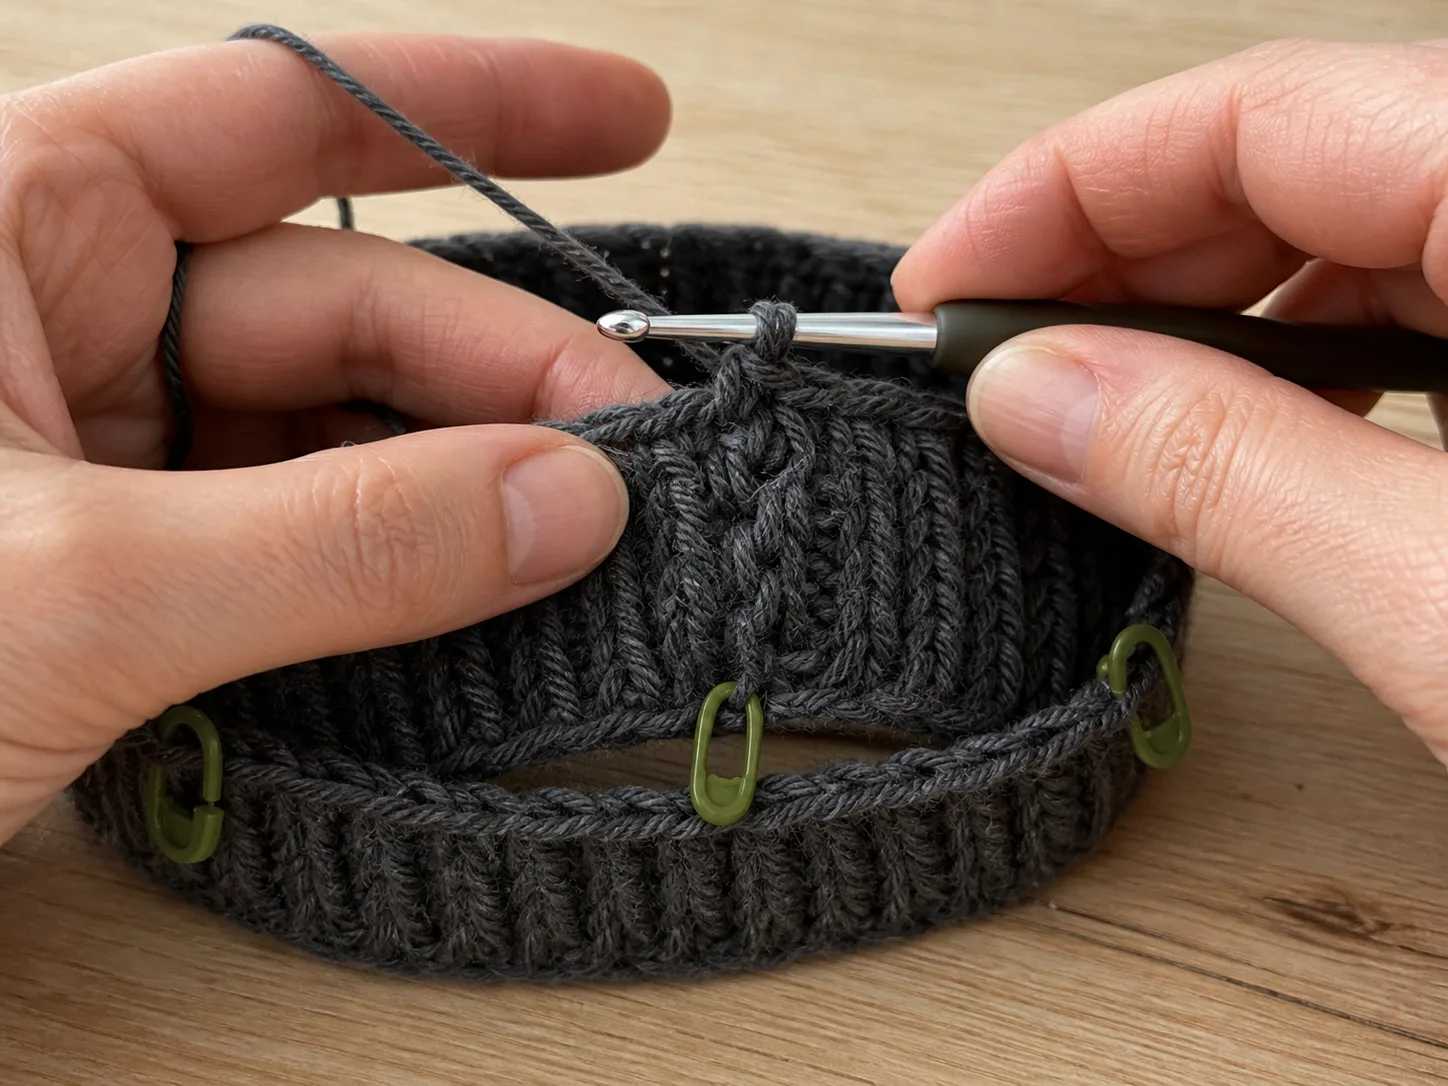
Full bottom-up pattern: worked example
The instructions below show the 23 in example so the construction is complete. Replace the example counts and depths with the worked calculation results for the intended wearer.
Make the band
Chain 9, or the number needed for the chosen band depth plus one turning chain.
Row 1: Sc in the second ch from the hook and in each ch across. The example has 8 sc. Turn.
Row 2: Ch 1. Sc BLO in each st across. Turn.
Repeat Row 2 until the band has 77 rows.
Do not permanently seam the band yet.
Checkpoint 1: temporary band fit
Clip the first and last rows together with locking markers or a loose temporary seam. Place the band at the intended lower-edge line.
Confirm all three conditions:
- It passes over the widest part of the head without painful pulling.
- It stays in place without forehead pressure.
- The ribs reopen after the band is removed.
Add or remove rows if needed, then recalculate from the final chosen row count. This keeps the body and crown calculations aligned with the band that will actually be used.
Join the band
Place the first and last rows together. Sew a flexible mattress-style seam through corresponding edge loops. Pull only until the gap closes; do not cinch the seam narrower than the surrounding ribbing.
Turn the band so the preferred seam face is inside. The joined band forms the lower edge of the hat.
Work the first body round
Attach yarn at the band seam. Work around the long edge of the band.
For the example, work one hdc into each of the 77 row ends, plus one additional hdc in 3 evenly spaced row ends, for 80 hdc total. Place a contrasting marker in the first stitch and work in a continuous spiral.
If the worked calculation asks for fewer body stitches than band row ends, use hdc2tog across the required number of evenly spaced pairs. If the difference is greater than eight, recheck both gauges instead of forcing strong shaping into one round.
Work the straight body
Rnd 2 onward: Hdc BLO in each st around, moving the round marker after every round.
Continue until the hat measures 6 in (15.2 cm) from the lower edge for the worked example.
Checkpoint 2: after 1 in / 2.5 cm of body
Lay the band flat without stretching and compare the body width just above it.
- If the body flares wider, too many stitches were added around the edge.
- If the band puckers inward, the body count is too small or the first round was worked too tightly.
- If the widths align but the hat feels different from the band, the body fabric has different stretch; compare the alternate multiple reported by the worked calculation.
Correct the first body round now. Do not wait until the crown.
Checkpoint 3: at the calculated crown-start depth
Try on the open tube or compare it with the wear-line measurement.
The live edge should sit roughly one crown-reserve height below the center top of the head. The lower edge should already be at the intended ear line. If the ears are not covered as planned, add only the missing vertical depth, then record the revised total. Do not add band rows to solve a height problem.
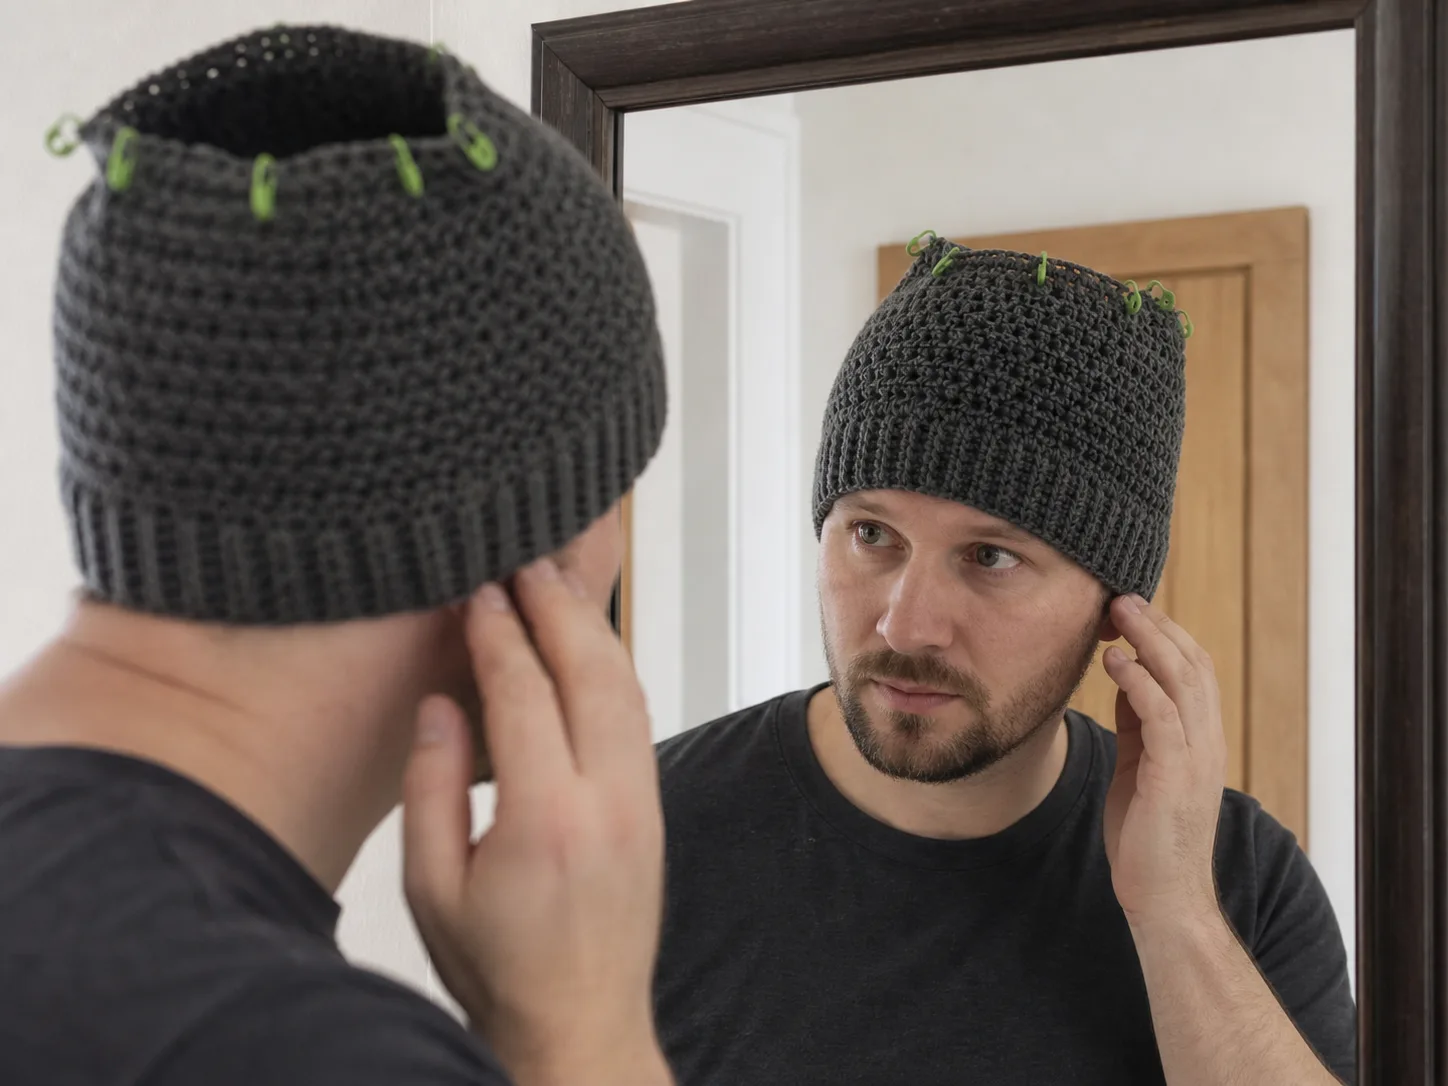
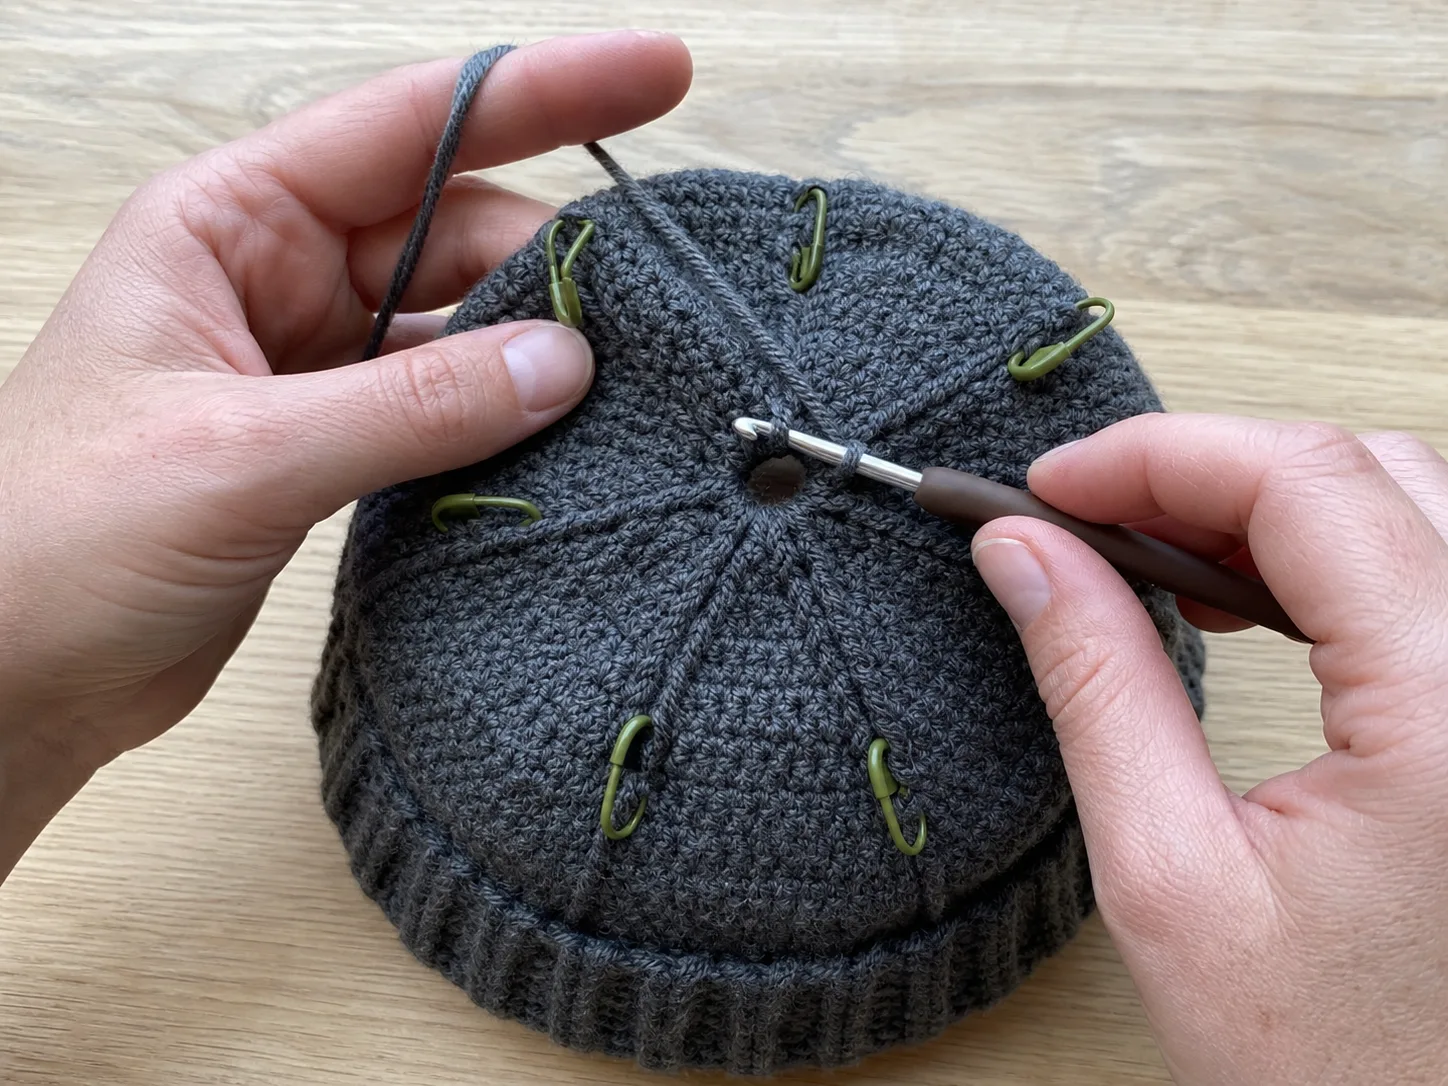
Shape the rounded eight-sector crown
For the 80-stitch example, place eight markers so each sector contains 10 stitches. The decrease is worked at the end of every sector.
Crown Rnd 1: [Hdc BLO in next 8 sts, hdc2tog BLO] 8 times. 72 sts.
Crown Rnd 2: [Hdc BLO in next 7 sts, hdc2tog BLO] 8 times. 64 sts.
Crown Rnd 3: [Hdc BLO in next 6 sts, hdc2tog BLO] 8 times. 56 sts.
Crown Rnd 4: [Hdc BLO in next 5 sts, hdc2tog BLO] 8 times. 48 sts.
Crown Rnd 5: [Hdc BLO in next 4 sts, hdc2tog BLO] 8 times. 40 sts.
Crown Rnd 6: [Hdc BLO in next 3 sts, hdc2tog BLO] 8 times. 32 sts.
Crown Rnd 7: [Hdc BLO in next 2 sts, hdc2tog BLO] 8 times. 24 sts.
Crown Rnd 8: [Hdc BLO in next st, hdc2tog BLO] 8 times. 16 sts.
Crown Rnd 9: Hdc2tog BLO around. 8 sts.
For another body count, divide the count by eight. Subtract two from that sector number to find the regular hdc stitches before each decrease in the first crown round. Reduce the regular-stitch number by one each round until only eight stitches remain.
Checkpoint 4: after three crown rounds
Set the hat on the head or a rounded form without stretching the crown upward.
- A smooth inward slope means the decrease rate and round height are working together.
- A vertical wall means decreases may have been missed.
- A sudden flat shelf means too many decreases were placed in one round.
- A narrow peak beginning at the center usually means crown shaping started too late or extra even rounds were added between decrease rounds.
Correct the crown while only a few rounds need to be reopened.
Close the crown
Fasten off with a tail at least 12 in (30 cm) long. Thread the tail through the front loop of each remaining stitch, return through the first two loops once more, and pull the opening closed gradually.
Pass the tail across the opening in two directions before securing it inside. This distributes the final tension and reduces the hard central knot that can be uncomfortable under headphones or a hood.
Weave the tail through several directions without pulling the crown into a point.
Close fit versus relaxed fit
The same construction supports two profiles without calling either one the correct men’s style.
Close fit
- Stretch the band swatch to firm, comfortable wearing pressure.
- Use the measured ear line without added slouch.
- Choose the body multiple whose finished circumference stays close to the relaxed band.
- Work every crown decrease round without extra even rounds.
Relaxed fit
- Use a gentler comfortable-stretch measurement for the band.
- Add intentional depth to D, not extra band rows.
- Choose the roomier body multiple only if the body fabric needs it.
- Keep the same eight-sector decrease structure so added depth remains below the crown instead of forming a peak.
If the beanie is a surprise gift
Best method: copy a comfortable hat’s measurements
Measure a hat the recipient already wears:
- relaxed flat width x 2;
- center-top-to-lower-edge depth;
- band depth;
- lower-edge position around the ears;
- whether the fabric returns after stretching.
Use those measurements as targets, then calculate stitch and row counts from the new yarn’s swatches.
Fallback method: prepare two stopping options
If no measurement or existing hat is available, use 22-24 in (56-61 cm) only as a planning range. Let the worked calculation show results for both ends of the range. Choose yarn with reliable recovery, keep the temporary band join adjustable, and avoid claiming either option is guaranteed.
Troubleshooting by symptom
| Symptom | Likely cause | Corrective action |
|---|---|---|
| Band will not pass over the head | Comfortable stretch was measured too firmly, chain edge is tight, or too few rows were worked | Recheck the same marked swatch area; use a larger foundation hook; add band rows |
| Band passes but leaves forehead pressure | Too much effective negative ease or stiff fiber | Use a gentler stretched width; add rows; choose a fabric with better recovery |
| Body flares above the band | Too many stitches in the first body round | Rework Round 1 with the lower multiple or fewer distributed additions |
| Band puckers under the body | Body count is too low or Round 1 is tight | Compare the upper multiple; loosen the first body round |
| Hat fits around but does not cover the ears | Total depth was guessed from an age/size label | Measure the desired wear line and add straight-body depth before the crown |
| Hat becomes slouchy unintentionally | Crown shaping began after the calculated start depth | Remove extra even rounds and begin the eight-sector crown earlier |
| Crown has a narrow point | Extra fabric remains at the center or decreases were delayed | Keep decrease rounds consecutive; verify eight decreases in every crown round |
| Crown looks flat or forms a shelf | Too many decreases occurred at once | Restore eight evenly spaced decreases per round |
| Spiral line twists noticeably | Round marker drifted or a stitch was added at the marker | Count every round and keep the first stitch clearly marked |
| Forehead area feels itchy | Fiber is uncomfortable against skin | Change fiber or add a soft lining; changing size will not remove fiber irritation |
Changing yarn, hook, head size, or band depth
Different yarn
Make new band and body swatches. Two worsted yarns can share the same label yet produce different row gauge, body gauge, stretch, and recovery. Replace every calculation input; do not carry the example count to the new yarn.
Different hook
A hook change can alter both stitch width and round height. Recalculate the body multiple and crown reserve. A denser fabric may need less negative ease even when the stitch count appears similar.
A head larger than 24 in / 61 cm
Use the actual measurement exactly as you would for any other wearer. The worked calculation does not cap the size at the published adult planning range. Confirm that the chosen body count and crown sector size remain practical with the yarn.
Deeper or folded band
Change the chain length used for band depth, not the number of rows used for circumference. If the band will fold, check pressure with both layers in place before joining permanently.
Final fit checklist
- The band passes over the head and recovers after removal.
- The lower edge reaches the planned ear line.
- The body does not flare or pucker above the band.
- The crown begins at the calculated depth.
- Eight decreases occur in every crown round.
- The top is rounded without a narrow peak or hard central knot.
- The seam and yarn tails do not press against the forehead or ears.
Frequently asked questions
What size should a men’s crochet beanie be?
The Craft Yarn Council lists 22-24 in (56-61 cm) as an adult man head-circumference planning range. Measure the intended wearer whenever possible. Finished circumference depends on the actual fabric’s comfortable stretch and recovery.
Is a men’s beanie different from a unisex beanie?
The construction does not require gendered colors or stitches. Use the wearer’s head circumference, preferred ear coverage, and fit preference. The same method works for any adult.
How much smaller should the hat be than the head?
Do not impose one number before swatching. Stretch the band sample only to the pressure the wearer wants. The method reports the effective negative ease created by that measurement.
How do I make the hat cover more of the ears?
Increase the desired finished depth and work more straight body before the calculated crown start. Do not increase circumference unless the band is also too tight.
Why is the top of my beanie pointy?
The straight body may be too long, decrease rounds may be too widely spaced, or the final opening may contain too many stitches. Reserve the calculated crown height and work eight decreases in each consecutive crown round.
Can I use a different stitch for the body?
Yes. Make a body swatch in that stitch and use both stitch gauge and round gauge in the method. The band, body count, and crown-start calculations will update.
Can I work joined rounds instead of a spiral?
Yes. Join without adding an extra stitch, and keep the join aligned. Count the round independently from the joining chain so the eight crown sectors remain equal.
References