

Size the flat disc, calculate the inward tuck, and verify the band
A classic beret is not simply a loose beanie. Its widest point is a flat circular disc, its lower crown tucks inward, and its band recovers around the wear line. This free crochet beret pattern calculates those three jobs separately so you can change the head size, gauge and amount of side overhang without guessing at a universal round count.
Start with the 22-inch beret example
This calculated example is a starting pattern for a 22 in (55.9 cm) head, with a planned disc, inward tuck and recovering band. It assumes a washed horizontal crown gauge of 3.5 dc stitches per inch, a washed straight-swatch row gauge of 2.2 rows per inch used only as a radial planning estimate, and a comfortably stretched band gauge of 3.5 post-stitch positions per inch. Check your own washed gauges and the actual disc before copying the counts: these numbers are predictions, not measurements of a finished beret or a universal adult size.
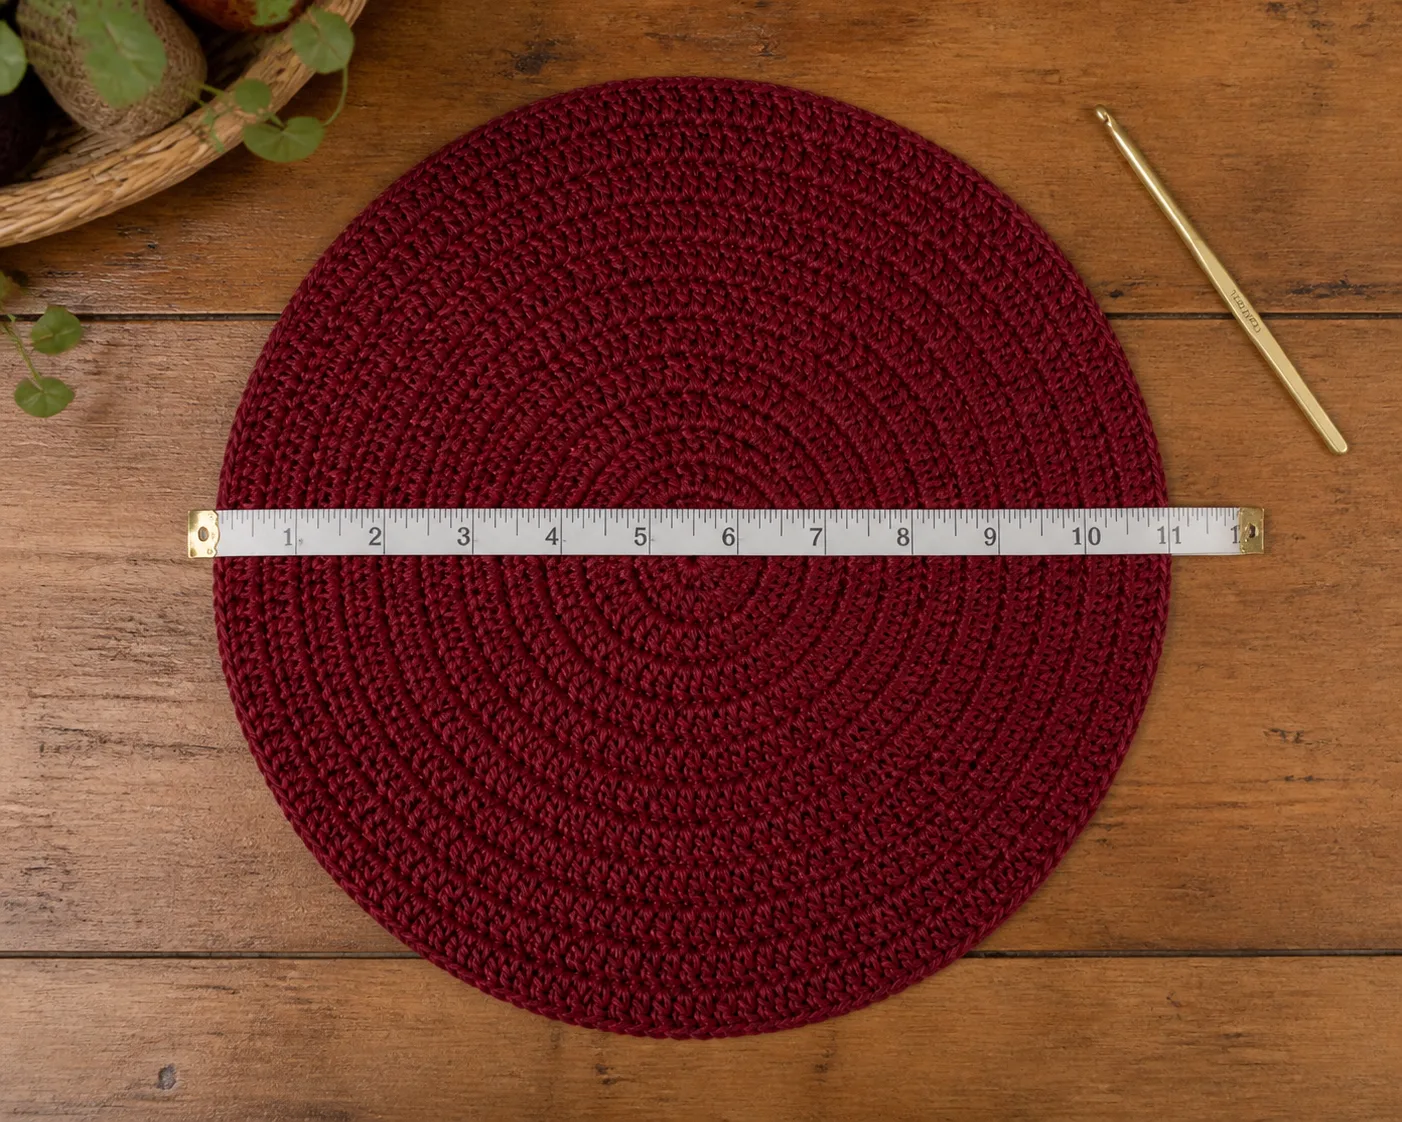
- Disc: work 10 dc in the magic ring, then add 10 evenly spaced stitches per increase round for a 12-round sequence ending at 120 stitches. The gauge model predicts about 10.91 in (27.7 cm) across; measure your own disc and check its shape.
- Tuck: work one even round at 120, then decrease once in each of 12 sectors over four rounds: 120 → 108 → 96 → 84 → 72 stitches.
- Band: keep 72 stitches and alternate FPdc and BPdc for about 1.25–1.75 in (3.2–4.4 cm), checking stretch and recovery at the wear line.
Follow the complete round-by-round pattern and fit gates. For another head size, overhang or gauge, use the disc–tuck–band calculation rather than extending the round counts by guesswork.
What Makes This a Beret, Not a Slouchy Beanie?
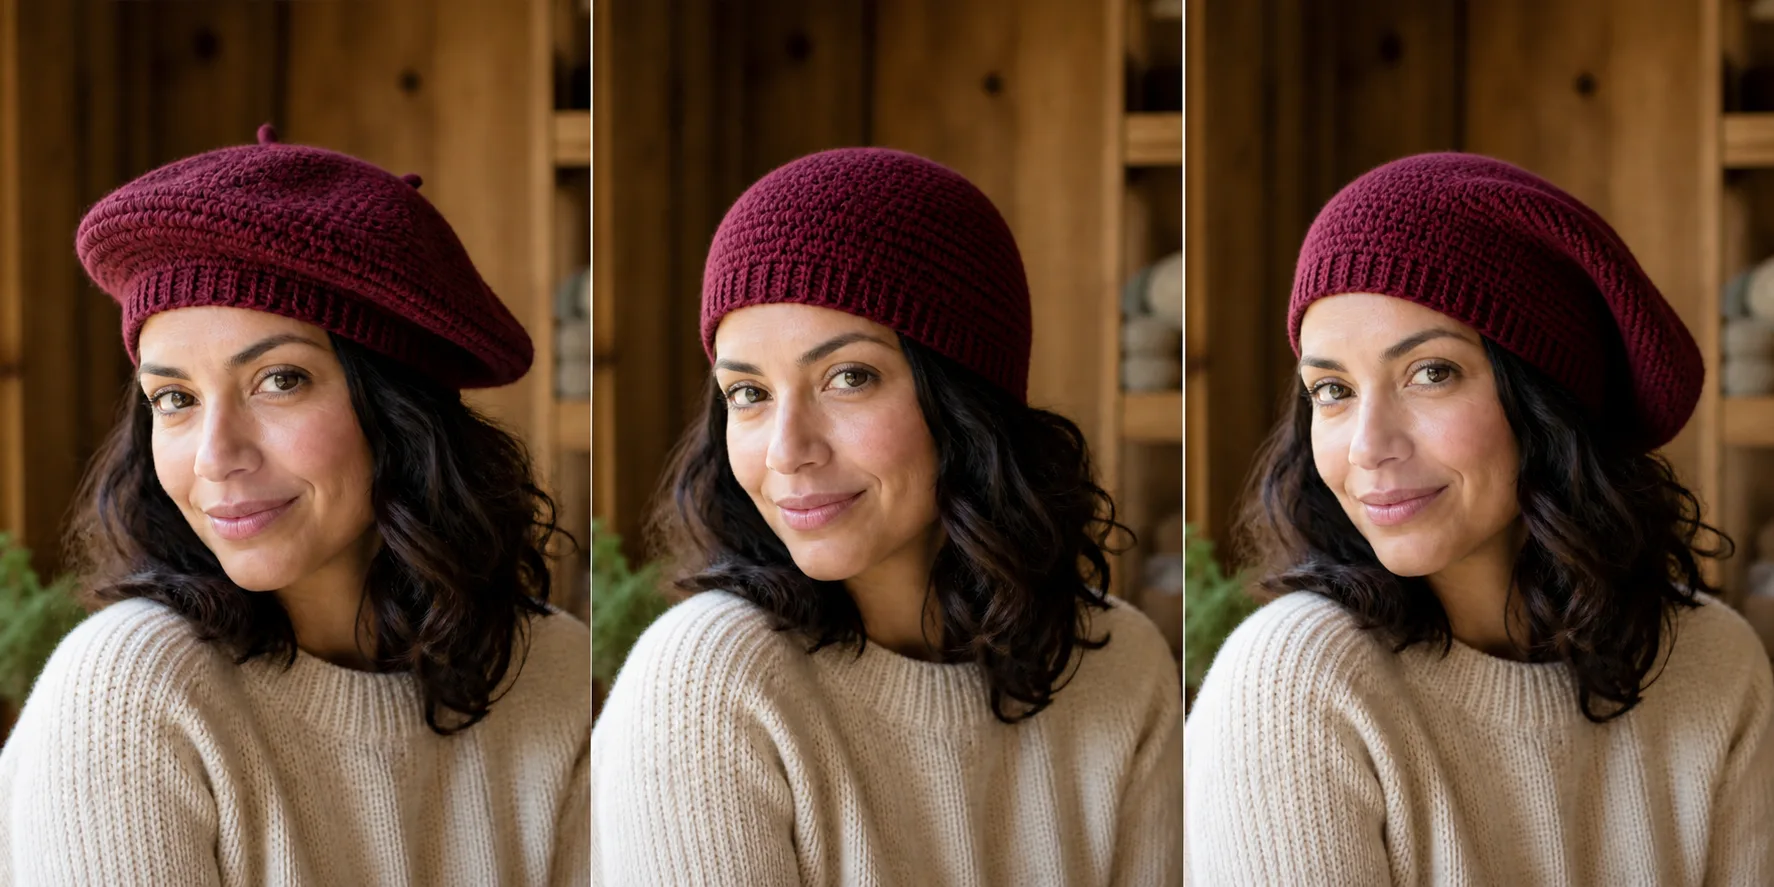
A slouchy beanie gets most of its extra volume from added length behind the head. A classic beret gets its volume from a disc that is wider than the head, followed by decreases that bring the opening back to the wear line. When it is laid flat before the decrease section, it should look like a broad circle rather than a long tube.
That distinction controls every adjustment in this pattern. Adding more straight rounds creates back drop; increasing the disc diameter creates beret overhang. If your goal is a long rear drape, use the published slouchy-beanie method instead of extending this pattern at random.
Project Overview
- Skill level: confident beginner to intermediate
- Construction: top-down joined rounds
- Main stitch: US double crochet
- Sector system: 10 increase positions in the 22-inch example; reset to 12 decrease sectors at the tuck
- Yarn: #4 medium/worsted yarn with enough recovery to hold a band
- Starting yardage: approximately 180-220 yd / 165-201 m for an adult example; swatch and record actual use
- Body hook: size needed to match your washed crown gauge; 5 mm is a starting point only
- Band hook: usually 0.5 mm smaller, subject to the band-recovery gate
- Notions: tape measure, yarn needle and 12 removable stitch markers
The Craft Yarn Council’s Standard Yarn Weight System treats hook and gauge ranges as guidelines. Your washed fabric, not the label alone, controls the calculations below.
US Abbreviations
| TERM | MEANING |
|---|---|
| BPdc | back post double crochet |
| ch | chain |
| dc | double crochet |
| dc2tog | double crochet two stitches together |
| FPdc | front post double crochet |
| rnd | round |
| sl st | slip stitch |
| st(s) | stitch(es) |
This pattern uses US terminology. The Craft Yarn Council crochet abbreviation list also shows the corresponding UK terms.
Beginning ch 2 never counts as a stitch. Join each round with a slip stitch to the first actual dc. The first dc is worked in the same stitch at the base of the beginning chain unless the instruction says otherwise.
Measure the Wear Line
Measure the head where the band will actually sit: across the mid-forehead, above the ears and around the fullest back point. Keep the tape level and comfortably close without pulling it into the skin. Record this circumference as H.

Choose two starting preferences:
- Band negative ease e. Begin around 5-8% for a recovering post-stitch band. This is a trial range, not a safety guarantee. Hair volume, fiber and skin sensitivity can require less or more.
- Side overhang O. Begin around 1.5-2 in / 3.8-5.1 cm per side for a classic adult silhouette. A smaller value looks neater; a larger value looks more dramatic and adds decrease depth.
Make and Wash Two Gauge Samples
The disc and the band do different jobs, so one relaxed square cannot describe both.
Crown gauge
Work a dc sample large enough to measure away from the edges. Wash and dry it as the finished beret will be treated. Record:
- g_c: washed dc stitches per inch across the row;
- g_r: washed dc rows per inch in height as a radial planning estimate; check the actual round-built disc because row and circular gauge may differ.
Band gauge
Work a small alternating FPdc/BPdc strip with the intended smaller hook. Wash and dry it. Stretch it only to the point that feels comfortable against the forehead, then count the stitch positions per inch. Record that value as g_b.
Do not pull the strip to its maximum possible width. A band calculated from maximum stretch can pass over the head yet feel harsh during wear.
The Disc-Tuck-Band Map
This map produces two legal stitch counts and the number of rounds between them.
Calculate the band
Target band circumference
B_target = H x (1 – e)
Raw band count
N_band_raw = B_target x g_b
Round N_band_raw to a multiple of 12. Check the legal count below and above the raw result instead of choosing automatically.
B_calc = N_band / g_b
calculated negative ease = (H – B_calc) / H
Reject a count that creates a loose opening or a band too tight to pass the recovery gate.
Calculate the widest disc
For a planning baseline, approximate the head’s circular diameter as H / pi, then add the chosen overhang to both sides:
D_raw = H / pi + 2 × O
Convert that diameter into the outer-edge stitch count:
N_peak_raw = pi x D_raw x g_c
Round the peak count to a multiple of 12 so the later tuck can be divided evenly; this gives a circumference-based diameter prediction, not a measured disc:
D_calc = N_peak / (pi x g_c)
calculated side overhang = (D_calc – H / pi) / 2
Plan the average disc increase rate separately: k_est = 2 x pi x g_c / g_r stitches added per round. For the 22-inch example, 2 x pi x 3.5 / 2.2 is about 10. Use the nearest workable rate as a test starting point, distribute any final partial increase evenly, and measure the disc. A straight swatch may not reproduce radial gauge in a circle. The head is not a perfect circle, so H / pi is only a planning shortcut; the maker’s flat-disc and worn-tuck checks decide whether to keep the result.
Calculate the tuck
Both legal counts are multiples of 12, so each decrease round can remove one stitch in every sector.
q = (N_peak – N_band) / 12
T_est = q / g_r
Here q is the number of decrease rounds and T_est is their approximate vertical depth using straight-swatch row gauge as a proxy. Measure your own tuck depth because circular shaping can change round height. If N_peak is not larger than N_band, the inputs cannot produce a beret tuck; recheck the disc allowance and both gauges.
Worked Example: 22-Inch Head
The default example uses:
- H = 22 in / 55.9 cm
- e = 0.07
- g_b = 3.5 comfortably stretched band positions/in
- g_c = 3.5 washed dc/in
- g_r = 2.2 washed dc rows/in used as a radial planning estimate
- O = 1.75 in / 4.4 cm per side
For accurate calculations, keep unrounded calculator values through each dependent step and round only the displayed result. The values below use unrounded inputs and intermediate results.
Band calculation
B_target = 22 x 0.93 = 20.46 in
N_band_raw = 20.46 x 3.5 = 71.61
The nearest legal count is 72.
B_calc = 72 / 3.5 = 20.571 in / 52.25 cm
Using the unrounded 20.5714 in result, calculated negative ease is (22 – 20.5714) / 22 = 6.49%; check the finished band for comfort and recovery.
Disc calculation
D_raw = 22 / pi + 3.5 = 10.5028 in (displayed as 10.50 in)
N_peak_raw = pi x 10.5028 x 3.5 = about 115.48
The neighboring legal counts are 108 and 120. Count 120 is closer to the requested diameter.
D_calc = 120 / (pi x 3.5) = 10.91 in / 27.7 cm
Calculated side overhang is about 1.96 in / 5.0 cm.
Tuck calculation
q = (120 – 72) / 12 = 4 decrease rounds
The count path is 120 -> 108 -> 96 -> 84 -> 72.
T_est = 4 / 2.2 = 1.82 in / 4.6 cm
The 120-stitch disc takes one 10-stitch starting round followed by eleven rounds adding ten stitches each. Its radial diameter estimate, 2 x 12 / 2.2 = 10.91 in, agrees with the circumference estimate. These are calculated examples; check the shape and measurements of your own piece. For another gauge, recalculate the increase rate before reusing the counts.
Calculated 22-Inch Beret: Starting Instructions
Part 1: Increase the flat disc
With the body hook, make a magic ring. This twelve-round sequence is the calculated example for a 22-inch head; check your own disc after every round.
- Round 1: Ch 2, work 10 dc in the ring, join to the first dc. 10 sts
- Round 2: Ch 2, work 2 dc in each st around, join. 20 sts
- Round 3: Ch 2, repeat [1 dc, 2 dc in next st] 10 times, join. 30 sts
- Round 4: Ch 2, repeat [2 dc, 2 dc in next st] 10 times, join. 40 sts
- Round 5: Ch 2, repeat [3 dc, 2 dc in next st] 10 times, join. 50 sts
- Round 6: Ch 2, repeat [4 dc, 2 dc in next st] 10 times, join. 60 sts
- Round 7: Ch 2, repeat [5 dc, 2 dc in next st] 10 times, join. 70 sts
- Round 8: Ch 2, repeat [6 dc, 2 dc in next st] 10 times, join. 80 sts
- Round 9: Ch 2, repeat [7 dc, 2 dc in next st] 10 times, join. 90 sts
- Round 10: Ch 2, repeat [8 dc, 2 dc in next st] 10 times, join. 100 sts
- Round 11: Ch 2, repeat [9 dc, 2 dc in next st] 10 times, join. 110 sts
- Round 12: Ch 2, repeat [10 dc, 2 dc in next st] 10 times, join. 120 sts
For another gauge, estimate increases per round from k_est = 2 x pi x g_c / g_r, choose a workable integer rate, and distribute a final partial increase round evenly if needed. This is a construction trial, not a promise that every yarn will lie flat; use the flat-disc gate before the tuck.
Count each round before proceeding. The 22-inch disc has ten evenly spaced increases in each full increase round; the 20-inch example ends with a separate eight-increase round. Stagger increase positions if a line becomes prominent, preserving that round’s planned total. Do not carry the increase markers into the twelve-sector tuck.
Flat-disc gate
Relax the disc on a flat surface and measure across it. A slight curl immediately off the hook may settle after washing, but a persistent bowl means too few increases for the fabric and a rippled edge means too many.
- If it bowls before N_peak, undo to the last acceptable round. Recheck the working gauge and planned increase rate, then recalculate a peak count compatible with the twelve-sector tuck before continuing. If the band gauge changes, recalculate N_band too.
- If it ripples, undo to the last acceptable round and reassess the increase rate or hook. Do not simply omit one full round: that can leave a peak count that cannot be divided into twelve decrease sectors. Recalculate and work to a compatible N_peak, then remeasure before starting the tuck.
- If the fabric lies flat but the diameter misses D_calc by more than about 0.25 in / 0.6 cm, trust your measured disc, recalculate the target count and increase rate, and confirm that the new peak count still supports twelve equal decrease sectors.
Part 2: Set twelve sectors
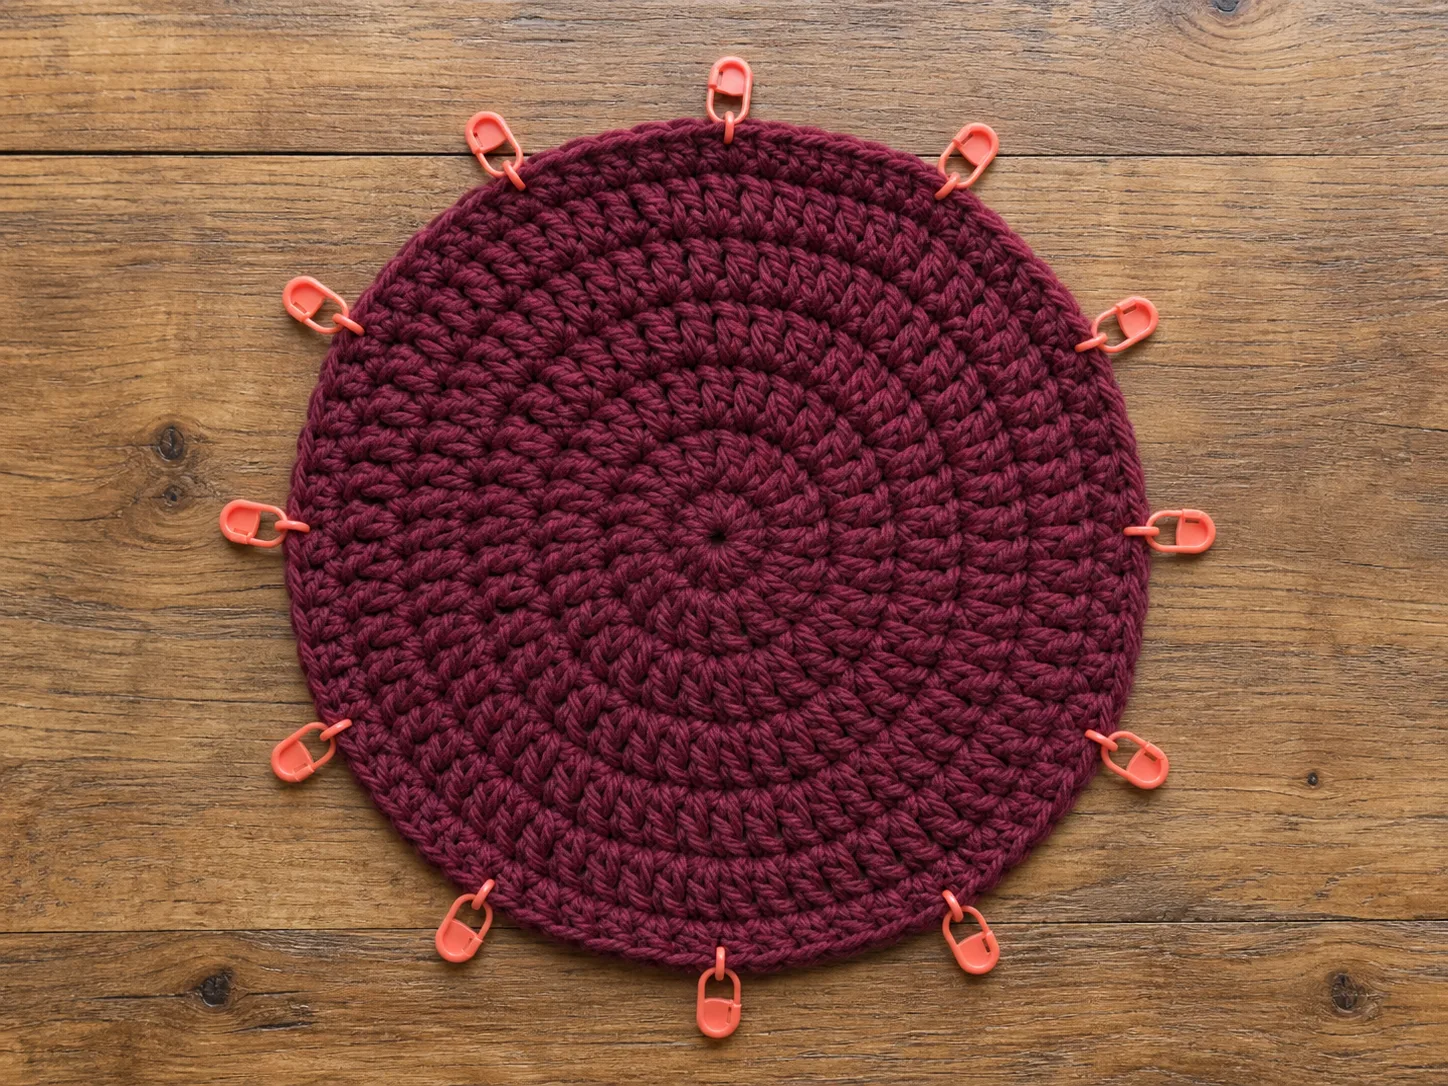
After checking the peak disc, discard the increase layout. Work one even dc round at N_peak, then divide this new round into 12 equal decrease sectors, each containing N_peak / 12 stitches. Place one removable marker at the beginning of each sector.
Part 3: Decrease from disc to band
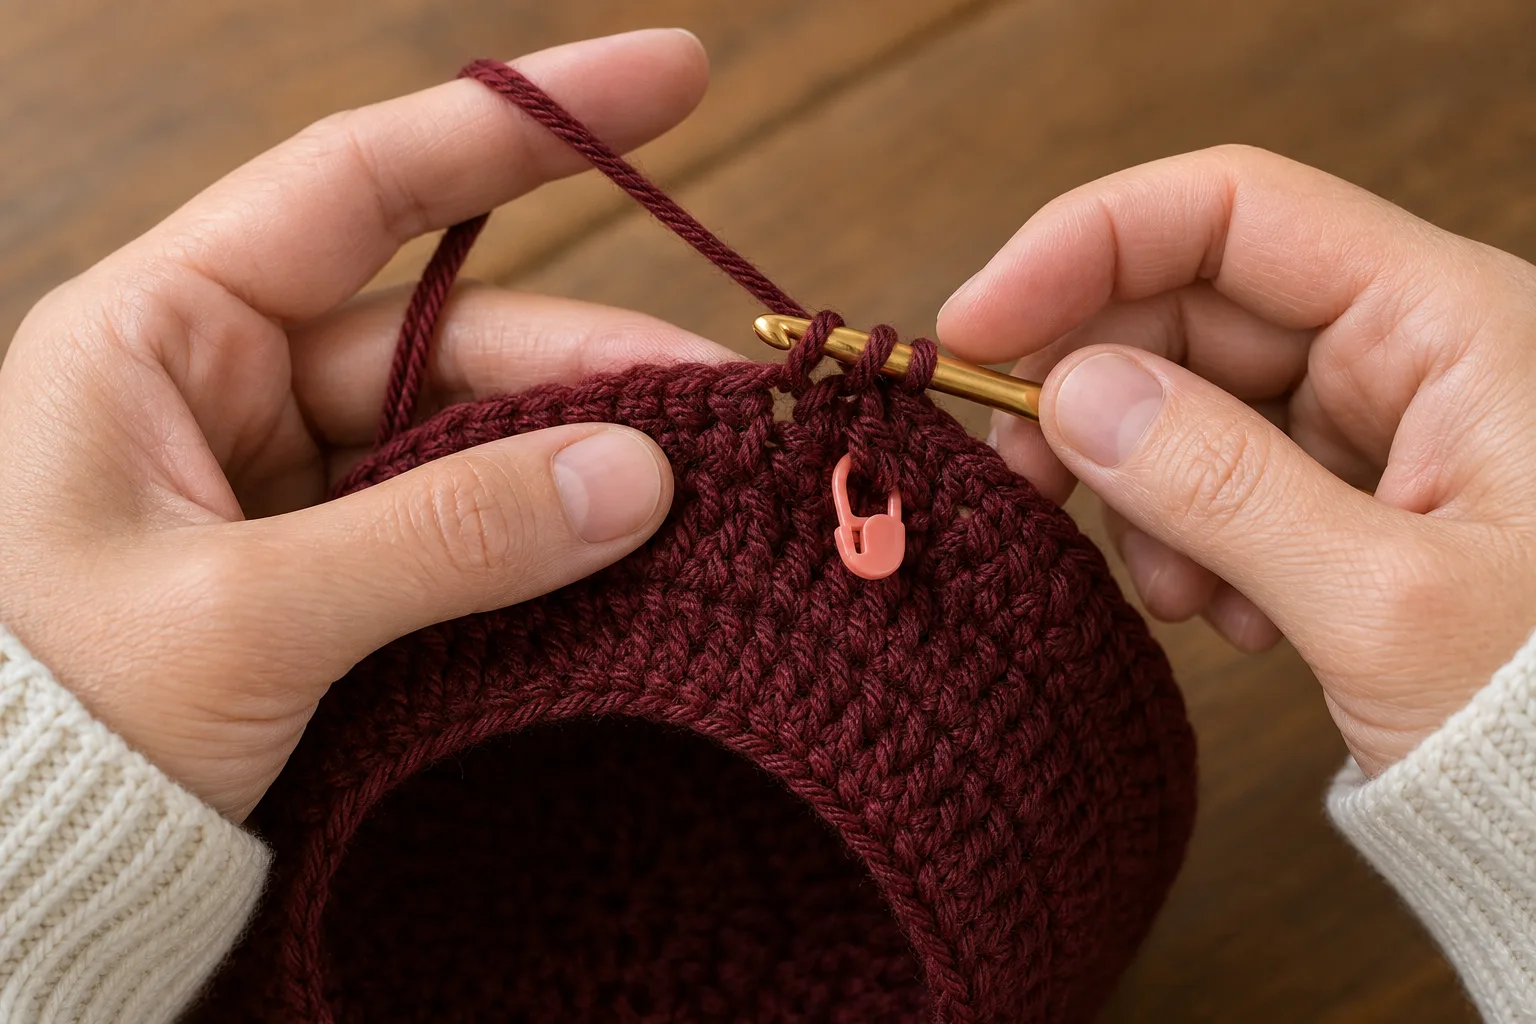
On every tuck round, remove one stitch in each sector. If the current sector contains m stitches, work m – 2 dc, then dc2tog over the final two stitches of that sector. Move the marker to the first stitch of the new sector.
For the default path:
- From 120: repeat [8 dc, dc2tog] 12 times. 108 sts
- From 108: repeat [7 dc, dc2tog] 12 times. 96 sts
- From 96: repeat [6 dc, dc2tog] 12 times. 84 sts
- From 84: repeat [5 dc, dc2tog] 12 times. 72 sts
Stop at N_band; do not continue decreasing simply because the lower crown still looks loose while lying flat. It is supposed to open above a smaller band.
Tuck gate
Place the unfinished beret on the wearer before adding a firm band. The crown should project to both sides and fold inward above the wear line. It should not hang mainly behind the head like a long beanie.
- Too little side overhang: return to the disc decision; adding straight rounds will not create the same silhouette.
- Excessive back drop: remove unplanned even rounds or reduce the disc allowance.
- Hard ridge at the decrease line: spread decreases consistently and avoid stacking extra decreases into one sector.
Part 4: Crochet the recovering band
Remove the sector markers after the count is verified. Switch to the band hook selected from the washed post-stitch swatch.
- Setup round: Ch 2, work 1 dc in each stitch around, join. Keep N_band stitches.
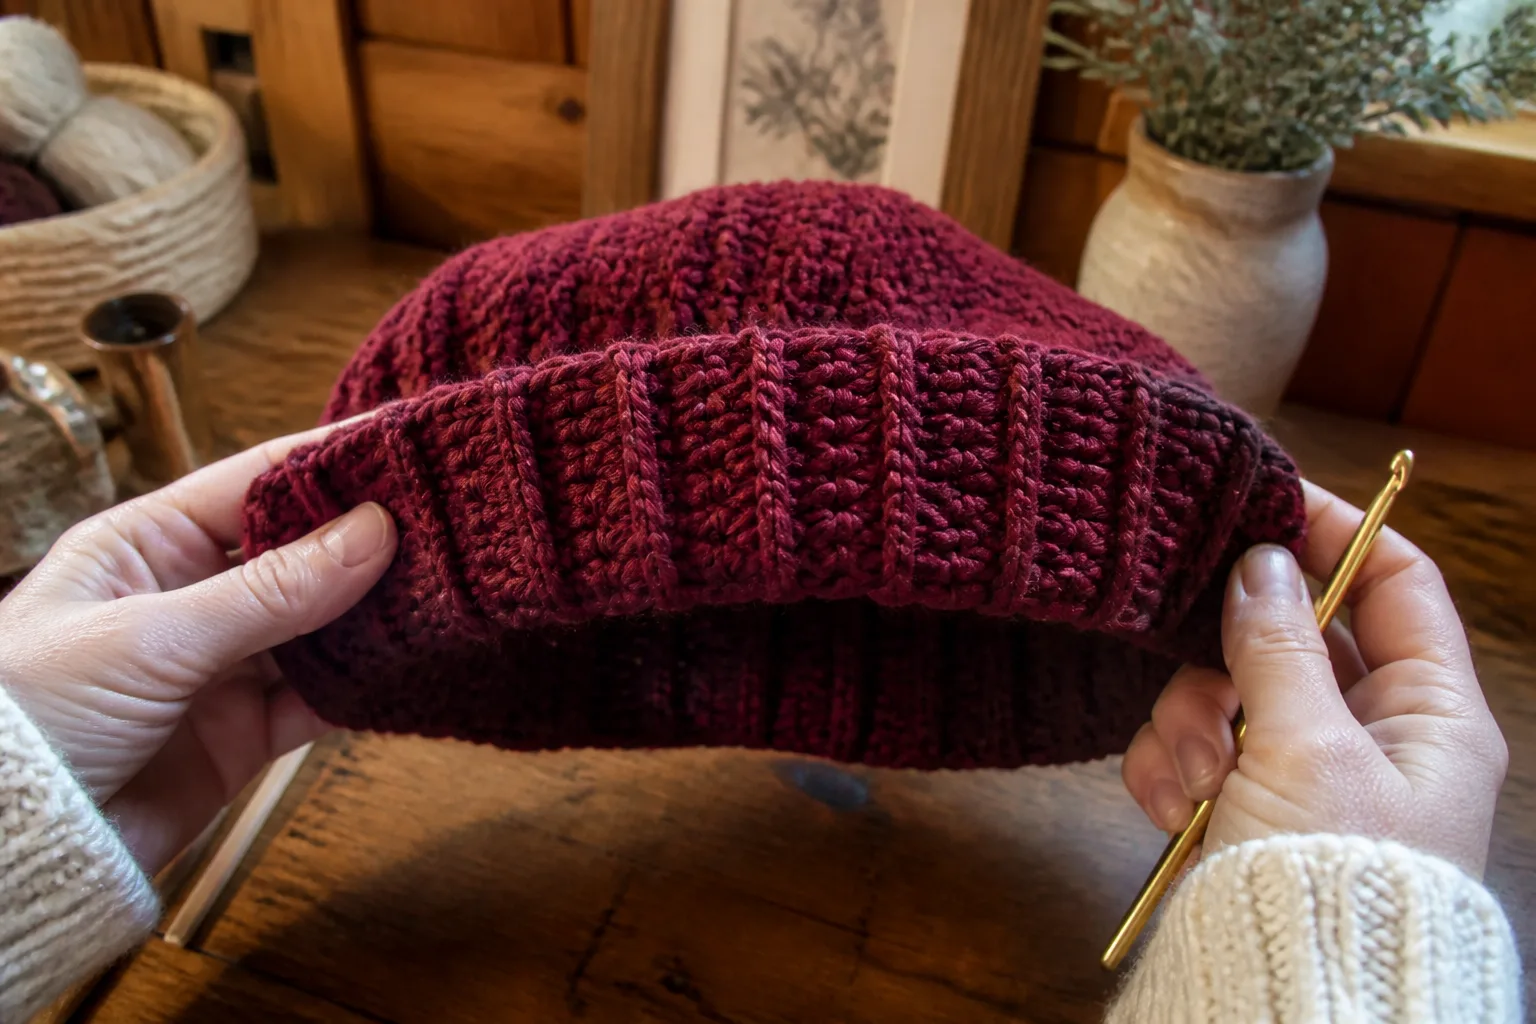
- Rib round: Ch 2, repeat [FPdc around next dc, BPdc around next dc] around, join to the first FPdc.
- Repeat the rib round until the band measures about 1.25-1.75 in / 3.2-4.4 cm, checking recovery before adding more depth.
Fasten off, close the final join neatly and weave the tail through several direction changes without making a rigid lump. Wash and dry the finished beret as the swatches were treated.
Four Acceptance Gates
Flat-disc gate
Pass: your washed disc lies flat and meets your measured diameter target without a bowl or wave.
Minimum correction: undo the last wrong increase interval; do not try to block a structural ruffle flat.
Tuck gate
Pass: the crown projects to both sides, then turns inward above the ears. It does not rely on a long tube for volume.
Minimum correction: return to the first incorrect disc or decrease round, not the band.
Band-recovery gate
Stretch the band over the widest head point, wear it for 30 seconds, then remove it.
Pass: it returns close to its recorded resting circumference, stays comfortable and leaves no persistent pressure mark.
Minimum correction: change the band hook or legal count before adding more rib rounds. Extra depth cannot repair a wrong circumference.
Tilt-and-visibility gate
Tilt the crown to the preferred side, then turn and nod the head.
Pass: the band remains at the recorded wear line and both eyes stay clear.
Minimum correction: improve band recovery or reduce the tilt/overhang; do not pin a badly fitting band in place as the primary fix.
Worked Example: 20-Inch Head
This case shows why the nearest legal count must be evaluated after rounding.
Inputs:
- H = 20 in / 50.8 cm
- e = 0.08
- g_b = 3.75 stretched positions/in
- g_c = 3.75 dc/in
- g_r = 2.4 washed dc rows/in used as a radial planning estimate
- O = 1.5 in / 3.8 cm
The target band is 20 x 0.92 = 18.4 in. The raw count is 18.4 x 3.75 = 69.
The legal choices are 60 and 72. Sixty stitches would measure only 16 in and create 20% negative ease. That is much tighter than the selected starting range, so choose 72 and test the band instead.
At 72 stitches, the band calculation predicts 72 / 3.75 = 19.2 in / 48.8 cm, which gives 4% calculated negative ease. If the post-stitch sample does not recover at this count, change the band gauge or hook; do not force the 60-stitch option because it is numerically legal.
For the disc:
D_raw = 20 / pi + 3 = 9.37 in
N_peak_raw = pi x 9.37 x 3.75 = about 110.34
Choose 108, which predicts a disc diameter of about 9.17 in / 23.3 cm and side overhang of about 1.40 in / 3.6 cm. At these example gauges, the estimated increase rate is 2 x pi x 3.75 / 2.4 = 9.82. Start with ten dc in Round 1, then add ten in each of Rounds 2–10 to reach 100 stitches. In Round 11, add eight evenly spaced stitches: repeat [11 dc, inc, 12 dc, inc] four times, consuming 100 old stitches and finishing with 108. Then reset twelve decrease sectors of nine stitches each. Both 108 / (pi x 3.75) and 2 x 11 / 2.4 predict about 9.17 in; measure your own disc.
The tuck requires (108 – 72) / 12 = 3 decrease rounds:
108 -> 96 -> 84 -> 72
Using the 2.4 rows/in radial planning proxy, predicted tuck depth is 3 / 2.4 = 1.25 in / 3.2 cm; measure the shaped piece.
Adapting the beret for a child or a gift
Do not scale the adult 72-stitch band or 120-stitch disc by a percentage. Measure the intended wear line H, choose the desired side overhang O, and make washed crown and band samples in the actual yarn and hooks.
Recalculate N_band and N_peak independently, round each to a legal multiple of 12, and retest estimated ease, flat-disc shape, tuck and eye clearance. The adult 1.5-2 in overhang range is a starting preference, not a child constant.
For a gift without try-on access, record the finished resting band, comfortable stretch range, disc diameter and tuck depth, and allow adjustment or remaking. A generic age label cannot replace the recipient’s measurements.
Troubleshooting by Return Point
| Symptom | Likely cause | Minimum correction | Return point |
|---|---|---|---|
| Disc forms a bowl | Too few increases for the fabric or tighter gauge than recorded | Undo to the last acceptable round; check gauge and increase rate, then recalculate and remeasure a peak count compatible with twelve decrease sectors | Disc increase |
| Disc edge ripples | Too many increases or looser edge gauge | Undo to the last acceptable round; recheck gauge and increase rate, then recalculate a twelve-sector-compatible peak count before the tuck | Disc increase |
| Finished hat looks like a beanie | Disc diameter/overhang too small | Recalculate N_peak; do not add straight length | Disc decision |
| Crown falls mainly behind head | Too many even rounds or excessive tuck depth | Remove unplanned rounds or reduce O | Disc/tuck boundary |
| Twelve dents show clearly | Decreases stacked harshly or tension tightened at markers | Relax dc2tog tension and shift decrease position within sectors | Tuck rounds |
| Band will not pass over head | Legal count or comfortably stretched gauge is too small | Undo band; change hook/gauge or choose adjacent legal count | Band calculation |
| Band stretches but stays loose | Fiber recovery is weak or band hook too large | Use a recovering yarn/sample or smaller hook, then recalculate | Band swatch |
| Tilt slides over one eye | Band recovery is weak or overhang is excessive for the chosen tilt | Correct band first; then reduce tilt or disc allowance | Band/tilt gate |
Final Checklist
- Measure H at the intended wear line.
- Make, wash and record the crown and post-stitch band gauges separately.
- After any gauge or count change, confirm that N_peak and N_band are both multiples of 12 and that N_peak is larger.
- Calculate band ease after rounding, then test the finished band for comfortable stretch and recovery.
- Confirm that the flat disc lies acceptably and meets your measured diameter target before starting the tuck.
- Work exactly one decrease in each of 12 sectors per tuck round, stopping at the recalculated band count.
- Try on the unfinished beret before adding a firm band if the wearer is available.
- Check that the band passes over the widest head point and recovers after wear.
- Check that the tilted beret stays clear of both eyes.
- Record the final hook sizes, yarn, counts, washed measurements and any corrections.
Frequently Asked Questions
How do I crochet a beret?
Crochet a flat circular disc, work an optional even transition round, decrease the disc evenly to a smaller head-band count, then add a recovering band. The essential difference from a beanie is that the widest disc is deliberately larger than the head before it tucks inward.
How do I make a crochet beret larger?
Identify which dimension is small. Increase N_peak if the crown lacks side overhang. Increase or change the gauge of N_band if the opening is tight. Adding random straight rounds changes depth and can create a slouchy beanie instead of a wider beret.
Can I use single crochet instead of double crochet?
Yes, but do not reuse the dc round count. Make and wash new crown and band samples, then recalculate both legal counts. A shorter stitch also changes the number and depth of rounds needed to create the same disc and tuck.
Why is my crochet beret wavy?
A wavy flat disc usually has too many increases for the stitch height and gauge. For the 22-inch example, check ten increases in each full increase round; for other gauges, recalculate the rate and check the disc before changing the final interval. Blocking can settle mild fabric movement but cannot reliably erase a structural ruffle.
Is a tam the same as a beret?
The terms overlap in crochet search results. A tam is often roomier or more softly draped, while a classic beret emphasizes a broad disc and contracted band. This pattern can move toward a tam by increasing O, but the tuck and visibility gates still apply.
Keep a finished-project record with H, e, O, both washed gauges, both legal counts, measured hat circumference, negative ease calculated from that measurement, measured disc diameter, tuck rounds, hook sizes and all four gate results. Those numbers make the next beret reproducible instead of accidental.