
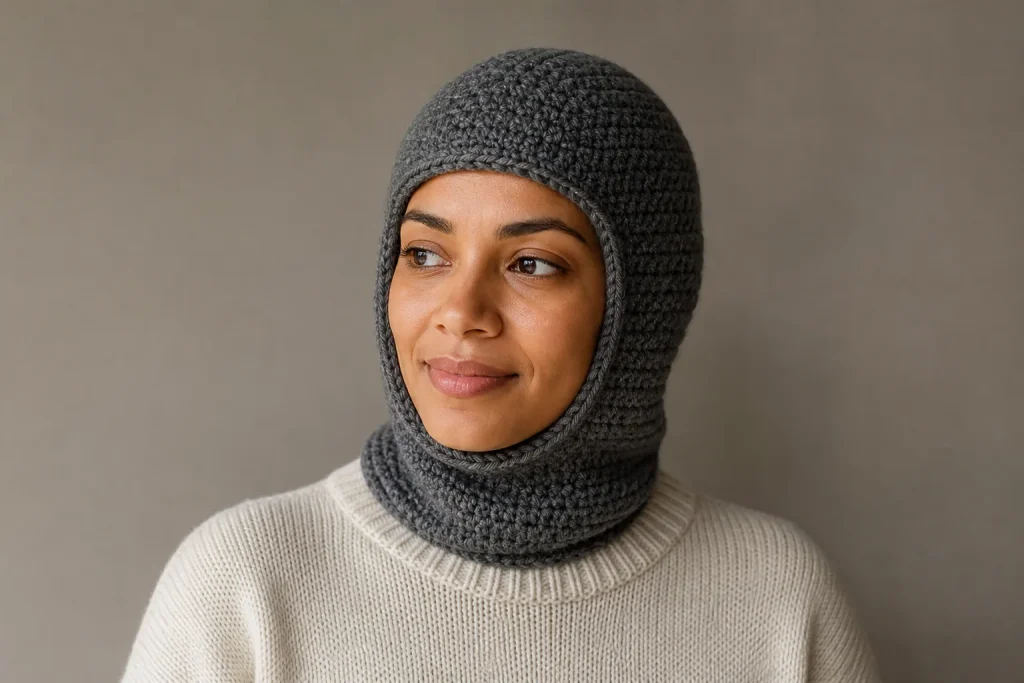
Fit the crown, center the face window, and restore the neck count
This adult pattern makes an open-face crochet balaclava that covers the crown, ears and neck while leaving the whole face visible.
Balaclava Window and Count Planner
Open the tool in a separate page. The article also retains the manual formulas and worked checks.
JavaScript is optional: use the manual calculation method and worked examples in the article.
What This Pattern Solves
Many balaclava patterns give one chain count, one adult size or a set of granny-square dimensions. Those paths can work at the stated gauge, but changing yarn or hook size changes more than head circumference. The crown, opening width, opening height, border and neck all have different measurement jobs.
The Crown–Window–Neck Map keeps those jobs separate. It:
- rounds the hood to a legal multiple of 12 for the crown;
- checks the estimated circumference and negative ease after rounding;
- uses joined-round gauge for crown depth and neck drop;
- uses a separate turned-row gauge for the face-opening phase;
- reserves space for an inward face border before stitches and rows are chosen;
- restores the exact hood count below the chin; and
- converts the vertical row edges back to stitch gauge for a flatter border pickup.
This is an adult open-face hood. It is not an eye-only ski mask, a mouth-opening mask, a child’s proportional reduction, a granny-square balaclava or a certified piece of protective equipment.
Project Overview
| Item | Default project |
|---|---|
| Skill level | Confident beginner / intermediate |
| Construction | Top-down joined HDC rounds, turned HDC face rows, joined neck rounds |
| Yarn | Medium / weight 4 yarn with comfortable next-to-face feel |
| Main hook | Size needed to match the washed joined-round gauge; 5 mm is a starting point only |
| Border hook | Same hook or 0.5 mm smaller only if the finished edge remains comfortable |
| Default adult input | 22 in / 55.9 cm head |
| Default washed gauge | 14 HDC and 9 rounds per 4 in / 10 cm; 10 turned rows per 4 in / 10 cm |
| Estimated body circumference at the default gauge | 20.57 in / 52.2 cm |
| Default face window | 7.5 in / 19.1 cm wide × 7 in / 17.8 cm high after the planned border |
| Default neck drop | 4.5 in / 11.4 cm below the chin bridge |
The default numbers are one complete worked example. Your final count comes from your wearer and washed fabric.
Materials
- approximately 300–400 yd / 274–366 m of medium / weight 4 yarn;
- main crochet hook needed for the washed gauge;
- optional hook 0.5 mm smaller for the face border;
- at least four locking stitch markers in two colors;
- flexible tape measure and a straight ruler;
- tapestry needle and scissors.
Choose yarn that feels comfortable at the forehead, cheeks and neck. A yarn label category does not predict the finished dimensions or recovery of your fabric; swatch the actual yarn and hook combination.
US Abbreviations and Round Convention
| Abbreviation | Meaning |
|---|---|
| ch | chain |
| hdc | half double crochet |
| sc | single crochet |
| sl st | slip stitch |
| st(s) | stitch(es) |
| rnd(s) | round(s) |
| RS / WS | right side / wrong side |
Join every HDC round with a slip stitch to the first HDC. The starting chain does not count as a stitch. Work the first HDC in the same stitch as the join unless the instructions say otherwise. Place a distinct marker in the first stitch; the join stays at the center back.
Measure and Swatch Before Choosing Counts
Record these wearer measurements without adding ease:
- Head circumference `H`: around the intended wear line, above the eyebrows and ears.
- Crown-to-brow depth `D_b`: from the top center of the head down to the planned top edge of the finished face border.
- Finished window width `A`: the clear straight opening desired from one side of the face to the other. Keep the tape or ruler close to the face without following the full head curve.
- Finished window height `F`: from the planned top border edge to the planned lower border edge beneath the chin.
- Neck drop `L_n`: from the lower face edge to the desired bottom edge along the side of the neck.
Make two construction-matched swatches:
- Joined-round tube: at least 6 in / 15 cm around and 5 in / 12.7 cm deep. Wash, dry and measure stitches per 4 in / 10 cm (g_s) and rounds per 4 in / 10 cm (g_r).
- Turned-row strip: use the same HDC, turning-chain rule and yarn. Wash, dry and measure turned rows per 4 in / 10 cm (g_t).
Do not substitute flat row gauge for joined-round depth without measuring it. Turning changes how the fabric relaxes, and the row-edge pickup later depends on the relationship between g_s and g_t.
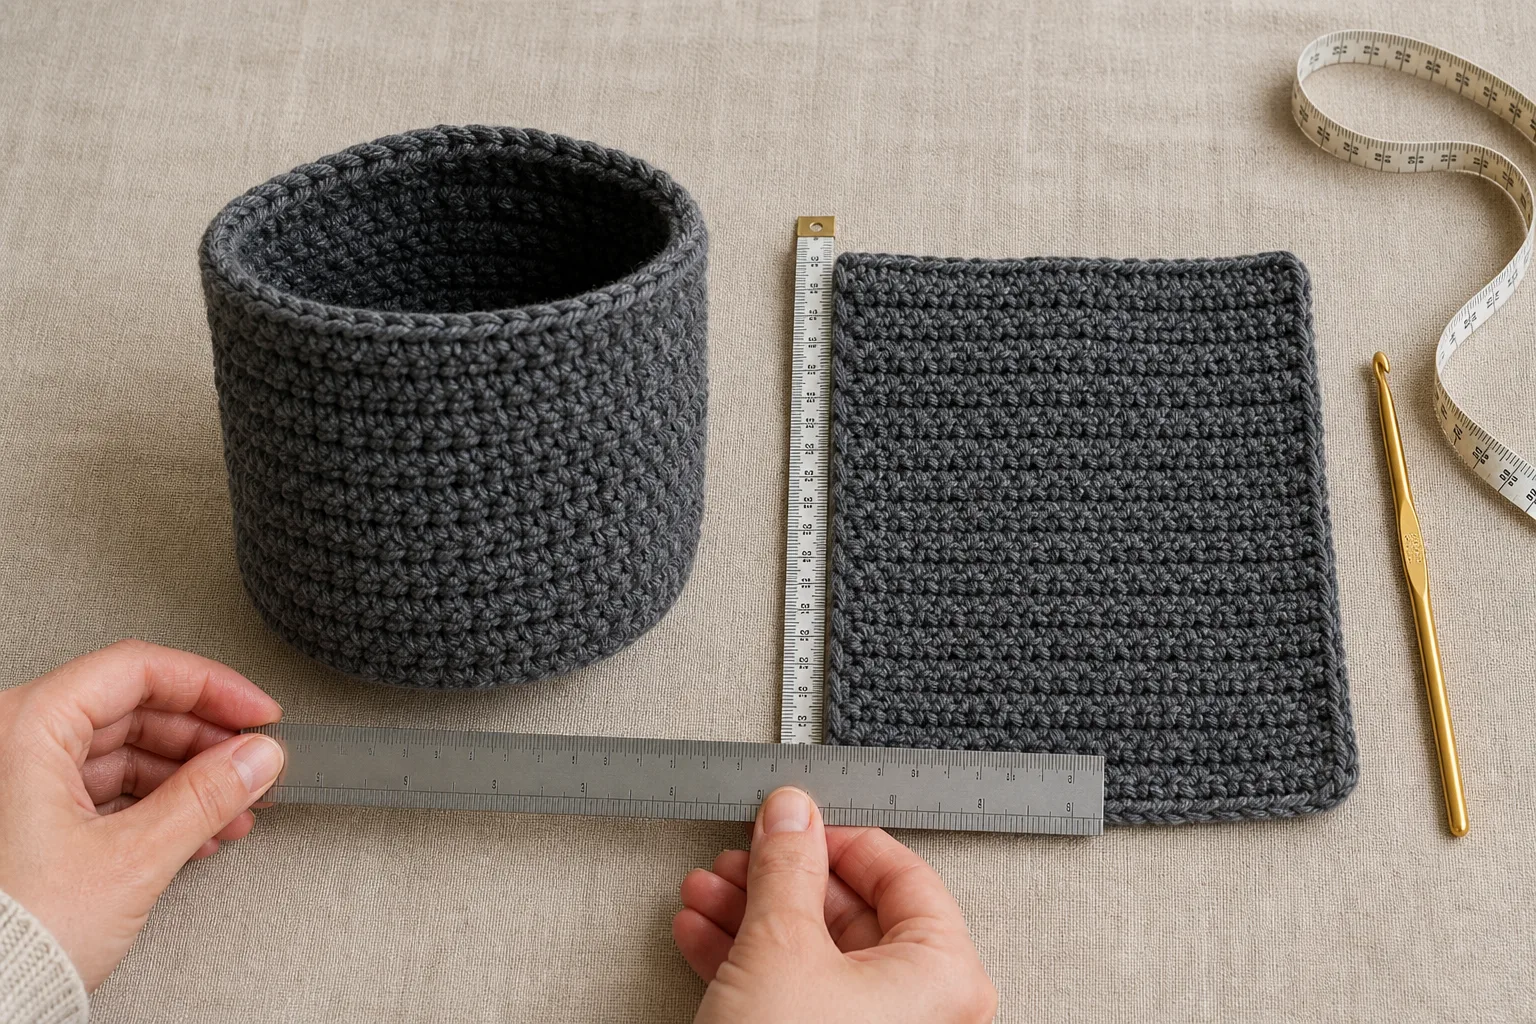
The Crown–Window–Neck Map
Use inches with gauges measured per 4 in, or centimeters with gauges measured per 10 cm. Do not mix the two formula sets.
Choose a legal hood count
Start with a modest negative-ease planning value e; 4–8% is a common adult starting range, not a guarantee.
C_target = H × (1 – e)
For inch gauge:
B_raw = C_target × g_s / 4
For metric gauge:
B_raw = C_target × g_s / 10
Compare the multiples of 12 immediately below and above B_raw. For each legal candidate:
C_actual = B × 4 / g_s
estimated ease = (H – C_actual) / H
Choose only after checking estimated ease and a pull-over test on the partly completed hood. If both legal neighbors fail, change the hook or fabric and make a new washed swatch. Do not break a crown sector.
Plan the crown-to-brow depth
The crown begins with 12 HDC and gains exactly 12 stitches on every increase round.
R_c = B / 12 total crown rounds; I = R_c − 1 increase rounds
The count path is 12, 24, 36 … B over R_c total crown rounds: one starting round followed by I increase rounds.
Plan the total round count to the brow:
Q = round_half_up(D_b × g_r / 4)
Then work Q − R_c plain rounds after the final increase round, counting the starting round once in the crown total. This is a planning conversion. The project held against the wearer decides the true brow position.
Reserve the finished face border
If the border is expected to extend b inward on every edge, make the raw opening larger before converting it to stitches and rows:
A_work = A + 2b
F_work = F + 2b
The border depth is an estimate based on the chosen edging. Measure after the first border round; do not assume every SC round has the same physical depth.
Convert the window width into an even stitch count
O_raw = A_work × g_s / 4
Round O_raw to the nearest even number O. The hood rows contain:
B – O stitches
As a warning only, review an opening outside 25–42% of B. That ratio is not an anatomical law; the wearer measurement and visibility gate are final.
Convert window height into turned rows
P = round_half_up(F_work × g_t / 4)
Work exactly B – O stitches on each of the P turned rows. At the bottom edge, chain O and verify:
(B – O) + O = B
Plan the vertical edge pickup
One SC in every row end is usually wrong when stitch gauge and turned-row gauge differ. Convert each side back to stitch gauge:
E_side = round_half_up(P × g_s / g_t)
Use that count as the first border-round plan, then inspect whether the edge lies flat. A ruffled edge has too many pickups; a cupped edge has too few.
Convert neck drop into rounds
N = round_half_up(L_n × g_r / 4)
The measured drop and a head-turn check decide whether to stop, not the calculated round number alone.
Worked Example: 22-Inch Head
Inputs:
- H = 22 in / 55.9 cm
- e = 6%
- g_s = 14 HDC per 4 in / 10 cm
- g_r = 9 rounds per 4 in / 10 cm
- D_b = 7 in / 17.8 cm
- A = 7.5 in / 19.1 cm
- F = 7 in / 17.8 cm
- b = 0.25 in / 0.6 cm
- g_t = 10 turned rows per 4 in / 10 cm
- L_n = 4.5 in / 11.4 cm
Fit and crown
C_target = 22 × 0.94 = 20.68 in
B_raw = 20.68 × 14 / 4 = 72.38
The legal neighbors are 72 and 84. Choose 72:
C_actual = 72 × 4 / 14 = 20.571… in
estimated ease = (22 – 20.571…) / 22 = 6.49%
R_c = 72 / 12 = 6 total crown rounds; I = 6 − 1 = 5 increase rounds
Q = round_half_up(7 × 9 / 4) = 16 total rounds
Work six total crown rounds (one starting round plus five increase rounds), then 10 plain rounds. This preserves 6 + 10 = 16 total rounds to the brow.
Face window and neck
A_work = 7.5 + 0.5 = 8 in
O = 8 × 14 / 4 = 28 stitches
Work 72 – 28 = 44 stitches per turned row.
F_work = 7 + 0.5 = 7.5 in
P = round_half_up(7.5 × 10 / 4) = 19 rows
E_side = round_half_up(19 × 14 / 10) = 27 pickups per side
Chain 28 below the chin and restore 72. Work:
N = round_half_up(4.5 × 9 / 4) = 10 neck rounds
Complete default ledger
| Phase | Round(s) / row(s) | Action | End count |
|---|---|---|---|
| Crown | Rnd 1 | 12 HDC in ring | 12 |
| Crown | Rnd 2 | 2 HDC in every stitch | 24 |
| Crown | Rnd 3 | [HDC 1, 2 HDC in next] × 12 | 36 |
| Crown | Rnd 4 | [HDC 2, 2 HDC in next] × 12 | 48 |
| Crown | Rnd 5 | [HDC 3, 2 HDC in next] × 12 | 60 |
| Crown | Rnd 6 | [HDC 4, 2 HDC in next] × 12 | 72 |
| Brow depth | Rnds 7–16 | HDC around without increases | 72 |
| Face opening | Rows 1–19 | turn; HDC across the back/sides | 44 each row |
| Chin bridge | after Row 19 | chain 28 and join without twisting | 44 + 28 = 72 |
| Neck | Rnds 1–10 | HDC in 44 body stitches and 28 bridge chains | 72 |
| Face border | first round | 28 top + 27 side + 28 bottom + 27 side | 110 planned |
Complete Crochet Balaclava Pattern
The instructions below execute the default 72-stitch example. Replace each bold count with the output from your own plan; do not mix default and personal counts.
Part 1: Work the twelve-sector crown
Rnd 1: Make a magic ring. Ch 1, work 12 HDC in the ring, join to the first HDC. Mark the first stitch. 12 sts
Rnd 2: Ch 1, 2 HDC in each stitch around, join. 24 sts
Rnd 3: Ch 1, [HDC in next stitch, 2 HDC in next] 12 times, join. 36 sts
Rnd 4: Ch 1, [HDC in next 2 stitches, 2 HDC in next] 12 times, join. 48 sts
Rnd 5: Ch 1, [HDC in next 3 stitches, 2 HDC in next] 12 times, join. 60 sts
Rnd 6: Ch 1, [HDC in next 4 stitches, 2 HDC in next] 12 times, join. 72 sts
Lay the crown flat without stretching. Twelve equal increase points should form a smooth disc. If one section contains a different count, return to the first mismatched round; do not hide the error in a later round.
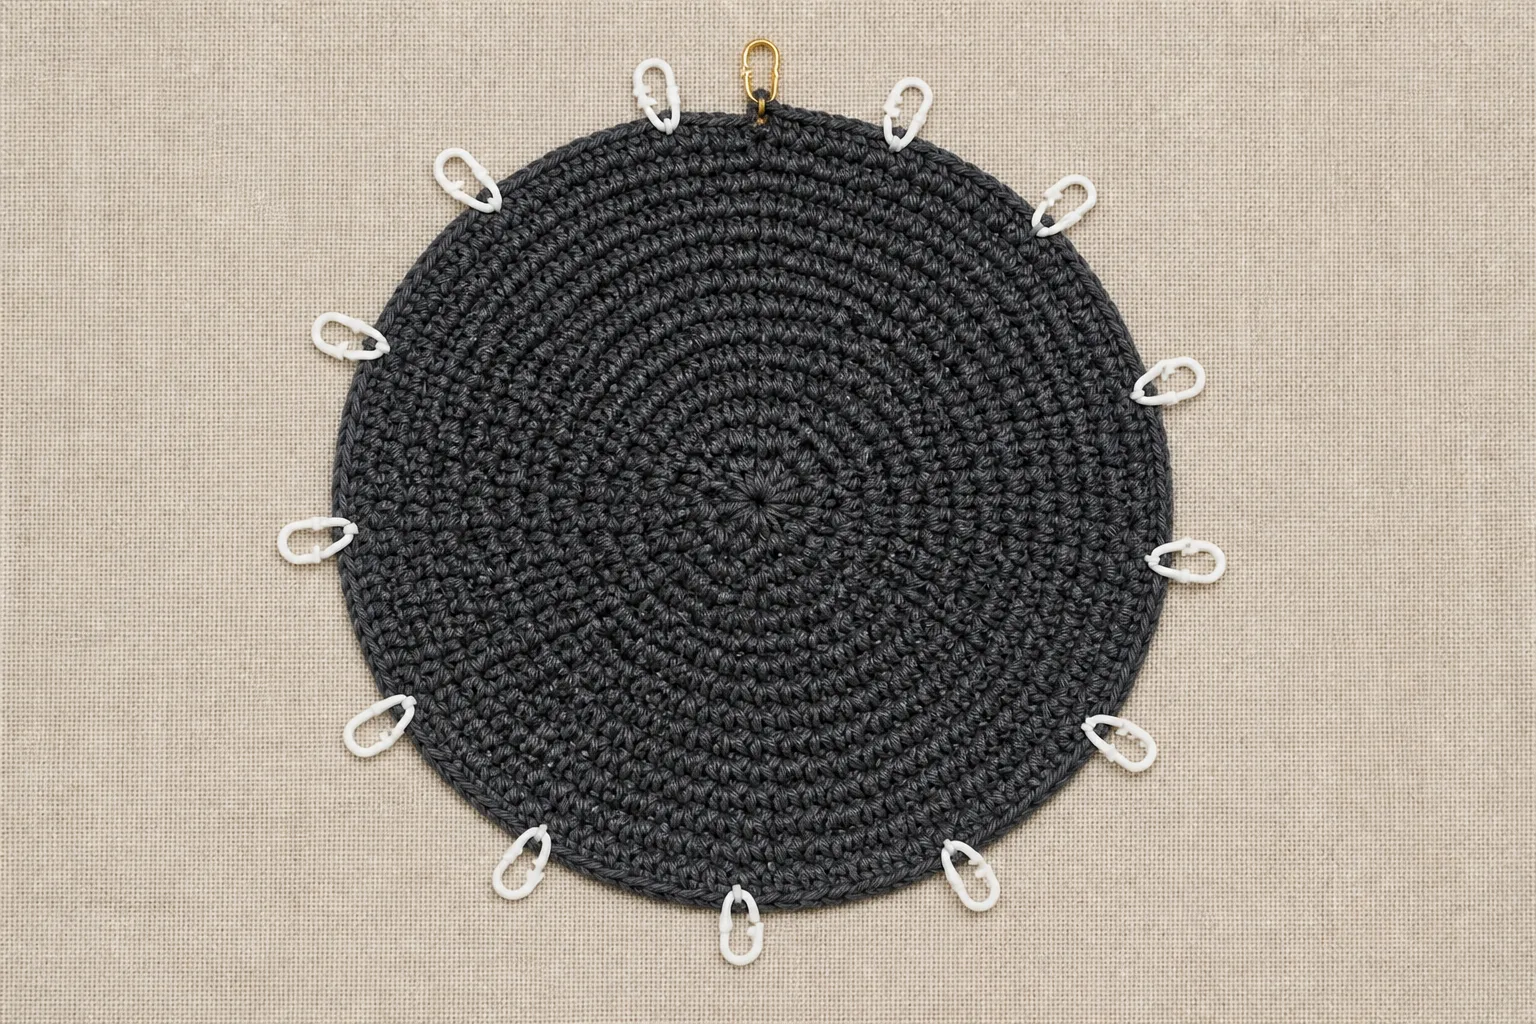
Crown gate
- Crown counts read 12 → 24 → 36 → 48 → 60 → 72.
- The disc lies flat rather than cupping or ruffling.
- The last increase round has 12 equal sectors.
If the fabric shape fails but the counts are correct, change the hook/fabric and reswatch. Adding random increases changes the legal count and all downstream calculations.
Part 2: Continue to the brow line
Rnds 7–16: Ch 1, HDC in each of the 72 stitches, join. After Rnd 16, measure from crown center to the intended top edge of the raw opening.
The calculated 16 rounds predict about 7.11 in / 18.1 cm at the example round gauge. If the raw opening is not at the planned position on the wearer, add or remove only plain rounds. The crown increase sequence stays unchanged.
Mark the face window
Keep the join at center back. Starting at the back marker, count 22 stitches clockwise and place an opening-edge marker. Count 22 stitches counterclockwise and place the other opening-edge marker. The 28 front stitches between the two markers are the unworked top edge of the face window; the other 44 stitches wrap around the sides and back.
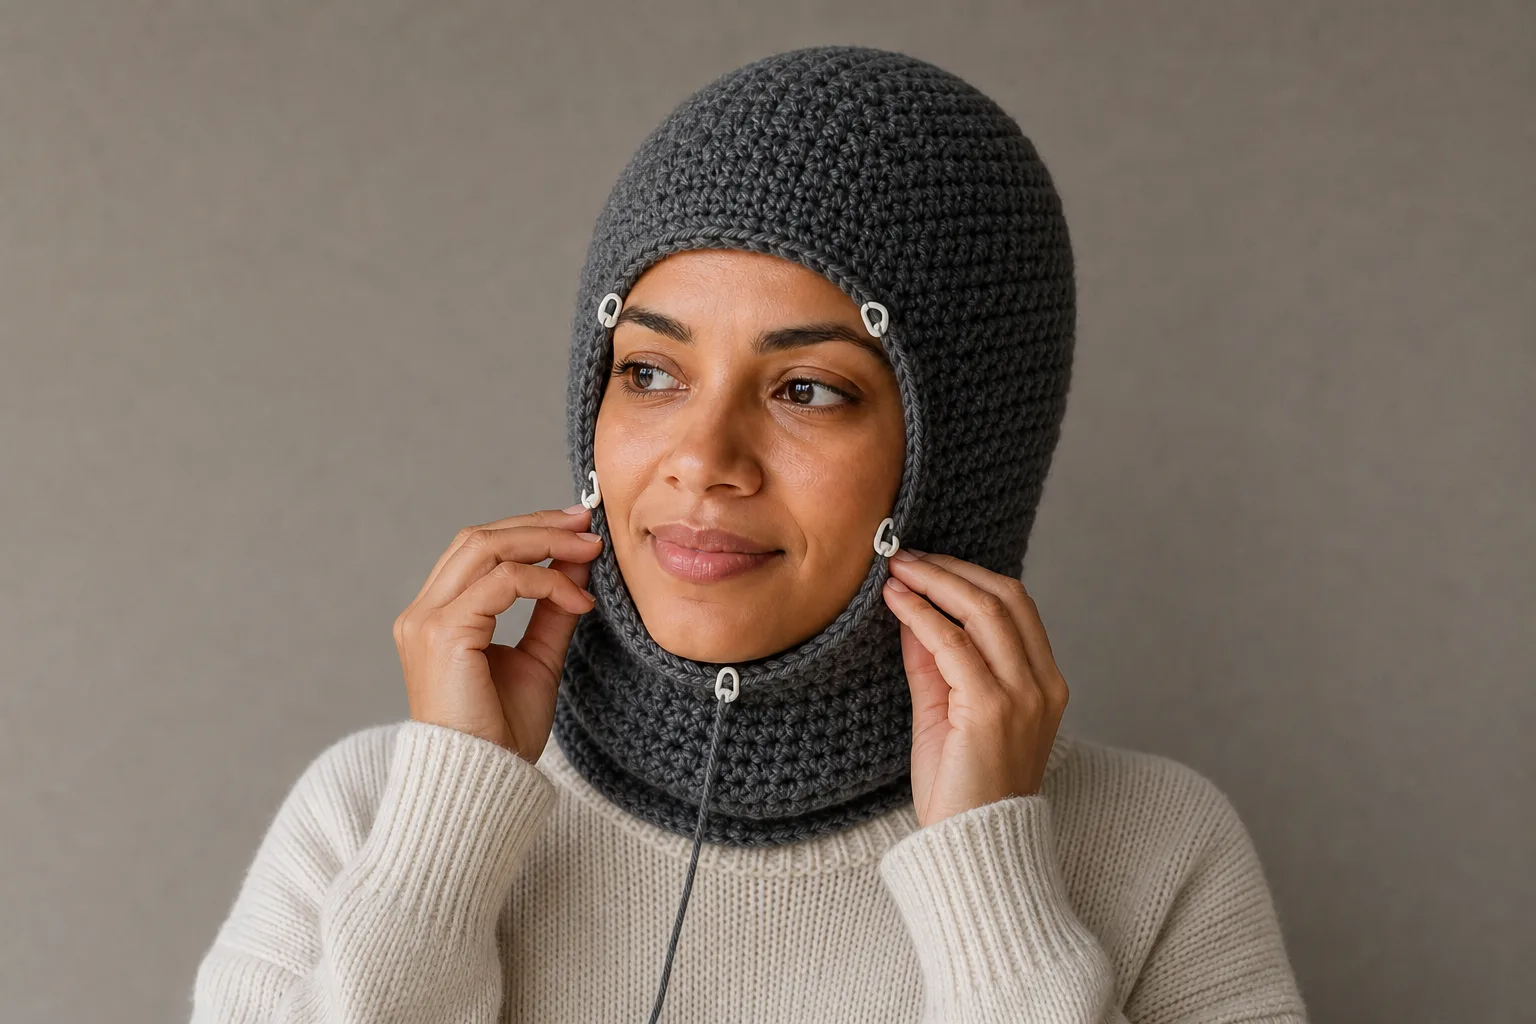
Brow-position gate
- The raw top edge leaves the planned border reserve above the final brow line.
- The two opening markers are equally distant from the center-back marker.
- The 28 unworked stitches are centered across the face.
Move the markers or change plain depth rounds now. Once the turned rows are long, correcting the top edge means undoing the entire opening phase.
Part 3: Work the face-opening rows
Fasten off at the center-back join. With RS facing, join yarn at one opening edge. Work around the side, back and other side to the second opening edge.
Row 1 (RS): Ch 1, HDC in each of the 44 hood stitches, turn. 44 sts
Rows 2–19: Ch 1, HDC in each stitch, turn. 44 sts per row
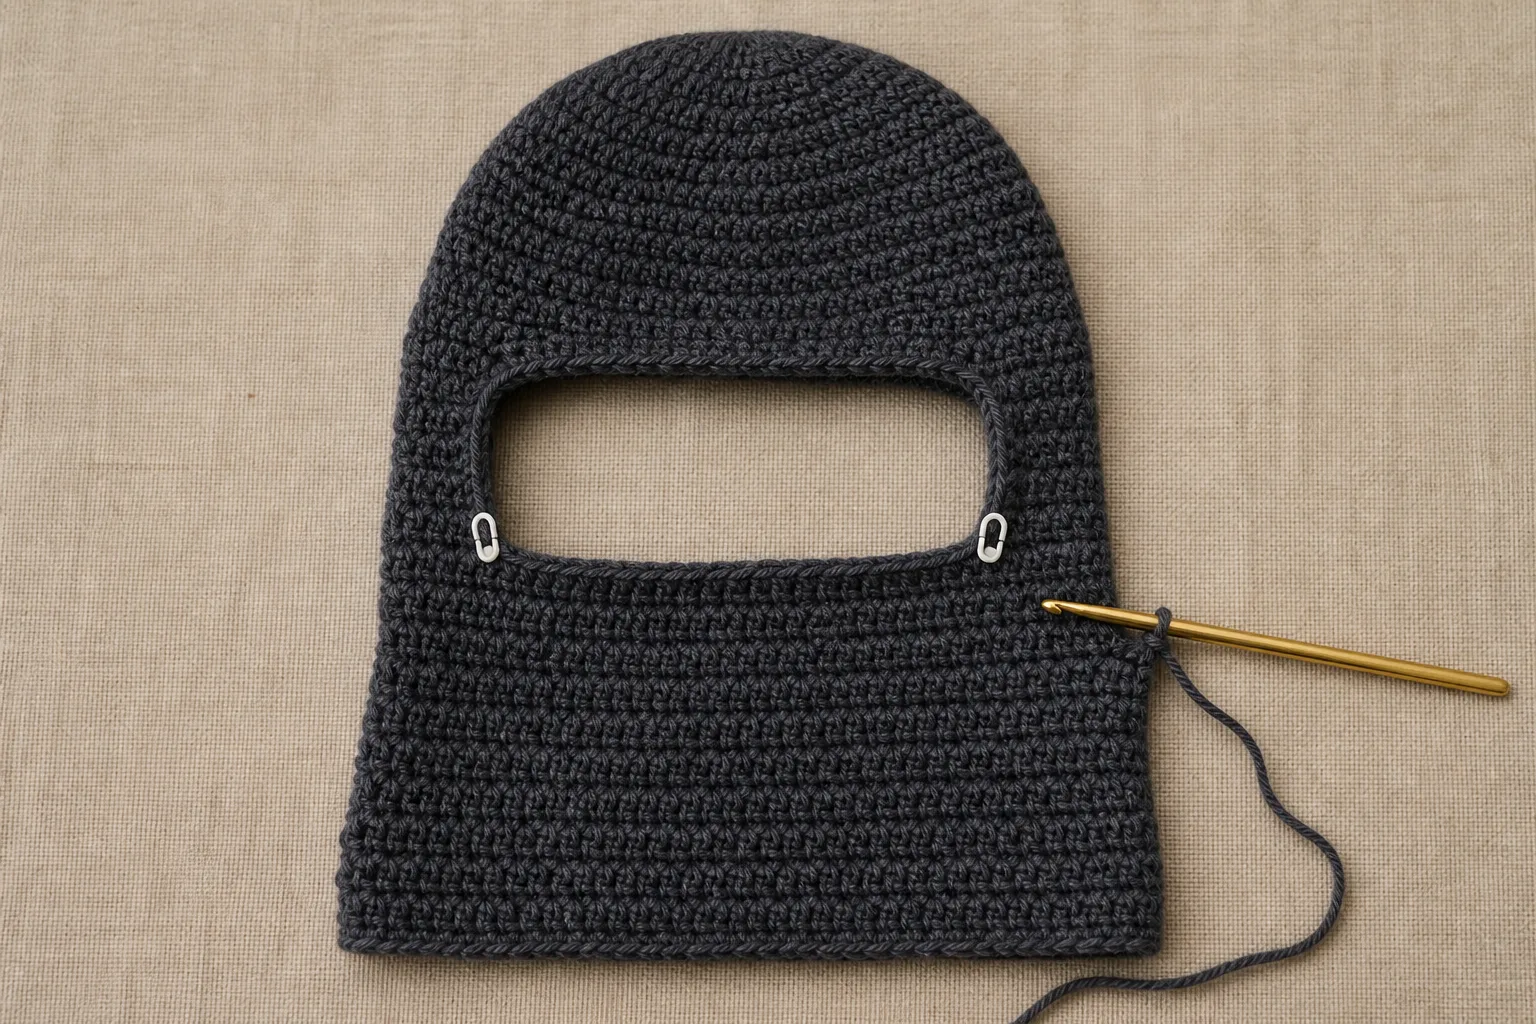
Count every row before turning. The row gauge, not the round gauge, controls the raw opening height.
Window gate
Fold the face border inward by the planned 0.25 in / 0.6 cm on all edges. Hold the fold in place without pins while checking it on the wearer; do not pull the project downward.
- Both eyes and the mouth remain fully clear.
- The two vertical edges have similar tension.
- The lower raw edge reaches the planned under-chin line.
- The hood has no diagonal twist from a missed edge stitch.
If the window is too short, add rows now. If it is too tall, remove rows now. If it is too narrow, the width count must be recalculated; stretching the two edge columns is not a durable correction.
Part 4: Restore the count under the chin
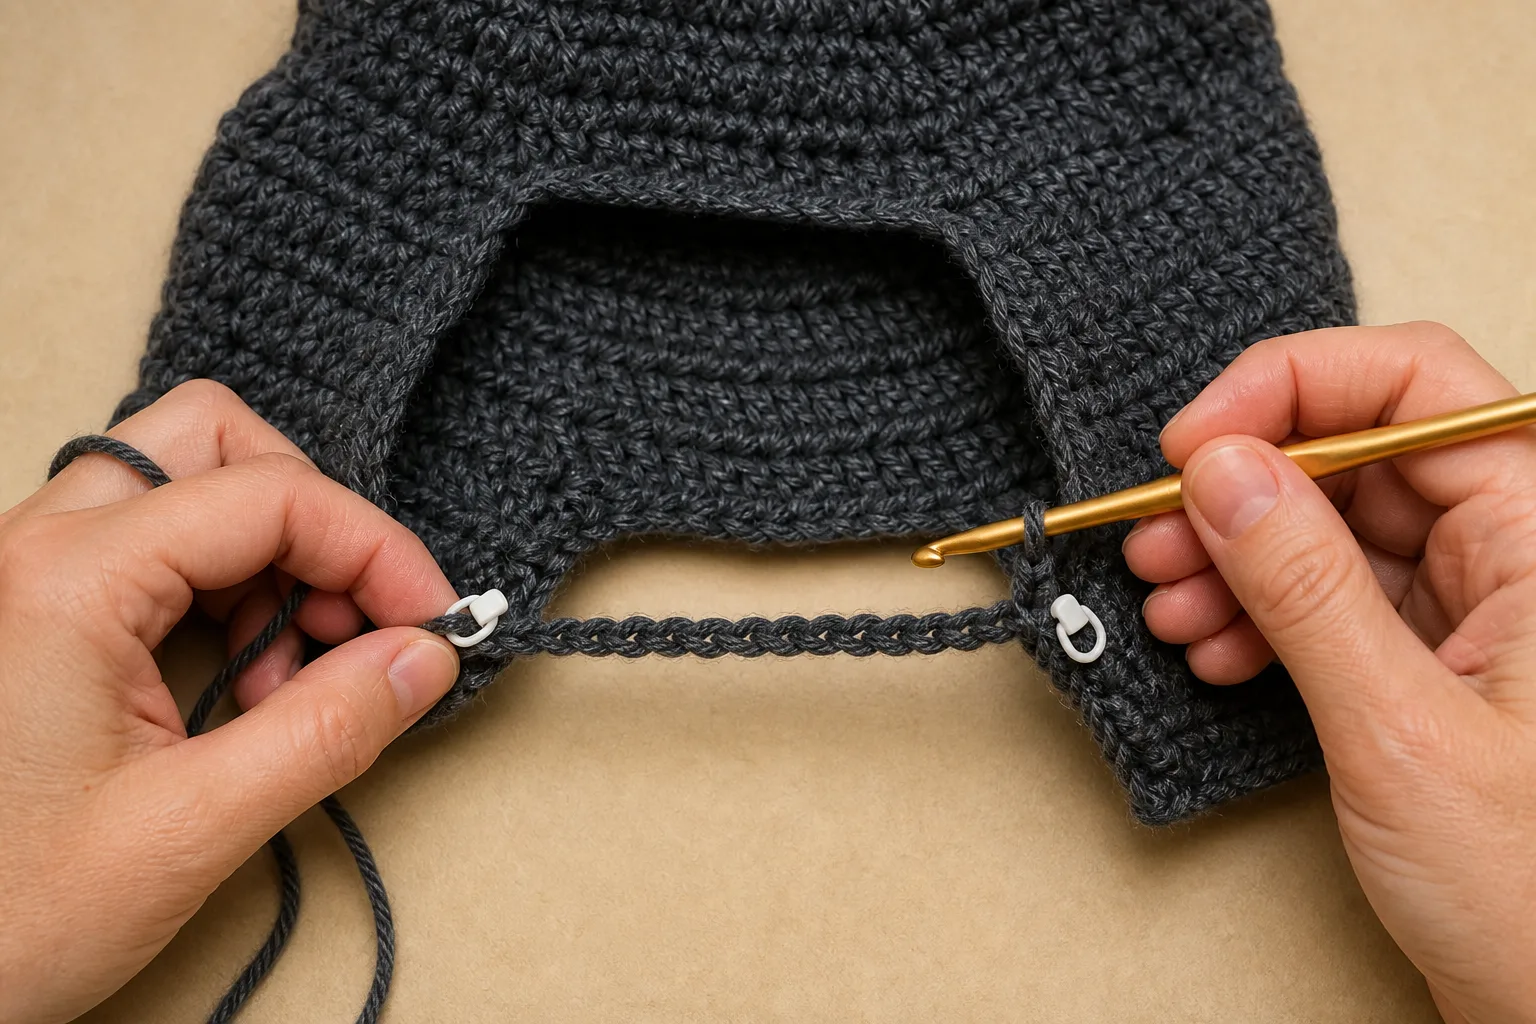
After Row 19, with the working loop at one lower opening edge, chain 28 loosely enough to span the wearer-approved lower width. Without twisting the hood, slip stitch to the opposite lower opening edge.
Before continuing, recount:
44 hood stitches + 28 bridge chains = 72 total
Part 5: Work the neck
Neck Rnd 1: Ch 1, HDC in the 44 hood stitches and in each of the 28 chains, join. 72 sts
Neck Rnds 2–10: Ch 1, HDC in each stitch, join. 72 sts
After Rnd 10, measure the side drop. Add or remove plain rounds if needed, keeping the 72-stitch count. Fasten off only after the wearer can turn and look down without the lower edge lifting uncomfortably.
Part 6: Add the measured face border
Join border yarn or the main yarn at the center of the chin bridge. For the first SC round:
- Work one SC in each of the 28 lower bridge chains.
- Distribute 27 SC evenly across the first 19-row vertical edge.
- Work one SC in each of the 28 unworked top-edge stitches.
- Distribute 27 SC evenly across the second vertical edge.
- Join to the first SC. 110 planned stitches
Keep the pickups balanced between the two sides. If the border ruffles, remove a pickup at evenly spaced side positions. If it cups inward or pulls the window smaller than planned, add pickups at the sides. Do not add or remove only at one corner.
One SC round is the example border. Measure the clear finished window after that round. Add another round only if the new inward depth and opening size remain within the wearer-approved plan.
Four Final Acceptance Gates
Crown and body
The crown is smooth, the hood count is legal, and the partly completed tube passes over the head without painful pressure. Measure the partly completed tube and compare its circumference and fit with the saved plan.
Face-window clearance
The border remains above the eyebrows, outside the eyes, clear of the mouth and comfortably below the chin. The wearer can blink, speak and look downward without fabric entering the face.
Count and bridge integrity
The opening rows stay at 44, the bridge contains 28 chains, and the first neck round returns to 72. There is no twist, stretched corner or isolated chain carrying the entire lower edge.
Neck and movement
The neck reaches the selected drop, remains under an outer collar if desired, and does not pull the crown or face border during normal head turns.
Worked Example: 23.5-Inch Head
Use H 23.5 in, e 6%, g_s 15, g_r 10, D_b 7.25 in, A 8 in, F 7.5 in, b 0.25 in, g_t 11, and L_n 5.2 in.
B_raw = 23.5 × 0.94 × 15 / 4 = 82.8375
The legal counts are 72 and 84; choose 84. Finished circumference is 22.4 in / 56.9 cm and estimated negative ease is 4.68%.
The crown sequence is:
12 → 24 → 36 → 48 → 60 → 72 → 84
Q = round_half_up(7.25 × 10 / 4) = 18, so seven total crown rounds (one starting round plus six increase rounds) are followed by 11 plain rounds. The total remains 7 + 11 = 18.
A_work = 8.5 in, O_raw = 31.875, so choose an even 32-stitch window and work 52 stitches per opening row.
F_work = 8 in, so P = 22 turned rows. Each vertical border edge plans round_half_up(22 × 15 / 11) = 30 pickups. Chain 32, restore 84, and work round_half_up(5.2 × 10 / 4) = 13 neck rounds.
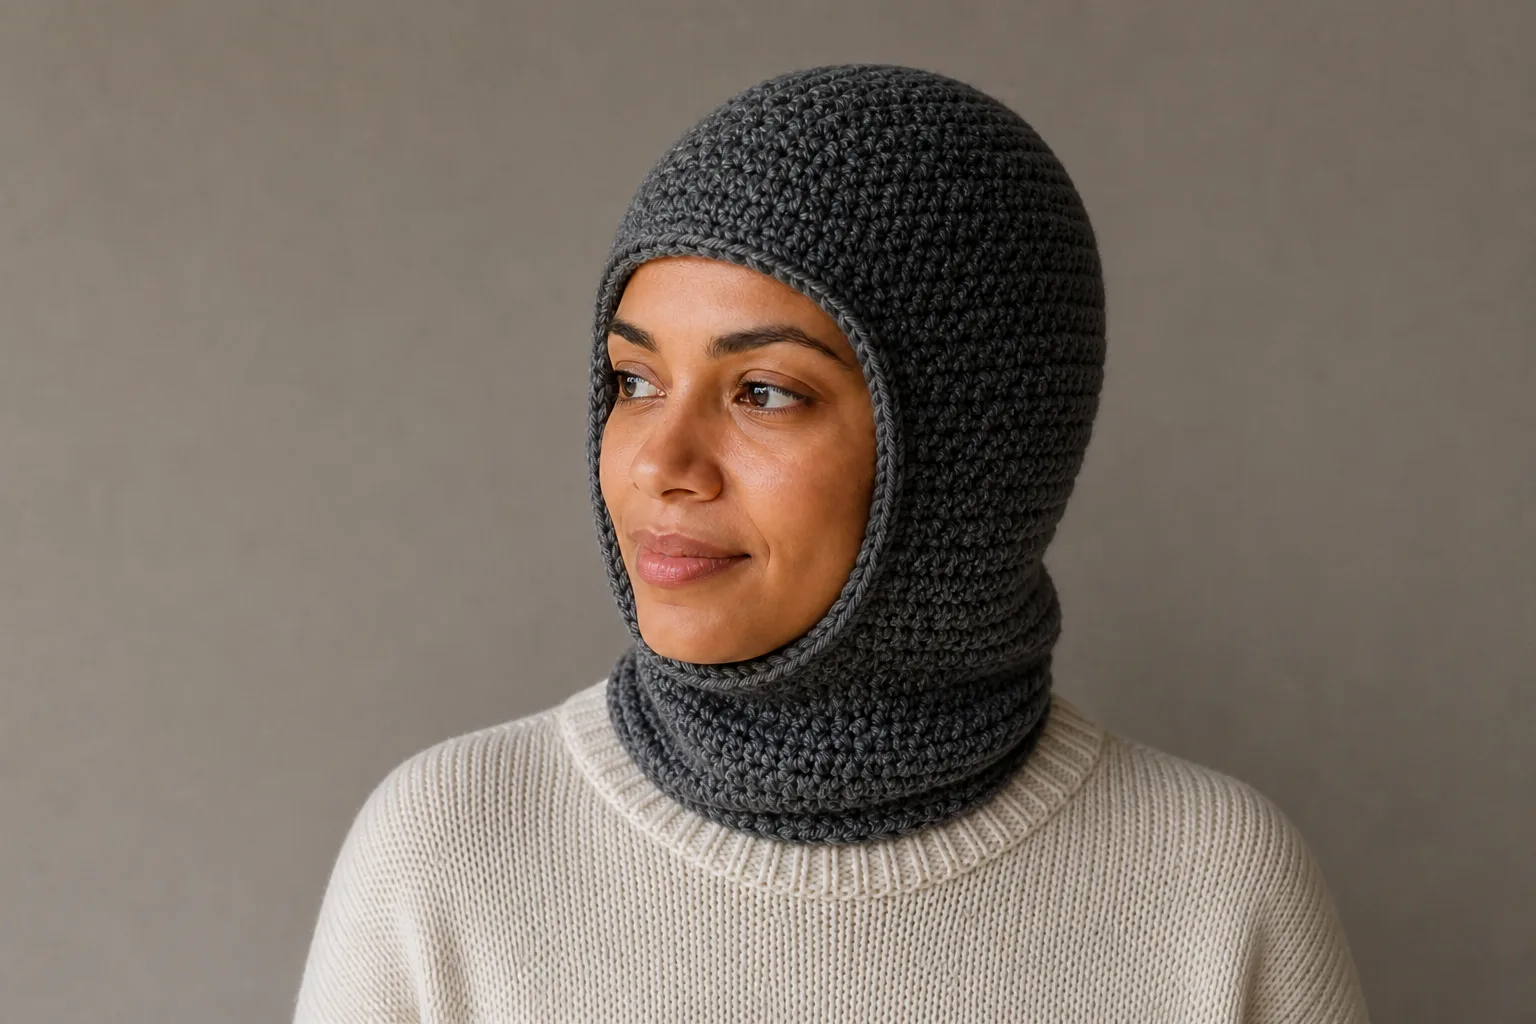
This second case changes every major count while preserving all structural invariants: a multiple-of-12 crown, an even opening, identical stitch counts on every face row, and a bridge that restores the full body count.
Troubleshooting by Return Point
| Symptom | Likely cause | Minimum correction | Return point |
|---|---|---|---|
| Crown cups or ruffles | gauge or increase rate does not suit the fabric | verify every sector; if counts pass, change hook/fabric and reswatch | first misshapen increase round |
| Hood is tight before the face opening | wrong legal body count or estimated ease | compare the adjacent multiple of 12 and back-calculate size/ease | crown/body count |
| Top border enters the eyebrows | opening started too late or border reserve was omitted | remove plain depth rounds or reduce/recalculate border depth | last plain round |
| Window pulls at both temples | O is too small or edge tension is too tight | recalculate the even opening count; do not stretch the edge columns | opening markers |
| Window is too short vertically | turned-row gauge or P was wrong | add only the missing opening rows | before chin bridge |
| Chin bridge bows upward | chain is too tight or contains too few stitches | remake the bridge with the approved O and matching tension | chin bridge |
| First neck round does not equal B | stitch lost/gained on row edge or bridge | find the first count mismatch; do not invent a partial crown sector | last verified opening row |
| Face border ruffles | too many vertical edge pickups | remove side pickups evenly and recheck the window | first border round |
| Face border cups inward | too few pickups or hook too small | add balanced side pickups or return to the main hook | first border round |
| Neck lifts during head turns | neck is too short or bridge/window is pulling | add measured plain neck rounds after confirming the bridge lies flat | neck section |
Frequently Asked Questions
How do you crochet a balaclava for beginners?
Use a legal top-down crown count, work plain rounds to the brow, then leave a centered group of front stitches unworked. Crochet the remaining hood in turned rows, chain the same number beneath the chin, restore the original round count, add the neck and finish the face edge. Count verification is more important than copying one adult number.
How wide should a crochet balaclava face opening be?
Measure the wearer’s desired clear opening rather than using a universal width. Add twice the planned inward border depth, convert that working width with the washed stitch gauge, and round to an even count. Fold the proposed border inward, hold it without pins, and check both eye and mouth clearance before making the chin bridge.
Can I use a different yarn weight?
Yes, but none of the example counts transfer automatically. Make a washed joined-round tube and a turned-row strip in the substitute yarn. Recalculate the legal body count, crown rounds, opening stitches, opening rows, side pickups and neck rounds. If both legal body neighbors fail, change the hook or fabric rather than breaking a sector.
Why does the opening ride into my eyes?
The opening may have started too low, the planned border reserve may be missing, or the border may contain too few side pickups. Return to the earliest wrong point: plain depth rounds for vertical position, opening calculations for width, or the first border round for pickup tension.
Is a crochet balaclava the same as a ski mask?
The terms overlap in search results, but shapes differ. This pattern leaves the whole face open. A close eye-only or separate mouth-opening mask changes visibility, fit and construction and is outside this pattern’s boundary.
Can I make this for a child from the adult example?
Do not scale the 72-stitch example by a percentage. Use the child’s current measurements, recipient requirements, gauges from both washed swatches and a new calculation. Child wear and supervision questions also require separate design decisions that this adult pattern does not claim to resolve.
Save H, e, all three washed gauges, D_b, A, F, b, L_n, both legal body counts, the chosen count, every crown total, every opening-row count, the bridge count and all four gate results. That ledger makes the next balaclava reproducible.
References