

Fit the back, frame the face, and balance the ties
This adult crochet bonnet pattern builds a smooth rounded back, extends to a measured face edge and leaves a small opening at the nape before the border and ties are added.
What This Pattern Solves
Many bonnet patterns solve sizing with age labels, one head size or a fixed number of crown rounds. That works only when the wearer, yarn, hook and washed fabric behave like the sample. It also hides a second sizing job: a bonnet can fit around the back of the head and still end too far from the face, flare at the cheek or pull at the nape.
The Back–Frame–Tie Map gives each part one job:
- a multiple-of-12 count controls the round back;
- estimated circumference and negative ease are checked after rounding;
- the crown radius is separated from the rows that add side depth;
- an even gap controls the open nape and two lower corners;
- row-edge pickups are converted through gauge instead of assumed one-for-one; and
- ties are delayed until the face edge and movement gates pass.
This is an adult open-front bonnet. It is not a baby bonnet, garment hood, hooded cowl, balaclava, helmet, protective head covering or closed-circumference beanie. Do not reduce the default counts proportionally for a child; child fit and tie safety require a separate design review.
Project Overview
| Item | Default project |
|---|---|
| Skill level | Confident beginner / intermediate |
| Construction | Top-down joined HDC crown, then turned HDC rows with an open nape |
| Yarn | Medium / weight 4 yarn with comfortable next-to-face feel |
| Hook | Size needed to match the washed gauge; 5 mm is only a starting point |
| Default wearer | Adult with a 22 in / 55.9 cm head |
| Default washed gauge | 14 HDC and 10 turned rows per 4 in / 10 cm |
| Default legal crown count | 72 stitches in twelve sectors |
| Default side plan | 12 rows over 58 stitches with a 14-stitch nape gap |
| Finished look | Rounded back, unstructured open face, narrow edging and relaxed ties |
The numbers below form one complete worked example. Personal counts come from the actual wearer and washed fabric.
Materials
- approximately 220–300 yd / 201–274 m of medium / weight 4 yarn;
- crochet hook needed for the washed gauge;
- optional hook 0.5 mm smaller only if the finished edging remains flexible;
- at least 14 removable locking stitch markers;
- flexible tape measure and straight ruler;
- tapestry needle and scissors.
The yardage is a planning range, not a promise. Dense stitches, longer ties, decorative edging and larger sizes use more yarn. Keep enough yarn from the same dye lot for both ties so they match.
US Abbreviations and Conventions
| Abbreviation | Meaning |
|---|---|
| ch | chain |
| HDC | half double crochet |
| SC | single crochet |
| sl st | slip stitch |
| st(s) | stitch(es) |
| rnd(s) | round(s) |
| RS / WS | right side / wrong side |
This pattern uses US crochet terms. Join every crown round with a slip stitch to the first HDC. The starting chain does not count as a stitch. Work the first HDC in the same stitch as the join unless the instructions say otherwise. Keep the join at center back and move a distinct marker into the first stitch of every round.
Measure and Swatch Before Choosing Counts
Record four wearer measurements without adding ease:
- Head circumference H: around the intended bonnet wear line, above the eyebrows and ears.
- Side depth S: from the center back of the head to the planned finished face edge, measured along the side.
- Nape opening width W: the desired open distance between the two lower corners at the back of the neck.
- Tie length T: from one lower corner to the desired relaxed end of one tie.
Also measure the inward depth of the planned face border on the washed swatch and call it B. For the calculation example, assume a one-row SC face border adds 0.25 in / 0.6 cm of inward depth. This is a planning allowance, not a measured width; replace it with the width of your own washed border swatch.
Make a construction-matched HDC swatch wider and taller than 4 in / 10 cm. Wash and dry it as the finished bonnet will be treated. Measure stitches per 4 in / 10 cm (g_s) and rows per 4 in / 10 cm (g_r) in the center, away from the edges.
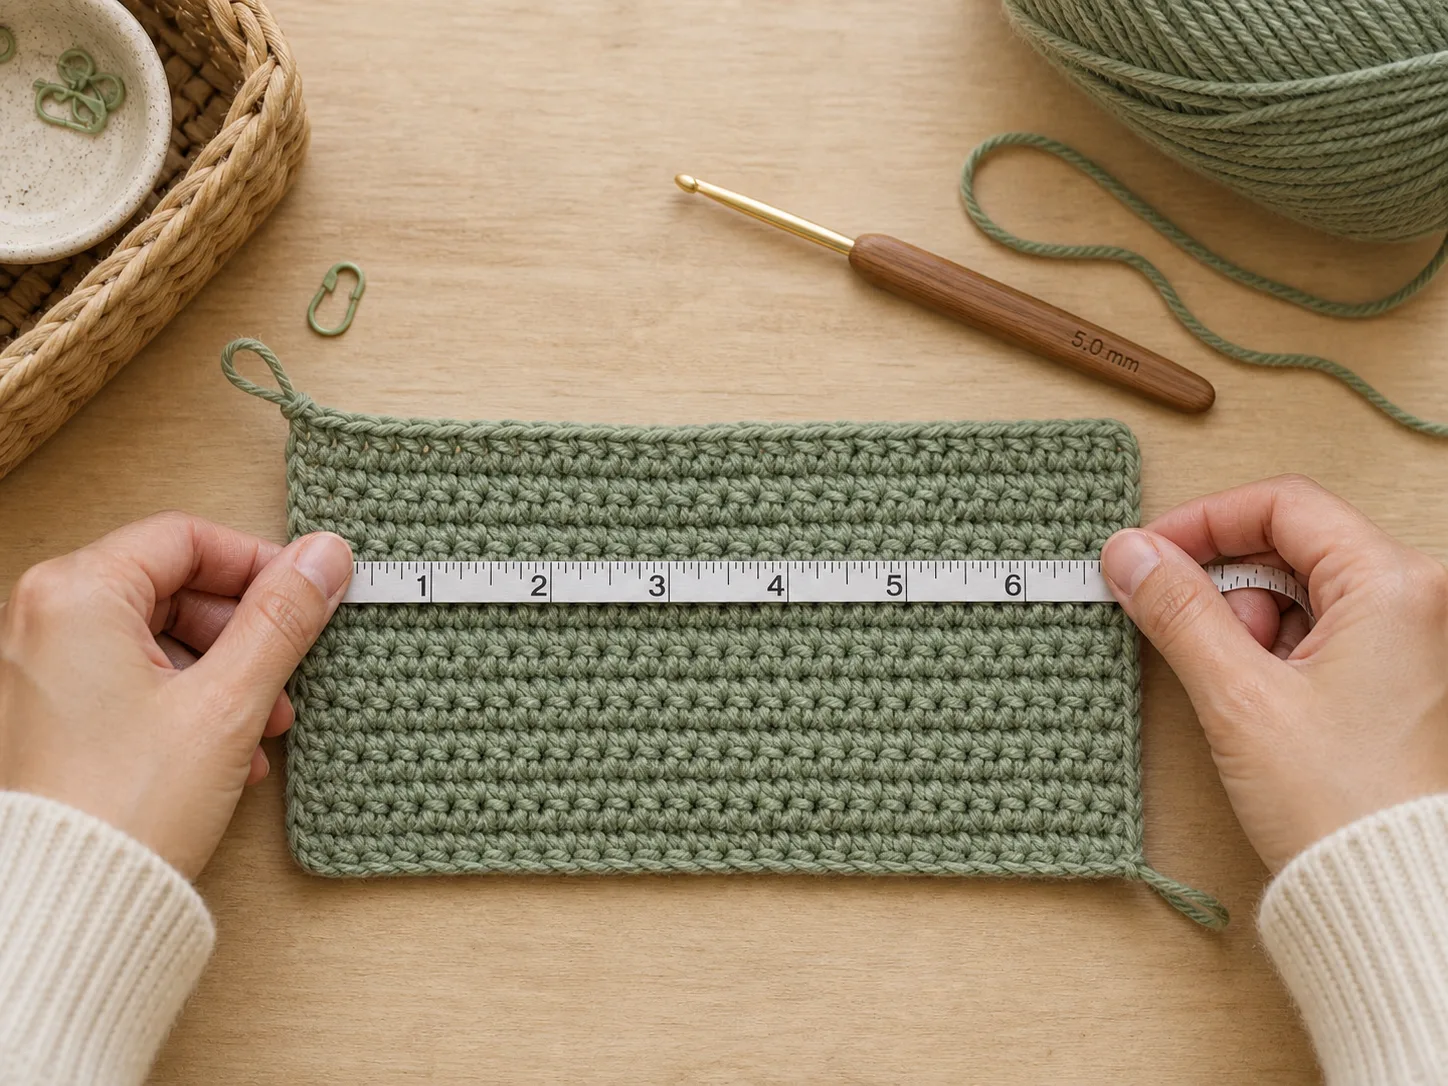
The default example uses 14 HDC and 10 rows per 4 in. If the swatch has a different count, use the formulas. Do not change only the hook and keep the default stitch counts.
The Back–Frame–Tie Map
Use inches with gauge measured per 4 in, or centimeters with gauge measured per 10 cm. Do not mix the two formula sets.
Choose a legal crown count
Start with a modest planning value for negative ease e. Six percent is used in both examples, but the wearer’s comfort and the fabric’s recovery decide the result.
C_target = H × (1 – e)
For a crown count from an inch-based stitch gauge:
N_raw = C_target × g_s / 4
For metric gauge:
N_raw = C_target × g_s / 10
Compare the multiples of 12 immediately below and above N_raw. For each candidate:
C_actual = N × 4 / g_s
estimated ease = (H – C_actual) / H
Choose only after checking the numbers and holding the finished crown around the back/sides of the wearer’s head. If the lower count is painfully tight and the upper count is loose, change the fabric or hook and make a new washed swatch. Do not break one crown sector to force an in-between count.
Separate crown diameter from added side depth
The crown begins with 12 HDC in Round 1 and gains 12 stitches in each later increase round. Keep total crown rounds R_c separate from increase rounds I:
R_c = N / 12; I = R_c − 1
The count path is 12, 24, 36 … N.
Convert the selected count back to a physical crown diameter:
D_actual = C_actual / π
Half of this diameter already supplies part of the center-back-to-face distance. The turned rows add only the remaining raw depth after reserving the planned face-border allowance B.
For added side depth from an inch-based row gauge:
Q = round_half_up((S – D_actual / 2 – B) × g_r / 4)
For metric gauge, replace /4 with /10.
If S is not greater than D_actual / 2 + B, stop. The chosen crown is too large for that side-depth plan or the measurement landmarks are inconsistent. After the rows and border are complete, measure the finished center-back-to-face depth; the formula only plans the raw row count.
Convert the nape width to an even gap
For a nape gap from an inch-based stitch gauge:
G_raw = W × g_s / 4
Round to the nearest even number G. The turned rows contain:
R = N – G
The invariant is R + G = N. Center the G unworked stitches around the center-back join so both lower corners contain the same number of stitches on either side.
Convert the lower row edges before edging
One SC in every row end can ruffle when stitch and row gauges differ. Plan each lower side edge as:
E_side = round_half_up(Q × g_s / g_r)
The first nape-edge round contains:
E_left + G + E_right, with E_left = E_right = E_side
This is a cross-axis pickup plan, not a one-pickup-per-row rule. Recount the completed first round and verify E_left + G + E_right = lower-edge total. The edge must also lie flat when relaxed. If it waves, remove the same number of evenly spaced pickups from both sides; if it cups or pulls the corners together, add the same number to both sides. Record the corrected total before continuing.
Plan, then physically measure each tie
A first chain estimate is:
L = round_half_up(T × g_s / 4)
Chain gauge can differ from HDC stitch gauge. Measure the relaxed chain from the lower corner and add or remove chains until it reaches T. Make both ties from the same measured length, not merely the same guess.
Worked Example: 22-Inch Adult Head
Inputs:
- H = 22 in / 55.9 cm
- e = 6%
- g_s = 14 HDC per 4 in / 10 cm
- g_r = 10 rows per 4 in / 10 cm
- S = 8.5 in / 21.6 cm
- B = 0.25 in / 0.6 cm assumed face-border depth for this example
- W = 4 in / 10.2 cm
- T = 12 in / 30.5 cm
Crown and estimated fit
C_target = 22 × 0.94 = 20.68 in
N_raw = 20.68 × 14 / 4 = 72.38
The legal neighbors are 72 and 84. Choose 72:
C_actual = 72 × 4 / 14 = 20.571… in
estimated ease = (22 – 20.571…) / 22 = 6.49%
D_actual = 20.571… / π = 6.548… in
R_c = 72 / 12 = 6 total crown rounds; I = 6 − 1 = 5 increase rounds
The legal count path is 12 → 24 → 36 → 48 → 60 → 72.
Side rows, nape and ties
Q = round_half_up((8.5 – 6.548/2 – 0.25) × 10 / 4) = 12 rows
G_raw = 4 × 14 / 4 = 14, so keep an even 14-stitch nape gap.
R = 72 – 14 = 58 stitches per turned row
E_side = round_half_up(12 × 14 / 10) = 17 pickups per lower side
The planned nape-edge count is 17 + 14 + 17 = 48 before the recount and lie-flat gate.
L = round_half_up(12 × 14 / 4) = 42 chains per tie as a starting estimate; measure the relaxed chain before keeping it.
Complete Default Ledger
| Phase | Round(s) / row(s) | Action | End count |
|---|---|---|---|
| Crown | Rnd 1 | 12 HDC in ring | 12 |
| Crown | Rnd 2 | 2 HDC in every stitch | 24 |
| Crown | Rnd 3 | [HDC 1, 2 HDC in next] × 12 | 36 |
| Crown | Rnd 4 | [HDC 2, 2 HDC in next] × 12 | 48 |
| Crown | Rnd 5 | [HDC 3, 2 HDC in next] × 12 | 60 |
| Crown | Rnd 6 | [HDC 4, 2 HDC in next] × 12 | 72 |
| Nape setup | after Rnd 6 | center and leave 14 stitches unworked | 58 worked + 14 gap |
| Side depth | Rows 1–12 | HDC across, turn | 58 each row |
| Face edge | first edging row | SC in each stitch of Row 12 | 58 planned |
| Lower/nape edge | first edging row | 17 side pickups + 14 gap + 17 side pickups | 48 planned |
| Ties | each corner | chain to 12 in; 42-chain estimate | measured length controls |
Complete Adult Crochet Bonnet Pattern
These instructions execute the 72-stitch default. If your selected count is different, replace every dependent number with the saved output from your own plan. Do not combine a personal crown count with the default gap or row count.
Part 1: Work the twelve-sector crown
Rnd 1: Make a magic ring. Ch 1, work 12 HDC in the ring, join to the first HDC. Mark the first stitch. 12 sts
Rnd 2: Ch 1, 2 HDC in each stitch around, join. 24 sts
Rnd 3: Ch 1, [HDC in next stitch, 2 HDC in next] 12 times, join. 36 sts
Rnd 4: Ch 1, [HDC in next 2 stitches, 2 HDC in next] 12 times, join. 48 sts
Rnd 5: Ch 1, [HDC in next 3 stitches, 2 HDC in next] 12 times, join. 60 sts
Rnd 6: Ch 1, [HDC in next 4 stitches, 2 HDC in next] 12 times, join. 72 sts
Lay the crown flat without stretching. Use markers to isolate repeated sectors while recounting.
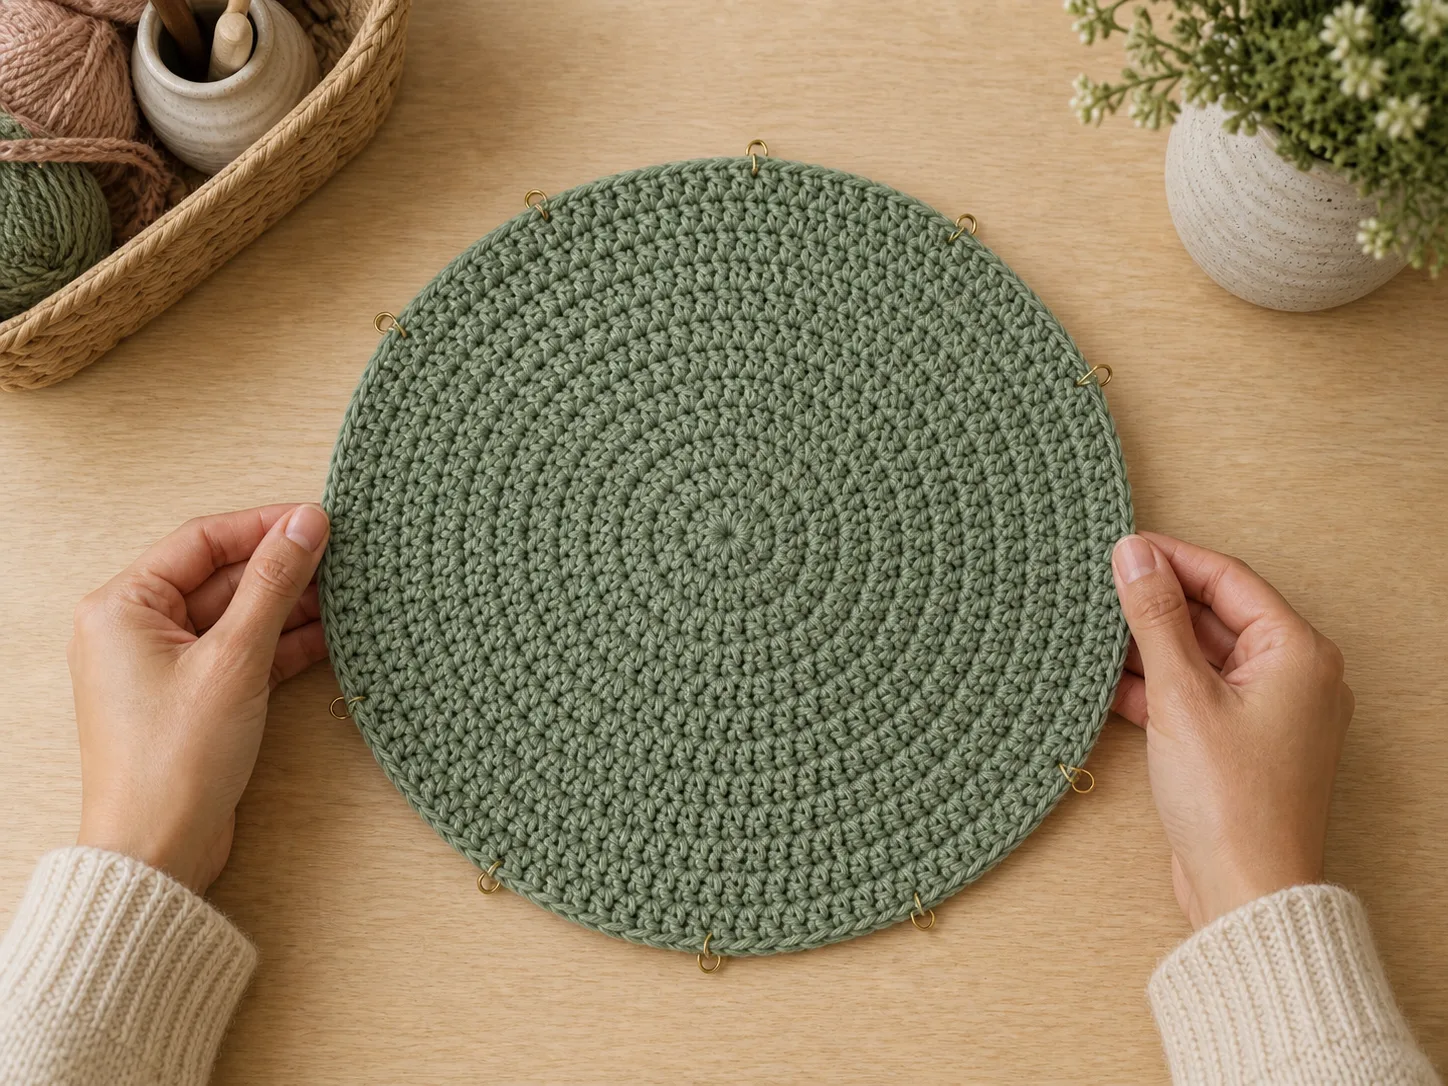
Crown gate
- Counts read 12 → 24 → 36 → 48 → 60 → 72.
- Every increase round adds exactly 12 stitches.
- The circle lies flat rather than cupping or ruffling.
- The selected 72-stitch edge reaches around the back/sides comfortably without painful pressure.
If the count is wrong, return to the first mismatched round. If the counts pass but the shape fails, change hook/fabric and reswatch; random increases will corrupt the legal count and every downstream number.
Part 2: Mark the nape gap
Keep the join marker at center back. Count seven stitches clockwise from the join and place a lower-corner marker. Return to the join, count seven stitches counterclockwise and place the second lower-corner marker. The 14 stitches centered between the markers form the unworked nape gap. The other 58 stitches will be worked in rows.
Fasten off at the center-back join. With RS facing, join yarn at one lower-corner marker.
Row 1 (RS): Ch 1, HDC in each of the 58 stitches around the crown edge to the second lower-corner marker, turn. 58 sts
Rows 2–12: Ch 1, HDC in each stitch, turn. 58 sts per row
Count every row before turning. A missed first or last stitch pulls the face edge diagonally and makes the two lower corners unequal.
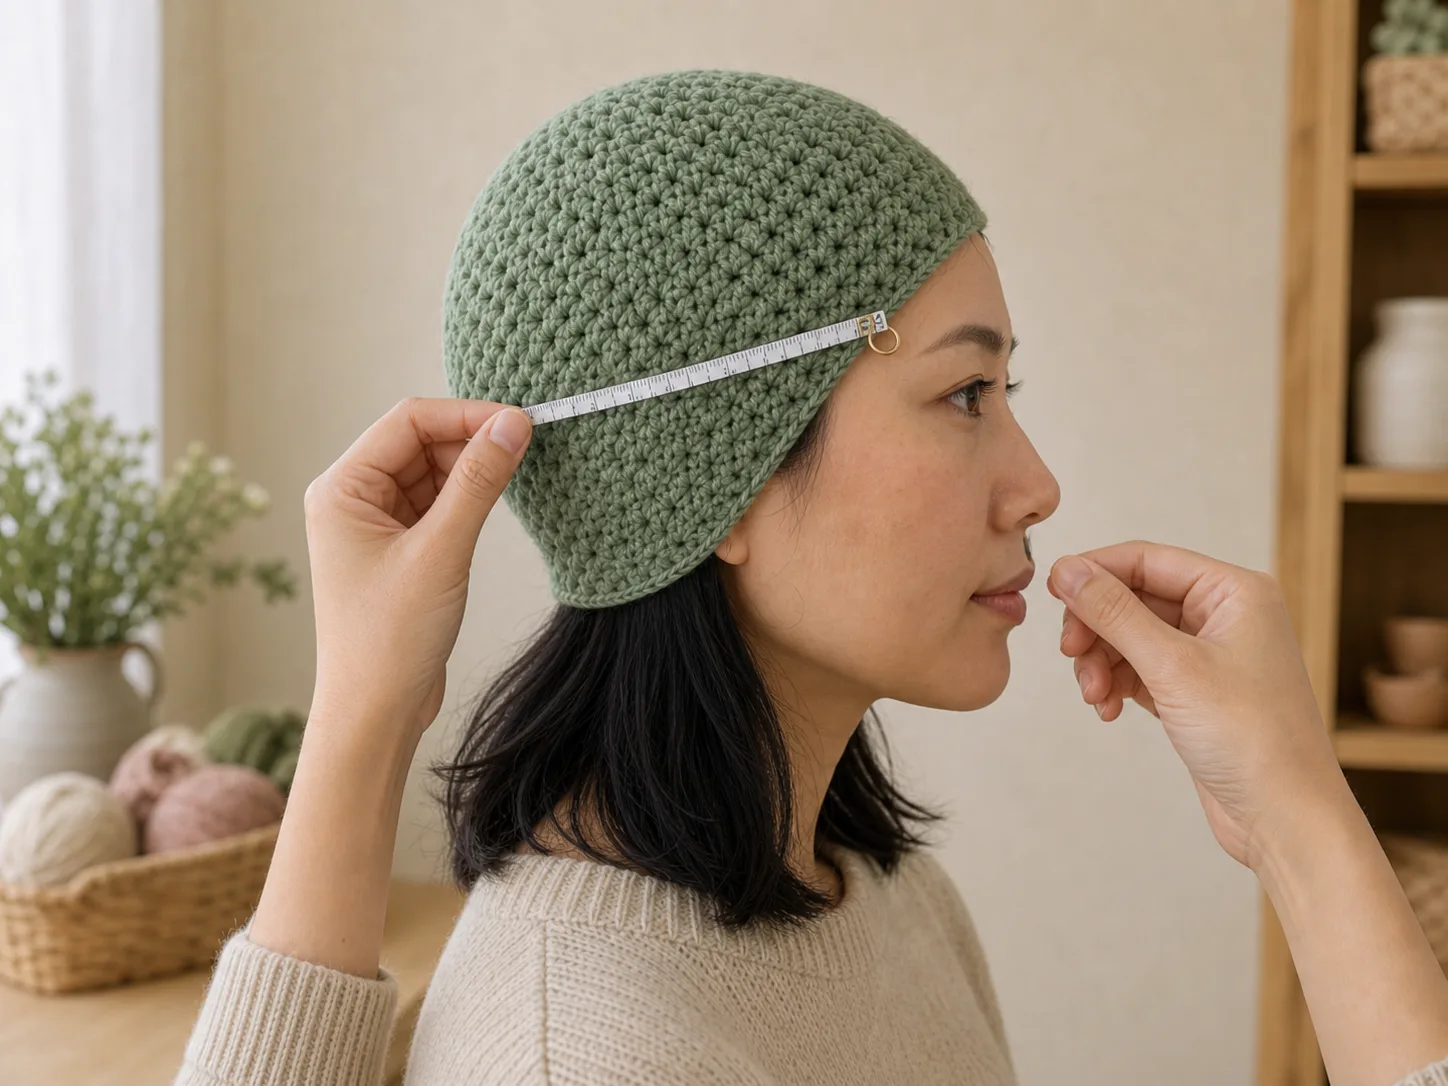
Side-depth gate
Hold the bonnet on the wearer with the crown center at the natural back of the head. Do not pull the lower corners forward.
- The raw Row 12 edge stops about B = 0.25 in behind the planned finished face landmark, reserving that planned depth for the SC edging.
- Both lower corners land at similar points below the ears.
- The crown remains seated rather than being dragged forward.
- The wearer can open the jaw and turn the head before ties are present.
If the face edge is too far back, add only the needed full rows. If it reaches too far forward, remove full rows. Do not change crown increases to fix side depth.
Part 3: Verify the open nape
Lay the bonnet open and compare the two lower corners. The 14 unworked crown stitches must remain centered around the join, and every row must still contain 58 stitches.
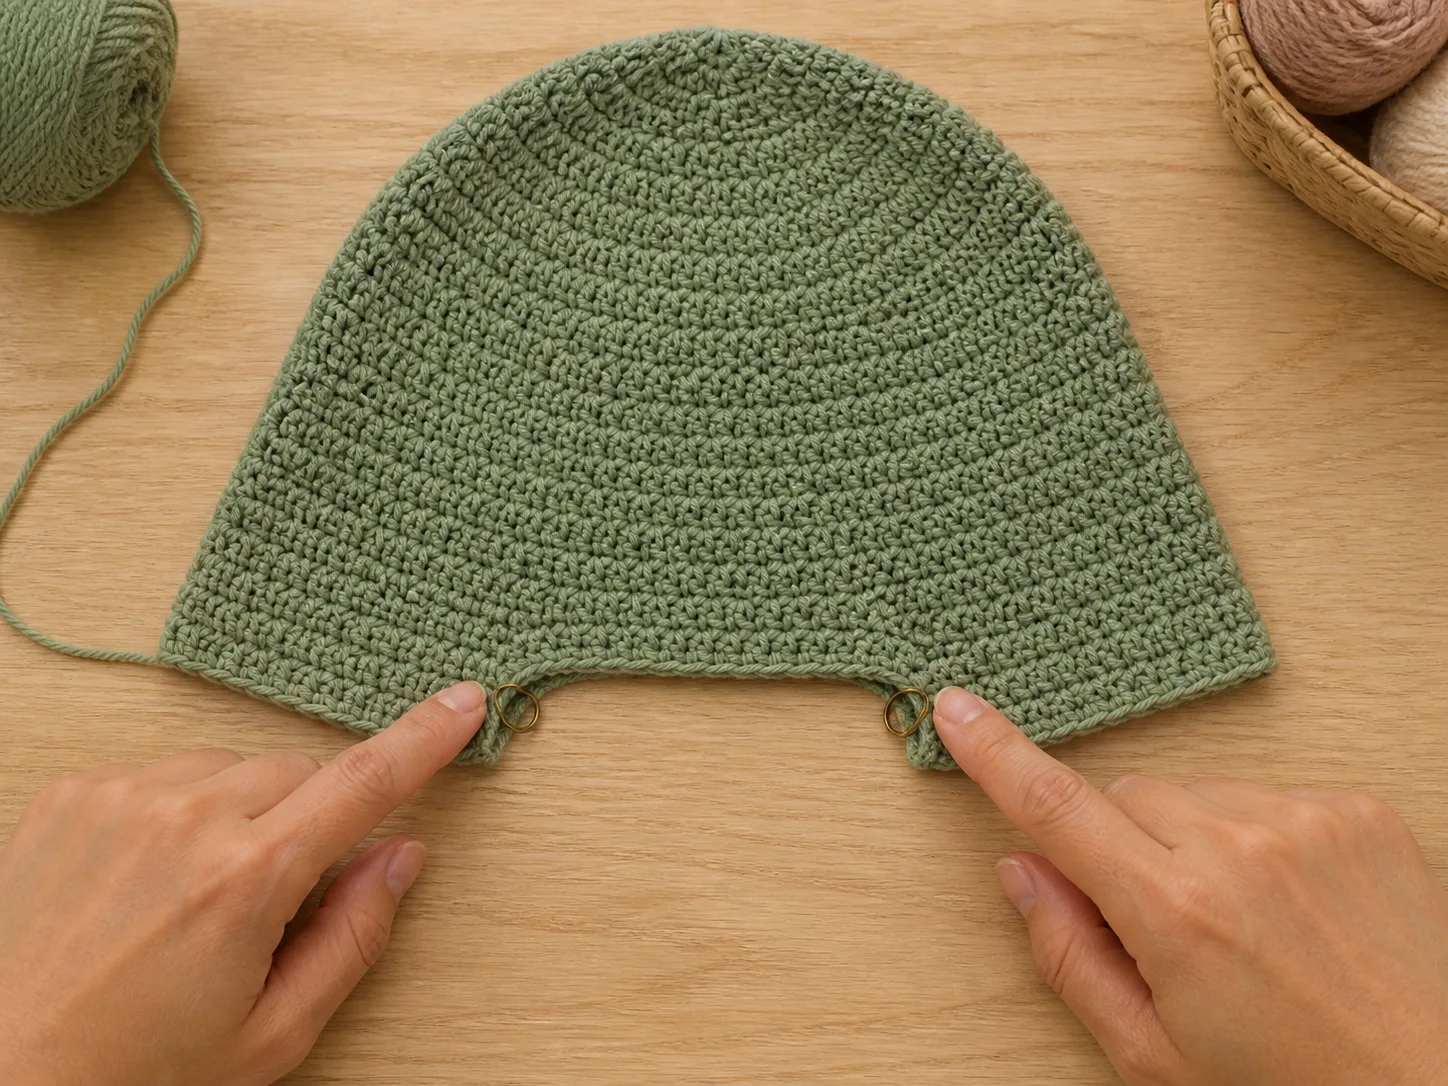
Nape gate
- 58 worked + 14 unworked = 72.
- The gap is centered at the back, not shifted toward one ear.
- Both lower side edges contain 12 row ends.
- The corners remain separate and do not overlap when the bonnet is relaxed.
If the gap is off center, return to the marker setup. If the corners twist because one row lost a stitch, return to the first unequal row rather than hiding the difference in edging.
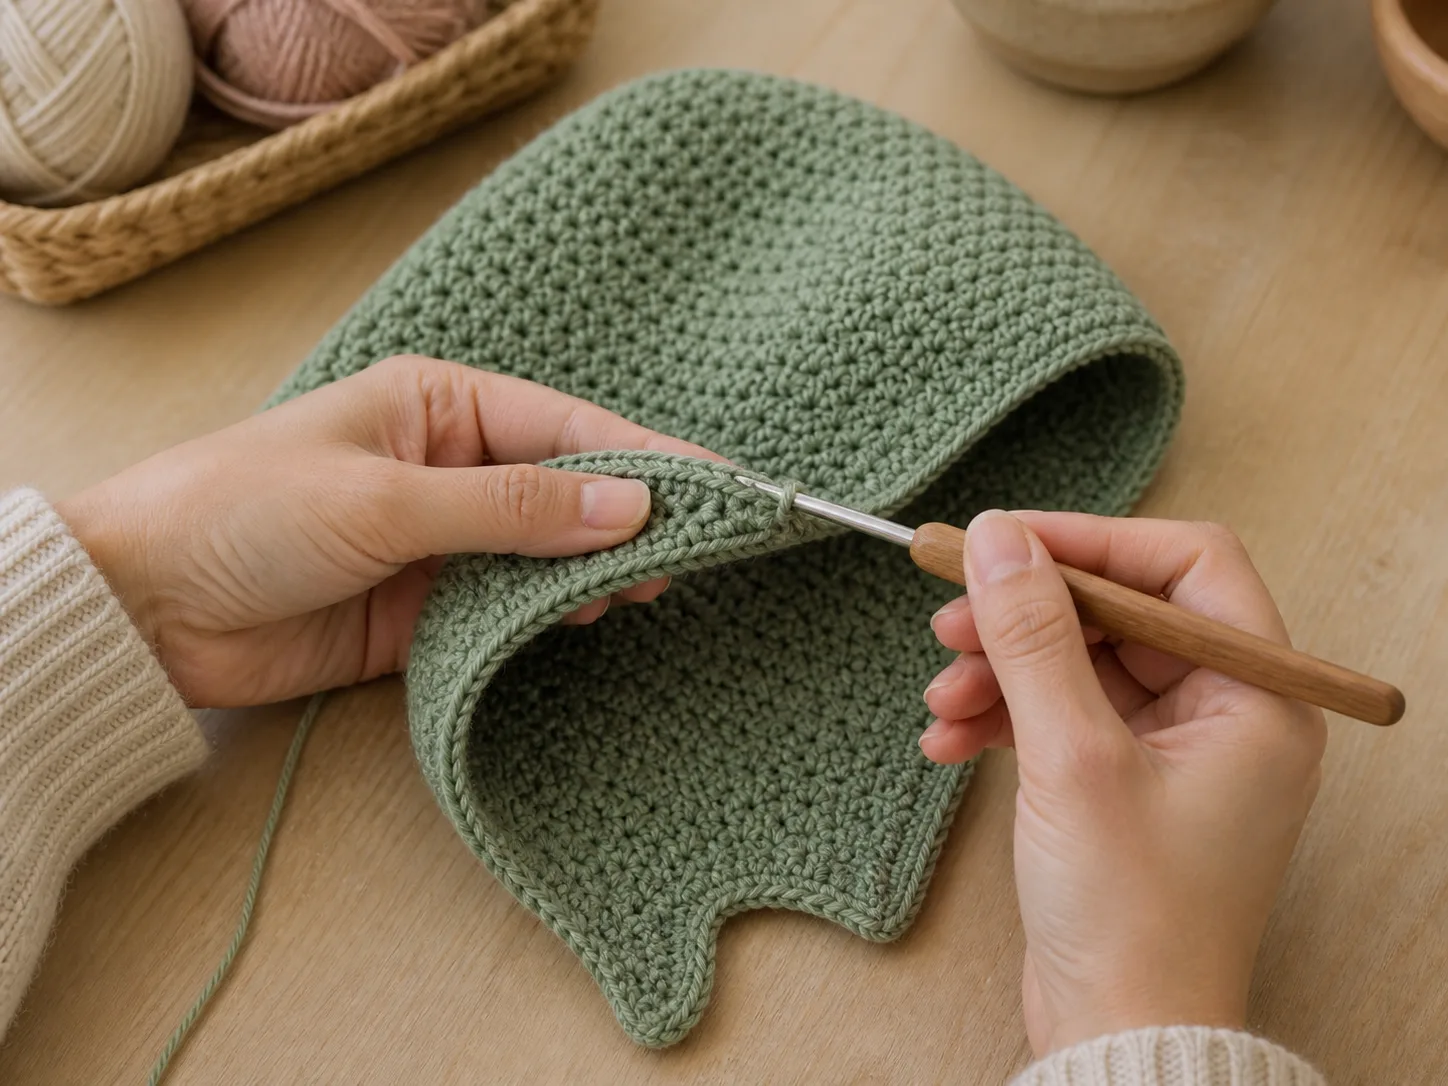
Part 4: Edge the face
With RS facing, join yarn at one lower corner on the Row 12 edge.
Face edging Row 1: Ch 1, work 1 SC in each of the 58 stitches across the final HDC row. 58 SC planned
Turn and inspect the edge. One narrow row is the default. Add another SC row only if the new inward depth still leaves the eyebrow, eye and cheek clear.
Face-edge gate
The relaxed edge should lie against or just outside the intended face line without entering the eyebrow or eye. If it waves, the edge contains too much length or the hook is too large. If it cups, the edging is too short or tight. Correct the edge now; ties will not repair a distorted face frame.
Part 5: Edge the lower sides and nape
Join yarn at the first lower corner. Work 17 SC evenly along the first 12-row side edge, one SC in each of the 14 unworked nape stitches, then 17 SC along the second side edge. 48 SC planned
The ratio means some row ends receive more than one pickup. Distribute those additions rather than stacking them at one corner. Recount 17 + 14 + 17 = 48, then lay the edge flat. If it waves or cups, change both side pickup counts equally, recompute the total and repeat the flatness check before fastening off.
Part 6: Add two equal ties
At the first lower corner, chain approximately 42, then measure the relaxed chain. Add or remove chains until it measures 12 in / 30.5 cm from the corner. Slip stitch back along the chain if a firmer tie is desired, then fasten off.
Repeat at the second corner. Match the finished physical length of the first tie. Do not tighten the knot to pull a loose bonnet into position; fit must pass before ties are used.
For an adult who does not want long ties, replace them with a short button loop and a securely sewn button positioned away from the throat. This is a design alternative, not part of the default count ledger.
Four Final Acceptance Gates
Back and crown
The rounded back stays smooth and seated. There is no central peak, ruffled increase ring or tight pressure line. Compare the selected count’s estimated negative ease with the plan, then check the fit on the wearer.
Face clearance
The finished edge remains outside the eyebrow and eye, follows both cheeks similarly and does not slide across the mouth when the wearer looks down.
Nape and lower corners
The nape gap is centered, the two lower edges lie flat and neither corner carries visibly more tension. The bonnet does not ride upward when the wearer turns.
Tie and movement
The two ties are equal and remain relaxed. The wearer can turn, look down and open the jaw without the knot tightening or the back lifting.

Worked Example: 23.5-Inch Head
Use H 23.5 in, e 6%, g_s 15 HDC/4 in, g_r 11 rows/4 in, S 9.25 in, assumed border allowance B 0.25 in, W 4.25 in and T 13 in.
C_target = 23.5 × 0.94 = 22.09 in
N_raw = 22.09 × 15 / 4 = 82.8375
The legal neighbors are 72 and 84; choose 84.
C_actual = 84 × 4 / 15 = 22.4 in
estimated ease = (23.5 – 22.4) / 23.5 = 4.68%
D_actual = 22.4 / π = 7.130… in
The crown path becomes 12 → 24 → 36 → 48 → 60 → 72 → 84: seven total crown rounds, consisting of one starting round and six increase rounds.
Q = round_half_up((9.25 – 7.130/2 – 0.25) × 11 / 4) = 15 rows
G_raw = 4.25 × 15 / 4 = 15.9375, so choose an even 16-stitch gap and work 84 – 16 = 68 stitches per row.
E_side = round_half_up(15 × 15 / 11) = 20, giving a planned lower-edge count of 20 + 16 + 20 = 56 before recounting and checking flatness.
The 13-inch tie estimate is round_half_up(13 × 15 / 4) = 49 chains, followed by the same physical-length check.
This case changes the crown, diameter, depth rows, gap, row count, pickups and tie estimate while preserving the invariants: a multiple-of-12 crown, an even centered gap, identical row counts and balanced lower edges.
Troubleshooting by Return Point
| Symptom | Likely cause | Minimum correction | Return point |
|---|---|---|---|
| Crown cups or ruffles | sector count or fabric increase rate is wrong | recount every sector; if counts pass, change hook/fabric and reswatch | first misshapen increase round |
| Crown feels painfully tight | lower legal count creates too much negative ease | compare the upper multiple of 12 and back-calculate estimated size | crown selection |
| Face edge stops behind the temple | side depth or row gauge is too small | add only the missing full rows | before face edging |
| Face edge covers the eyebrow | too many side rows or too-deep edging | remove full side rows or the extra edging row | last correct side row |
| One lower corner sits higher | a turned row lost its first or last stitch | restore 58 stitches from the first unequal row | first unequal side row |
| Nape gap is shifted | gap markers were not centered on the join | remark seven stitches on each side of center back | nape setup |
| Lower edge waves | too many side-edge pickups | remove pickups evenly on both sides | first lower edging round |
| Lower edge cups | too few pickups or a tight hook | add pickups evenly or remake with a suitable hook | first lower edging round |
| Ties pull the face edge inward | ties are being used to compensate for loose fit | correct crown/face fit and keep the knot relaxed | earliest failed fit gate |
| Ties differ in length | chain counts matched but chain tension did not | measure and remake only the shorter/longer tie | tie stage |
Frequently Asked Questions
Can I use a different yarn weight?
Yes, if you make and wash a new HDC swatch, recalculate the adjacent multiples of 12 and repeat every physical gate. A yarn weight label is a category, not a guarantee of stitch or row gauge.
Why not use head circumference divided by pi and stop there?
That estimate gives a crown diameter, but a bonnet also needs a wearer-specific face-edge position and nape opening. The Back–Frame–Tie Map subtracts the crown radius from the side-depth measurement so crown size and added rows do not perform the same job twice.
How tight should the ties be?
They should stabilize an already acceptable fit, not create it. The knot should remain relaxed during head turns and jaw movement. If tightening the ties is the only way to keep the back seated, return to the earliest failed crown or depth gate.
Can this be converted to a balaclava?
Not by closing the ties or adding a neck strip. A balaclava requires a controlled face window, chin bridge and neck count. Use the separate crochet balaclava guide for that outcome.
Can I make this for a baby or child?
Do not proportionally shrink this adult pattern. Child head proportions, growth allowance, closure design and tie safety need their own specification. Use an age-specific bonnet pattern designed for that wearer.