

Fit the opening, flatten the gills, and match both 160-stitch rims
This adult crochet mushroom hat pattern makes a true projected Amanita-style cap: a fitted center opening, a cream gill underside and a separate red dome joined at one count-matched outer rim.
What This Pattern Makes—and What It Does Not
Search results for “mushroom hat” mix several outcomes: mushroom colorwork on a beanie, character hats with eyes, soft berets, bucket hats made from mushroom squares and projected costume caps. Those are not interchangeable constructions.
This pattern makes the projected costume cap. The Ring–Gill–Dome Map:
- chooses a fitted center opening from the wearer’s actual head and washed gauge;
- rounds both opening and outer rim to legal multiples of eight;
- back-calculates estimated circumference, diameter and negative ease after rounding;
- grows a flat cream underside from the center opening to the chosen cap diameter;
- schedules a separate, longer red surface that reaches the same rim count;
- verifies opening + underside increases = outer rim and 8 + dome increases = outer rim;
- joins both 160-stitch rims one-for-one; and
- stops for fit, flatness, visibility and movement checks before irreversible finishing.
This is an adult costume/fashion hat. It is not a botanical-identification guide, a child-size proportional reduction, a protective helmet, a rain hat or a sun-protection claim. The wide cap changes peripheral clearance, so the finished movement gate is part of the pattern—not an optional afterthought.
Project Overview
| Item | Default project |
|---|---|
| Skill level | Confident intermediate |
| Construction | Center-out SC gill annulus, separate center-out SC dome, one-for-one outer join, short inner band |
| Terms | US crochet terms |
| Yarn | Medium / weight 4 yarn; firm, recoverable fabric preferred |
| Hook | Size needed to match the washed joined-round gauge; 4–5 mm is only a swatching range |
| Default wearer | Adult, 22 in / 55.9 cm actual head circumference |
| Default washed gauge | 14 SC and 14 joined rounds per 4 in / 10 cm |
| Center opening | 72 stitches; estimated circumference 20.57 in / 52.2 cm |
| Outer rim | 160 stitches; estimated diameter 14.55 in / 37.0 cm |
| Finished inner band | About 1.43 in / 3.6 cm deep before any wearer-led adjustment |
| Cap layers | Cream underside + red dome, both ending at 160 stitches |
The default numbers form one complete executable case. If your washed gauge or wearer changes, recalculate every dependent count; do not keep 72 or 160 merely because they appear in this example.
Materials
- medium / weight 4 yarn in cap red and underside cream;
- a small amount of white yarn for optional spots;
- crochet hook needed for the washed gauge;
- optional hook 0.5 mm larger for the initial ring only, if the foundation edge does not stretch comfortably;
- at least 16 locking stitch markers in two colors;
- flexible tape measure, rigid ruler and calculator;
- tapestry needle and scissors;
- optional flexible washable mesh or millinery support, only if its manufacturer permits the intended use and care.
Plan roughly 450–600 yd / 411–549 m total for an adult cap in medium yarn, but treat that as a purchasing allowance rather than measured yardage. Yarn construction, hook, spot count, gill density and support choice change consumption. For a reproducible estimate, weigh the washed swatch and compare its area with the two finished cap layers.
Do not use exposed wire. If you add flexible support, round every cut edge, keep it clear of the head opening and fully enclose it between the two crochet layers. Follow the material maker’s care instructions rather than assuming the insert can be machine washed.
US Abbreviations and Round Convention
| Abbreviation | Meaning |
|---|---|
| ch | chain |
| FSC | foundation single crochet |
| inc | 2 single crochet in the same stitch |
| MR | adjustable / magic ring |
| sc | single crochet |
| sl st | slip stitch |
| st(s) | stitch(es) |
| rnd(s) | round(s) |
| RS / WS | right side / wrong side |
Join every structural round with a slip stitch to the first SC. The starting chain does not count as a stitch. Place a distinct marker in the first stitch and move it every round. On each increase round, move the first increase one stitch clockwise from its previous position while preserving exactly one increase in each of eight equal sectors. That small shift softens visible radial corners without changing the ledger.
Measure and Swatch Before Choosing Counts
Record three planning inputs:
- Head circumference H: measure the actual wearing line above the eyebrows and around the fullest back of the head. Include the hairstyle that will be worn beneath the cap.
- Requested outer diameter D_req: measure across the desired mushroom cap from edge to edge. Hold a paper circle of that diameter over the head and check door, shoulder and sight-line clearance before committing.
- Inner-band depth: measure how far the band may extend downward without touching the eyebrows or ears uncomfortably.
Make a construction-matched gauge sample
Work a joined-round SC tube at least 6 in / 15 cm around and 5 in / 12.7 cm deep, using the exact yarn, hook, join and starting-chain convention planned for the hat. Wash and dry it according to the yarn label. Measure the center 4 in / 10 cm without stretching:
- g_s: washed stitches per 4 in / 10 cm;
- g_r: washed joined rounds per 4 in / 10 cm.
Then make a small eight-sector confirmation circle: begin with 8 SC and add 8 stitches on each of the next four rounds. Wash and dry it. If the counts are correct but the sample persistently bowls or ruffles, change hook or fabric and reswatch before using the planning formulas. The tube supplies density; the mini circle is the first physical shape gate.
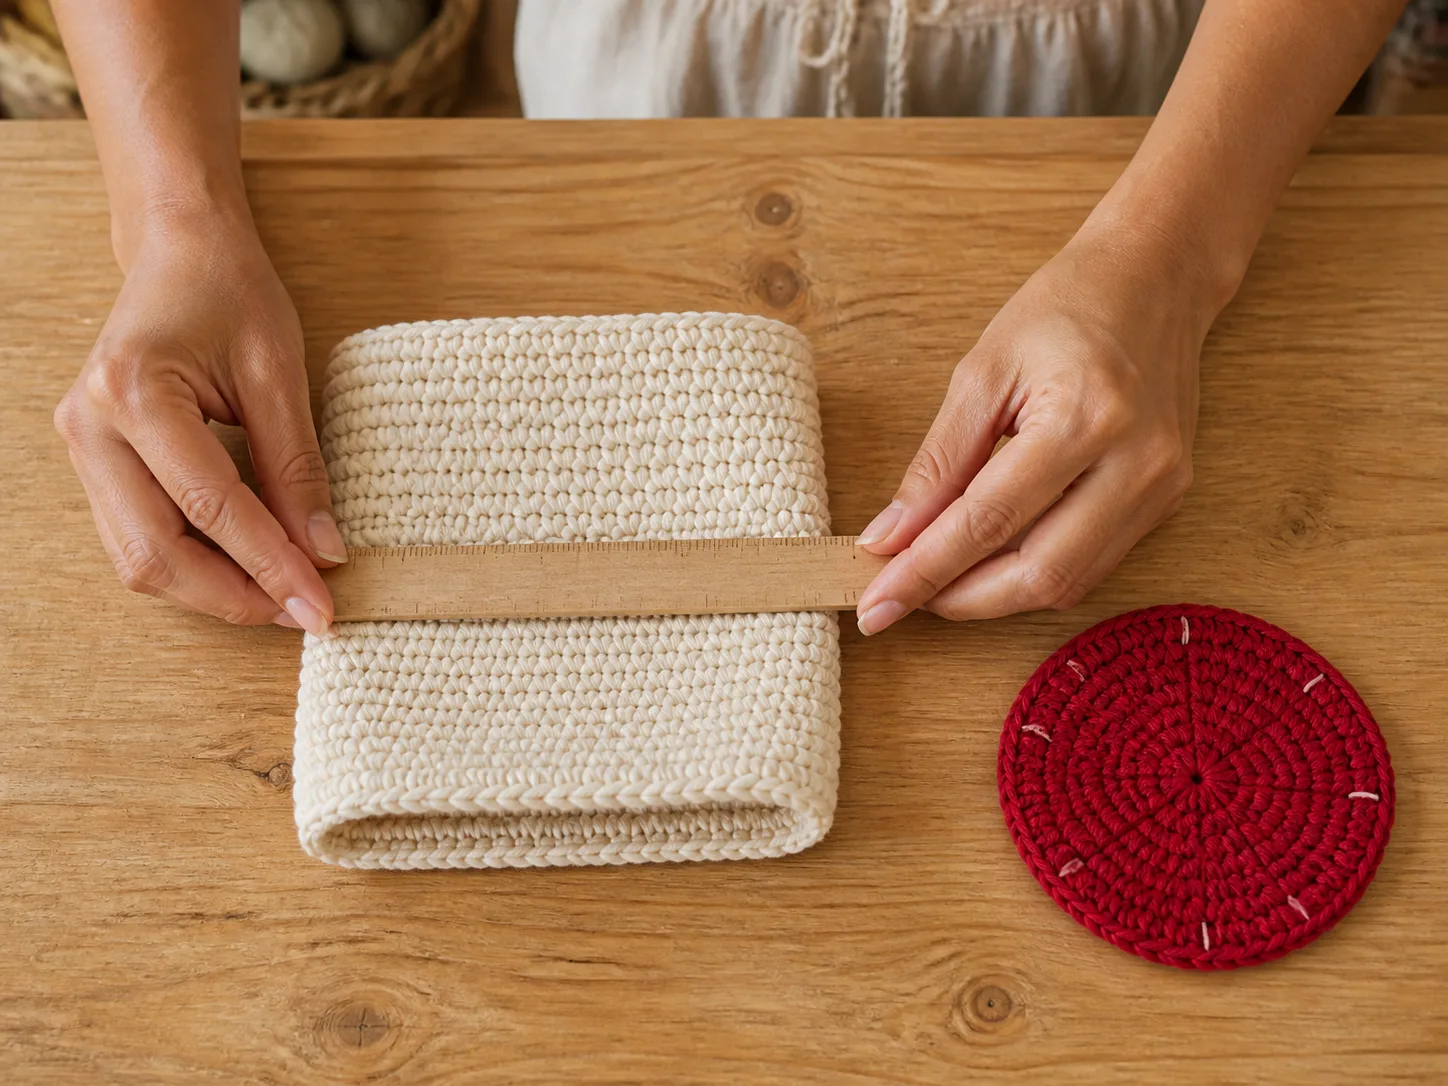
The Ring–Gill–Dome Map
Use inches with gauges measured per 4 in, or centimeters with gauges measured per 10 cm. Keep full precision inside the calculation and round only where a legal stitch or round count is required.
Choose a legal center-opening count
Start with a modest negative-ease planning value e. For the firm SC fabric used here, 4–7% is a starting range, not a universal fit law.
C_target = H × (1 – e)
For inch gauge:
N_raw = C_target × g_s / 4
For metric gauge:
N_raw = C_target × g_s / 10
Compare the multiples of eight immediately below and above N_raw. For each candidate N, back-calculate:
C_open_actual = N × 4 / g_s
estimated ease = (H – C_open_actual) / H
The foundation ring and first band rounds must still pass a wearer test. If both legal neighbors fail, change the hook or fabric and make a new washed swatch; do not break the eight-sector structure.
Choose a legal outer-rim count
Convert the requested cap diameter to a raw outer circumference count:
M_raw = π × D_req × g_s / 4
Compare the adjacent multiples of eight. For each candidate M:
C_outer_actual = M × 4 / g_s
D_outer_actual = C_outer_actual / π
Choose the legal count whose estimated diameter and physical paper-circle clearance best match the plan. A wider cap is not automatically better.
Plan the cream underside annulus
First find the estimated opening diameter:
D_open = C_open_actual / π
Then find the radial distance from the opening to the outer rim:
R_under = (D_outer_actual – D_open) / 2
Convert that distance with the round gauge:
A = round_half_up(R_under × g_r / 4)
The exact number of eight-stitch increase events is:
U = (M – N) / 8
Require A >= U; this version places at most one eight-stitch event in a round. If A < U, the chosen dimensions and fabric would demand a faster increase pace than this construction allows. Change the outer size, opening, gauge or construction and reswatch.
Plan the red top dome
The top begins with 8 SC, so its exact increase-event count is:
T = (M – 8) / 8
The default uses a surface-to-flat-radius planning ratio k = 1.18:
P = round_half_up((D_outer_actual / 2) × k × g_r / 4)
Require P – 1 >= T, because Rnd 1 establishes the first 8 stitches and each later increase event adds 8.
k does not predict a guaranteed dome height. It only allocates more worked surface length than a flat radius. Yarn stiffness, round height, blocking, spots and any enclosed support determine the real silhouette. Check the red piece as a physical shallow bowl; do not replace that gate with the ratio.
Prove both paths before joining
The underside must satisfy:
N + 8U = M
The dome must satisfy:
8 + 8T = M
Count both physical rims again:
underside rim = dome rim = M
The join then consumes exactly one underside stitch and one dome stitch at each of the M positions. No bridge, hidden increase or “ease it in” step is permitted.
Worked Example: 22-Inch Adult Head
Inputs:
- H = 22 in / 55.9 cm
- e = 6%
- g_s = 14 SC per 4 in / 10 cm
- g_r = 14 joined rounds per 4 in / 10 cm
- D_req = 14.5 in / 36.8 cm
- k = 1.18
- inner-band depth = 1.5 in / 3.8 cm
Opening calculation
C_target = 22 × 0.94 = 20.68 in
N_raw = 20.68 × 14 / 4 = 72.38
The legal neighbors are 72 and 80. Choose 72:
C_open_actual = 72 × 4 / 14 = 20.571… in
estimated ease = (22 – 20.571…) / 22 = 6.49%
The 80-stitch alternative would measure 22.857… in at this gauge and would introduce positive ease. The 72-stitch ring is therefore the only plausible neighbor, subject to the physical opening gate.
Outer-rim calculation
M_raw = π × 14.5 × 14 / 4 = 159.436…
The legal neighbors are 152 and 160. Choose 160:
C_outer_actual = 160 × 4 / 14 = 45.714… in
D_outer_actual = 45.714… / π = 14.551… in
Underpiece calculation
D_open = 20.571… / π = 6.548… in
R_under = (14.551… – 6.548…) / 2 = 4.001… in
A = round_half_up(4.001… × 14 / 4) = 14 rounds
U = (160 – 72) / 8 = 11 increase events
Underpiece conservation check:
72 + 11 × 8 = 160
Dome calculation
T = (160 – 8) / 8 = 19 increase events
P = round_half_up((14.551… / 2) × 1.18 × 14 / 4) = 30 rounds
Dome conservation check:
8 + 19 × 8 = 160
The planned dome surface path is 30 × 4 / 14 = 8.571… in, about 1.18 times the calculated flat outer radius. That is a shaping allowance only; the shallow-bowl gate decides whether the fabric works.
Complete Default Count Ledger
Cream underside
| Phase | Round | Action | End count |
|---|---|---|---|
| Opening | setup | FSC 72 and join without twisting | 72 |
| Annulus | 1 | (SC 8, inc) × 8 | 80 |
| Annulus | 2 | (SC 9, inc) × 8 | 88 |
| Annulus | 3 | SC around | 88 |
| Annulus | 4 | (SC 10, inc) × 8 | 96 |
| Annulus | 5 | (SC 11, inc) × 8 | 104 |
| Annulus | 6 | (SC 12, inc) × 8 | 112 |
| Annulus | 7 | SC around | 112 |
| Annulus | 8 | (SC 13, inc) × 8 | 120 |
| Annulus | 9 | (SC 14, inc) × 8 | 128 |
| Annulus | 10 | (SC 15, inc) × 8 | 136 |
| Annulus | 11 | (SC 16, inc) × 8 | 144 |
| Annulus | 12 | SC around | 144 |
| Annulus | 13 | (SC 17, inc) × 8 | 152 |
| Annulus | 14 | (SC 18, inc) × 8 | 160 |
Red dome
| Round | Action | End count | Round | Action | End count |
|---|---|---|---|---|---|
| 1 | 8 SC in MR | 8 | 16 | (SC 9, inc) × 8 | 88 |
| 2 | 2 SC in each stitch | 16 | 17 | SC around | 88 |
| 3 | SC around | 16 | 18 | (SC 10, inc) × 8 | 96 |
| 4 | (SC 1, inc) × 8 | 24 | 19 | (SC 11, inc) × 8 | 104 |
| 5 | (SC 2, inc) × 8 | 32 | 20 | SC around | 104 |
| 6 | SC around | 32 | 21 | (SC 12, inc) × 8 | 112 |
| 7 | (SC 3, inc) × 8 | 40 | 22 | (SC 13, inc) × 8 | 120 |
| 8 | (SC 4, inc) × 8 | 48 | 23 | SC around | 120 |
| 9 | SC around | 48 | 24 | (SC 14, inc) × 8 | 128 |
| 10 | (SC 5, inc) × 8 | 56 | 25 | (SC 15, inc) × 8 | 136 |
| 11 | (SC 6, inc) × 8 | 64 | 26 | SC around | 136 |
| 12 | SC around | 64 | 27 | (SC 16, inc) × 8 | 144 |
| 13 | (SC 7, inc) × 8 | 72 | 28 | (SC 17, inc) × 8 | 152 |
| 14 | (SC 8, inc) × 8 | 80 | 29 | SC around | 152 |
| 15 | SC around | 80 | 30 | (SC 18, inc) × 8 | 160 |
Complete Crochet Mushroom Hat Pattern
The instructions below execute the 72-opening / 160-rim example. Replace every count with one internally consistent personal ledger; do not mix a personal opening with the default outer schedule.
Part 1: Make and test the center ring
With cream yarn, FSC 72 and join to the first FSC without twisting. Keep the join flexible. If you do not use FSC, make a loose chain ring, work one SC into each chain and recount 72 before proceeding; the chain must pass the same wearer gate.
Try the ring at the intended wearing line over the planned hairstyle.

Opening gate
- The ring reaches the intended wearing line without force.
- It stays in place when the wearer looks down.
- It does not leave painful pressure at the forehead or behind the ears.
- Measure the finished opening and compare its circumference and fit with the saved plan.
If 72 is uncomfortable, stop. Compare the legal neighbor and its back-calculated size. If neither works, change the hook or fabric and make a new washed swatch.
Part 2: Crochet the cream gill annulus
Work into the top edge of the FSC ring. Mark eight sectors of 9 stitches each. On each increase round, add one stitch in every sector and move the first increase one stitch clockwise from the previous increase event.
Rnd 1: Ch 1, (SC in next 8 stitches, inc in next) 8 times, join. 80 sts
Rnd 2: Ch 1, (SC 9, inc) 8 times, join. 88 sts
Rnd 3: Ch 1, SC around, join. 88 sts
Rnd 4: Ch 1, (SC 10, inc) 8 times, join. 96 sts
Rnd 5: Ch 1, (SC 11, inc) 8 times, join. 104 sts
Rnd 6: Ch 1, (SC 12, inc) 8 times, join. 112 sts
Rnd 7: Ch 1, SC around, join. 112 sts
Rnd 8: Ch 1, (SC 13, inc) 8 times, join. 120 sts
Rnd 9: Ch 1, (SC 14, inc) 8 times, join. 128 sts
Rnd 10: Ch 1, (SC 15, inc) 8 times, join. 136 sts
Rnd 11: Ch 1, (SC 16, inc) 8 times, join. 144 sts
Rnd 12: Ch 1, SC around, join. 144 sts
Rnd 13: Ch 1, (SC 17, inc) 8 times, join. 152 sts
Rnd 14: Ch 1, (SC 18, inc) 8 times, join. 160 sts
Do not block the piece wider merely to reach 14.55 in. Smooth it on a flat surface without stretching and measure through the center opening to the outside edge.
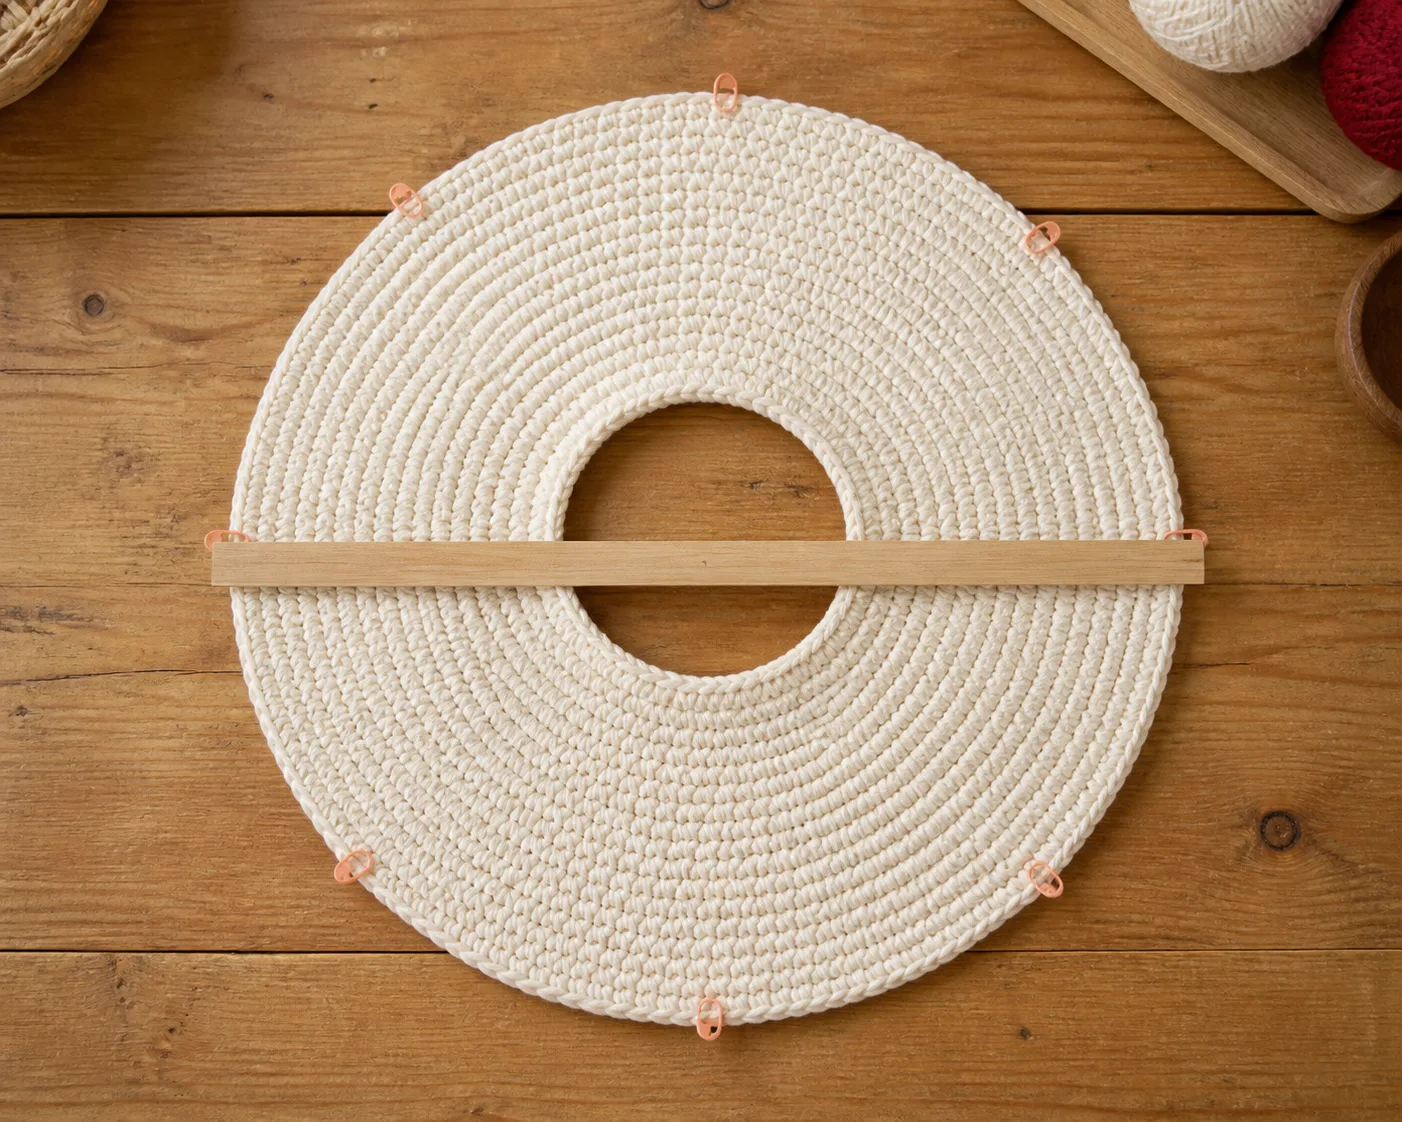
Underpiece flatness gate
- The sequence ends at 160 stitches.
- The center opening still measures and fits as planned.
- The annulus rests substantially flat after smoothing, without persistent waves or a rigid bowl.
- The outer diameter is close to the back-calculated 14.55 in / 37.0 cm.
If a wave first appears after an increase round, return to that round and replace the next scheduled increase event with a plain round only after recalculating how a later event will restore the final 160 count. If the fabric cups, return to the first affected section and move a later increase event earlier. Never add or remove isolated stitches outside the eight-sector ledger.
Part 3: Add the short inner band
With the underside RS facing, join cream yarn to the unused lower edge loops of the FSC ring. Work one SC in each of the 72 foundation positions and join. 72 sts
Work four more plain SC rounds, joining each round. Five band rounds total; 72 sts each
At the example row gauge, five rounds measure about 5 × 4 / 14 = 1.429 in / 3.6 cm. Add or remove only plain band rounds to reach the wearer-approved depth. This step is one foundation position to one stitch; it does not convert a row edge to a different axis and does not use a “pick up one per row” assumption.
Try the underside and band together. The cap must remain above the eyebrows, and the band must not push the ears outward. Complete this correction before surface gills or joining.
Part 4: Crochet the red dome
With red yarn, make an MR. Keep eight sector markers in the work and shift the first increase one stitch clockwise at each increase event.
Rnd 1: Ch 1, 8 SC in MR, join. 8 sts
Rnd 2: Ch 1, 2 SC in each stitch, join. 16 sts
Rnd 3: Ch 1, SC around, join. 16 sts
Rnds 4–15: Follow the red-dome ledger exactly, ending with: 24, 32, 32, 40, 48, 48, 56, 64, 64, 72, 80, 80 stitches.
Pause after Rnd 15. The piece should begin forming a controlled shallow bowl rather than a flat disc or narrow tube.
Rnds 16–30: Continue the ledger exactly, ending with: 88, 88, 96, 104, 104, 112, 120, 120, 128, 136, 136, 144, 152, 152, 160 stitches.
Recount each round from the full table; the shortened count line above is a verification aid, not a substitute for the round instructions.
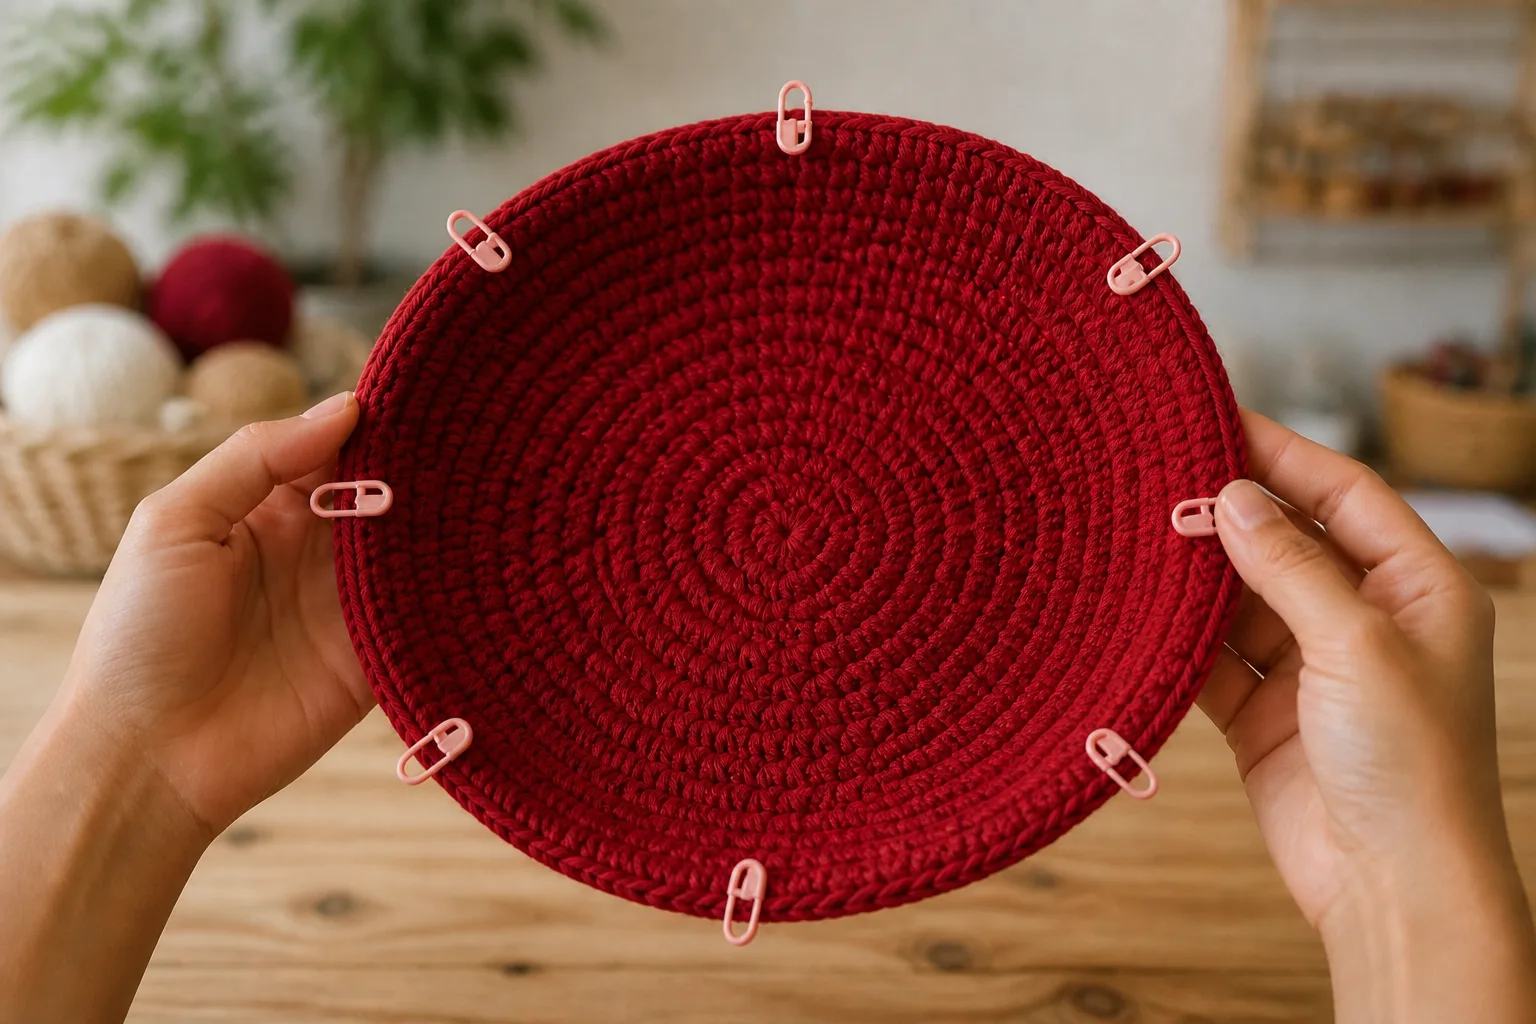
Dome gate
- The final count is 160.
- The eight sectors are equal and no single sector contains a hidden extra increase.
- The piece forms a shallow bowl when relaxed.
- Its rim meets the cream rim without stretching either piece.
If the top remains flat, do not gather the edge: the round/increase pace, fabric or hook must be reconsidered. If it becomes a narrow cone, return to the earliest plain round after which the curve became excessive and bring a later scheduled increase event forward while preserving all 19 events and the 160-stitch finish.
Part 5: Make and attach optional spots
Make spots in white before the two cap layers are joined, so all sewing tails can remain inside.
- Small spot: 6 SC in MR; fasten off.
- Medium spot: Rnd 1: 6 SC in MR. Rnd 2: 2 SC in each stitch. 12 sts
- Large spot: Rnds 1–2 as medium. Rnd 3: (SC 1, inc) 6 times. 18 sts
Make 5–9 spots in mixed sizes. Pin them to the red dome while it is relaxed. Keep the spot edges at least one full stitch from the 160-stitch joining rim. Sew every spot flat without pulling the dome into dents.
Part 6: Add surface-crochet gills
With the cream underside RS facing, mark eight major lines from the opening toward the eight outer sector markers. Keep the working yarn beneath the fabric and work loose surface slip stitches along the first line from near the center opening toward the rim. Repeat for the other seven major lines.
Lay the underside flat. If it still passes, add one intermediate gill line between each pair of major lines for 16 total spokes. Stop short of the foundation ring and outer joining loops so the gills do not thicken the head opening or rim seam.
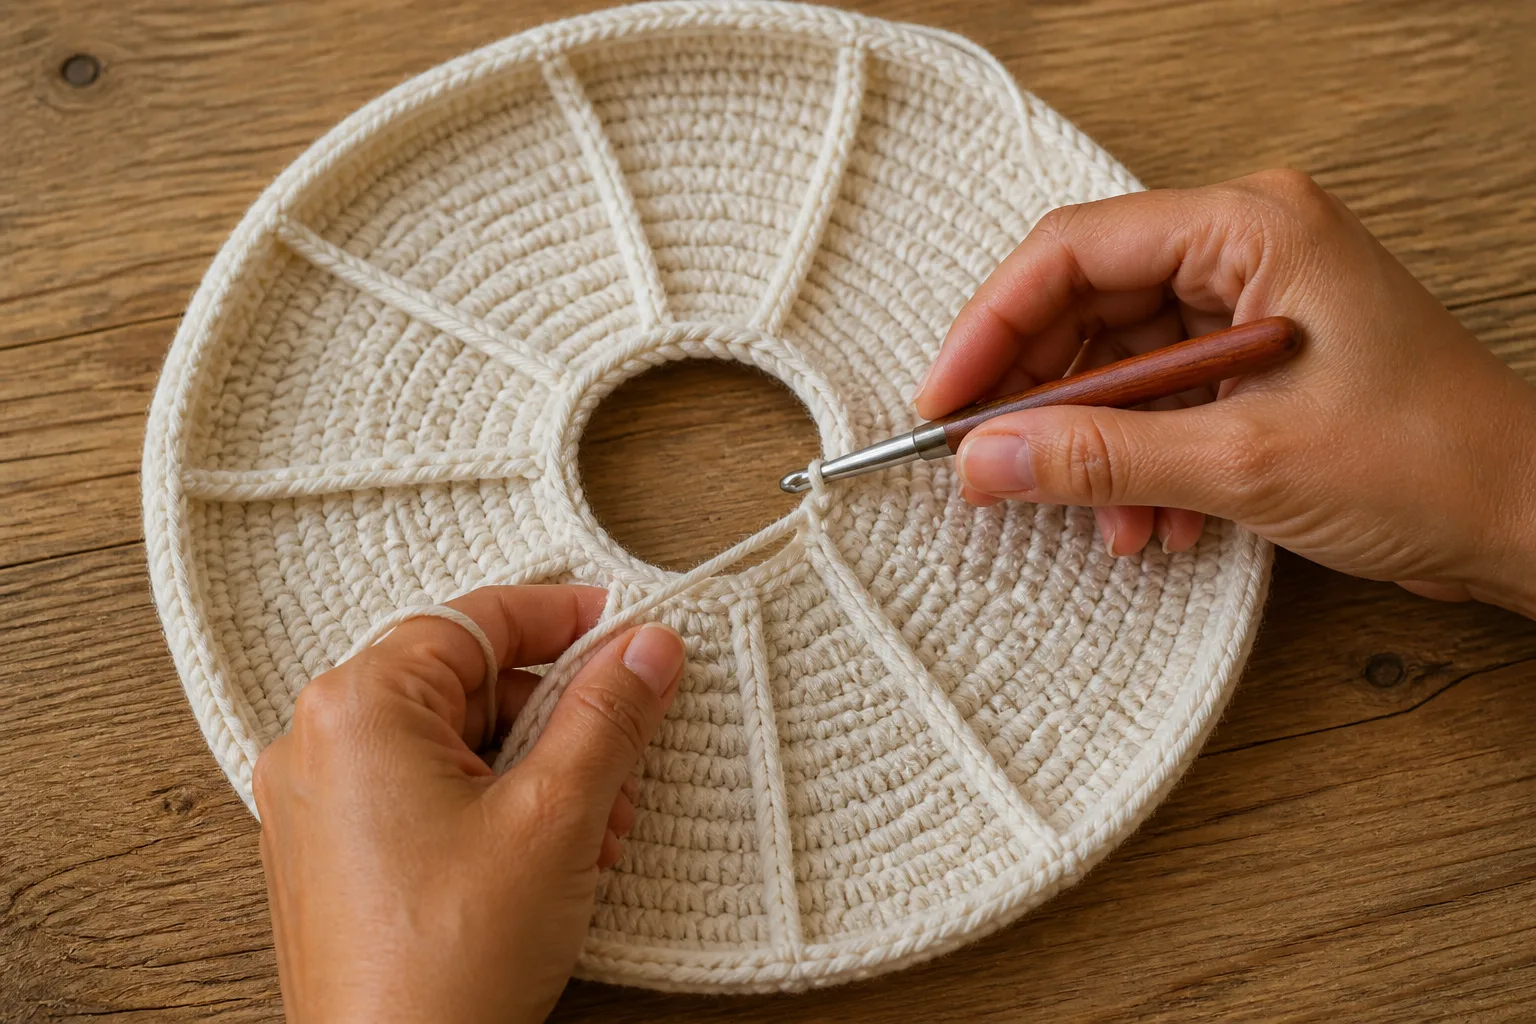
Gill gate
- The underside still lies substantially flat.
- Surface stitches are loose enough that the fabric does not pucker.
- All yarn tails are secured on the hidden side.
- The center opening and outer joining loops remain unobstructed.
If one line puckers, remove only that surface-crochet line and remake it more loosely. Do not stretch-block a shortened spoke into compliance.
Part 7: Join the two 160-stitch rims
Place the red dome above the cream underside with wrong sides together and visible sides facing out. Match all eight sector markers. Add a marker halfway between each sector so the two rims are pinned at 16 balanced positions.
With red or cream yarn, join through one red rim stitch and one cream rim stitch. Work one SC through both layers at every position. 160 joining SC
Recount at every sector: each eighth contains 20 paired positions.
If you are not adding support, close the complete rim. If you are using flexible support, stop with approximately 4 in / 10 cm unjoined. Trace the crochet annulus onto the support, then cut it inside both the outer edge and center opening so it cannot enter either seam. Round and cover every edge, insert it without forcing the crochet wider, and complete the one-for-one join. Use only material whose maker permits the intended contact and care.
Do not “ease in” a count mismatch. If one layer reaches a sector marker first, return to the last matched marker and find the missed or doubled stitch.
Five Final Acceptance Gates
Opening and band fit
The opening stays at the planned wearing line, passes over the hairstyle without force and does not create painful pressure. The inner band stays above the eyebrows and clear of the ears.
Underside flatness
The cream layer has no persistent ruffle or rigid cup before joining. The gills do not shorten it, and the optional support rests inside without stretching the crochet.
Rim conservation
The underside, dome and completed joining round each account for 160 positions. All 16 marker intervals pair without a missed stitch, pleat or hidden gather.
Dome and silhouette
The red layer forms a shallow mushroom dome, the white spots lie flat, and the outer edge projects evenly around the head. The project reads as a cap with a visible underside—not as a colorwork beanie or soft beret.
Visibility and movement
With another person observing the clearance, the wearer looks left, right and down, walks through a normal doorway and raises both shoulders. The cap stays above the eyes, does not catch the shoulders and does not shift enough to obstruct sight. Reduce the outer diameter if the wide silhouette fails this gate.

Worked Example: 23.5-Inch Adult Head
Use H 23.5 in, e 6%, g_s 16, g_r 15, D_req 16.25 in, k 1.18 and a 1.5-in band.
C_target = 23.5 × 0.94 = 22.09 in
N_raw = 22.09 × 16 / 4 = 88.36
The legal opening neighbors are 88 and 96. Choose 88. The estimated opening circumference is 88 × 4 / 16 = 22 in, giving 6.38% estimated negative ease. At this gauge, the 96-stitch candidate would calculate to 24 in and introduce positive ease.
M_raw = π × 16.25 × 16 / 4 = 204.204…
The legal outer neighbors are 200 and 208. Choose 208, producing a 52-in outer circumference and 52 / π = 16.552… in estimated diameter.
The opening diameter is 22 / π = 7.003… in, so the underside extension is (16.552… – 7.003…) / 2 = 4.775… in.
A = round_half_up(4.775… × 15 / 4) = 18 rounds
U = (208 – 88) / 8 = 15 events
P = round_half_up((16.552… / 2) × 1.18 × 15 / 4) = 37 rounds
T = (208 – 8) / 8 = 25 events
Both paths conserve the rim:
88 + 15 × 8 = 208
8 + 25 × 8 = 208
This case changes the opening, underside depth, event schedule, dome length and joining count. It demonstrates why changing only the hook while keeping the 72/160 default would not be a controlled size adjustment.
Troubleshooting by Return Point
| Symptom | Likely cause | Minimum correction | Earliest safe return point |
|---|---|---|---|
| Foundation ring is tight | chain/FSC edge is less elastic than the washed fabric or the wrong legal count was chosen | remake with a flexible foundation or recalculate the legal neighbor | center ring before Annulus Rnd 1 |
| Cream annulus waves | increase events are too fast for the actual radial gauge | verify counts; move the next event later and regenerate the remaining schedule | first increase round after which the wave persists |
| Cream annulus cups | increase events are too slow or a sector increase is missing | find the missing event or move the next planned event earlier | first affected sector/round |
| Red top stays flat | surface pace is too close to a flat circle for this fabric | reswatch or redistribute the same 19 events across more plain rounds | earliest plain round where curvature should begin |
| Red top becomes conical | too many plain rounds before the required increases | move a later event earlier while preserving all totals | first round where the cone becomes rigid |
| One rim reaches a marker first | missed/doubled stitch or unmatched sector | undo to the last matched marker and recount both layers | last matched sector marker |
| Surface gills pucker | slip stitches are too tight | remove and remake only the tight spoke | start of that gill line |
| Spot creates a dent | sewing tension is tighter than the relaxed dome | remove that spot and resew with the dome supported | affected spot |
| Hat tilts over the eyes | opening too loose, projection unbalanced or support shifted | correct the band/opening or reopen the rim and center support | opening gate or outer join, whichever first failed |
| Cap catches shoulders or doorways | outer diameter is too large for wearer clearance | select the smaller legal outer count and recompute both schedules | outer-rim calculation |
Frequently Asked Questions
Is this a free crochet mushroom hat pattern?
Yes, the full default 72-opening / 160-rim pattern is provided on this page. “Free” does not make the example counts universal: use the wearer’s actual head, washed joined-round gauge and chosen cap diameter before changing size.
How is this different from a mushroom beanie?
A mushroom beanie uses colorwork or sewn details on a normal fitted hat body. This pattern leaves a fitted opening inside a wide cream annulus and joins that underside to a separate red dome. The visible gill layer and projected edge are structural, not printed or embroidered motifs on a beanie.
How do I make the mushroom hat bigger?
Separate head fit from cap projection. Recalculate the center opening to a multiple of eight, then recalculate the requested outer diameter to another multiple of eight. Regenerate both increase schedules so the underside and dome still end at the same count. Do not add random stitches at the join.
Why is my crochet circle ruffling?
The fabric is receiving circumference faster than its radial growth can support. Verify that every sector has the planned count, then return to the first increase round after which the wave persists. Move a future eight-stitch event later and recompute the remaining schedule; do not press a structural ruffle flat with blocking alone.
Does the cap need wire or plastic support?
Not always. Firm washed SC, two joined layers and a moderate diameter may hold the silhouette. If the completed fabric cannot meet the projection gate, use a flexible fully enclosed support whose maker permits the intended use. Keep it clear of the head opening and never leave sharp or exposed wire at the rim.
Can I use a different yarn weight?
Yes, but none of the example counts or round schedules transfer automatically. Make the washed joined-round tube and mini confirmation circle in the substitute fabric, then recompute N, M, A, U, P and T. If the physical samples fail, change the hook or construction before making the full cap.
Can I scale the adult example for a child?
Do not proportionally shrink the 72/160 example. A child version changes current head measurements, visibility, peripheral clearance, weight and supervision decisions. Those requirements need a separate measured design and are outside this adult pattern.
Save H, e, both washed gauges, requested diameter, both legal opening candidates, both legal rim candidates, the chosen N and M, every increase-event round, all physical rim counts and all five gate results. That ledger makes the next cap reproducible.