

A measurement-adaptive winter beanie with a double folded cuff, dense body, personal ear-depth calculation, washed-fabric stretch gate and a repeatable household wind check.
Winter Hat Warmth and Coverage Planner
Open the tool in a separate page. The article also retains the manual formulas and worked checks.
JavaScript is optional: use the manual calculation method and worked examples in the article.
Quick answer
A winter hat is useful only when three things agree: it fits without squeezing, the folded cuff still reaches the intended point on the ears, and the washed fabric slows moving air well enough for the conditions in which it will be worn. Yarn described as warm does not automatically solve gaps between stitches. A thick hat that stops above the lower ear can also feel colder than a thinner, denser hat with deliberate coverage.
This pattern calculates the ribbed cuff and the body separately. For the complete example, a 22-inch / 55.9-cm head uses a washed back-loop single-crochet cuff gauge of 18 rows per 4 inches and a dense body gauge of 16 stitches and 13 rounds per 4 inches. The worked example selects 96 cuff rows and 84 body stitches. It then shows exactly how to distribute those 84 pickups around the 96-row band instead of pretending that every row end receives one stitch.
Ear coverage is calculated from a physical measurement. The wearer measures 9 inches / 22.9 cm from crown center to the desired lower edge of the folded cuff. A visible 2.25-inch / 5.7-cm fold means the unfolded ribbing is 4.5 inches / 11.4 cm deep, while the body and crown above the cuff attachment must measure 6.75 inches / 17.1 cm. At the example row gauge, the ten-round taper occupies about 3.08 inches, so the crown shaping begins about 3.67 inches / 9.3 cm above the cuff attachment after approximately 12 even rounds.
Before the full hat, the same washed swatches must pass two practical gates. A stretch-and-recovery check prevents an apparently snug cuff from becoming a rigid ring or growing loose. A small-fan and tissue comparison reveals whether obvious air channels remain. These are transparent household project checks, not standardized textile tests, temperature ratings or windproof certification.
What makes a winter hat different from an ordinary beanie
Many beanie patterns solve only circumference. A winter hat must also manage coverage and air movement. Those are related but independent problems.
- Circumference determines whether the hat stays on without pressure.
- Depth determines whether the folded lower edge actually covers the ears.
- Fabric density determines how easily moving air passes through the stitch structure.
- Cuff construction determines whether the most exposed zone has one layer or two.
- Recovery determines whether the band returns after stretching over the head.
- Moisture and weather determine how the whole clothing system performs outdoors.
A thicker yarn can still create large channels. A smaller hook can make a fabric firmer, but forcing painfully tight stitches is not a sound warmth strategy. A lining can reduce air movement, but it can also remove the stretch that made the crochet shell fit. This tutorial keeps those decisions separate so one fix does not create a new problem.
No handmade hat has a temperature rating from this pattern
This article does not rate the hat for a particular temperature or wind speed. Fiber, fabric density, moisture, activity, exposure time, individual circulation and the rest of the clothing system all affect comfort and cold risk. A desk-fan comparison cannot reproduce outdoor wind, and a crochet hat is not protective equipment.
Cold-weather guidance from CDC and NIOSH emphasizes covering exposed skin, including the ears; wearing suitable layers; staying dry; and protecting against wind. Clothing should remain comfortable rather than excessively tight. In severe cold, strong wind or wet conditions, use appropriate rated layers, reduce exposure and follow local weather advice. Treat this handmade hat as one part of that system.
The original three-gate method
Do not begin the full hat until the plan passes all three gates.
- Fit gate: the selected cuff and body counts produce comfortable negative ease, while the washed cuff still has at least a small reserve of usable stretch.
- Coverage gate: the calculated crown-to-folded-edge depth reaches the wearer’s chosen lower-ear point after the cuff is folded.
- Wind gate: the washed body swatch shows little or no tissue movement in the repeatable fan comparison, or the plan deliberately adds and fit-tests an ear-band or full lining.
The worked example shows a complete plan immediately. Every value in the worked example is complete and can be replaced with the reader’s measurements.
Measure the wearer, not the age label
Use a soft tape around the intended wear line: across the forehead, above or partly over the ear area according to preference, and around the fullest part at the back of the head. Keep the tape level and comfortably snug. Record the actual circumference.
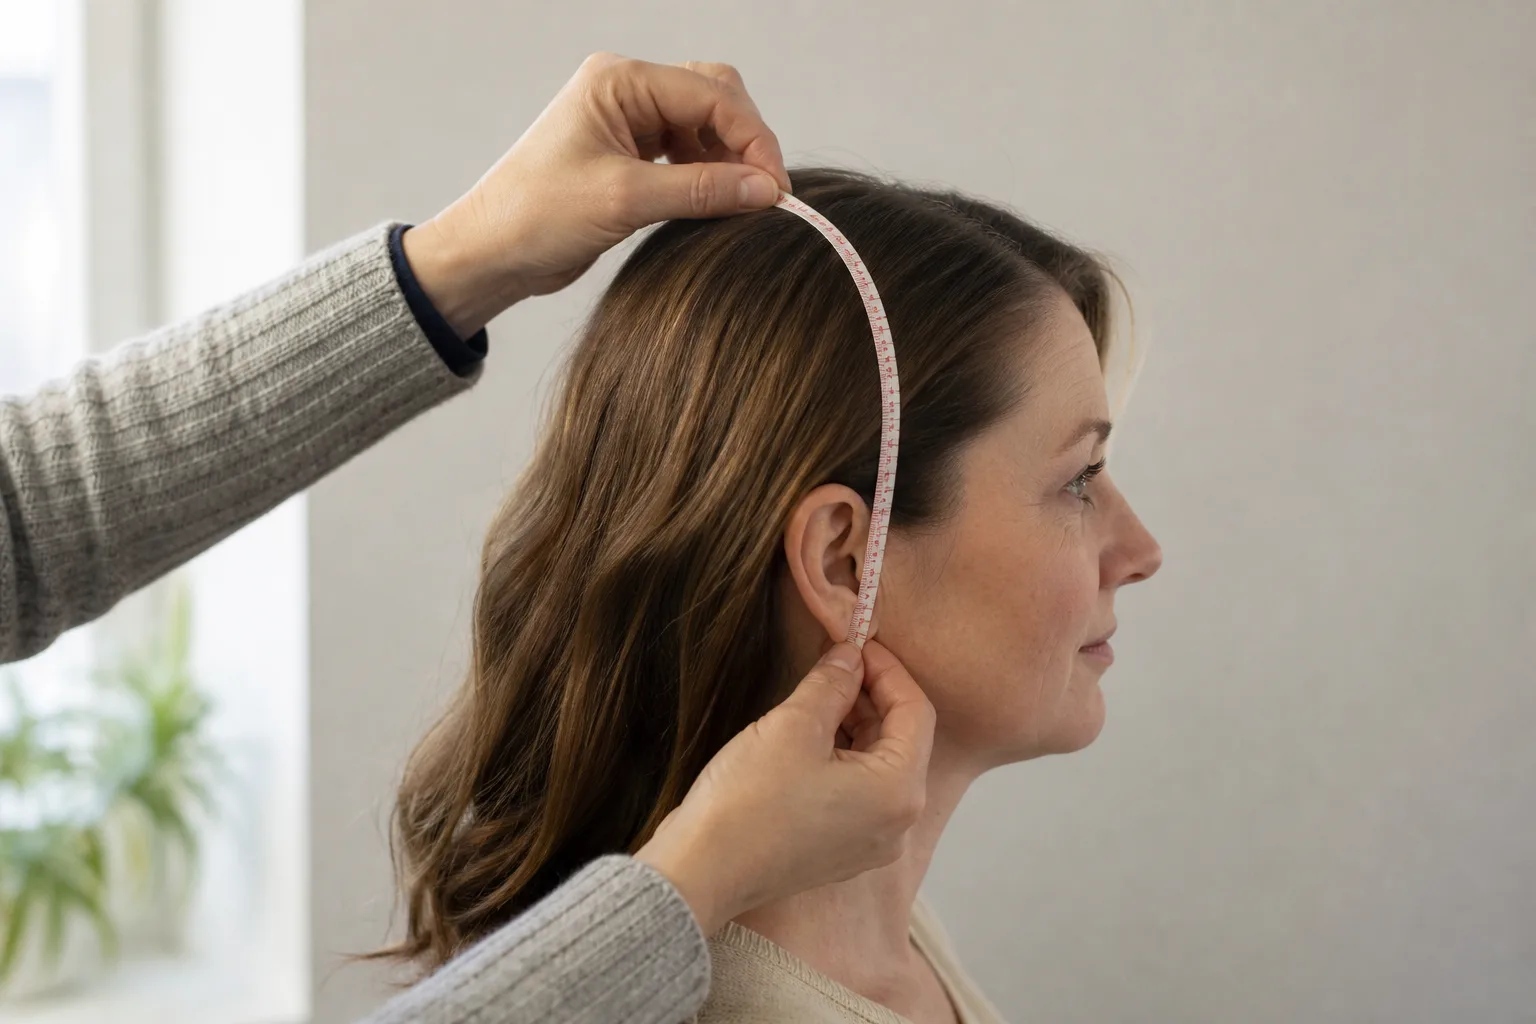
Then measure the coverage depth. Place one end of the tape at the top center of the crown. Follow the curve of the head to the point where the lower edge of the folded cuff should finish. For a winter hat, that point is often near the lower ear, but the wearer decides. Hair volume, ear position, crown shape, hearing devices and styling preference all change the result.
Do not measure straight down through the air. The tape follows the head’s surface. Take the measurement on both sides if the wearer’s preferred placement differs and use the longer comfortable result.
The worked example uses:
- actual head circumference: 22 inches / 55.9 cm;
- crown center to lower folded edge: 9 inches / 22.9 cm;
- visible folded cuff: 2.25 inches / 5.7 cm.
The visible fold is not the full band height. A 2.25-inch fold needs a 4.5-inch-deep band so the cuff is doubled after folding.
Make two washed swatches
The cuff and body behave differently, so they need separate gauges. Use the exact yarn, hook, stitch, working tension and finishing method intended for the hat. Make both swatches large enough to measure away from edges. Wash and dry them as the hat will be cared for, then let them rest flat.
Cuff swatch
Work back-loop-only single crochet in rows. Measure rows across the direction that will travel around the head. Also count stitches across the direction that will become the cuff’s vertical height.
The example has 18 rows across 4 inches and 18 stitches across 4 inches:
Body swatch
Use the dense half-double-crochet fabric described below. Count stitches across width and rounds across height.
The example has 16 stitches and 13 rounds across 4 inches:
Measure the washed fabric relaxed. Do not stretch it to match a target gauge. If you dislike the fabric, change the hook or yarn and make another swatch rather than forcing your hands to hold painful tension.
Run the cuff stretch-and-recovery gate
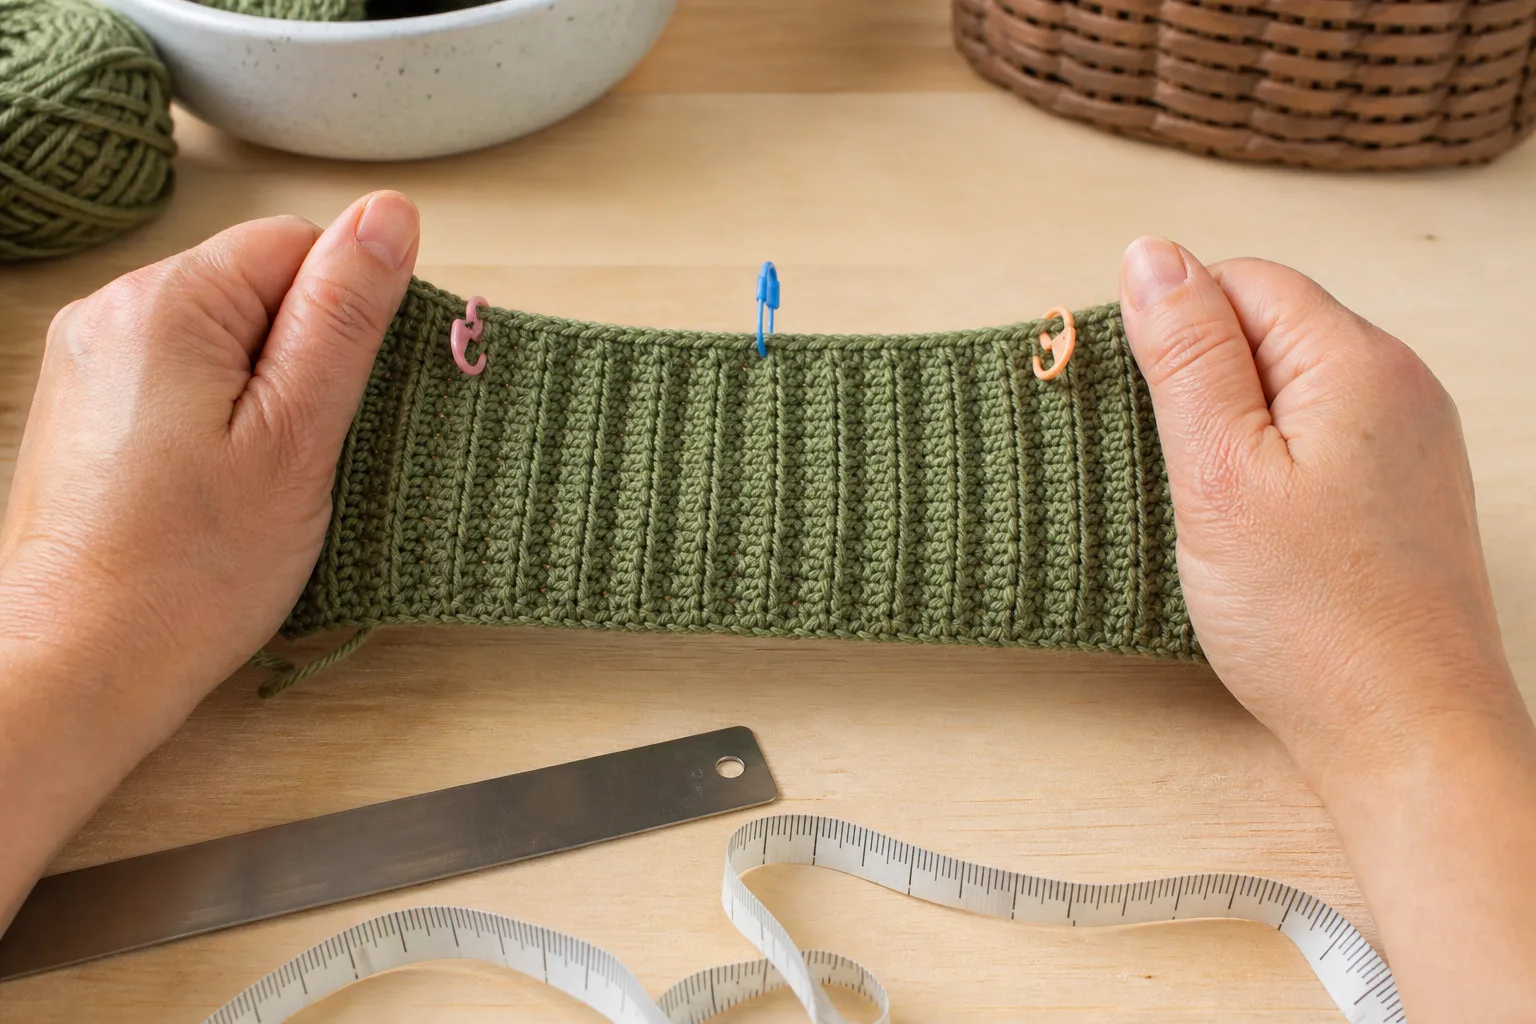
Mark a centered span on the washed ribbing. Record three measurements:
- A: relaxed span before stretching;
- B: span under a comfortable stretch similar to putting the hat on—not the maximum possible stretch;
- C: span after release and a short rest.
Calculate:
The example begins at 4 inches, stretches comfortably to 5 inches and returns to 4.1 inches. Available stretch is 25%. Residual growth is 2.5%. The selected body has about 4.5% negative ease, leaving a 20.5-percentage-point reserve.
As a conservative maker’s heuristic, keep at least 5 percentage points of reserve. Residual growth up to about 3% is a stable starting result; 3%–5% is a warning to check recovery carefully; above 5% suggests making another washed swatch or using less negative ease. These thresholds are project planning rules, not an industry standard.
Run the household wind gate
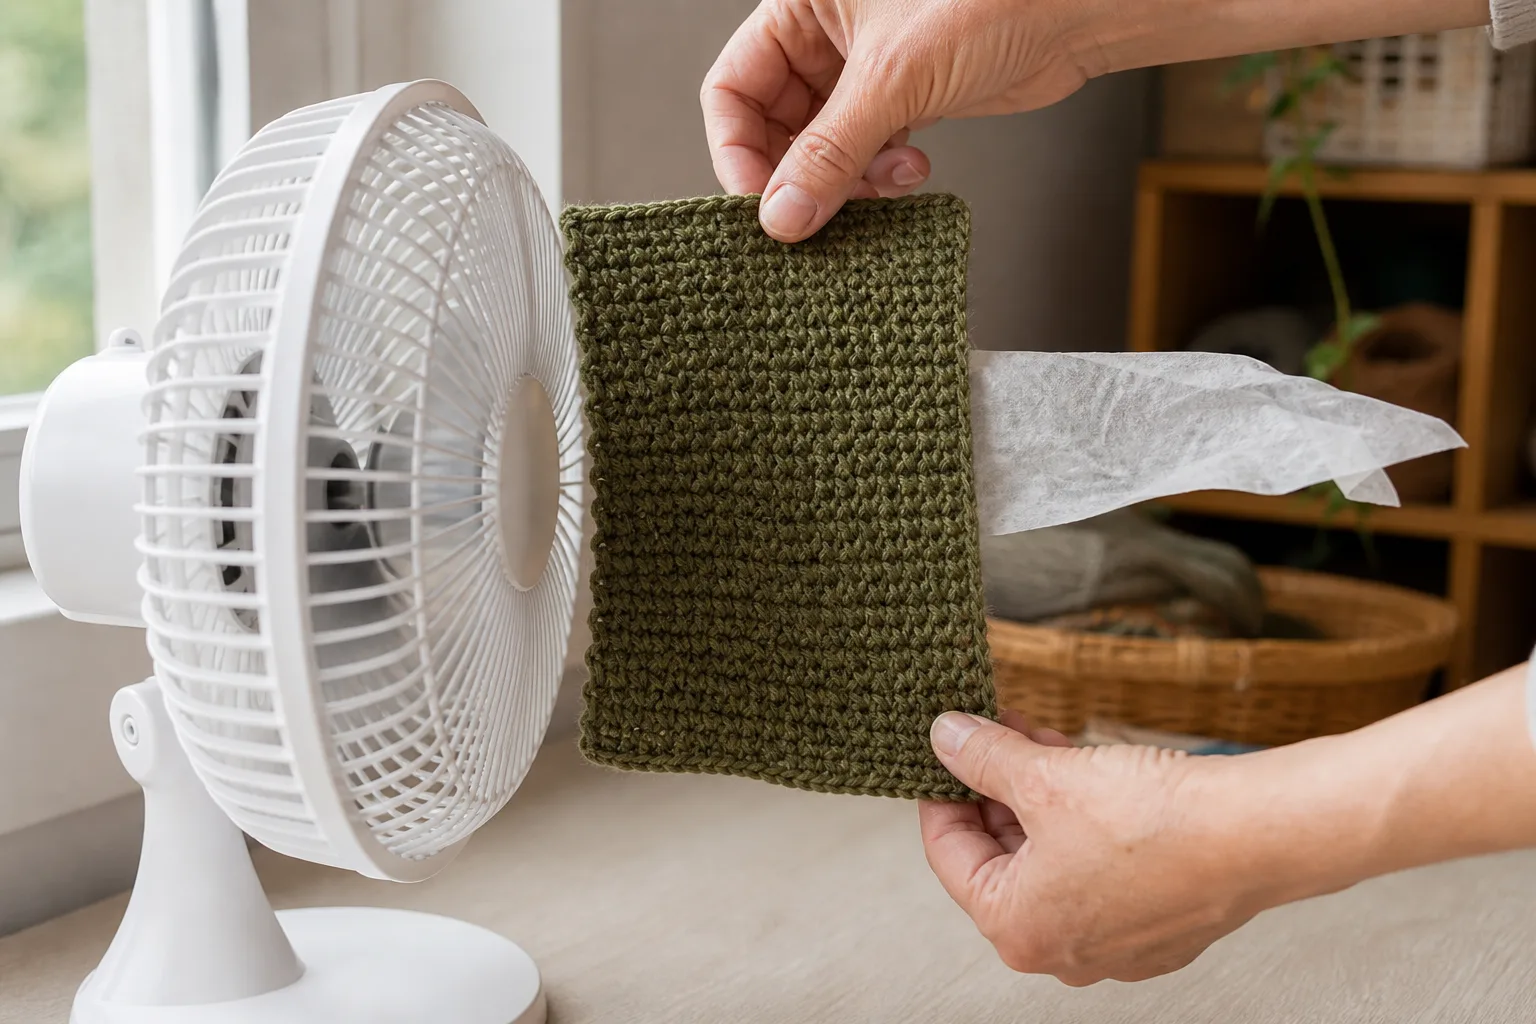
Use the washed body swatch, a small fan and a narrow strip of lightweight tissue. Keep the setup repeatable: same fan setting, same distance and same swatch orientation.
- Hang or hold the tissue behind the location where the swatch will go.
- Turn on the fan briefly without the swatch and observe the control movement.
- Place the relaxed swatch between fan and tissue without sealing its outer edges.
- Repeat with the cuff swatch doubled as it will be worn.
- Record the result rather than deciding from thickness alone.
Use three practical categories:
| Tissue response behind washed swatch | Planning decision |
|---|---|
| Little or no movement | The fabric is a reasonable candidate; verify outdoors in appropriate conditions. |
| Slight movement | Recheck the doubled ear zone; consider a stretch ear-band liner and fit-test it. |
| Obvious movement | Make a denser comfortable swatch or plan a lining before making the full hat. |
The comparison does not prove windproofness. Its value is consistency: two candidate fabrics can be compared under the same simple setup before hours are invested in the hat.
Calculate cuff rows and body stitches separately
Start with the intended circumference:
For a 22-inch head with 5% intended negative ease:
Cuff rows
Multiply target circumference by cuff rows per inch:
The construction is easier to quarter when the row count is a multiple of four. The nearby choices are 92 and 96. The worked example selects 96 because its physical circumference—21.33 inches—is closer to 20.90 than 92 rows at 20.44 inches. On the actual head, the selected cuff has about 3.0% negative ease.
Cuff strip height
The desired visible fold is 2.25 inches, so the strip must be twice that depth:
At 4.5 cuff stitches per inch:
Round to 20 working stitches. Chain 21 when the turning chain does not count as a stitch.
Body stitches
Multiply target circumference by the body stitch gauge:
Choose the nearest multiple of four: 84 stitches. That produces an estimated body circumference of 21 inches and about 4.5% negative ease on the 22-inch head.
The cuff has 96 rows while the body has 84 stitches. That difference is expected. Never insert 96 body stitches merely because the band has 96 row ends.
Apply the Winter Hat Warmth + Ear-Coverage method
Use the wearer’s circumference and coverage depth, the visible cuff fold, both washed gauges, and the three stretch spans. Select the result of the household wind comparison. The method gives:
- selected cuff rows and actual cuff ease;
- unfolded cuff height and cuff stitches;
- selected body count and actual body ease;
- pickups per cuff quarter;
- body/crown height above the band;
- taper height and where to begin shaping;
- approximate even rounds;
- stretch, residual growth and reserve;
- wind decision and any revision warning.
The default values are the full worked example, so every field and result is visible when the page loads. Round counts are planning aids. Physical circumference, depth and comfort checkpoints always win.
Complete worked example
| Field | Input or result | Decision |
|---|---|---|
| Head circumference | 22 in / 55.9 cm | Personal measurement |
| Intended negative ease | 5% | Starting target, not a universal rule |
| Cuff gauge | 18 rows and 18 stitches per 4 in | 4.5 rows/stitches per inch |
| Selected cuff | 96 rows | 21.33 in actual; 3.0% negative ease |
| Visible cuff | 2.25 in / 5.7 cm | Covers the ear zone after folding |
| Unfolded cuff | 4.50 in / 11.4 cm | Double the visible fold |
| Cuff stitches | 20 plus turning chain | Based on vertical cuff gauge |
| Body gauge | 16 stitches and 13 rounds per 4 in | 4 sts/in and 3.25 rounds/in |
| Selected body | 84 stitches | 21.00 in actual; 4.5% negative ease |
| Pickup map | 21 in each 24-row quarter | Skip 3 row-end spaces evenly per quarter |
| Crown-to-lower-edge depth | 9.00 in / 22.9 cm | Personal coverage target |
| Body/crown above cuff | 6.75 in / 17.1 cm | 9.00 − 2.25 |
| Taper | 10 rounds = 3.08 in | 84→80, then eight-stitch decreases |
| Even body | about 12 rounds / 3.67 in | Begin taper by physical height |
| Stretch result | 25% available | Comfortable swatch stretch |
| Residual growth | 2.5% | Stable starting result |
| Stretch reserve | 20.5 points | Passes five-point maker heuristic |
| Wind gate | Assumed example result: little/no tissue movement | Example planning decision: candidate fabric; verify your own swatch |
| Flat height before folding | 11.25 in / 28.6 cm | 6.75 body/crown + 4.50 full cuff |
Materials and tools
- Yarn that produces a dense, comfortable washed fabric. Wool and wool blends can be useful, but fiber name alone does not prove wind resistance. Follow care needs and wearer sensitivities.
- Hook sizes that produce the recorded cuff and body gauges without painful tension. They may be different sizes.
- Removable stitch markers in at least two colors.
- Soft measuring tape and rigid ruler.
- Small household fan and lightweight tissue strip for the comparative wind gate.
- Tapestry needle and scissors.
- Optional stretch knit fleece or another appropriate lining fabric; use material whose stretch and care suit the shell.
Abbreviations and stitch notes
- BLO: back loop only
- ch: chain
- HDC: half double crochet
- HDC2tog: half double crochet two together
- rnd: round
- SC: single crochet
- sl st: slip stitch
- st(s): stitch(es)
The body uses compact joined-round HDC. Make the yarn-over and pull-through motions with even tension; do not deliberately elongate the loops. Joined rounds keep the shaping easy to audit. The seam is less important than predictable counts in this teaching pattern. If your HDC swatch shows obvious channels in the wind gate, do not assume a smaller hook is the only answer. Test a linked HDC, a compact modified HDC or a suitable lining, then enter the new washed gauge.
Beginning chains do not count as stitches in this pattern. Join to the first actual stitch. Mark that stitch on every round so the seam and count remain visible.
Part 1: make the double-height ribbed cuff
Using the cuff hook, chain 21 for the worked example.
Row 1: SC in the second chain from the hook and in each chain across: 20 SC. Turn.
Row 2: Ch 1. SC in BLO of each stitch across: 20 SC. Turn.
Repeat Row 2 until the strip has 96 total rows. Do not rely on rows alone. Relax the strip on a flat surface and confirm that its length is about 21.33 inches / 54.2 cm. Its depth should be about 4.5 inches / 11.4 cm.
Run the stretch-and-recovery check on the washed swatch result, not on an unwashed strip whose behavior may change. If the actual strip length differs materially from the calculation, stop and determine whether working tension drifted.
Join the cuff without creating a rigid seam
Bring the short ends together without twisting the strip. Slip stitch through corresponding loops with relaxed tension, or mattress stitch the ends. The seam must stretch similarly to the ribbing. A tight, bulky join becomes a pressure point and can defeat an otherwise suitable cuff.
Fold the ring temporarily in half. Place it on the wearer without attaching the body. The folded edge should reach the chosen lower-ear position and the ring should stretch over the head without strain. This is Checkpoint 1.
Do not permanently tack the fold yet. Keeping the band open makes body pickup and seam inspection easier.
Part 2: mark the quarters and distribute body pickups
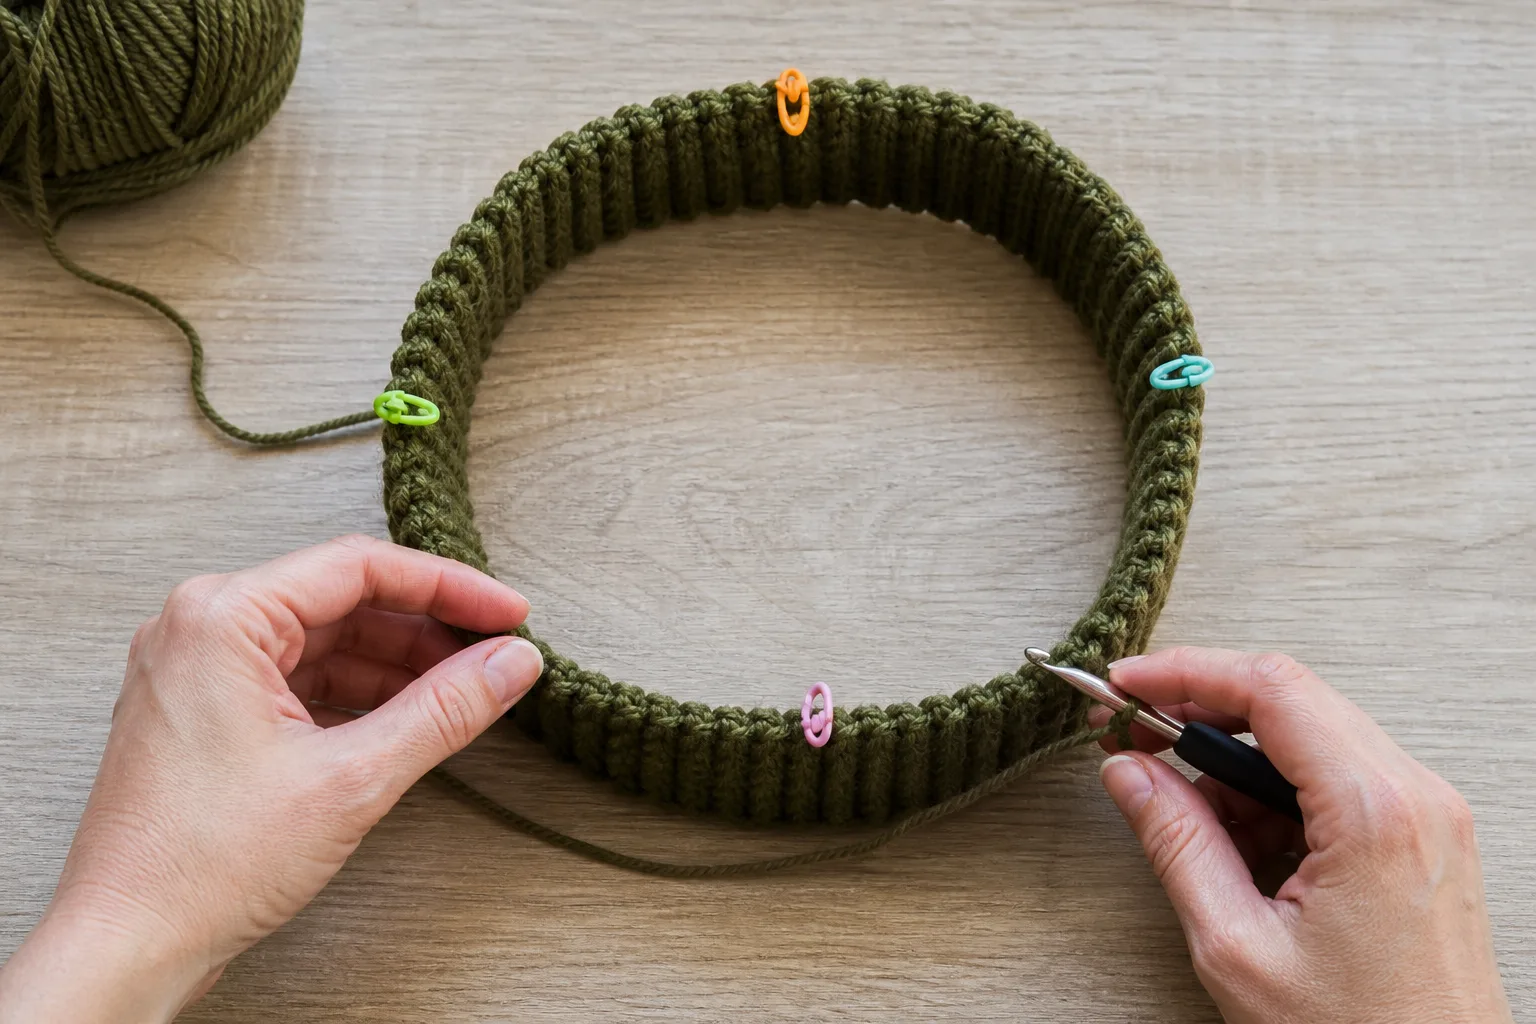
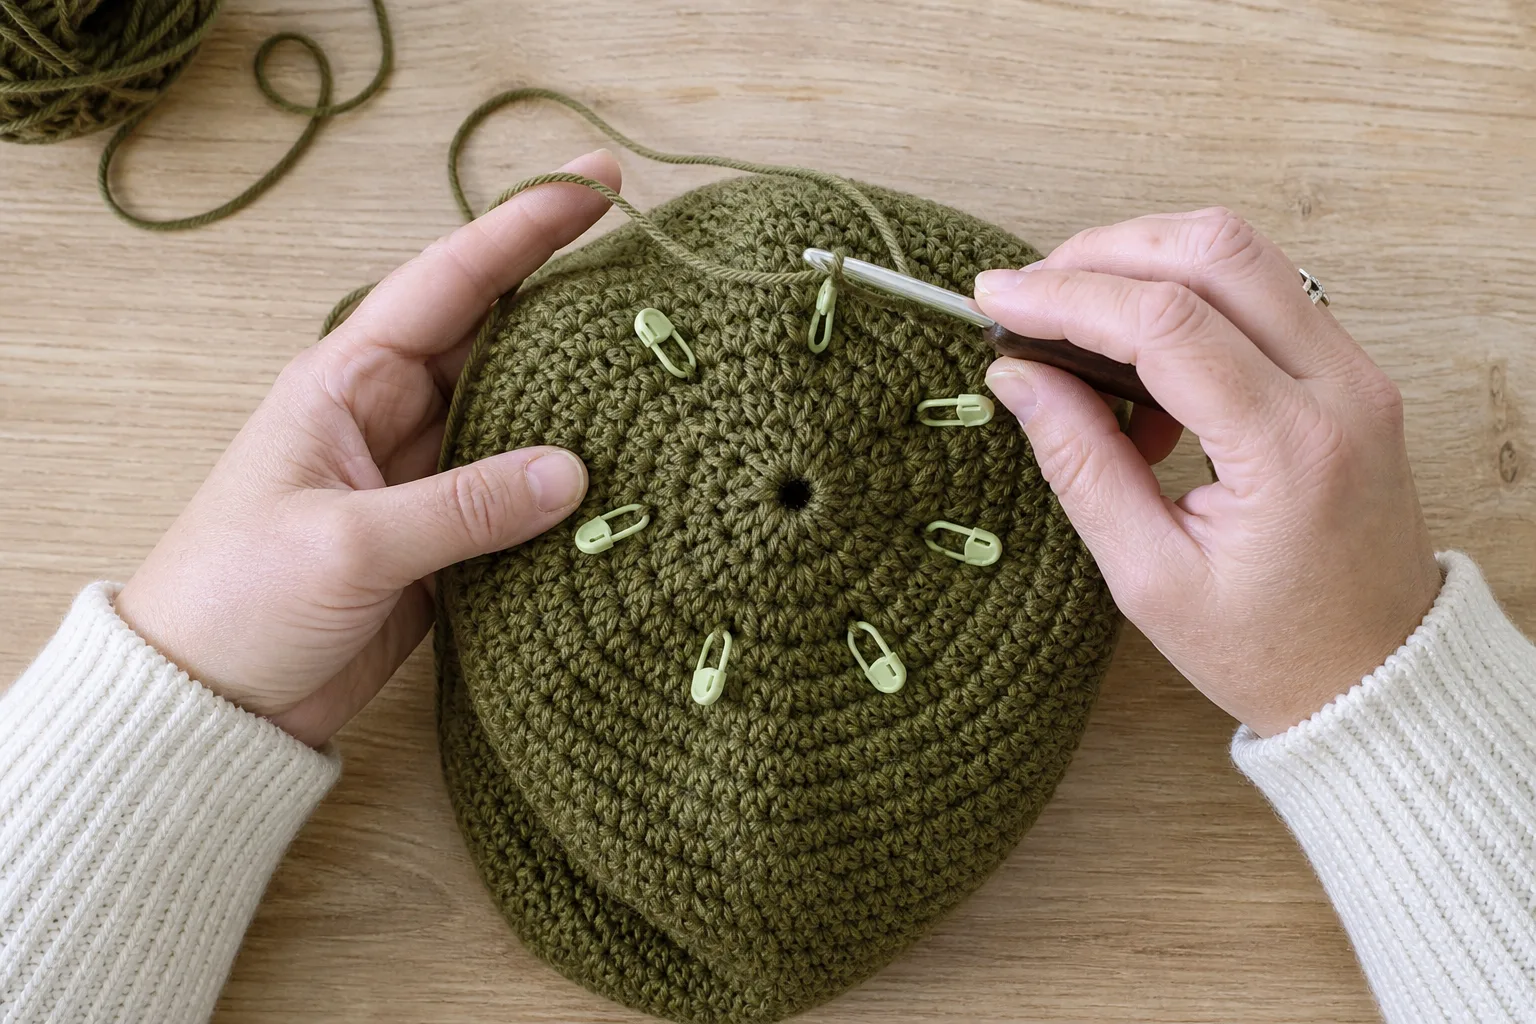
Keep the band unfolded. Mark the cuff seam. Count 24 rows and place the second marker; repeat until four equal 24-row quarters are marked.
The body needs 84 stitches, so each quarter receives 21 stitches. Each cuff quarter has 24 row-end spaces. Skip three row-end spaces in each quarter, distributing the skips instead of clustering them. One clear rhythm is to omit a pickup after approximately every sixth worked row-end space, checking that the quarter finishes with exactly 21 body stitches.
Using the body hook, attach yarn at the seam. Work 21 HDC evenly across the first quarter, then repeat in every quarter. Join to the first HDC: 84 HDC.
Count each quarter before continuing. If the body count is wrong, correct the pickup round now. Do not hide extra increases or decreases in the next round; that distorts the fit and makes crown shaping harder to audit.
Part 3: work the dense body to a measured height
Body Round: Ch 1, HDC in each stitch around, join to first HDC: 84 HDC.
Repeat the Body Round until the fabric measures about 3.67 inches / 9.3 cm from the cuff attachment. At the example gauge this is approximately 12 even rounds, but measure the fabric rather than obeying 12 when your round height says otherwise.
Open the cuff to its full depth and try the tube on before shaping. Fold 2.25 inches upward and check the lower edge against the intended point on the ears. The upper edge of the unfinished tube should also leave enough height for the calculated 3.08-inch taper. This is Checkpoint 2.
If the cuff reaches the ears but the upper tube seems short, add height before tapering. If the cuff does not reach the chosen lower point, verify that the fold is 2.25 inches and that the original crown-to-lower-edge measurement followed the head surface. Do not add random crown rounds after shaping has begun.
Part 4: shape a rounded crown
The 84-stitch body first aligns to 80, then decreases in eight sectors. Move a marker after every decrease and recount each round.
Alignment Round: Ch 1. Work 19 HDC, HDC2tog; repeat four times. Join: 80 stitches.
Decrease Round 1: Work 8 HDC, HDC2tog; repeat eight times: 72 stitches.
Decrease Round 2: Work 7 HDC, HDC2tog; repeat eight times: 64 stitches.
Continue the same logic, working one fewer plain HDC before each HDC2tog:
There are ten shaping rounds including the alignment round. At 3.25 rounds per inch, they occupy about 3.08 inches / 7.8 cm. When eight stitches remain, cut a long tail, thread it through the front loop of each remaining stitch, draw closed and secure on the inside without creating a hard knot at the crown.
If the fabric becomes difficult to manipulate near the top, change the final one or two rounds to SC decreases while preserving the planned count. The crown measurement and smooth closure matter more than forcing bulky HDC2tog stitches into a tiny opening.
Part 5: fold and secure the cuff
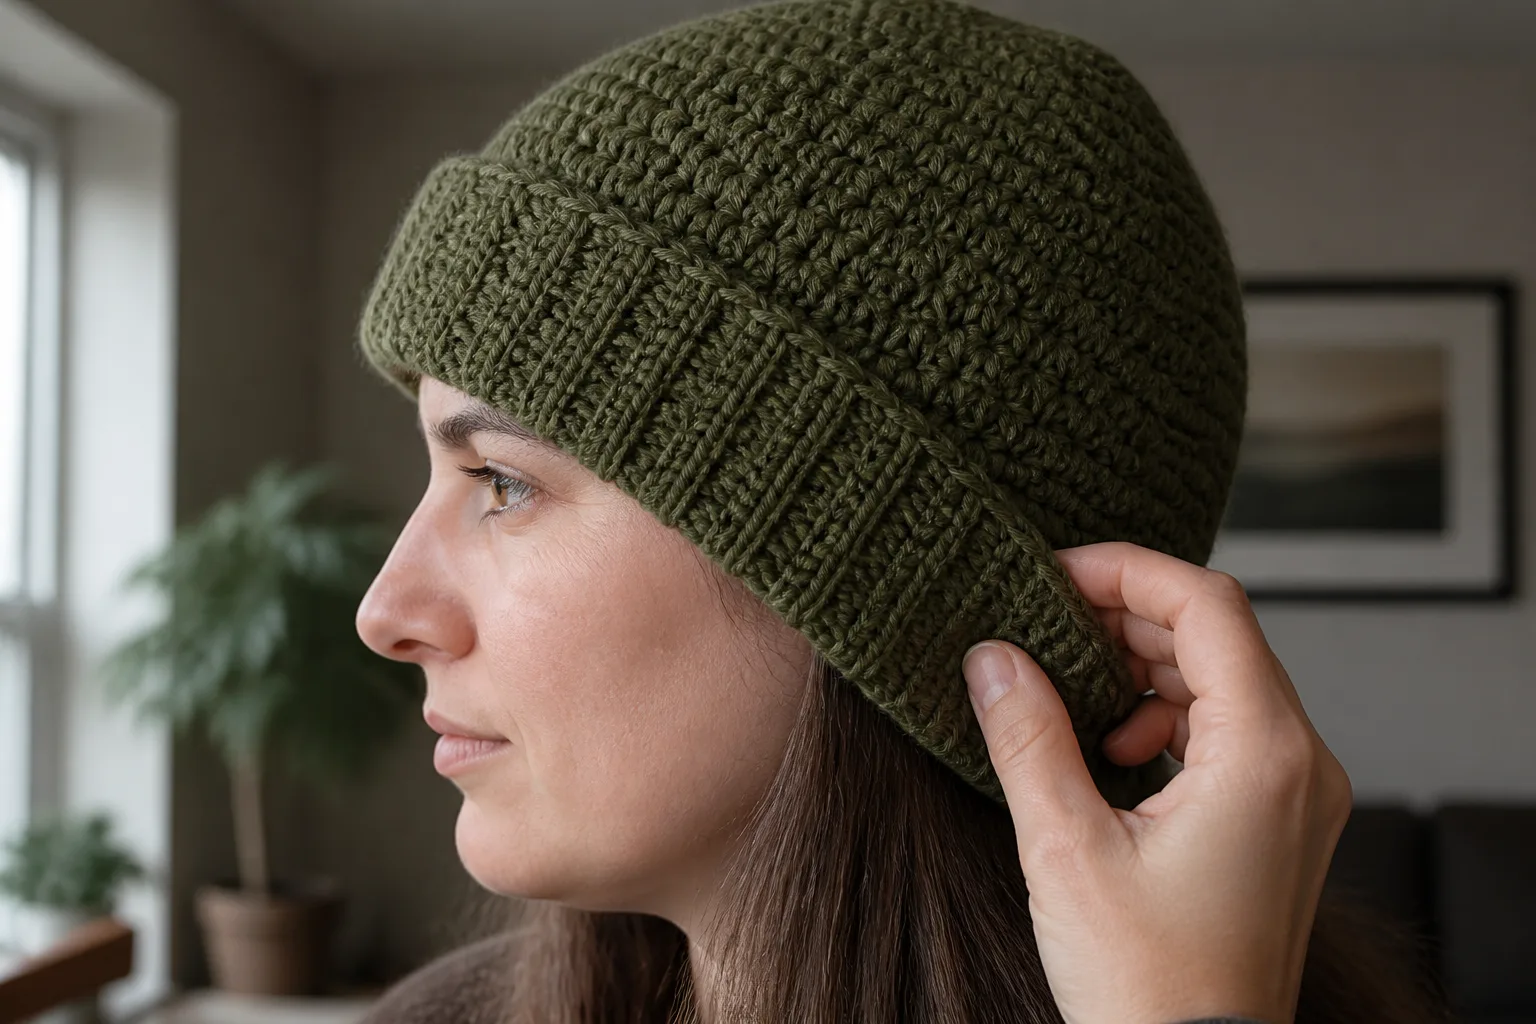
Wash or steam only as appropriate for the chosen yarn, then allow the hat to rest. Fold the lower half of the cuff to the outside so the visible fold measures 2.25 inches / 5.7 cm all around. Confirm that it reaches the intended lower-ear point on the wearer.
The fold can remain adjustable, or it can be secured at the seam and quarter points with a few elastic, unobtrusive stitches. Do not sew a rigid line around the full circumference unless the sewing method stretches with the ribbing. A non-stretch seam can make a comfortable cuff suddenly too small.
Checkpoint 3 is a movement check. Turn the head, look down and wear the hat for several minutes. The cuff should remain over the intended ear area without pressure, upward migration or a gap at the back neck. Comfort is a pass criterion, not a cosmetic extra.
Optional stretch ear-band lining
If the dense body passes but slight movement remains behind the doubled cuff, an ear-band liner may solve the relevant problem with less bulk than a full lining.
Use a stretch fabric whose greatest stretch runs around the head. Make a separate ring and baste it inside the doubled cuff. The liner should cover the ear zone without extending into the crown unless full lining is intentional. Try on the basted assembly before final sewing.
Do not cut the liner to the crochet shell’s relaxed circumference by assumption. Different fleece and knit fabrics stretch and recover differently. Fit the liner ring separately, keep its seam smooth, then attach it with a stitch that preserves stretch. If adding the liner makes the hat hard to pull on, leaves forehead pressure or reduces circulation, remove it and revise the liner. Warmth is not improved by turning a comfortable hat into a rigid band.
A full lining follows the same rule. Its stretch direction goes around the head, its depth is checked independently, and it is basted before final attachment. Consider leaving a small amount of ease between crown layers so the lining does not pull the crochet crown inward.
Four physical checkpoints that override the calculation
- Relaxed cuff ring: measured circumference and stretch over the head agree with the plan; seam is not rigid.
- Open tube before taper: folded cuff reaches the intended ear point and the remaining upper height equals the planned taper.
- Finished indoor fit: wearer can turn and bend without the cuff riding above the ears or creating pressure.
- Appropriate outdoor check: in mild, safe conditions, observe drafts, moisture and movement. Do not use hazardous weather to test a handmade hat.
The formula predicts from measurements. These checkpoints reveal yarn substitution, tension drift, seam stiffness, hair volume and individual comfort that equations cannot fully capture.
Troubleshooting by symptom
Wind is still easy to feel through the crown
Repeat the fan comparison on the finished fabric. If the tissue movement is obvious, make a denser comfortable swatch or add a properly fitted lining. Do not keep shrinking the hook until the hands hurt. Dense stitch structure, yarn behavior and lining all matter.
The cuff is tight but the body fits
The cuff row count, cuff seam or liner is the likely constraint. Check the ring’s physical circumference and seam stretch. Remove a rigid seam or liner before changing the body.
The body is tight but the cuff fits
Recheck body stitch gauge and the 84-stitch circumference. The body and cuff are independent systems. Add body stitches in a new pickup round or remake with a suitable gauge; do not stretch-block an uncomfortable dense fabric into submission.
The hat rides upward and exposes the ears
Check finished depth, not only circumference. The fold may be deeper than planned, the even body may be short, or the crown taper may have begun too early. A very tight lower band can also push upward.
The folded cuff does not reach the lower ear
Confirm the original crown-center-to-lower-edge measurement and the actual visible fold. If the whole hat is short, add body height before shaping on the next version. If only the fold is too deep, reduce the visible fold while preserving comfortable double coverage.
The crown is pointy
The taper is too tall for the circumference or the decreases are too gradual. Compare actual taper height with the calculated 3.08 inches. Working the final rounds in SC can reduce bulk, but a severely tall taper should be remade with fewer shaping rounds or more decreases per round.
The crown puckers
Decreases may be clustered or too abrupt. Mark eight sectors, distribute each decrease evenly and keep the working loop relaxed. A small amount of gathering at the final eight stitches is normal; large folds earlier are not.
The seam spirals or becomes obvious
Joined HDC rounds can shift. Keep the first stitch marked, join consistently and avoid counting the beginning chain. A controlled seam at the back is preferable to losing the count needed for accurate crown shaping.
The liner made the hat smaller
Check whether the liner’s greatest stretch runs around the head, whether its seam stretches and whether it was fit-tested as a separate ring. Remove and recut rather than forcing the wearer into the reduced circumference.
Hands hurt while trying to make the fabric dense
Stop and change the method. Try a different hook shape, a slightly larger hook with a denser stitch, shorter sessions or a lining. Pain is a failed process signal, not proof that the fabric is finally warm enough.
The wearer overheats or the hat becomes wet
Adjust layers and activity. A dense lined hat may be inappropriate for high exertion or mild conditions. Wetness changes comfort and heat loss. Carry a dry alternative when conditions require it.
Care and rechecking fit
Follow the yarn and lining care requirements. If their instructions conflict, use the more conservative method. Reshape the hat after washing and dry it fully before measuring. Recheck cuff circumference, folded depth and recovery after the first wash.
If the hat grows, record the new circumference and repeat the recovery span. A small elastic thread concealed through the inner cuff may refine a mildly relaxed band, but it should not rescue a structurally overgrown or damaged fabric. Replace or remake a hat whose fit, lining or seams no longer remain comfortable.
Frequently asked questions
How many stitches does an adult winter hat need?
There is no reliable universal number. Multiply the wearer’s target circumference by the washed body stitch gauge, then choose a compatible count and calculate the estimated circumference. In this example 84 stitches work because the gauge is 4 stitches per inch and the head is 22 inches—not because every adult needs 84.
Is wool automatically windproof?
No. Fiber influences warmth and moisture behavior, but stitch structure and gaps control air paths. Test the washed fabric rather than inferring wind resistance from the label.
Is a double brim warmer?
It adds a second layer around the ear and forehead zone, which can reduce direct air paths compared with one layer of the same fabric. The result still depends on density, fit, moisture and conditions.
Can I use single crochet for the body?
Yes, after making and washing a new swatch. Use its stitch and row gauge in the method and recalculate the count and taper height.
Can I add earflaps?
Earflaps change the lower-edge geometry and tie placement. This pattern focuses on a continuous folded cuff.
Must I line the whole hat?
No. If the issue is concentrated at the ears, a stretch ear-band lining can reduce bulk. Baste and fit-test any lining before final attachment.
Why do the cuff and body have different counts?
The cuff is measured in ribbing rows around the head. The body is measured in stitches around the head. Different stitches and directions create different gauges, so 96 cuff rows can correctly support 84 body stitches.
Does the fan test certify the hat as windproof?
No. It is a repeatable household comparison that exposes obvious differences between swatches. It supplies a stop/revise decision before the full project, not a performance rating.
What makes this article different
Most winter-hat patterns offer fixed sizes, a warm yarn suggestion, a dense stitch or a folded brim. This article connects the decisions that usually remain separate:
- two washed gauges produce two honest counts;
- personal crown-to-ear depth determines coverage after folding;
- taper height is subtracted before even rounds are planned;
- cuff pickups are distributed by quarter instead of assumed one-for-one;
- washed stretch and recovery are tested against estimated negative ease;
- moving air is screened before the full hat;
- lining is treated as its own stretch-and-fit system;
- cold-weather limitations are stated without inventing a temperature rating.
The result is not one “correct adult winter hat.” It is a method for turning the wearer, the washed fabric and the intended conditions into a plan that can be checked before, during and after construction.
References