
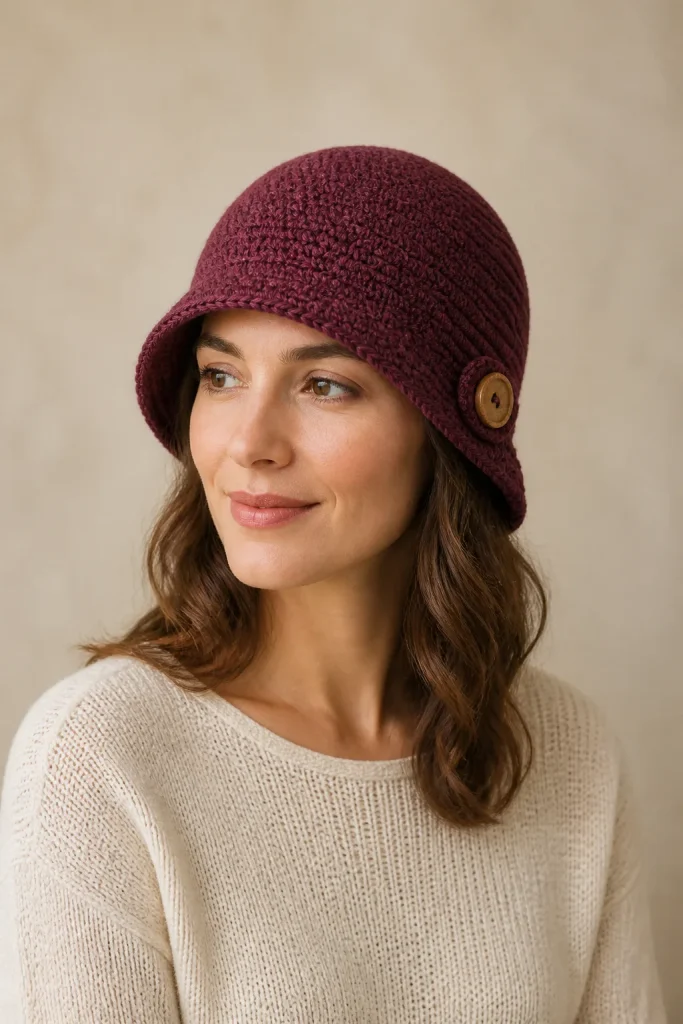
Fit the bell line, keep the eyes clear, and control the lower sweep
A crochet cloche is not simply a beanie with more stitches at the edge. Its close shell must sit low, then release into a short bell-shaped sweep at the right point on the wearer.
What Makes a Cloche Different From a Bucket Hat?
A cloche has a deep, rounded crown that follows the head and sits low over the forehead. Its lower edge is short and face-framing. A bucket hat usually has a more cylindrical crown and a distinct projected brim. In crochet, the difference comes from fit, transition position, and edge gain—not from the word used in the pattern title.
This pattern makes a close-fitting adult cloche with a restrained bell-shaped edge. For a general flat, angled, or wavy brim, use the Crochet Hat With Brim guide. For deliberate ruffles, use the Crochet Ruffle Hat Pattern guide. For a short bucket-hat silhouette, use the Easy Crochet Bucket Hat Pattern guide.
Project Specification and Limits
- Construction: one-piece, top-down, joined and turned rounds
- Main stitch: half double crochet
- Fit: 4–6% negative ease after washing, subject to fabric recovery
- Lower-sweep gain: 10–15% above the fitted shell count
- Lower-sweep depth: approximately 1.5–2 in (3.8–5.1 cm)
- Skill level: confident beginner to intermediate
- Terms: standard US crochet terms
The number ranges are starting envelopes, not guarantees. Hair volume, fiber recovery, stitch texture, preferred forehead coverage, and sensitivity to pressure all change the result. The three wearer checks in this article override a nominal size label.
Materials and US Terms
- Medium-weight yarn is a practical starting point. For an adult project, plan approximately 220–280 yd (201–256 m) as a purchasing range. Fiber, size, gauge, sweep depth, and decoration change actual use.
- Crochet hook that produces a dense but recoverable washed fabric. A 5 mm hook is only a starting point for the 22-inch worked-example gauge.
- A second hook 0.5 mm larger if the magic ring or first round is tight.
- Flexible tape measure, removable stitch markers, yarn needle, scissors, and four temporary sector markers.
- Optional: one matte button approximately 1 in (25 mm) wide for the decorative side tab.
US abbreviations: ch chain, hdc half double crochet, sc single crochet, sl st slip stitch, st(s) stitch(es), inc increase, RS right side, and WS wrong side.
The beginning chain does not count as a stitch. Join with a slip stitch in the first hdc. Turn after every joined round so the fabric surface and seam remain balanced.
Make and Wash the Gauge Sample
Make a joined, turned hdc tube with the same yarn, hook, joining method, and intended care method as the hat. The sample must be large enough to measure away from the join.
- Wash and dry the sample as you will care for the finished hat.
- Measure at least 4 in (10 cm) horizontally and divide to find washed stitches per inch or centimeter.
- Measure several full rounds vertically and divide to find washed rounds per inch or centimeter.
- Stretch the tube around a curved surface for ten seconds, release it, and observe recovery.
- Choose only the negative ease that feels comfortable and lets the fabric return close to its relaxed width.
If the fabric stays stretched, opens into large gaps, or leaves a deep pressure mark, change the hook or ease and make a new sample before calculating the hat.
The Bell-Line Fit Map
Use one unit throughout each calculation.
| Symbol | Meaning | How to obtain it |
|---|---|---|
| H | Head circumference at the intended wear line | Measure the wearer |
| e | Chosen negative ease as a decimal | Washed recovery check |
| g_s | Washed stitches per unit | Gauge tube |
| g_r | Washed rounds per unit | Gauge tube |
| m | Legal repeat multiple | Use 4 for this pattern |
| L | Crown-center-to-transition depth | Mark on the wearer |
| b | Desired lower-sweep depth | Choose 1.5–2 in (3.8–5.1 cm) |
| f | Edge-gain rate | Choose 0.10–0.15 |
Calculate the fitted shell:
target shell circumference C = H × (1 − e)
raw shell count S_raw = C × g_s
usable shell count S = S_raw rounded to the nearest multiple of m
Verify the rounding:
actual shell circumference C_a = S ÷ g_s
estimated negative ease = (H − C_a) ÷ H
Calculate the wearer-position plan:
transition-round estimate R_t = L × g_r, rounded to a whole round
This is a planning estimate. Crown geometry and stitch height can drift. The tape measurement on the actual hat is the final authority.
Calculate the restrained lower sweep:
raw edge count E_raw = S × (1 + f)
usable edge count E = a nearby multiple of m that keeps the actual gain inside the 10–15% envelope
actual edge gain = (E − S) ÷ S
total added stitches A = E − S
increase rounds q = A ÷ 4
lower-sweep rounds R_b = b × g_r, rounded to a whole round
Check the legal multiples on both sides of E_raw. If the ordinary nearest multiple pushes actual gain above 15% or below 10%, choose the adjacent legal count that stays inside the envelope. The pattern adds four stitches on each increase round. Spread q increase rounds as evenly as possible through R_b. If q is greater than R_b, the chosen edge gain is too large for this short sweep; reduce f or add depth rather than stacking multiple increases in one round.
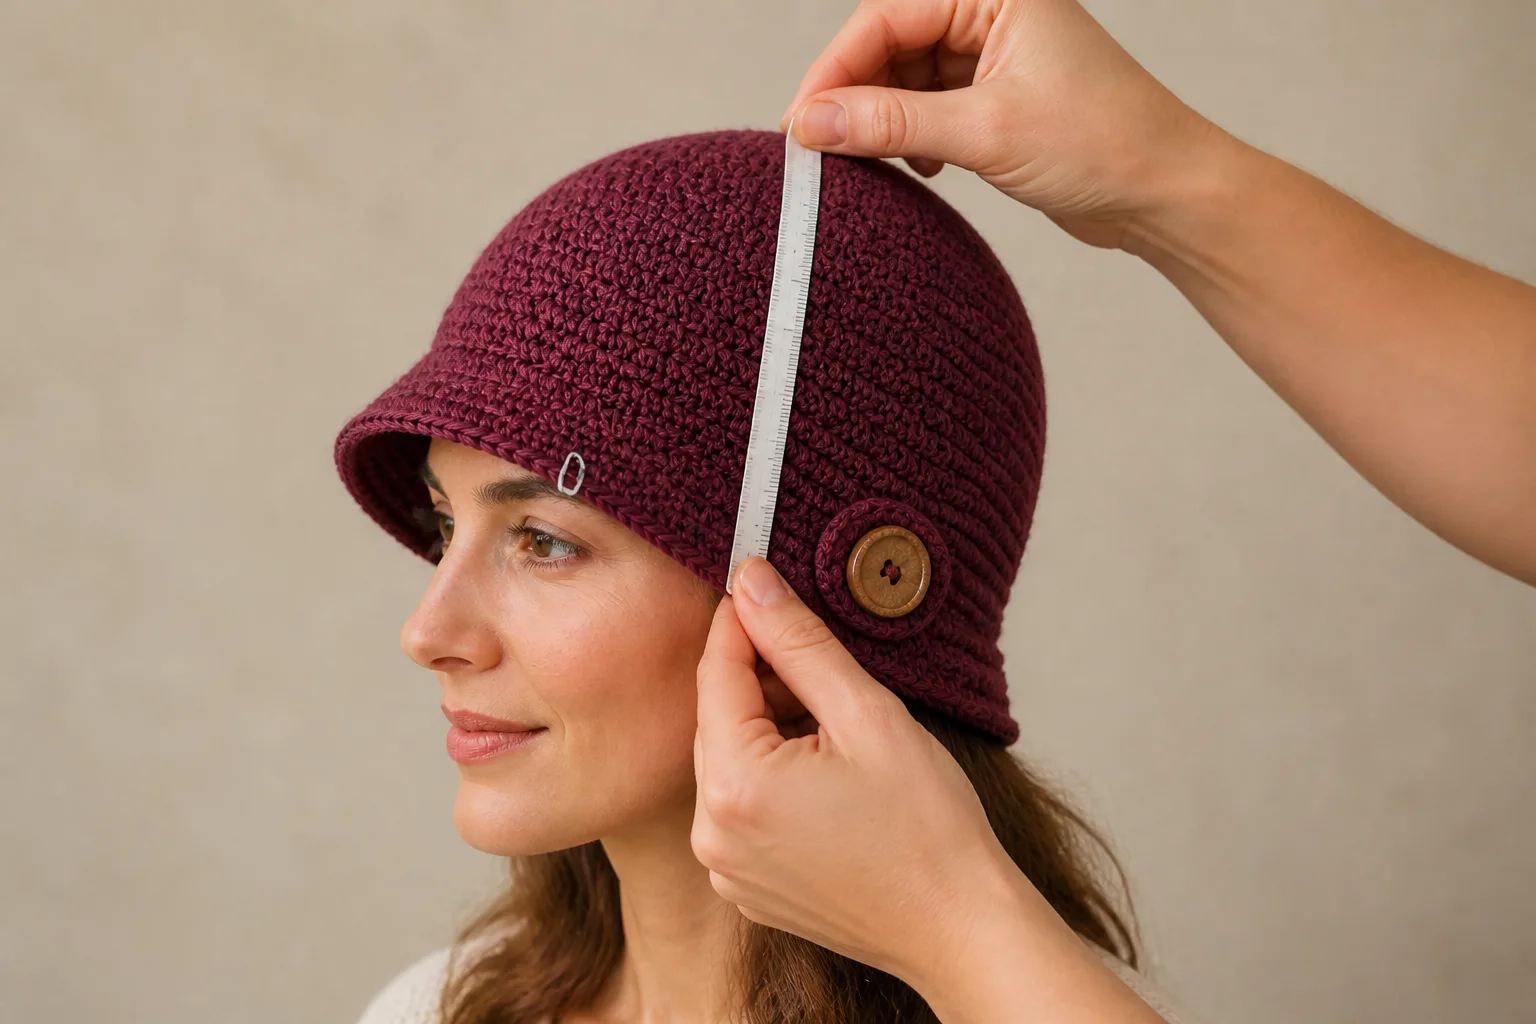
Worked Example: 22-Inch Head
A 22 in (55.9 cm) head uses 6% ease, washed gauge of 16 hdc and 12 rounds per 4 in (10 cm), and a repeat multiple of 4.
- g_s = 4 sts/in; g_r = 3 rounds/in
- C = 22 × 0.94 = 20.68 in (52.5 cm)
- S_raw = 20.68 × 4 = 82.72 sts
- nearest multiple of 4: S = 84 sts
- C_a = 84 ÷ 4 = 21 in (53.3 cm)
- estimated negative ease = (22 − 21) ÷ 22 = 4.5%
The wearer marks L at 7.25 in (18.4 cm):
- R_t = 7.25 × 3 = 21.75, or approximately 22 rounds from the crown center
For a 12% lower-sweep gain and 1.75 in (4.4 cm) depth:
- E_raw = 84 × 1.12 = 94.08 sts
- nearest multiple of 4: E = 96 sts
- A = 96 − 84 = 12 added sts
- actual edge gain = 12 ÷ 84 = 14.3%
- q = 12 ÷ 4 = 3 increase rounds
- R_b = 1.75 × 3 = 5.25, or 5 lower-sweep rounds
The worked-example count ledger is 84 → 88 → 88 → 92 → 92 → 96.
Complete Top-Down Crochet Cloche Pattern
Build the Crown Toward the Calculated Shell Count
Make a magic ring.
Round 1 (RS): Ch 1, work 8 hdc in the ring, sl st in the first hdc to join. Turn. 8 hdc.
Round 2 (WS): Ch 1, 2 hdc in each st around, join. Turn. 16 hdc.
Round 3: Ch 1, [hdc in next st, 2 hdc in next st] eight times, join. Turn. 24 hdc.
Round 4: Ch 1, [hdc in next 2 sts, 2 hdc in next st] eight times, join. Turn. 32 hdc.
Continue the same eight-sector sequence, working one more plain hdc between increases on each new full increase round. Move the start of each sector by one or two stitches on alternating rounds so the increases do not stack into eight visible corners.
Measure the relaxed crown after each round. Its target flat diameter is approximately:
target crown diameter D = C_a ÷ 3.1416
For the 22-inch worked example, D = 21 ÷ 3.1416 = 6.68 in (17 cm).
Stop the full eight-increase sequence when the crown is within approximately 0.25 in (6 mm) below D. Count the stitches as K.
- If K equals S, begin the shell.
- If K is below S by eight stitches or fewer, work one shaping round with S − K increases distributed evenly.
- If K is below S by more than eight, distribute the correction across two rounds.
- If K is above S, undo the last crown round and replace it with a partial increase round. Do not decrease immediately after an oversized crown; that creates a ridge and does not repair the diameter.
For the 22-inch worked example, a crown reaching the target diameter near 80 stitches uses one partial shaping round with four increases to reach S = 84.
Work the Close Shell
Shell Round: Ch 1, hdc in each of the S stitches around, join. Turn. S hdc.
Repeat the Shell Round until the center top reaches the calculated transition depth L or the planned round estimate R_t, whichever is reached first. Put the hat on the wearer before beginning the lower sweep.
Pass the Shell-Hold Gate
The shell passes only when all four statements are true:
- it sits low without sliding upward;
- it feels secure without pain, a deep mark, or stretched-open stitches;
- the center top touches the crown without a hollow point or a tight ridge;
- the marked transition line sits at the intended forehead and temple level.
If circumference is wrong, return to S. If only the transition sits too high or low, add or remove even Shell Rounds. Do not use the lower sweep to repair a loose shell.
Work the Restrained Lower Sweep
Place four sector markers evenly around the S-stitch round. On each increase round, add one stitch inside each sector, shifting the increase position by several stitches from the previous increase round.
For the 22-inch worked example:
Sweep Round 1: Ch 1. Working in the back loop only, [hdc in next 20 sts, 2 hdc in next st] four times, join. Turn. 88 hdc.
Sweep Round 2: Ch 1, hdc in each st around, join. Turn. 88 hdc.
Sweep Round 3: Ch 1, [hdc in next 21 sts, 2 hdc in next st] four times, join. Turn. 92 hdc.
Sweep Round 4: Ch 1, hdc in each st around, join. Turn. 92 hdc.
Sweep Round 5: Ch 1, [hdc in next 22 sts, 2 hdc in next st] four times, join. Turn. 96 hdc.
For another size, each increase round adds four stitches. If the current count is X, work one increase per quarter: hdc in the next (X ÷ 4 − 1) stitches, then 2 hdc in the next stitch; repeat four times.
Stabilize the Edge
Try on the hat before adding a finishing round. If the lower edge already has the intended depth and flexibility, fasten off after Sweep Round 5.
For a firmer edge, work one round of sc without increases. Join, fasten off, and weave in the ends. Do not add an automatic wire or stiffener: this short cloche edge should follow the face, and a structural insert changes the design problem.
Add the Optional Side Tab
Chain 11.
Tab Row 1: Sc in the second chain from the hook and in each chain across. Turn. 10 sc.
Tab Rows 2–3: Ch 1, sc in each stitch across. Turn. 10 sc.
Fasten off with a sewing tail. Place the tab above one temple so it crosses only the lower sweep, not the fitted shell. Sew both short ends securely. Sew the button through the tab and hat fabric; the button is decorative and does not control fit.
Three Acceptance Gates
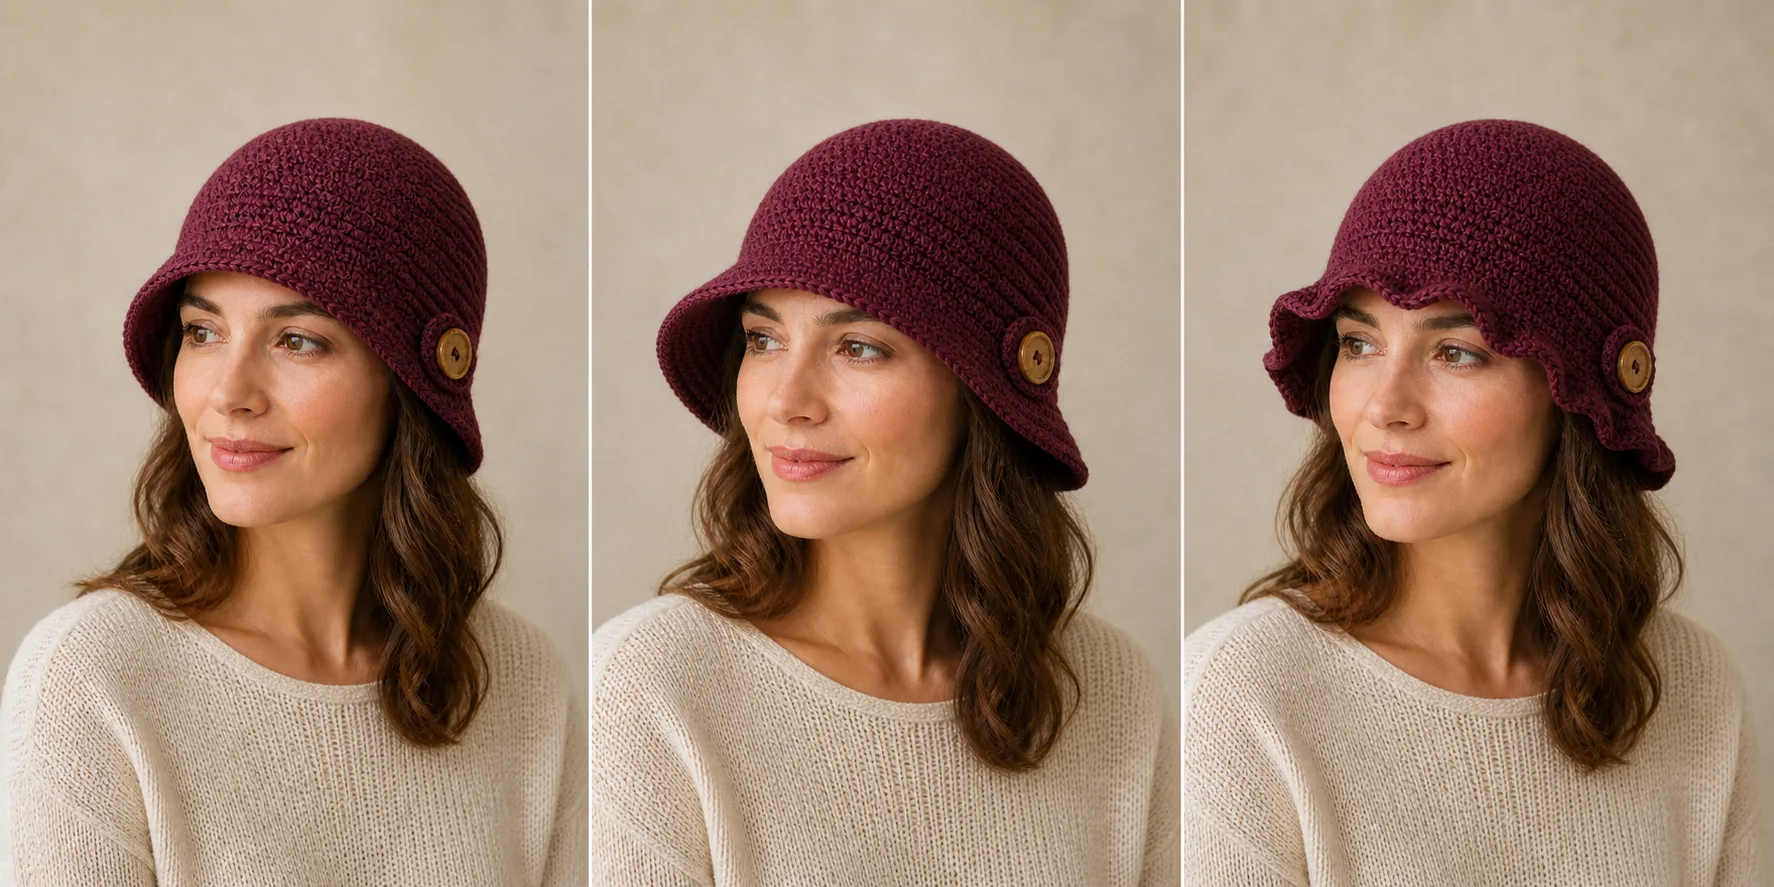
Gate 1: Shell Hold
Pass: the shell stays low during a gentle head turn, feels secure without pressure, and recovers after removal.
Correction: recalculate S from the verified washed gauge. Changing sweep stitches cannot repair a loose or painful shell.
Gate 2: Bell-Line Position
Pass: the first sweep round begins at the wearer-marked level near the forehead and temples; the crown remains close above it.
Correction: remove or add even Shell Rounds. A transition that begins too early makes the hat look round and loose; one that begins too late can hide the eyes.
Gate 3: Worn Sweep and Eye Clearance
Pass: both eyes and the lower eyebrow line remain visible, the edge frames rather than projects, and no repeated waves appear between the four sectors.
Correction: if waves appear, undo the most recent increase round and replace it with an even round. If the edge cups inward, add one planned four-stitch increase round only if the 15% gain ceiling and eye-clearance check still pass.
Worked Example: 20-Inch Head
This second case shows why the legal repeat and estimated ease must be checked after rounding.
A 20 in (50.8 cm) head uses 5% ease and a washed gauge of 14 hdc and 11 rounds per 4 in (10 cm).
- g_s = 3.5 sts/in; g_r = 2.75 rounds/in
- C = 20 × 0.95 = 19 in (48.3 cm)
- S_raw = 19 × 3.5 = 66.5 sts
- nearest multiple of 4: S = 68 sts
- C_a = 68 ÷ 3.5 = 19.43 in (49.4 cm)
- estimated negative ease = (20 − 19.43) ÷ 20 = 2.9%
The rounding reduced the planned ease from 5% to 2.9%. Accept 68 stitches only if the washed recovery check and Shell-Hold Gate pass. If the fabric is too loose, 64 stitches produce 18.29 in (46.4 cm), or 8.6% negative ease, which may be too firm; a different hook or fabric may be the better correction.
With L = 6.75 in (17.1 cm), f = 15%, and b = 1.75 in (4.4 cm):
- R_t = 6.75 × 2.75 = 18.56, or approximately 19 rounds
- E_raw = 68 × 1.15 = 78.2 sts
- the ordinary nearest multiple is 80, but (80 − 68) ÷ 68 = 17.6%, above the 15% ceiling
- boundary-safe E = 76 sts; actual edge gain = 8 ÷ 68 = 11.8%
- A = 8 sts; q = 2 increase rounds
- R_b = 1.75 × 2.75 = 4.81, or 5 lower-sweep rounds
Spread the two increase rounds apart. One valid five-round ledger is 68 → 72 → 72 → 72 → 76 → 76. The method transfers; the counts do not.
Troubleshooting: Fix the Right Variable
| Symptom | Likely cause | Minimum correction | Return point |
|---|---|---|---|
| Hat rides upward | S is too small, transition is too low, or hair volume was not included | Recheck washed recovery and head measurement; correct shell before sweep | Shell calculation |
| Shell rotates or feels loose | S is too large or fabric did not recover after washing | Recalculate estimated ease and choose a verified fabric/count | Shell calculation |
| Crown forms eight corners | Increases stacked in the same locations | Stagger sector starts on future rounds; reshape gently after washing | Crown rounds |
| Crown has a ridge before shell | Oversized crown was followed by decreases | Undo to the last correct crown round and use a partial increase round | Crown shaping |
| Transition begins above the temples | Too few even Shell Rounds | Add even rounds and repeat the wearer measurement | Bell-line gate |
| Brim hides the eyes | Transition is too low or sweep is too deep | Remove shell or sweep rounds; repeat eye-clearance check | Bell-line / sweep |
| Lower edge is wavy | Increase rounds are too frequent, gauge changed, or f is too high | Replace the latest increase round with an even round; recount | Sweep ledger |
| Lower edge cups inward | Too few added stitches for the fabric | Add one four-stitch increase round within the 15% ceiling | Sweep ledger |
| Sweep collapses against face | Fabric is too soft for the chosen depth | Shorten the sweep or make a denser washed fabric | Gauge / sweep depth |
| Side tab pulls the hat | Tab or button stitches are too tight | Reseat the tab as decoration without shortening the circumference | Finishing |
Blocking can refine a structurally correct edge. It cannot reliably erase an excessive increase rate or repair the wrong shell count.
Final Acceptance Checklist
- The washed hat matches the recorded finished shell circumference.
- The shell stays low without pressure, rolling, or sliding upward.
- The crown is rounded, not faceted, pointed, or ridged.
- The bell line begins at the accepted wearer-marked depth.
- The lower edge gains no more than the chosen 10–15%.
- Both eyes remain fully visible from the front and three-quarter views.
- No repeated waves or inward cups appear between sectors.
- The side tab, if used, is decorative and does not distort the fit.
- All ends are secure, and the hat is reshaped using the same care method as the gauge sample.
Frequently Asked Questions
Can I turn this into a bucket hat?
You can change the construction, but that becomes a different silhouette. A bucket hat normally uses a more cylindrical crown and a distinct projected brim. Use the Easy Crochet Bucket Hat Pattern guide for a complete bucket-hat route rather than extending this cloche sweep until the boundary disappears.
Why does my cloche look like a ruffle hat?
The lower edge probably gained stitches too quickly. Recount the last correct shell round, compare the edge count with S, and undo the most recent increase round. This design stops at 10–15% gain; deliberate ruffles require the separate fullness method in the Crochet Ruffle Hat Pattern guide.
Should a cloche cover my eyebrows?
The style sits low, but the safe and useful acceptance point is wearer-specific. Set the transition and final depth while the wearer can see clearly. Both eyes should remain unobstructed, and the edge should not press into the eye area when the head turns.
Can I use single crochet instead of half double crochet?
Yes, after making and washing a new in-the-round sample. Single crochet changes both stitch and round gauge and usually creates a firmer fabric. Recalculate S, R_t, E, and R_b; do not reuse the hdc counts.
Will blocking fix a wavy brim?
Blocking may smooth small irregularities after the count and increase spacing are correct. Persistent repeated waves usually indicate excessive stitch gain or a gauge change. Correct the latest structural error before relying on blocking.
Can I make the lower sweep longer?
Yes, within the wearer’s eye-clearance and fabric-support limits. Add even rounds before adding more increases. A longer edge with the same 10–15% gain becomes softer; a longer edge with repeated increases can cross into a projected brim or ruffle.
Save Your Finished-Hat Record
Keep H, e, g_s, g_r, S, C_a, estimated ease, measured finished shell circumference and ease calculated from that measurement, L, R_t, f, E, q, R_b, final hook, yarn, care method, and the result of each acceptance gate. That record explains the fit checks and makes the next version faster to reproduce.