
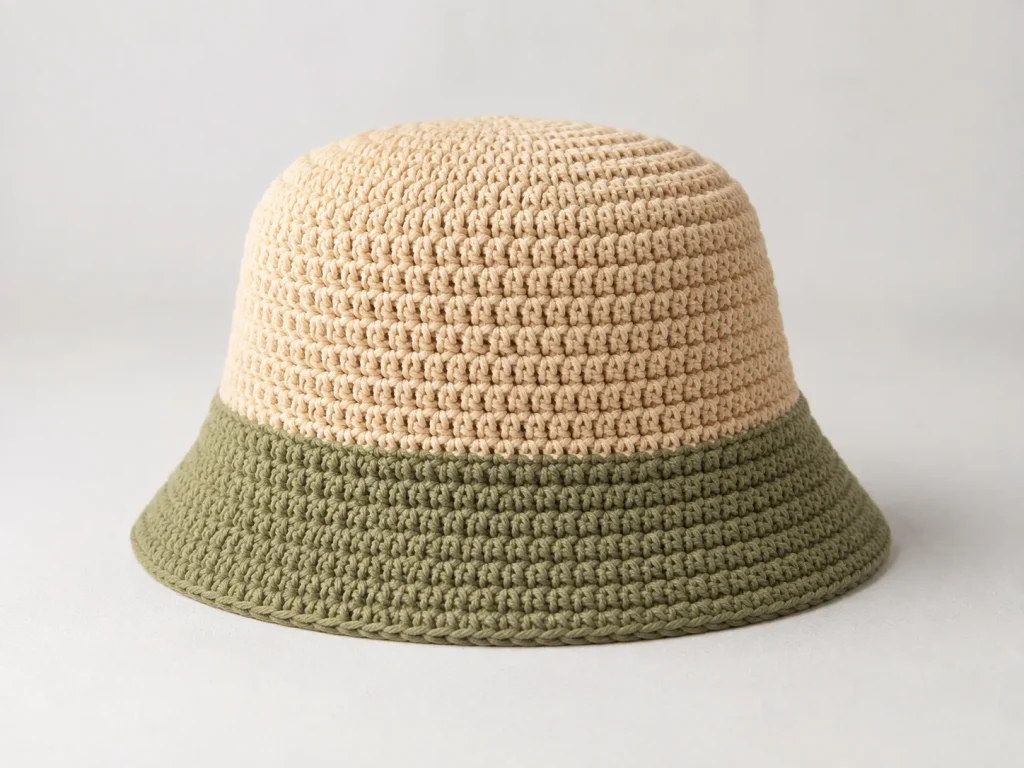
A bucket hat looks simple, but small differences in yarn, hook size, and crochet tension can change the fit quickly. This beginner-friendly, calculation-based pattern uses three checkpoints so you can measure as you go instead of relying on a size label alone.
Print PDF: free bucket hat pattern or choose one complete stitch-count route.
The hat is worked from the top down in three sections: crown, sides, and brim. You will get five calculated starting options, inch and centimeter measurements, clear adjustment rules, and troubleshooting guidance.
Start this bucket hat pattern
- Choose your starting count. Measure the wearer and compare it with the five calculated options. Check the finished circumference against your own gauge.
- Check your supplies and gauge. Review the materials and make a swatch using the 15 sc per 4 in / 10.16 cm target. Change hook size if your swatch differs.
- Begin the crown. Make a magic ring, work 6 single crochet stitches into it, and continue with Round 2 onward. Stop increasing at the count that matches your measured target.
The five counts are calculated starting options, not fixed age sizes. Recheck the crown diameter and fit before making the brim.
Follow one bucket-hat option from crown to brim
Choose the row whose estimated body circumference is closest to your target at your measured gauge. The numbers below assume the article’s 15 single crochet stitches per 4 in target. They are calculation routes, not age sizes or measured finished hats. If your gauge differs, recalculate before following a row.
On a phone, scroll the table sideways to see the brim counts.
| Crown count | Stop crown after | Estimated body / crown diameter | Sides | Brim rounds 1 → 2 |
|---|---|---|---|---|
| 72 sts | Round 12 | 19.2 in / 6.1 in | 72 sc each round | 78 → 84 sts |
| 78 sts | Round 13 | 20.8 in / 6.6 in | 78 sc each round | 84 → 90 sts |
| 84 sts | Round 14 | 22.4 in / 7.1 in | 84 sc each round | 90 → 96 sts |
| 90 sts | Round 15 | 24.0 in / 7.6 in | 90 sc each round | 96 → 102 sts |
| 96 sts | Round 16 | 25.6 in / 8.1 in | 96 sc each round | 102 → 108 sts |
Start at Round 1, stop the crown at your row’s round and check its diameter. Work the side rounds without increases until your chosen depth; then use the brim instructions for that same row. The table is a route map; the linked sections contain the actual stitch repeats and the fit checkpoints.
Choose your stitch count and follow one complete route
Use your head measurement and gauge to choose a count from the table above. This reader brings the crown, sides and brim for that count together, so you do not have to switch between five lists.
Calculation gauge: 15 sc and 16 rounds per 4 in / 10.16 cm. Dimensions below are estimates from that gauge, not measured finished sizes or age labels. The 84-stitch route is shown first as an example; choose your own count.
Open the count you need below. Each route includes the complete crown and brim sequence.
Download the free 6-page bucket hat pattern PDF – supplies and notes on page 1; one complete count route on each following page. No sign-up required.
72-stitch route – estimated circumference 19.2 in / 48.8 cm
Estimated crown diameter: 6.1 in / 15.5 cm. Stop crown increases after Round 12, then measure your crown before starting the sides.
Crown: start at Round 1
| Round | Instruction | End count |
|---|---|---|
| 1 | Make a magic ring; work 6 sc into it. Place a marker in the first stitch. | 6 sts |
| 2 | Work 2 sc into each stitch around. | 12 sts |
| 3 | *Sc in next 1 st, inc in next st; repeat from * 6 times. | 18 sts |
| 4 | *Sc in next 2 sts, inc in next st; repeat from * 6 times. | 24 sts |
| 5 | *Sc in next 3 sts, inc in next st; repeat from * 6 times. | 30 sts |
| 6 | *Sc in next 4 sts, inc in next st; repeat from * 6 times. | 36 sts |
| 7 | *Sc in next 5 sts, inc in next st; repeat from * 6 times. | 42 sts |
| 8 | *Sc in next 6 sts, inc in next st; repeat from * 6 times. | 48 sts |
| 9 | *Sc in next 7 sts, inc in next st; repeat from * 6 times. | 54 sts |
| 10 | *Sc in next 8 sts, inc in next st; repeat from * 6 times. | 60 sts |
| 11 | *Sc in next 9 sts, inc in next st; repeat from * 6 times. | 66 sts |
| 12 | *Sc in next 10 sts, inc in next st; repeat from * 6 times. | 72 sts |
Sides: keep the same count
Work 1 sc into every stitch around: 72 sts each round. Continue without increases until the distance from the center top to the lower edge is about 6.25-6.75 in / 16-17 cm, or until your chosen depth. This is a starting range, not a fixed size. Check the wearer and the in-progress hat before making the brim; adjust side depth separately from circumference.
Brim: follow only this route
Work Brim Round 1 in FLO. Work later rounds through both loops. Each listed increase round adds 6 stitches. Eight rounds at the example row gauge calculate to about 2 in / 5.08 cm of brim; stop earlier if needed and check the shape every couple of rounds.
| Round | Instruction | End count |
|---|---|---|
| 1 | *Sc in next 11 sts, inc in next st; repeat from * 6 times. | 78 sts |
| 2 | *Sc in next 12 sts, inc in next st; repeat from * 6 times. | 84 sts |
| 3 | *Sc in next 13 sts, inc in next st; repeat from * 6 times. | 90 sts |
| 4 | *Sc in next 14 sts, inc in next st; repeat from * 6 times. | 96 sts |
| 5 | *Sc in next 15 sts, inc in next st; repeat from * 6 times. | 102 sts |
| 6 | *Sc in next 16 sts, inc in next st; repeat from * 6 times. | 108 sts |
| 7 | *Sc in next 17 sts, inc in next st; repeat from * 6 times. | 114 sts |
| 8 | *Sc in next 18 sts, inc in next st; repeat from * 6 times. | 120 sts |
Shape check: if the brim starts to ruffle, stop and recount; undo the last increase round or work an even round before increasing again. If you insert an even round, its stitch count stays unchanged: recalculate the next increase repeat from your current count rather than advancing the table by a round.
Finish and check
When the brim reaches your chosen width, sl st into the next stitch. Cut the yarn with a tail long enough to weave in securely, pull through and weave in the ends. Shape gently; follow the yarn label for care. Confirm the hat fits comfortably. If the crown is the wrong circumference, changing side depth or brim width will not fix it.
Open this 72-stitch route on PDF page 2. Read page 1 for supplies, terms and gauge notes.
78-stitch route – estimated circumference 20.8 in / 52.8 cm
Estimated crown diameter: 6.6 in / 16.8 cm. Stop crown increases after Round 13, then measure your crown before starting the sides.
Crown: start at Round 1
| Round | Instruction | End count |
|---|---|---|
| 1 | Make a magic ring; work 6 sc into it. Place a marker in the first stitch. | 6 sts |
| 2 | Work 2 sc into each stitch around. | 12 sts |
| 3 | *Sc in next 1 st, inc in next st; repeat from * 6 times. | 18 sts |
| 4 | *Sc in next 2 sts, inc in next st; repeat from * 6 times. | 24 sts |
| 5 | *Sc in next 3 sts, inc in next st; repeat from * 6 times. | 30 sts |
| 6 | *Sc in next 4 sts, inc in next st; repeat from * 6 times. | 36 sts |
| 7 | *Sc in next 5 sts, inc in next st; repeat from * 6 times. | 42 sts |
| 8 | *Sc in next 6 sts, inc in next st; repeat from * 6 times. | 48 sts |
| 9 | *Sc in next 7 sts, inc in next st; repeat from * 6 times. | 54 sts |
| 10 | *Sc in next 8 sts, inc in next st; repeat from * 6 times. | 60 sts |
| 11 | *Sc in next 9 sts, inc in next st; repeat from * 6 times. | 66 sts |
| 12 | *Sc in next 10 sts, inc in next st; repeat from * 6 times. | 72 sts |
| 13 | *Sc in next 11 sts, inc in next st; repeat from * 6 times. | 78 sts |
Sides: keep the same count
Work 1 sc into every stitch around: 78 sts each round. Continue without increases until the distance from the center top to the lower edge is about 6.25-6.75 in / 16-17 cm, or until your chosen depth. This is a starting range, not a fixed size. Check the wearer and the in-progress hat before making the brim; adjust side depth separately from circumference.
Brim: follow only this route
Work Brim Round 1 in FLO. Work later rounds through both loops. Each listed increase round adds 6 stitches. Eight rounds at the example row gauge calculate to about 2 in / 5.08 cm of brim; stop earlier if needed and check the shape every couple of rounds.
| Round | Instruction | End count |
|---|---|---|
| 1 | *Sc in next 12 sts, inc in next st; repeat from * 6 times. | 84 sts |
| 2 | *Sc in next 13 sts, inc in next st; repeat from * 6 times. | 90 sts |
| 3 | *Sc in next 14 sts, inc in next st; repeat from * 6 times. | 96 sts |
| 4 | *Sc in next 15 sts, inc in next st; repeat from * 6 times. | 102 sts |
| 5 | *Sc in next 16 sts, inc in next st; repeat from * 6 times. | 108 sts |
| 6 | *Sc in next 17 sts, inc in next st; repeat from * 6 times. | 114 sts |
| 7 | *Sc in next 18 sts, inc in next st; repeat from * 6 times. | 120 sts |
| 8 | *Sc in next 19 sts, inc in next st; repeat from * 6 times. | 126 sts |
Shape check: if the brim starts to ruffle, stop and recount; undo the last increase round or work an even round before increasing again. If you insert an even round, its stitch count stays unchanged: recalculate the next increase repeat from your current count rather than advancing the table by a round.
Finish and check
When the brim reaches your chosen width, sl st into the next stitch. Cut the yarn with a tail long enough to weave in securely, pull through and weave in the ends. Shape gently; follow the yarn label for care. Confirm the hat fits comfortably. If the crown is the wrong circumference, changing side depth or brim width will not fix it.
Open this 78-stitch route on PDF page 3. Read page 1 for supplies, terms and gauge notes.
84-stitch route – estimated circumference 22.4 in / 56.9 cm
Estimated crown diameter: 7.1 in / 18.1 cm. Stop crown increases after Round 14, then measure your crown before starting the sides.
Crown: start at Round 1
| Round | Instruction | End count |
|---|---|---|
| 1 | Make a magic ring; work 6 sc into it. Place a marker in the first stitch. | 6 sts |
| 2 | Work 2 sc into each stitch around. | 12 sts |
| 3 | *Sc in next 1 st, inc in next st; repeat from * 6 times. | 18 sts |
| 4 | *Sc in next 2 sts, inc in next st; repeat from * 6 times. | 24 sts |
| 5 | *Sc in next 3 sts, inc in next st; repeat from * 6 times. | 30 sts |
| 6 | *Sc in next 4 sts, inc in next st; repeat from * 6 times. | 36 sts |
| 7 | *Sc in next 5 sts, inc in next st; repeat from * 6 times. | 42 sts |
| 8 | *Sc in next 6 sts, inc in next st; repeat from * 6 times. | 48 sts |
| 9 | *Sc in next 7 sts, inc in next st; repeat from * 6 times. | 54 sts |
| 10 | *Sc in next 8 sts, inc in next st; repeat from * 6 times. | 60 sts |
| 11 | *Sc in next 9 sts, inc in next st; repeat from * 6 times. | 66 sts |
| 12 | *Sc in next 10 sts, inc in next st; repeat from * 6 times. | 72 sts |
| 13 | *Sc in next 11 sts, inc in next st; repeat from * 6 times. | 78 sts |
| 14 | *Sc in next 12 sts, inc in next st; repeat from * 6 times. | 84 sts |
Sides: keep the same count
Work 1 sc into every stitch around: 84 sts each round. Continue without increases until the distance from the center top to the lower edge is about 6.25-6.75 in / 16-17 cm, or until your chosen depth. This is a starting range, not a fixed size. Check the wearer and the in-progress hat before making the brim; adjust side depth separately from circumference.
Brim: follow only this route
Work Brim Round 1 in FLO. Work later rounds through both loops. Each listed increase round adds 6 stitches. Eight rounds at the example row gauge calculate to about 2 in / 5.08 cm of brim; stop earlier if needed and check the shape every couple of rounds.
| Round | Instruction | End count |
|---|---|---|
| 1 | *Sc in next 13 sts, inc in next st; repeat from * 6 times. | 90 sts |
| 2 | *Sc in next 14 sts, inc in next st; repeat from * 6 times. | 96 sts |
| 3 | *Sc in next 15 sts, inc in next st; repeat from * 6 times. | 102 sts |
| 4 | *Sc in next 16 sts, inc in next st; repeat from * 6 times. | 108 sts |
| 5 | *Sc in next 17 sts, inc in next st; repeat from * 6 times. | 114 sts |
| 6 | *Sc in next 18 sts, inc in next st; repeat from * 6 times. | 120 sts |
| 7 | *Sc in next 19 sts, inc in next st; repeat from * 6 times. | 126 sts |
| 8 | *Sc in next 20 sts, inc in next st; repeat from * 6 times. | 132 sts |
Shape check: if the brim starts to ruffle, stop and recount; undo the last increase round or work an even round before increasing again. If you insert an even round, its stitch count stays unchanged: recalculate the next increase repeat from your current count rather than advancing the table by a round.
Finish and check
When the brim reaches your chosen width, sl st into the next stitch. Cut the yarn with a tail long enough to weave in securely, pull through and weave in the ends. Shape gently; follow the yarn label for care. Confirm the hat fits comfortably. If the crown is the wrong circumference, changing side depth or brim width will not fix it.
Open this 84-stitch route on PDF page 4. Read page 1 for supplies, terms and gauge notes.
90-stitch route – estimated circumference 24.0 in / 61.0 cm
Estimated crown diameter: 7.6 in / 19.4 cm. Stop crown increases after Round 15, then measure your crown before starting the sides.
Crown: start at Round 1
| Round | Instruction | End count |
|---|---|---|
| 1 | Make a magic ring; work 6 sc into it. Place a marker in the first stitch. | 6 sts |
| 2 | Work 2 sc into each stitch around. | 12 sts |
| 3 | *Sc in next 1 st, inc in next st; repeat from * 6 times. | 18 sts |
| 4 | *Sc in next 2 sts, inc in next st; repeat from * 6 times. | 24 sts |
| 5 | *Sc in next 3 sts, inc in next st; repeat from * 6 times. | 30 sts |
| 6 | *Sc in next 4 sts, inc in next st; repeat from * 6 times. | 36 sts |
| 7 | *Sc in next 5 sts, inc in next st; repeat from * 6 times. | 42 sts |
| 8 | *Sc in next 6 sts, inc in next st; repeat from * 6 times. | 48 sts |
| 9 | *Sc in next 7 sts, inc in next st; repeat from * 6 times. | 54 sts |
| 10 | *Sc in next 8 sts, inc in next st; repeat from * 6 times. | 60 sts |
| 11 | *Sc in next 9 sts, inc in next st; repeat from * 6 times. | 66 sts |
| 12 | *Sc in next 10 sts, inc in next st; repeat from * 6 times. | 72 sts |
| 13 | *Sc in next 11 sts, inc in next st; repeat from * 6 times. | 78 sts |
| 14 | *Sc in next 12 sts, inc in next st; repeat from * 6 times. | 84 sts |
| 15 | *Sc in next 13 sts, inc in next st; repeat from * 6 times. | 90 sts |
Sides: keep the same count
Work 1 sc into every stitch around: 90 sts each round. Continue without increases until the distance from the center top to the lower edge is about 6.25-6.75 in / 16-17 cm, or until your chosen depth. This is a starting range, not a fixed size. Check the wearer and the in-progress hat before making the brim; adjust side depth separately from circumference.
Brim: follow only this route
Work Brim Round 1 in FLO. Work later rounds through both loops. Each listed increase round adds 6 stitches. Eight rounds at the example row gauge calculate to about 2 in / 5.08 cm of brim; stop earlier if needed and check the shape every couple of rounds.
| Round | Instruction | End count |
|---|---|---|
| 1 | *Sc in next 14 sts, inc in next st; repeat from * 6 times. | 96 sts |
| 2 | *Sc in next 15 sts, inc in next st; repeat from * 6 times. | 102 sts |
| 3 | *Sc in next 16 sts, inc in next st; repeat from * 6 times. | 108 sts |
| 4 | *Sc in next 17 sts, inc in next st; repeat from * 6 times. | 114 sts |
| 5 | *Sc in next 18 sts, inc in next st; repeat from * 6 times. | 120 sts |
| 6 | *Sc in next 19 sts, inc in next st; repeat from * 6 times. | 126 sts |
| 7 | *Sc in next 20 sts, inc in next st; repeat from * 6 times. | 132 sts |
| 8 | *Sc in next 21 sts, inc in next st; repeat from * 6 times. | 138 sts |
Shape check: if the brim starts to ruffle, stop and recount; undo the last increase round or work an even round before increasing again. If you insert an even round, its stitch count stays unchanged: recalculate the next increase repeat from your current count rather than advancing the table by a round.
Finish and check
When the brim reaches your chosen width, sl st into the next stitch. Cut the yarn with a tail long enough to weave in securely, pull through and weave in the ends. Shape gently; follow the yarn label for care. Confirm the hat fits comfortably. If the crown is the wrong circumference, changing side depth or brim width will not fix it.
Open this 90-stitch route on PDF page 5. Read page 1 for supplies, terms and gauge notes.
96-stitch route – estimated circumference 25.6 in / 65.0 cm
Estimated crown diameter: 8.1 in / 20.7 cm. Stop crown increases after Round 16, then measure your crown before starting the sides.
Crown: start at Round 1
| Round | Instruction | End count |
|---|---|---|
| 1 | Make a magic ring; work 6 sc into it. Place a marker in the first stitch. | 6 sts |
| 2 | Work 2 sc into each stitch around. | 12 sts |
| 3 | *Sc in next 1 st, inc in next st; repeat from * 6 times. | 18 sts |
| 4 | *Sc in next 2 sts, inc in next st; repeat from * 6 times. | 24 sts |
| 5 | *Sc in next 3 sts, inc in next st; repeat from * 6 times. | 30 sts |
| 6 | *Sc in next 4 sts, inc in next st; repeat from * 6 times. | 36 sts |
| 7 | *Sc in next 5 sts, inc in next st; repeat from * 6 times. | 42 sts |
| 8 | *Sc in next 6 sts, inc in next st; repeat from * 6 times. | 48 sts |
| 9 | *Sc in next 7 sts, inc in next st; repeat from * 6 times. | 54 sts |
| 10 | *Sc in next 8 sts, inc in next st; repeat from * 6 times. | 60 sts |
| 11 | *Sc in next 9 sts, inc in next st; repeat from * 6 times. | 66 sts |
| 12 | *Sc in next 10 sts, inc in next st; repeat from * 6 times. | 72 sts |
| 13 | *Sc in next 11 sts, inc in next st; repeat from * 6 times. | 78 sts |
| 14 | *Sc in next 12 sts, inc in next st; repeat from * 6 times. | 84 sts |
| 15 | *Sc in next 13 sts, inc in next st; repeat from * 6 times. | 90 sts |
| 16 | *Sc in next 14 sts, inc in next st; repeat from * 6 times. | 96 sts |
Sides: keep the same count
Work 1 sc into every stitch around: 96 sts each round. Continue without increases until the distance from the center top to the lower edge is about 6.25-6.75 in / 16-17 cm, or until your chosen depth. This is a starting range, not a fixed size. Check the wearer and the in-progress hat before making the brim; adjust side depth separately from circumference.
Brim: follow only this route
Work Brim Round 1 in FLO. Work later rounds through both loops. Each listed increase round adds 6 stitches. Eight rounds at the example row gauge calculate to about 2 in / 5.08 cm of brim; stop earlier if needed and check the shape every couple of rounds.
| Round | Instruction | End count |
|---|---|---|
| 1 | *Sc in next 15 sts, inc in next st; repeat from * 6 times. | 102 sts |
| 2 | *Sc in next 16 sts, inc in next st; repeat from * 6 times. | 108 sts |
| 3 | *Sc in next 17 sts, inc in next st; repeat from * 6 times. | 114 sts |
| 4 | *Sc in next 18 sts, inc in next st; repeat from * 6 times. | 120 sts |
| 5 | *Sc in next 19 sts, inc in next st; repeat from * 6 times. | 126 sts |
| 6 | *Sc in next 20 sts, inc in next st; repeat from * 6 times. | 132 sts |
| 7 | *Sc in next 21 sts, inc in next st; repeat from * 6 times. | 138 sts |
| 8 | *Sc in next 22 sts, inc in next st; repeat from * 6 times. | 144 sts |
Shape check: if the brim starts to ruffle, stop and recount; undo the last increase round or work an even round before increasing again. If you insert an even round, its stitch count stays unchanged: recalculate the next increase repeat from your current count rather than advancing the table by a round.
Finish and check
When the brim reaches your chosen width, sl st into the next stitch. Cut the yarn with a tail long enough to weave in securely, pull through and weave in the ends. Shape gently; follow the yarn label for care. Confirm the hat fits comfortably. If the crown is the wrong circumference, changing side depth or brim width will not fix it.
Open this 96-stitch route on PDF page 6. Read page 1 for supplies, terms and gauge notes.
JavaScript is off. Open any stitch-count heading above to read its complete route, or use the PDF. The full original tutorial remains below.
Measure First – Do Not Choose a Size by the Word “Adult”
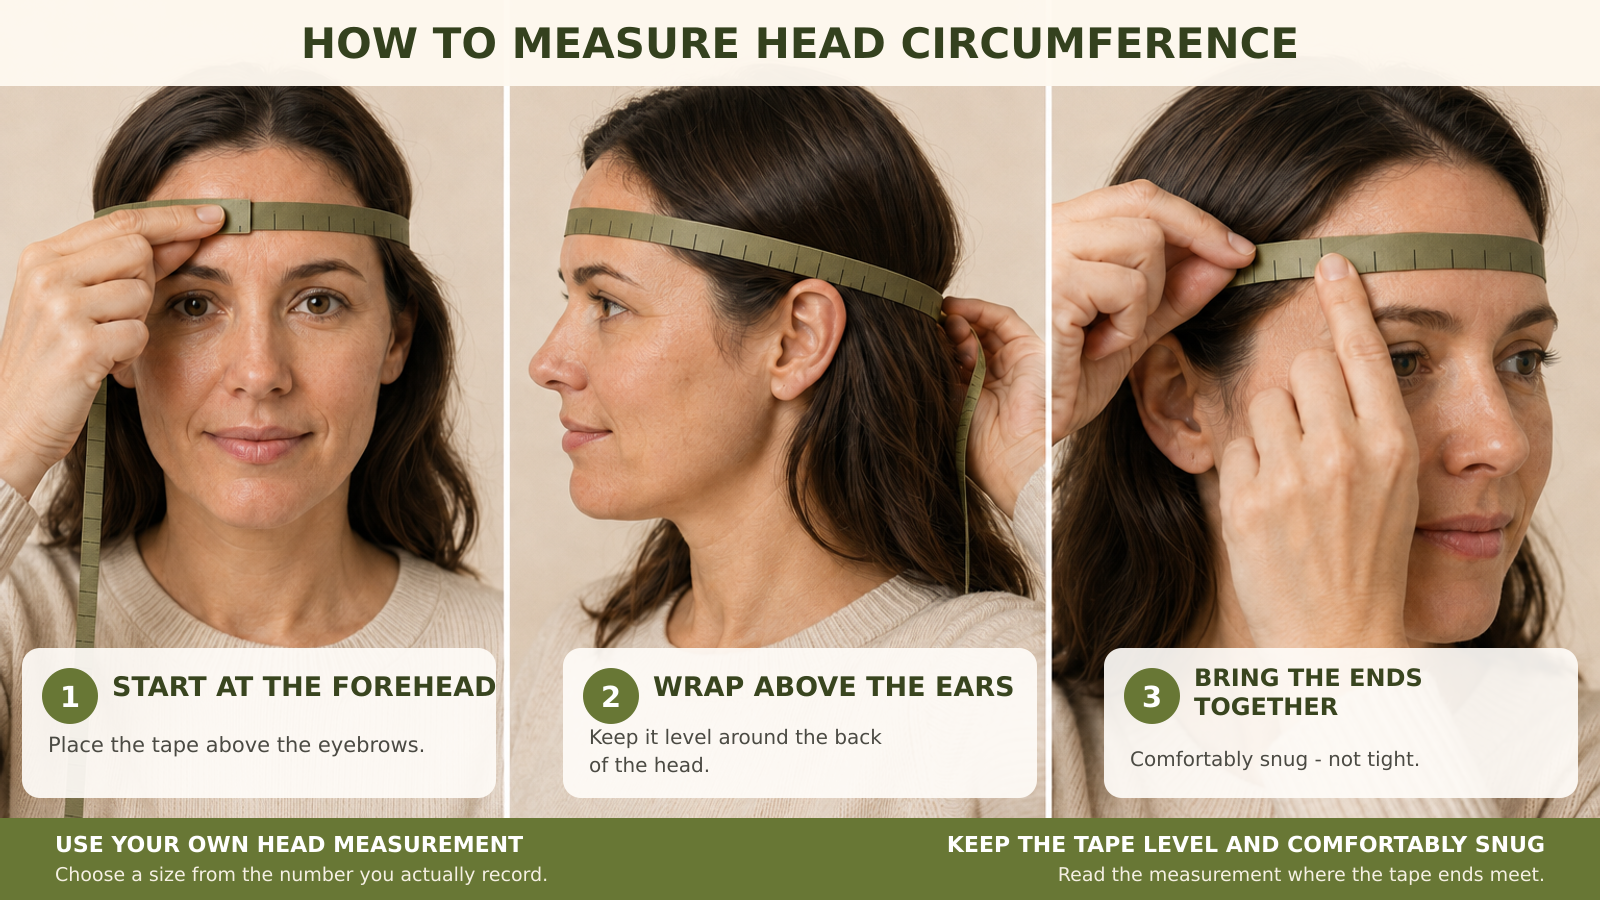
Measure around the fullest part of the head, keeping the tape level and comfortably snug. The Craft Yarn Council’s adult reference ranges together cover roughly 21-24 in / 53-61 cm. Use that range only as context: the person’s actual measurement matters more than an adult size label.
Measure the intended wearer, decide the target finished circumference, and choose the stitch option whose estimated circumference is closest to that target. Use the crown and fit checkpoints to confirm the choice as you work.
| Starting option | Crown stitches | Approx. body circumference | Approx. crown diameter | How to use this option |
|---|---|---|---|---|
| 72-stitch option | 72 | 19.2 in / 48.8 cm | 6.1 in / 15.5 cm | Smallest listed option; compare its estimated circumference with your measured target |
| 78-stitch option | 78 | 20.8 in / 52.8 cm | 6.6 in / 16.8 cm | Choose when this estimate is closest to your target finished circumference |
| 84-stitch option | 84 | 22.4 in / 56.9 cm | 7.1 in / 18.1 cm | Choose when this estimate is closest to your target finished circumference |
| 90-stitch option | 90 | 24.0 in / 61.0 cm | 7.6 in / 19.4 cm | Choose when this estimate is closest to your target finished circumference |
| 96-stitch option | 96 | 25.6 in / 65.0 cm | 8.1 in / 20.7 cm | Largest listed option; confirm the crown and fit before continuing |
Important: The circumference and crown-diameter values in the table above are calculated from the target stitch gauge. Check your own gauge and in-progress measurements because changes in yarn, hook size, or tension can affect the fit.
How the table was calculated: stitches divided by 15, then multiplied by 4, gives the estimated circumference in inches. Dividing that circumference by 3.1416 gives the estimated flat crown diameter. Results are rounded, so always check the fabric itself.
Materials
- #4 Medium / Worsted yarn. Cotton or a cotton-rich yarn is a practical choice when you want a bucket hat with some structure.
- 5 mm crochet hook to start; use a different hook if needed to reach the target gauge.
- Stitch marker.
- Measuring tape.
- Scissors.
- Yarn needle for weaving in ends.
- Keep roughly 300 yd / 275 m available as a conservative planning allowance for one adult hat. This is not a measured consumption figure; actual use depends on size, yarn, tension, hat depth, and brim width.
Why cotton? It often produces a more structured fabric than a very soft, stretchy yarn. But the number on the label is not enough by itself: two #4 yarns can still feel and behave differently, so check your gauge after any yarn change.
Gauge – Your Best Protection Against a Bad Fit
Calculation gauge used for the stitch counts below (make a swatch before starting):
If 15 stitches measure wider than 4 inches, your stitches are looser and the hat will grow larger. Try a smaller hook. If 15 stitches measure narrower than 4 inches, your stitches are tighter and the hat will grow smaller. Try a larger hook.
Do not rely on the stitch count alone. Use stitch count + gauge + actual measurement together.
Abbreviations Used
| Abbreviation | Meaning |
|---|---|
| ch | chain |
| sc | single crochet |
| sl st | slip stitch |
| st / sts | stitch / stitches |
| inc | work 2 single crochet stitches into the same stitch |
| FLO | front loop only |
Pattern Notes
- Work in continuous rounds. Do not join every round unless the instructions tell you to.
- Place a stitch marker in the first stitch of each round and move it up as you work.
- Count the stitches at the end of every increase round. Fix a wrong count before continuing.
- The crown grows by 6 stitches on every increase round. This is the basic rule behind the top of the hat.
Part One – Crochet the Crown
Make a magic ring. If you prefer not to use a magic ring, chain 2 and work Round 1 into the second chain from the hook.
Round 1: Work 6 sc into the ring. (6 sts)
Round 2: Work 2 sc into every stitch. (12 sts)
Round 3: *Sc in next st, inc in next st.* Repeat around. (18 sts)
Round 4: *Sc in next 2 sts, inc in next st.* Repeat around. (24 sts)
Round 5: *Sc in next 3 sts, inc in next st.* Repeat around. (30 sts)
Round 6: *Sc in next 4 sts, inc in next st.* Repeat around. (36 sts)
Round 7: *Sc in next 5 sts, inc in next st.* Repeat around. (42 sts)
Round 8: *Sc in next 6 sts, inc in next st.* Repeat around. (48 sts)
Round 9: *Sc in next 7 sts, inc in next st.* Repeat around. (54 sts)
Round 10: *Sc in next 8 sts, inc in next st.* Repeat around. (60 sts)
Round 11: *Sc in next 9 sts, inc in next st.* Repeat around. (66 sts)
Round 12 – 72-stitch option: *Sc in next 10 sts, inc in next st.* Repeat around. Stop here only if the crown matches your target measurement. (72 sts)
Round 13 – 78-stitch option: *Sc in next 11 sts, inc in next st.* Repeat around. Stop here only if the crown matches your target measurement. (78 sts)
Round 14 – 84-stitch option: *Sc in next 12 sts, inc in next st.* Repeat around. Stop here only if the crown matches your target measurement. (84 sts)
Round 15 – 90-stitch option: *Sc in next 13 sts, inc in next st.* Repeat around. Stop here only if the crown matches your target measurement. (90 sts)
Round 16 – 96-stitch option: *Sc in next 14 sts, inc in next st.* Repeat around. Stop here only if the crown matches your target measurement. (96 sts)
Checkpoint 1: Stop and check the crown
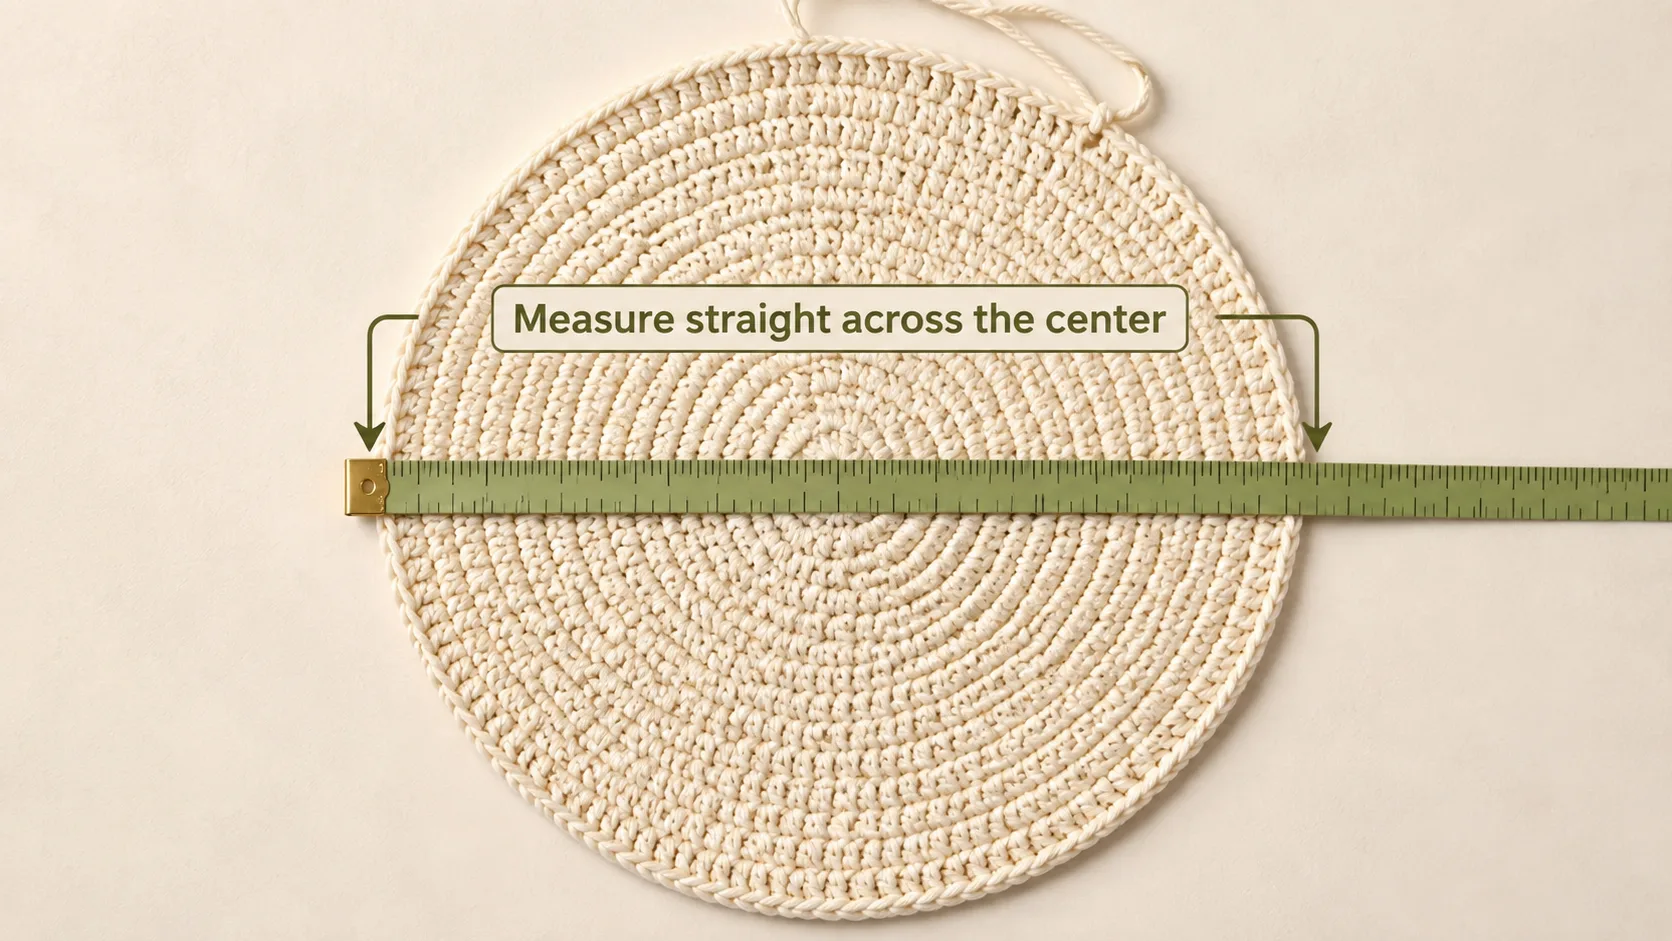
Lay the crown on a flat surface. It should look reasonably flat, not like a gathered flower and not like a deep bowl. Measure straight across the center.
- 72 stitches: about 6.1 in / 15.5 cm
- 78 stitches: about 6.6 in / 16.8 cm
- 84 stitches: about 7.1 in / 18.1 cm
- 90 stitches: about 7.6 in / 19.4 cm
- 96 stitches: about 8.1 in / 20.7 cm
If your crown is much larger, your crochet is probably looser than the target. If it is much smaller, your crochet is probably tighter. Fixing the size here is easier than finishing an entire hat that does not fit.
Part Two – Crochet the Sides
Once the crown is wide enough, stop increasing. Work 1 sc in every stitch around, keeping the same stitch count:
- 72-stitch option: 72 sts per round
- 78-stitch option: 78 sts per round
- 84-stitch option: 84 sts per round
- 90-stitch option: 90 sts per round
- 96-stitch option: 96 sts per round
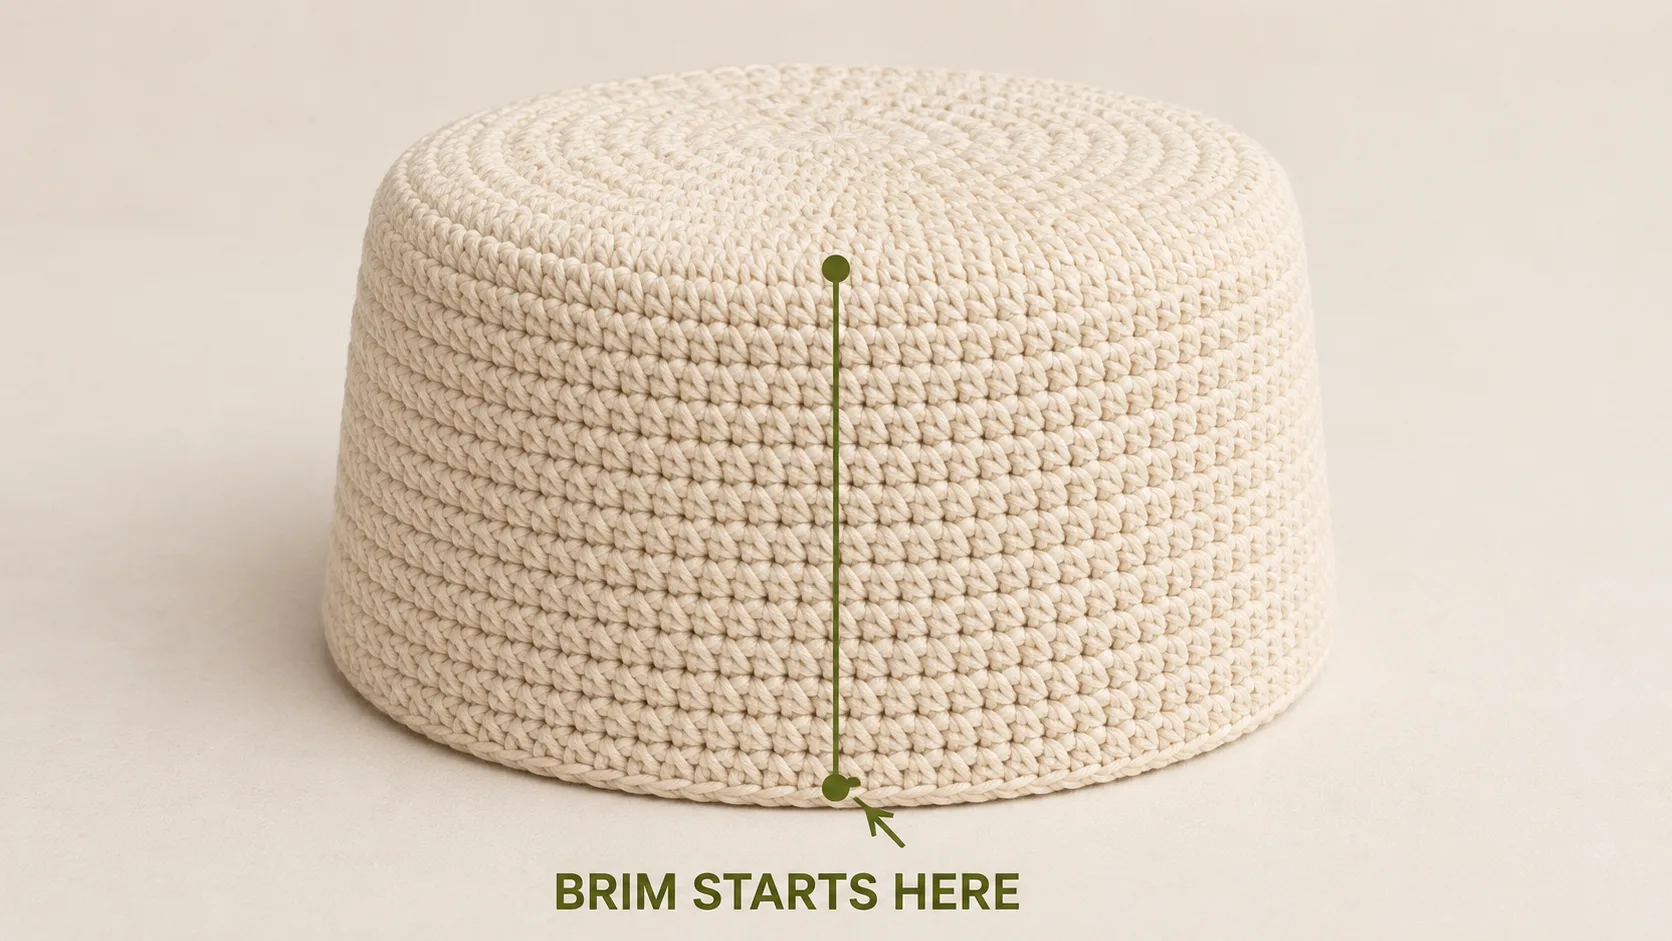
Continue until the distance from the center top to the lower edge is roughly 6.25-6.75 in / 16-17 cm, or until the unfinished hat reaches the depth you want. Treat this as a starting range, not a universal adult depth. Trying the hat on at this stage is more useful than following a fixed number of rounds.
Checkpoint 2: Check the fit before the brim
- Too loose around the head? The crown circumference is too large; adding the brim will not fix it.
- Too tight around the head? The crown circumference is too small or your stitches are tighter than the target.
- Fits around the head but feels too deep? Remove side rounds.
- Fits around the head but feels too shallow? Add side rounds.
Part Three – Crochet the Brim
The brim needs to grow wider so it turns outward. On the first brim round, work in the front loop only. After that, work through both loops unless noted.
Brim Round 1
- 72-stitch body: *Sc in next 11 sts, inc in next st.* Repeat 6 times. 78 sts.
- 78-stitch body: *Sc in next 12 sts, inc in next st.* Repeat 6 times. 84 sts.
- 84-stitch body: *Sc in next 13 sts, inc in next st.* Repeat 6 times. 90 sts.
- 90-stitch body: *Sc in next 14 sts, inc in next st.* Repeat 6 times. 96 sts.
- 96-stitch body: *Sc in next 15 sts, inc in next st.* Repeat 6 times. 102 sts.
Brim Round 2
- 72-stitch body: *Sc in next 12 sts, inc in next st.* Repeat 6 times. 84 sts.
- 78-stitch body: *Sc in next 13 sts, inc in next st.* Repeat 6 times. 90 sts.
- 84-stitch body: *Sc in next 14 sts, inc in next st.* Repeat 6 times. 96 sts.
- 90-stitch body: *Sc in next 15 sts, inc in next st.* Repeat 6 times. 102 sts.
- 96-stitch body: *Sc in next 16 sts, inc in next st.* Repeat 6 times. 108 sts.
For each new brim round, add one more single crochet between increases. Example for the 84-stitch body option:
| Brim round | Repeat | Total stitches |
|---|---|---|
| 1 | sc 13, inc | 90 |
| 2 | sc 14, inc | 96 |
| 3 | sc 15, inc | 102 |
| 4 | sc 16, inc | 108 |
| 5 | sc 17, inc | 114 |
| 6 | sc 18, inc | 120 |
| 7 | sc 19, inc | 126 |
| 8 | sc 20, inc | 132 |
If your row gauge matches 16 rounds per 4 in / 10.16 cm, 8 brim rounds calculate to about 2 in / 5 cm. Stop sooner for a shorter brim. Continue for a wider brim only while the outer edge stays smooth and stable.
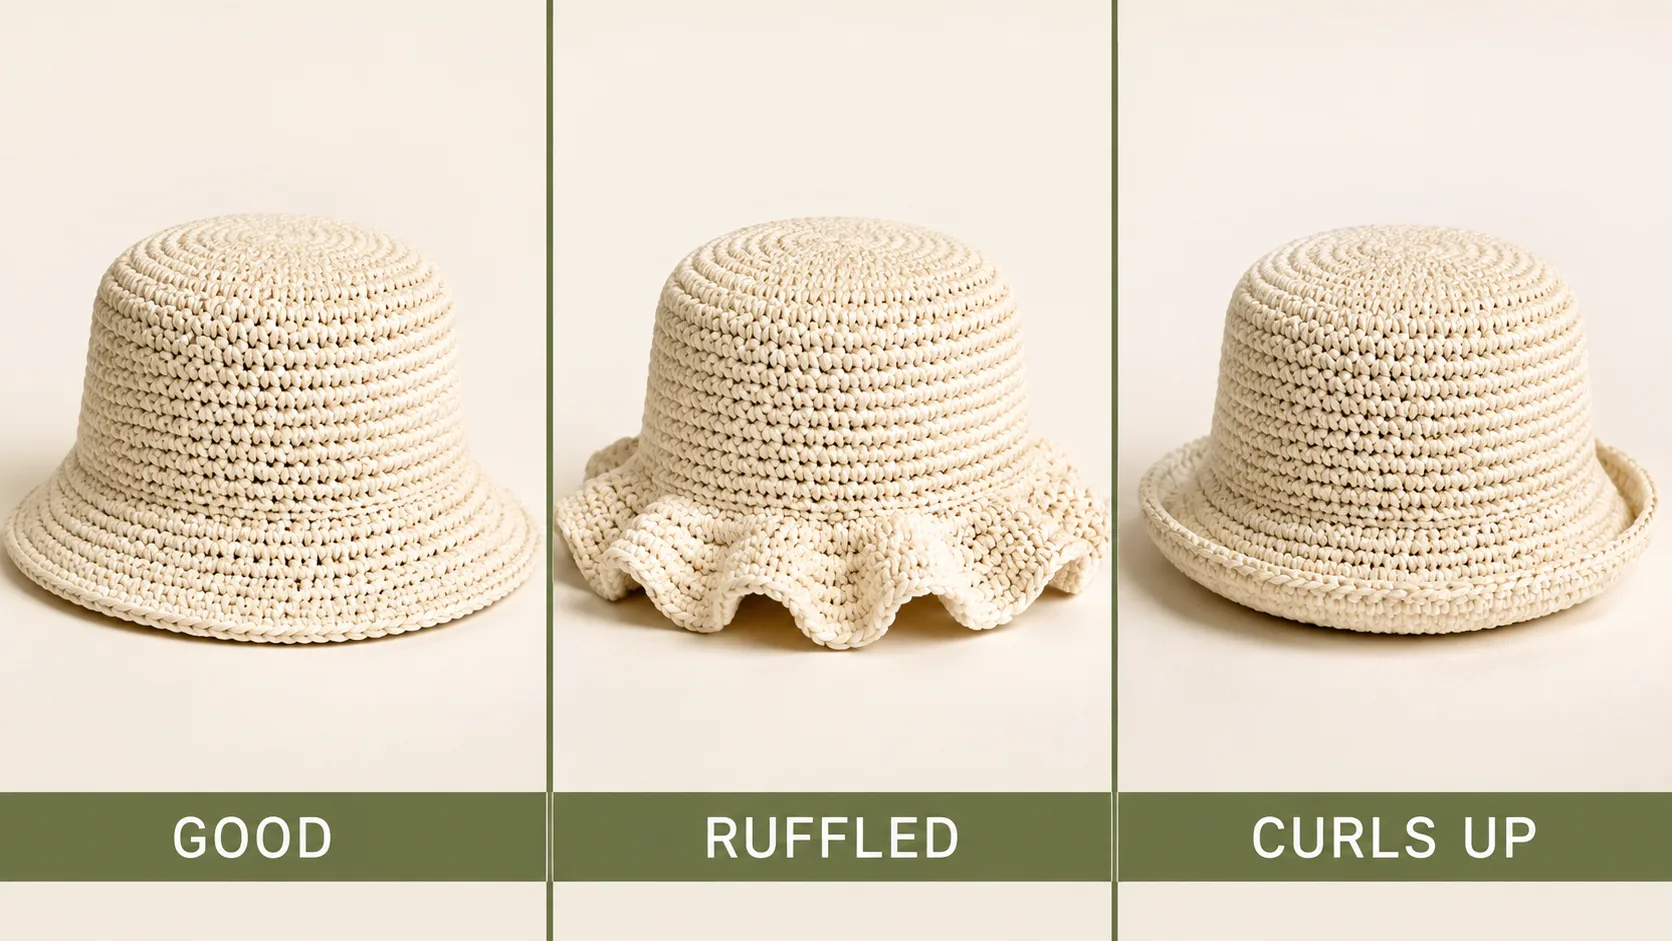
Checkpoint 3: Watch the shape, not just the round number
Lay the hat on a flat surface every couple of brim rounds. A good brim should spread outward without heavy ruffles. If it begins to wave strongly, it may be growing too quickly for your yarn and tension. If it curls upward, it may need more room at the outer edge.
Finishing
- When the brim reaches the width you want, slip stitch into the next stitch to finish the round neatly.
- Cut the yarn, leaving a tail long enough to weave in securely.
- Pull the yarn through and weave in all loose ends with a yarn needle.
- Shape the hat gently with your hands. If your yarn can be blocked or washed, follow the care instructions on the yarn label.
How to Adjust the Fit
If the hat is too wide around the head
Use fewer crown increase rounds or a smaller hook if your gauge is loose. Do not try to fix a wide hat by making the side section shorter; width and depth are separate measurements.
If the hat is too small around the head
Check the gauge first. If your stitches are tighter than the target, a larger hook may solve the problem. If the gauge is close but you need more circumference, add one more crown increase round before starting the sides.
Continue the same increase sequence in 6-stitch steps when a larger crown is needed. After 90 stitches, the next option is 96 stitches: *Sc in next 14 sts, inc in next st.* Repeat around, then measure the crown before continuing.
If the hat is too deep or too shallow
Change only the number of straight side rounds. Fewer side rounds make a shallower hat; more side rounds make a deeper hat.
If you want a wider brim
Continue the increase sequence, but watch the fabric. A wider brim does not always need an increase on every round. If strong ruffles start to form, work an even round before increasing again.
Troubleshooting – Fix Problems Before You Waste More Yarn
| Problem | What to check first | What to try |
|---|---|---|
| Crown is wavy | Extra increases or loose gauge | Recount stitches; undo the last round if needed; use a smaller hook if gauge is loose |
| Crown forms a bowl too early | Missed increases or tight gauge | Recount increases; compare the crown diameter; try a larger hook if needed |
| Hat is too big | Body circumference and gauge | Use fewer crown rounds or a smaller hook |
| Hat is too small | Gauge and crown diameter | Use a larger hook or one more crown increase round |
| Brim looks like a ruffle | Brim is growing too fast | Undo the last increase round; work an even round; increase less often |
| Brim curls upward | Outer edge may be too tight | Check missed increases and tension; add a controlled increase round |
| Brim feels too floppy | Fabric is too soft for the look you want | Use firmer cotton, slightly denser fabric, or a shorter brim |
Frequently Asked Questions
Is this crochet bucket hat pattern suitable for beginners?
Yes, if you know single crochet and basic increases. The more important skill is checking your stitch count and measurements as you go.
Should I use cotton or acrylic yarn?
Both can work. Cotton often gives a firmer, less stretchy fabric, while acrylic can feel softer and more flexible. Choose based on the shape you want, then match the gauge.
What hook size should I use?
Start with 5 mm. If your sample is too large, try a smaller hook. If it is too small, try a larger hook. The correct hook is the one that gives you the target size and a fabric you like.
How wide should the brim be?
About 2 in / 5 cm is a useful starting point for this pattern, but you can stop earlier or continue farther. Watch the brim shape as you adjust it.
Can I use a different yarn?
Yes. Make a small gauge sample first and check the crown diameter while you work. Do not assume two yarns with the same weight number will create identical fabric.
Can I make this without a magic ring?
Yes. Chain 2 and work the first round into the second chain from the hook. The center may look a little different, but the rest of the construction stays the same.
Check Stitch Count, Gauge, and Measurements Together
Two people can crochet the same 84 stitches and still make different-sized hats. If your crown measurement and fit are close to the target before you start the brim, you have a much better chance of finishing with a bucket hat that fits the way you want.
Save This Pattern for Your Next Hat
Once you understand how the crown controls width, the straight side rounds control depth, and the brim increases control flare, you can adjust this basic bucket-hat shape much more confidently. Keep measuring as you work, and make one change at a time so you can see what actually improves the fit.