

Fit the cap, match the round ears, and center the flat muzzle
This crochet bear hat is built as four separately checked jobs: a fitted cap, two matched round ears, two mirrored attachment bases and one centered muzzle. The cap must fit before any face part is added. The ear discs must share one legal count, and every attachment point must remain stable without stuffing, wire or hard eye pieces.
What This Crochet Bear Hat Pattern Makes
This page makes one human-worn, brimless HDC beanie with two compact round bear ears and one low flat muzzle. The default is an adult 72-stitch hat in medium yarn. That count is an example produced by the stated 22 in head measurement and washed gauge. It is not a universal adult size and should not be copied for a different wearer without recalculation.
Each finished ear is made from two matching four-round SC discs. The two layers are joined around eighteen edge-stitch pairs, leaving exactly six consecutive pairs open as the base. That broad open base spreads the attachment across six hat stitches. The ear is not stuffed, wired or supported by plastic.
The muzzle is a small back-and-forth SC panel. Its eight rows widen symmetrically from four to ten stitches and narrow back to four, so it lies flat against the cap. A flat embroidered nose, mouth line and short closed-eye curves are optional. The recognizable bear silhouette comes from the round ears and muzzle, not from hard parts.
This is not a bunny hat with long row-built ears, a frog hat with raised eye tabs, a sack-style cat-ear beanie, a bear bonnet, a bucket hat or an earflap hat with ties. Those products change the construction, leverage, lower-edge behavior or sight-line risk. If one of those outcomes is wanted, use its own complete pattern rather than attaching its parts to this cap.
Project Overview
| Item | Default project |
|---|---|
| Construction | Top-down joined-round HDC cap; separate double-layer SC ears; separate flat-SC muzzle |
| Body structure | Eight equal crown sectors; 72 stitches after Rnd 9 |
| Default wearer input | 22 in / 55.9 cm actual head circumference |
| Starting ease plan | 7% negative ease for the stated flexible washed HDC fabric |
| Washed body gauge | 14 HDC × 10 rounds = 4 in / 10 cm |
| Washed ear gauge | 14 SC around a flat disc edge = 4 in / 10 cm |
| Washed muzzle gauge | 14 SC × 16 rows = 4 in / 10 cm |
| Modeled depth | About 8.07 in / 20.5 cm before wearer acceptance |
| Ear plan | Four 24-stitch, four-round discs joined into two ears; six open base pairs per ear |
| Ear placement | Centers at boundaries 29 and 43; bases 26–32 and 40–46 on Rnd 10 |
| Muzzle plan | Eight rows: 4, 6, 8, 10, 10, 8, 6, 4 stitches; bottom three rounds above lower edge |
| Skill level | Confident beginner/intermediate: joined rounds, increases, decreases, counting, seaming and measured placement |
Materials
- Medium / worsted weight yarn in chestnut, brown, gray, cream or another main color. Allow approximately 180–260 yd / 165–238 m for an adult hat with four ear panels and one muzzle. Confirm yardage from a project-matched sample instead of treating the range as guaranteed.
- Small amount of oatmeal, tan or another contrast yarn for the muzzle.
- Small amount of dark yarn for the optional flat nose, mouth and closed-eye embroidery.
- Hook that produces the accepted washed HDC cap fabric; 5.0–5.5 mm is only a starting range.
- A second hook about 0.5 mm smaller if the flat SC ear or muzzle fabric is too loose at the body hook size.
- Locking stitch markers in at least three colors.
- Flexible tape measure, yarn needle, scissors, removable pins or scrap-yarn tacks.
- Paper and pencil or the saved two-case calculation ledger.
Choose yarn by the behavior of its washed fabric. The cap must pass comfortably over the head and recover to the wear line. The round ear sample must fold without becoming a limp spiral. The muzzle sample must lie flat without turning into a rigid badge or pulling the hat inward. A yarn label can identify fiber and nominal weight, but it cannot replace the project-matched washed gauges.
Measurements and Washed Gauges
Measure the wearer’s actual head circumference H at the intended lower-hat line. Measure crown-center-to-lower-edge depth L on the wearer, or measure a well-fitting hat worn in the same position. Do not substitute a baby, toddler, child or adult label when a current measurement is available.
Make three construction-matched samples:
- Body sample: a joined-round HDC tube large enough to measure away from the join. Record relaxed stitches per 4 in as g_s and rounds per 4 in as g_r after washing and drying.
- Ear sample: a flat SC disc made with the intended ear hook. Measure complete edge stitches along a relaxed arc and record stitches per 4 in as g_e after washing and drying.
- Muzzle sample: a flat SC rectangle worked back and forth. Record stitches per 4 in as g_ms and rows per 4 in as g_mr after washing and drying.
Choose three physical design inputs only after holding paper stand-ins against an accepted plain cap:
- Q = desired finished round-ear diameter.
- P = physical distance between the two ear-center lines along the first plain body round.
- M_w and M_h = desired maximum muzzle width and height; U = desired distance from the finished lower edge to the muzzle’s bottom edge.
The three gauges are not interchangeable. Joined-round HDC, flat-disc SC and turned-row SC have different axes and recovery. A maker can obtain the same nominal stitch count from all three and still produce different physical sizes.
Abbreviations and Terms
| Abbreviation | US term | UK equivalent |
|---|---|---|
| ch | chain | chain |
| MR | magic ring | magic ring |
| sc | single crochet | double crochet |
| hdc | half double crochet | half treble crochet |
| sl st | slip stitch | slip stitch |
| st(s) | stitch(es) | stitch(es) |
| rnd(s) | round(s) | round(s) |
| sc2tog | single crochet two together | double crochet two together |
| inc | work 2 stitches in one stitch | work 2 stitches in one stitch |
The beginning chain in joined HDC rounds does not count as a stitch. Join to the first true HDC and keep the back join marked. Ear rounds are joined for an auditable count. Muzzle turning chains do not count as stitches.
Make and Accept the Samples First
Wash every sample as the finished hat will be washed and dry it fully without pulling it to a target number. Measure the body tube relaxed, then under comfortable stretch. Reject an ease choice that requires force to pass over the head or does not recover to the intended line.
Measure the ear sample around a complete relaxed edge arc. It should remain flat or form only a gentle cup. A strong ruffle means the fabric is receiving too much radial growth for its height; a rigid bowl means too little radial growth or a very tight fabric. This pattern keeps the six-sector arithmetic intact. If the disc shape fails while its stitch count is correct, change hook or fabric rather than deleting one increase from a random sector.
Measure the muzzle sample across complete stitches and rows. Fold it lightly, then release it. Reject fabric that remains creased, curls into a tube or stretches so loosely that the outer edge cannot be sewn without scalloping.
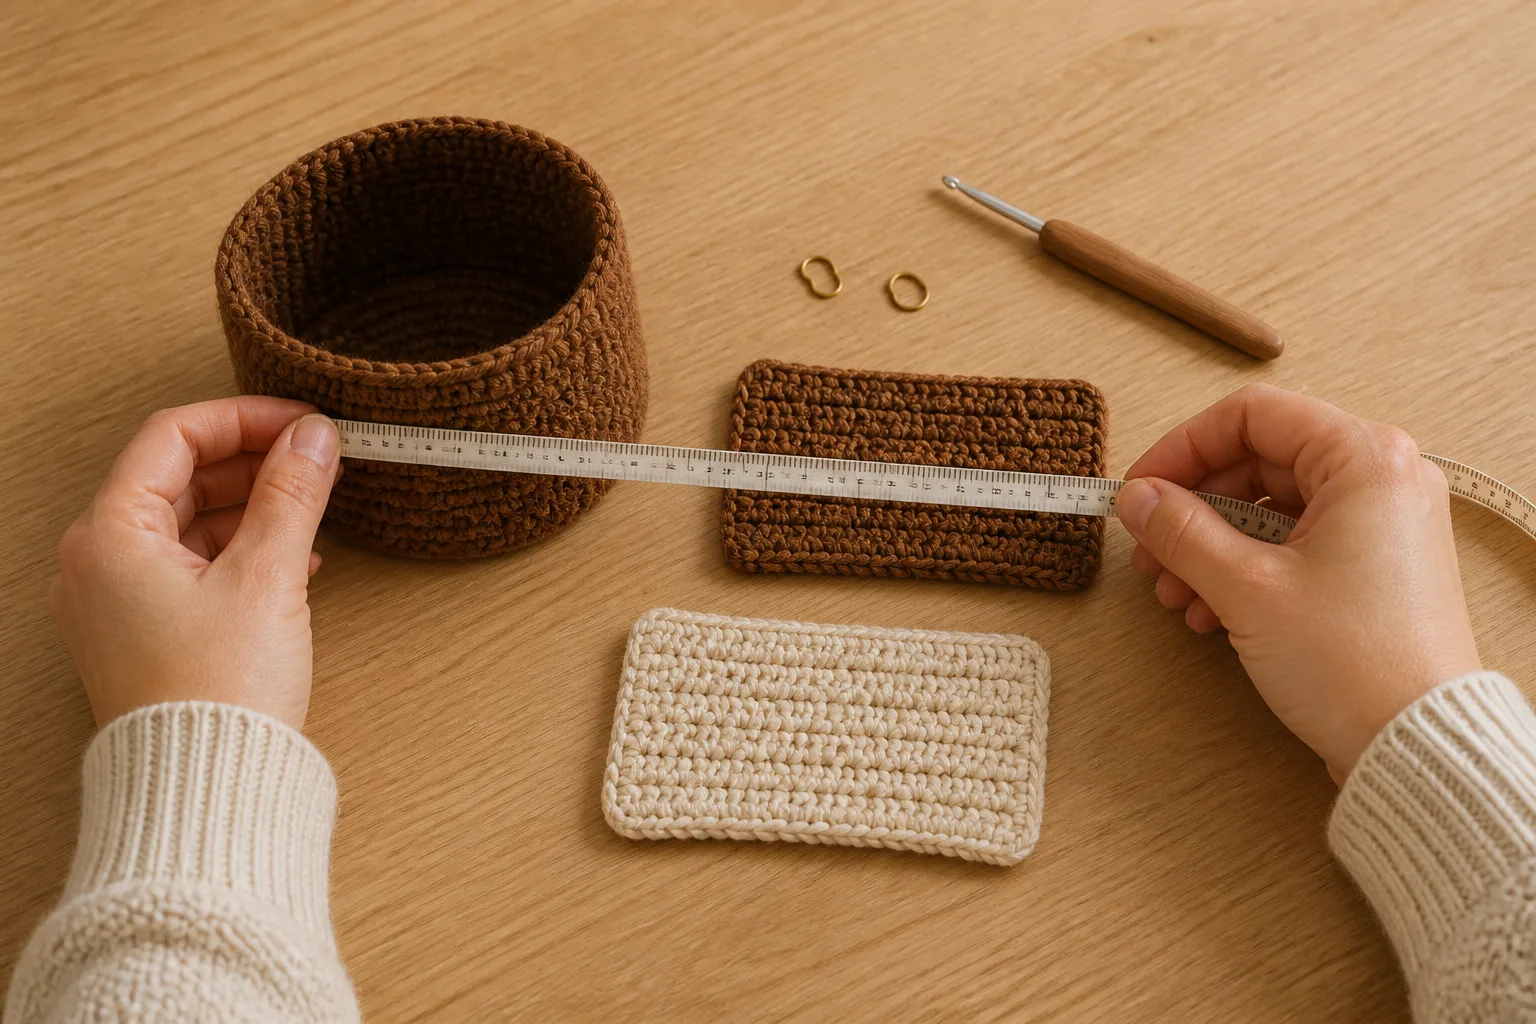
The Cap–Disc–Muzzle Map
Use inches with gauge per 4 in, or centimeters with gauge per 10 cm. Keep full precision until a legal whole-stitch or whole-round choice is required.
Choose the fitted cap count
Let H be actual head circumference, e the starting negative-ease decimal, g_s the washed body stitches per 4 in and N the chosen legal body count.
C_target = H × (1 − e)
N_raw = C_target × g_s / 4
Compare the multiples of eight immediately below and above N_raw. For each candidate, back-calculate:
C_actual = N × 4 / g_s
estimated negative ease = (H − C_actual) / H
Choose only after the washed tube passes over the head comfortably and recovers to the intended line. If neither adjacent multiple works, change the hook or fabric and swatch again. Do not insert isolated stitches into one crown sector.
Convert the count to crown and depth
Estimate flat crown diameter and radius from the estimated circumference at the chosen count:
D_crown = C_actual / π
R_crown = D_crown / 2
The crown gains exactly eight stitches per increase round:
crown rounds = N / 8
Estimate the number of complete full-count body rounds B:
B_raw = (L − R_crown) × g_r / 4
Round half up to a whole body round and back-calculate:
L_actual = R_crown + B × 4 / g_r
These are planning approximations. A real crown curves and a head is not a hemisphere. The washed mini crown, completed crown, wearer depth and lower-edge position remain physical acceptance gates.
Convert round-ear diameter to a six-sector count
Let Q be the desired finished ear diameter and g_e the washed flat-disc edge stitches per 4 in. Estimate the circumference stitches required for a round disc:
E_raw = π × Q × g_e / 4
Compare the multiples of six immediately below and above E_raw. Choose an ear edge count E that preserves six equal increase sectors, then back-calculate:
Q_actual = E × 4 / g_e / π
ear rounds = E / 6
The default disc ends at 24 stitches after four rounds. Two identical discs form each ear. Join eighteen consecutive edge-stitch pairs and leave six consecutive pairs open. The modeled open-base width in the ear fabric is:
W_base = 6 × 4 / g_e
Do not choose 25 stitches because the raw answer is near 25. The increase ledger requires a multiple of six. If both legal neighbors produce the wrong physical size or shape, change the ear hook/fabric and sample again.
Mirror the ear centers around true front
Let P be the chosen physical distance between ear-center lines on the accepted cap.
S_raw = P × g_s / 4
Round S_raw to the nearest even body-stitch distance S. Mark the back-join boundary as 0. The true front boundary is:
F = N / 2
The ear centers are:
left center = F − S / 2
right center = F + S / 2
Each six-stitch base extends three stitch intervals on either side of its center boundary. Mark both complete bases before sewing either ear. Require at least two unclaimed stitch intervals between them. If they overlap, increase P within the stable front half or rebuild a smaller legal ear construction; never move one ear alone.
Size and place the flat muzzle
Let M_w and M_h be desired muzzle width and height, g_ms the washed muzzle stitches per 4 in, g_mr the washed muzzle rows per 4 in and U the desired lower-edge offset.
M_width_raw = M_w × g_ms / 4
Round once to an even maximum stitch count M. This pattern uses an eight-row symmetric ledger whose maximum is M and whose narrow ends are M − 6. For the default M = 10, the row counts are 4, 6, 8, 10, 10, 8, 6, 4.
M_rows_raw = M_h × g_mr / 4
Round to the nearest even row count. If the result is not eight, keep symmetric pairs around the middle and add or remove complete equal-count row pairs rather than changing one side only.
Convert the lower offset through the body round gauge:
U_raw = U × g_r / 4
Round half up to a whole body-round offset U_r. Center the panel on F and place its bottom edge U_r complete rounds above the finished lower edge. Pin the whole perimeter. If the panel puckers, return to the muzzle sample, row ledger or pinning tension rather than hiding the pucker under tighter embroidery.
Default Calculation
Use H = 22 in, e = 7%, g_s = 14, g_r = 10 and L = 8.25 in.
C_target = 22 × 0.93 = 20.46 in
N_raw = 20.46 × 14 / 4 = 71.61
The legal body neighbors are 64 and 72. Choose 72 only after the washed stretch check.
C_actual = 72 × 4 / 14 = 20.5714… in
estimated negative ease = (22 − 20.5714…) / 22 = 6.4935…%
D_crown = 20.5714… / π = 6.5480… in
R_crown = 3.2740… in
Nine total crown rounds produce 72 stitches: Round 1 starts with 8 HDC, and Rounds 2–9 are eight increase rounds that each add 8. For body depth:
B_raw = (8.25 − 3.2740…) × 10 / 4 = 12.4398…
Round half up to 12 full-count rounds.
L_actual = 3.2740… + 12 × 4 / 10 = 8.0740… in
For each round ear, use g_e = 14 SC per 4 in and Q = 2.25 in.
E_raw = π × 2.25 × 14 / 4 = 24.7400… stitches
The legal ear neighbors are 24 and 30. Choose E = 24, giving four rounds.
Q_actual = 24 × 4 / 14 / π = 2.1826… in
W_base = 6 × 4 / 14 = 1.7142… in
For ear placement, use P = 4 in.
S_raw = 4 × 14 / 4 = 14 stitches
With F = 72 / 2 = 36, centers are 29 and 43. Mark bases 26–32 and 40–46 on Rnd 10. Eight stitch intervals remain between the bases.
For the muzzle, use g_ms = 14 SC and g_mr = 16 rows per 4 in, M_w = 3 in, M_h = 2 in and U = 1.25 in.
M_width_raw = 3 × 14 / 4 = 10.5 stitches
Choose even M = 10. The modeled maximum width is 10 × 4 / 14 = 2.8571… in.
M_rows_raw = 2 × 16 / 4 = 8 rows
Use the eight-row ledger 4, 6, 8, 10, 10, 8, 6, 4. The modeled height is 2 in.
U_raw = 1.25 × 10 / 4 = 3.125 rounds
Round half up to three complete body rounds, giving an estimated lower offset of 1.2 in.
How to Crochet a Bear Hat
- Make, wash and accept a joined-round HDC body sample, a flat SC ear disc and a turned-row SC muzzle sample.
- Convert actual head circumference to an eight-stitch legal cap count; confirm the washed tube passes and recovers comfortably.
- Crochet the eight-sector crown to the chosen count and continue at full count to the accepted wearer depth.
- Convert desired ear diameter to a six-sector legal count; make four identical discs, pair them and leave six open base pairs per finished ear.
- Mark true front, convert desired center span to an even distance and pin both mirrored six-stitch bases before attaching either ear.
- Make the symmetric flat muzzle, center it from the calculated lower offset, add optional flat embroidery and complete fit, pucker, attachment, sight-line and movement gates.
Default 72-Stitch Cap
Crown
With main color, make an MR.
Rnd 1: Ch 1, work 8 hdc in MR. Join. 8 sts
Rnd 2: Ch 1, work 2 hdc in each stitch around. Join. 16 sts
Rnd 3: Ch 1, *(hdc in next st, 2 hdc in next st)* 8 times. Join. 24 sts
Rnd 4: Ch 1, *(hdc in next 2 sts, 2 hdc in next st)* 8 times. Join. 32 sts
Rnd 5: Ch 1, *(hdc in next 3 sts, 2 hdc in next st)* 8 times. Join. 40 sts
Rnd 6: Ch 1, *(hdc in next 4 sts, 2 hdc in next st)* 8 times. Join. 48 sts
Rnd 7: Ch 1, *(hdc in next 5 sts, 2 hdc in next st)* 8 times. Join. 56 sts
Rnd 8: Ch 1, *(hdc in next 6 sts, 2 hdc in next st)* 8 times. Join. 64 sts
Rnd 9: Ch 1, *(hdc in next 7 sts, 2 hdc in next st)* 8 times. Join. 72 sts
Keep the back join and all eight sectors marked through the crown gate.
Crown Gate
- Count exactly 72 stitches and nine completed crown rounds.
- Confirm eight equal nine-stitch sectors at the end of Rnd 9.
- Measure about 6.55 in / 16.6 cm across for the stated washed fabric.
- Accept a substantially flat crown or gentle cup; reject a persistent wave or rigid bowl.
- No sector contains a doubled or missing increase.
If the count is correct but the crown waves, return to the first increase round after which the wave persists and change hook/fabric. If the crown bowls rigidly, find a missing increase before changing the schedule. Do not add or remove isolated stitches to conceal a fabric mismatch.
Body
Rnds 10–21: Ch 1, hdc in each stitch around. Join. 72 sts each round
After Rnd 18, try on the cap if possible. Measure from crown center to lower edge without stretching. Add or remove only complete 72-stitch body rounds until the wearer’s selected line is reached. Fasten off after the accepted final round; do not add an unplanned tightening round.
Body and Fit Gate
- The opening passes over the head without force and recovers to the chosen wear line.
- Every body round preserves 72 stitches and the back join remains at center back.
- Crown-center-to-edge depth matches the wearer-selected position.
- The cap stays centered during a slow left/right head turn before parts are attached.
- The lower edge remains above the eyes and does not form a hard pressure ridge.
Make the Matched Round Ears
Work all four panels from one written round ledger. Mark them A1, A2, B1 and B2 as soon as they are complete. Wash and dry the four panels together. If one disc differs visibly in diameter or shape, return to its first mismatched round rather than stretching it to match.
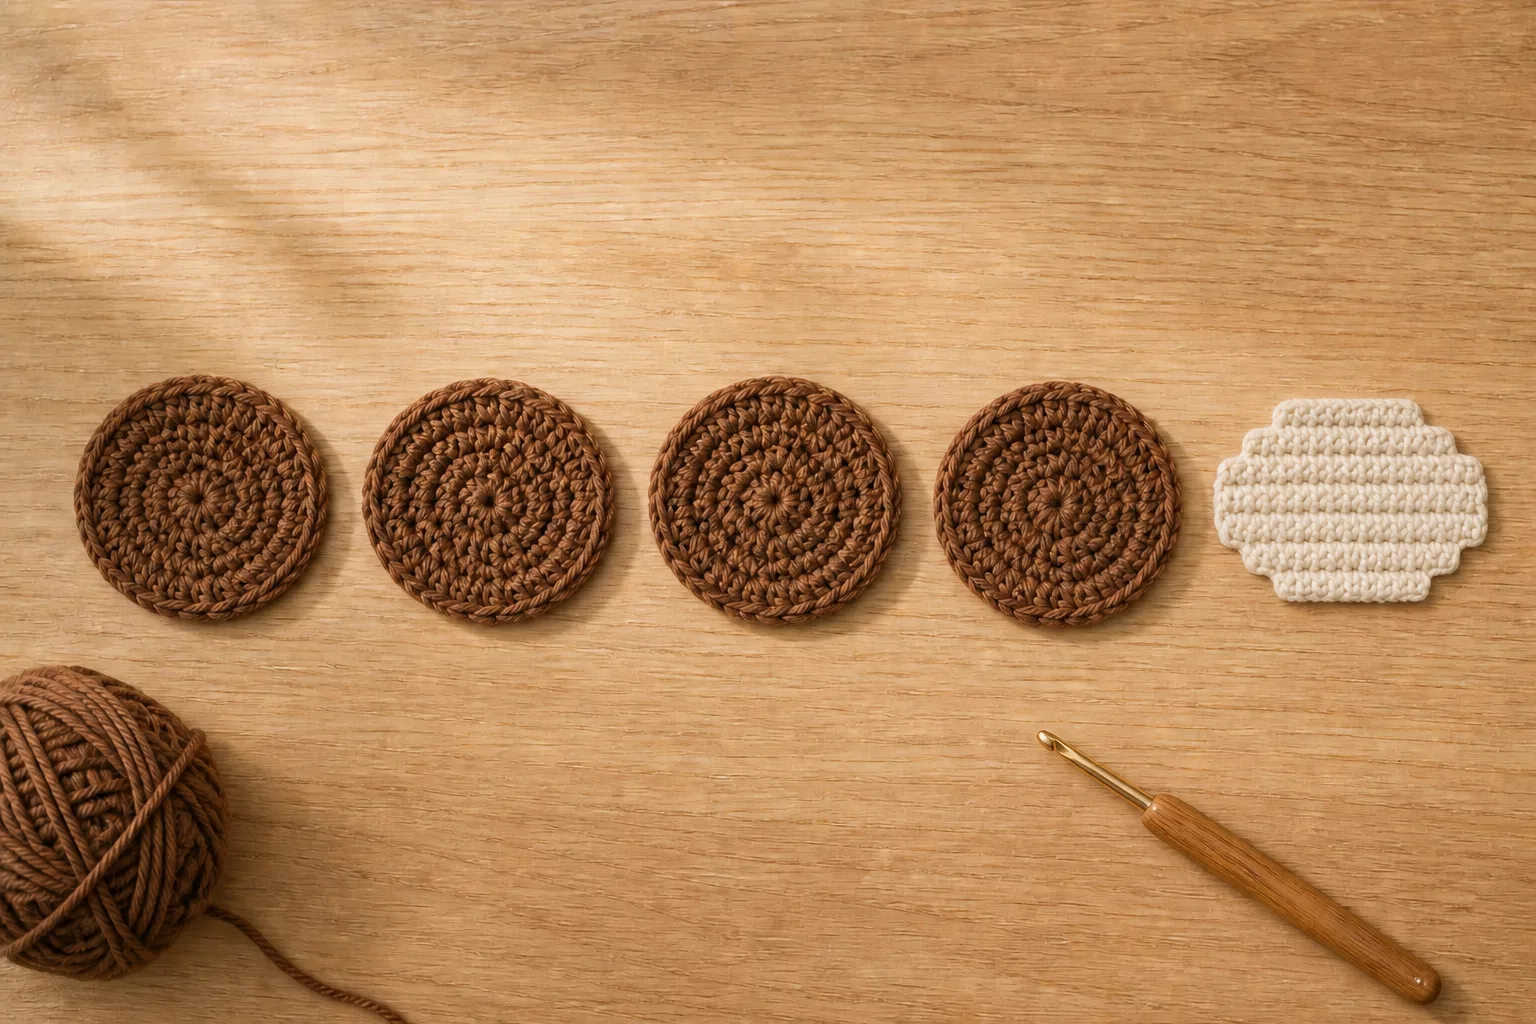
Ear Disc — Make 4
For each round ear panel, make an MR with the main color.
Rnd 1: Ch 1, work 6 sc in MR. Join. 6 sts
Rnd 2: Ch 1, work 2 sc in each stitch around. Join. 12 sts
Rnd 3: Ch 1, *(sc in next st, 2 sc in next st)* 6 times. Join. 18 sts
Rnd 4: Ch 1, *(sc in next 2 sts, 2 sc in next st)* 6 times. Join. 24 sts
Fasten off. Leave a 24 in / 61 cm joining-and-attachment tail on A2 and B2. The other two panels need only weaving tails.
Pair, Measure and Join
Place A1 over A2 and B1 over B2 with wrong sides together. Align the round starts and every edge stitch. Mark one run of six consecutive edge-stitch pairs at the bottom of each pair; these six pairs remain open.
Compare the two pairs under one relaxed tape. The default washed diameter should be near 2.18 in / 5.5 cm. Both ears must match each other even if the physical number differs slightly from the model.
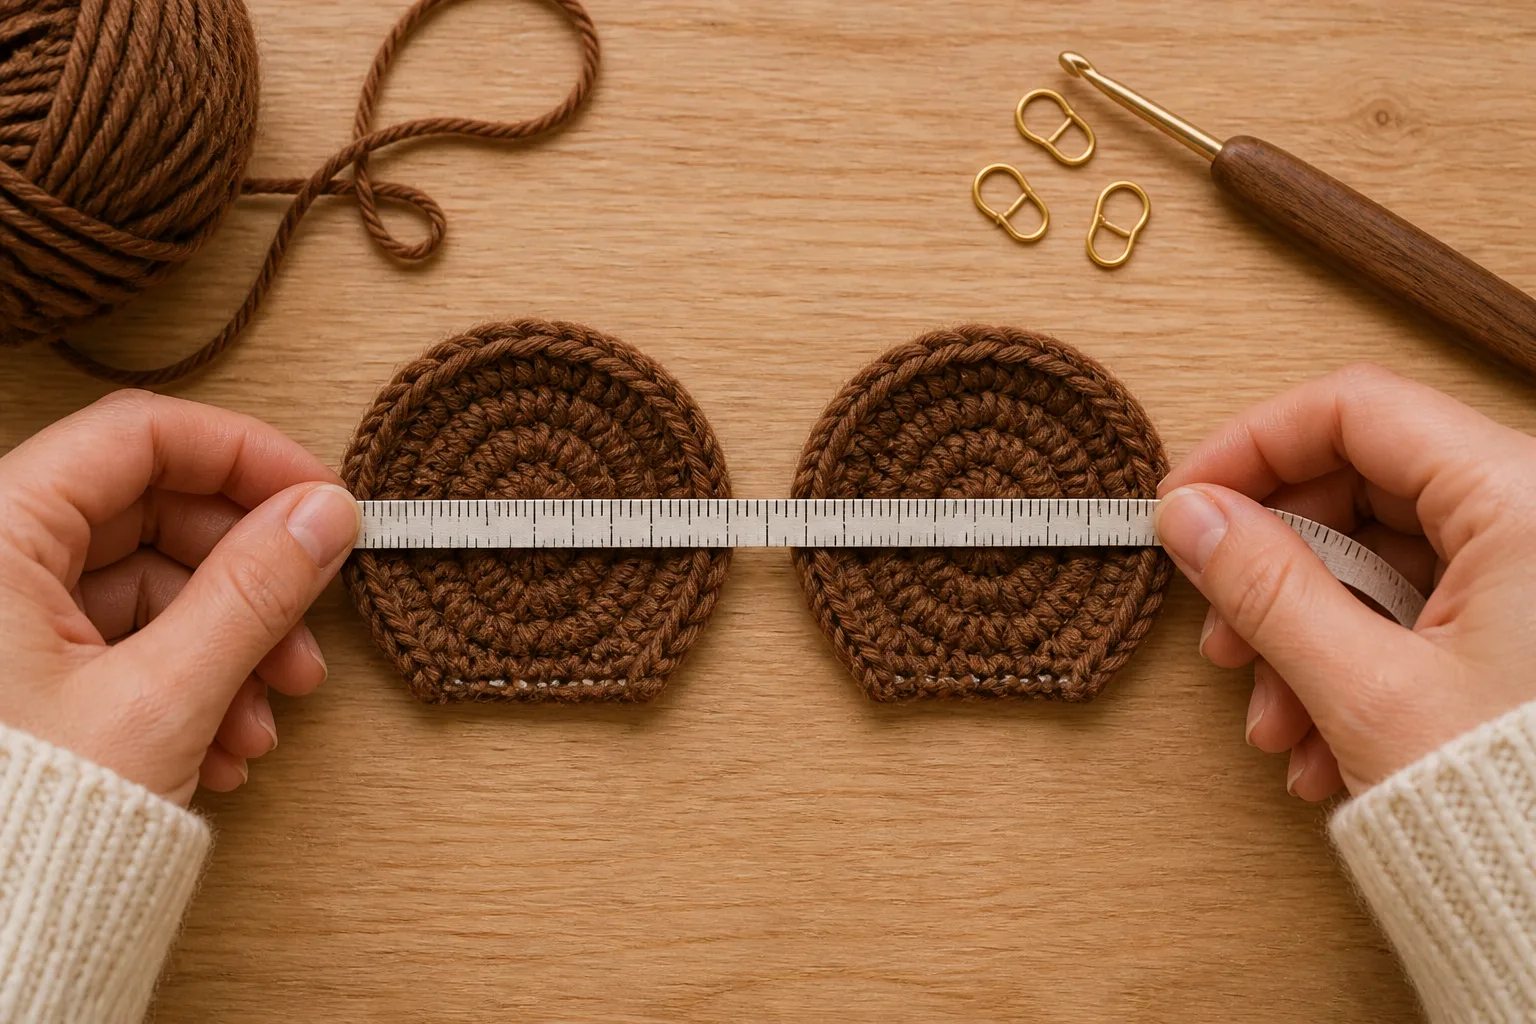
Using the long main-color tail, join corresponding edge stitches through both layers from one marked base corner around eighteen pairs to the other base corner. Use short mattress or whip stitches that do not cinch the edge. Leave all six marked base pairs open.
Do not stuff the ear and do not insert wire or plastic. Roll the joined edge lightly between the fingers. The ear should bend and recover without one layer sliding ahead of the other.
Ear Gate
- All four panels contain 6, 12, 18 and 24 stitches in Rnds 1–4.
- Both finished ears have the same relaxed physical diameter and the same six-pair open base.
- Seams lie flat without a tight corded edge.
- Layers are unstuffed and contain no hard support.
- Each open base is clearly accessible for broad attachment.
Mark and Attach the Mirrored Ear Bases
Place the accepted plain cap on the wearer only long enough to identify visual front. Center the back join and mark the boundary exactly opposite as F. Remove the cap before pinning or sewing.
For the default 72-stitch cap, count from the back boundary to centers 29 and 43 on Rnd 10. Confirm both centers are seven stitch intervals from F = 36. Mark bases 26–32 and 40–46. Count six body-stitch intervals for each base and confirm eight unclaimed intervals remain between them.
Hold both completed ears against the cap. The open six-pair bases follow Rnd 10 while the round bodies rise toward the crown and tilt slightly outward. Pin all six pairs on both ears before sewing either one. If the silhouette is wrong, recalculate P and move both centers symmetrically; do not move one ear alone.
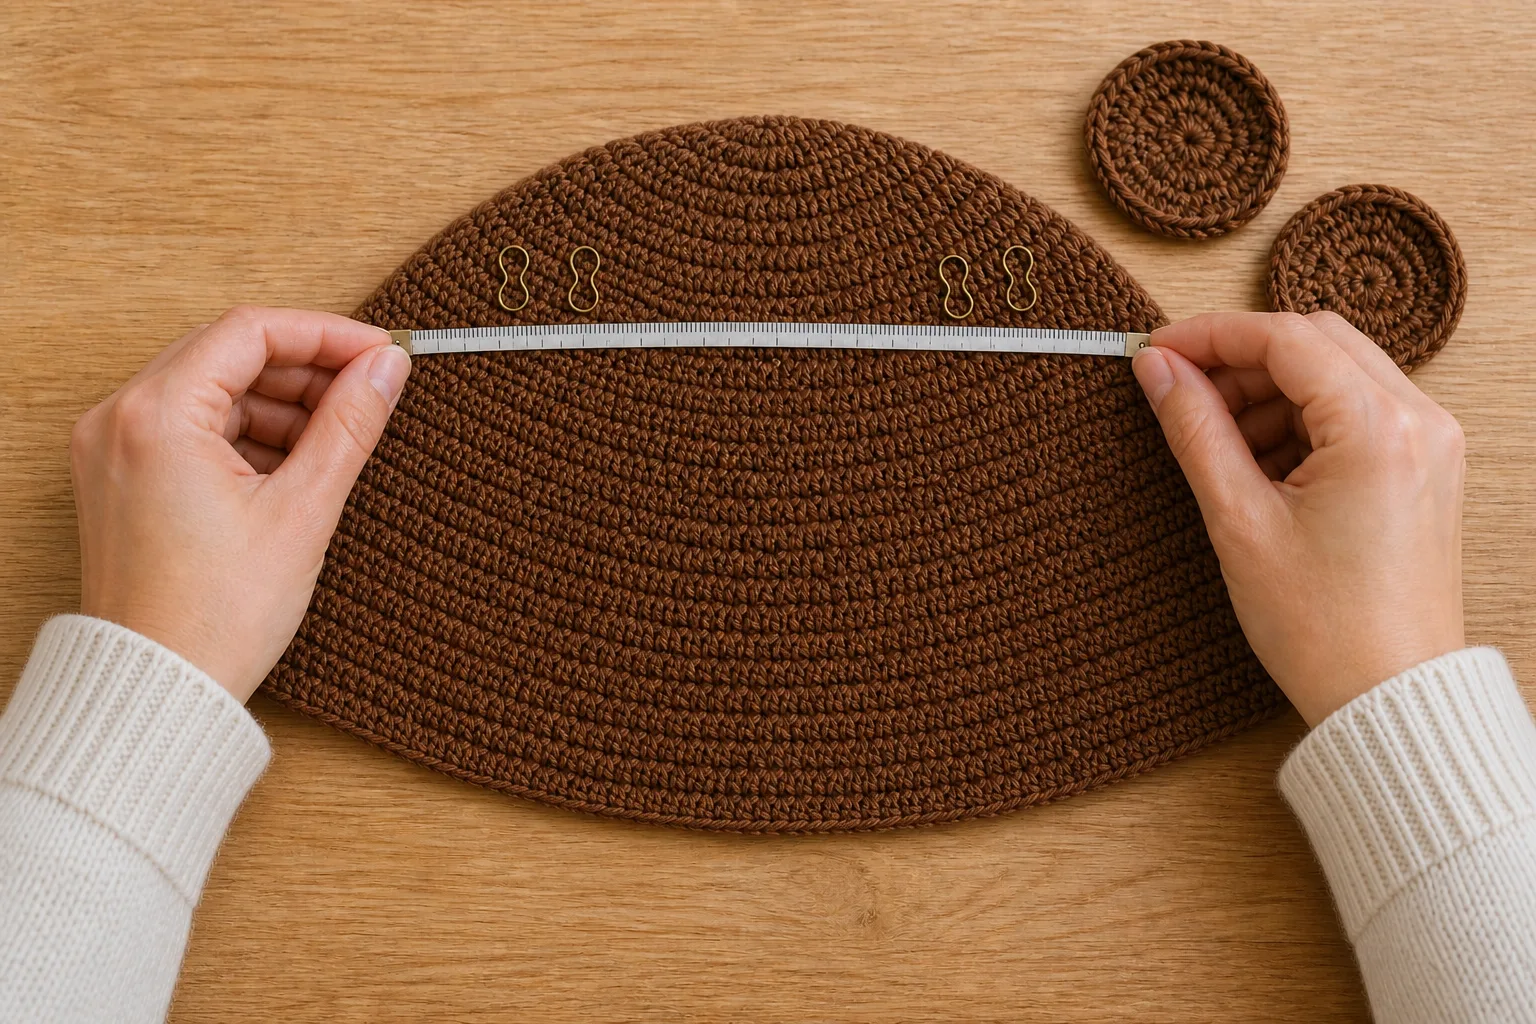
Thread the long tail from A2. Starting at one end of the left six-stitch base, sew through the first paired ear-base stitch and the corresponding body stitch on Rnd 10. Continue across all six pairs. Return in the opposite direction, changing the angle and catching adjacent body fabric near Rnd 11 without pulling the two rounds together.
The two passes must oppose each other and distribute load across the entire base. Catch the fabric surrounding each body stitch, not one exposed surface loop. Knot inside the cap and bury the tail through several inches of fabric. Repeat from the opposite direction for the right ear.
Ear Placement and Attachment Gate
- Both center boundaries are the same stitch distance from true front.
- Both base spans contain six intervals and do not overlap.
- Both round ears sit at the same height and outward angle.
- Each base has two opposing passes across all six paired stitches.
- Neither base rotates, lifts or exposes an open edge under a gentle four-direction check.
Make and Place the Flat Muzzle
Muzzle Panel — Make 1
With contrast color, ch 5.
Row 1: Sc in second ch from hook and across. Turn. 4 sts
Row 2: Ch 1, 2 sc in first st, sc in next 2 sts, 2 sc in last st. Turn. 6 sts
Row 3: Ch 1, 2 sc in first st, sc in next 4 sts, 2 sc in last st. Turn. 8 sts
Row 4: Ch 1, 2 sc in first st, sc in next 6 sts, 2 sc in last st. Turn. 10 sts
Row 5: Ch 1, sc across. Turn. 10 sts
Row 6: Ch 1, sc2tog, sc in next 6 sts, sc2tog. Turn. 8 sts
Row 7: Ch 1, sc2tog, sc in next 4 sts, sc2tog. Turn. 6 sts
Row 8: Ch 1, sc2tog, sc in next 2 sts, sc2tog. 4 sts
Fasten off with a 30 in / 76 cm sewing tail. Wash and dry the panel. Compare its maximum width and height with the accepted paper stand-in. The default model is about 2.86 × 2 in / 7.3 × 5.1 cm before wearer acceptance.
Center and Attach the Muzzle
On the default cap, count three complete body rounds upward from the accepted lower edge. Place the bottom of Row 8 at that line and center the panel’s vertical axis on F = 36. The wider Rows 4–5 sit above the middle, making a short soft muzzle rather than a long face patch.
Pin the top, bottom and both widest corners first. Add removable tacks around the remaining edge. Put the cap on the wearer only after every pin is removed; confirm the panel is centered and clear of the eyes. Remove the cap again before permanent sewing.
Use short relaxed whip stitches through the muzzle edge and surrounding body fabric. Do not pull one long stitch across the inside. Pause every few stitches and lay the cap flat. If the muzzle wrinkles or the body caves inward, undo to the first tight stitch.
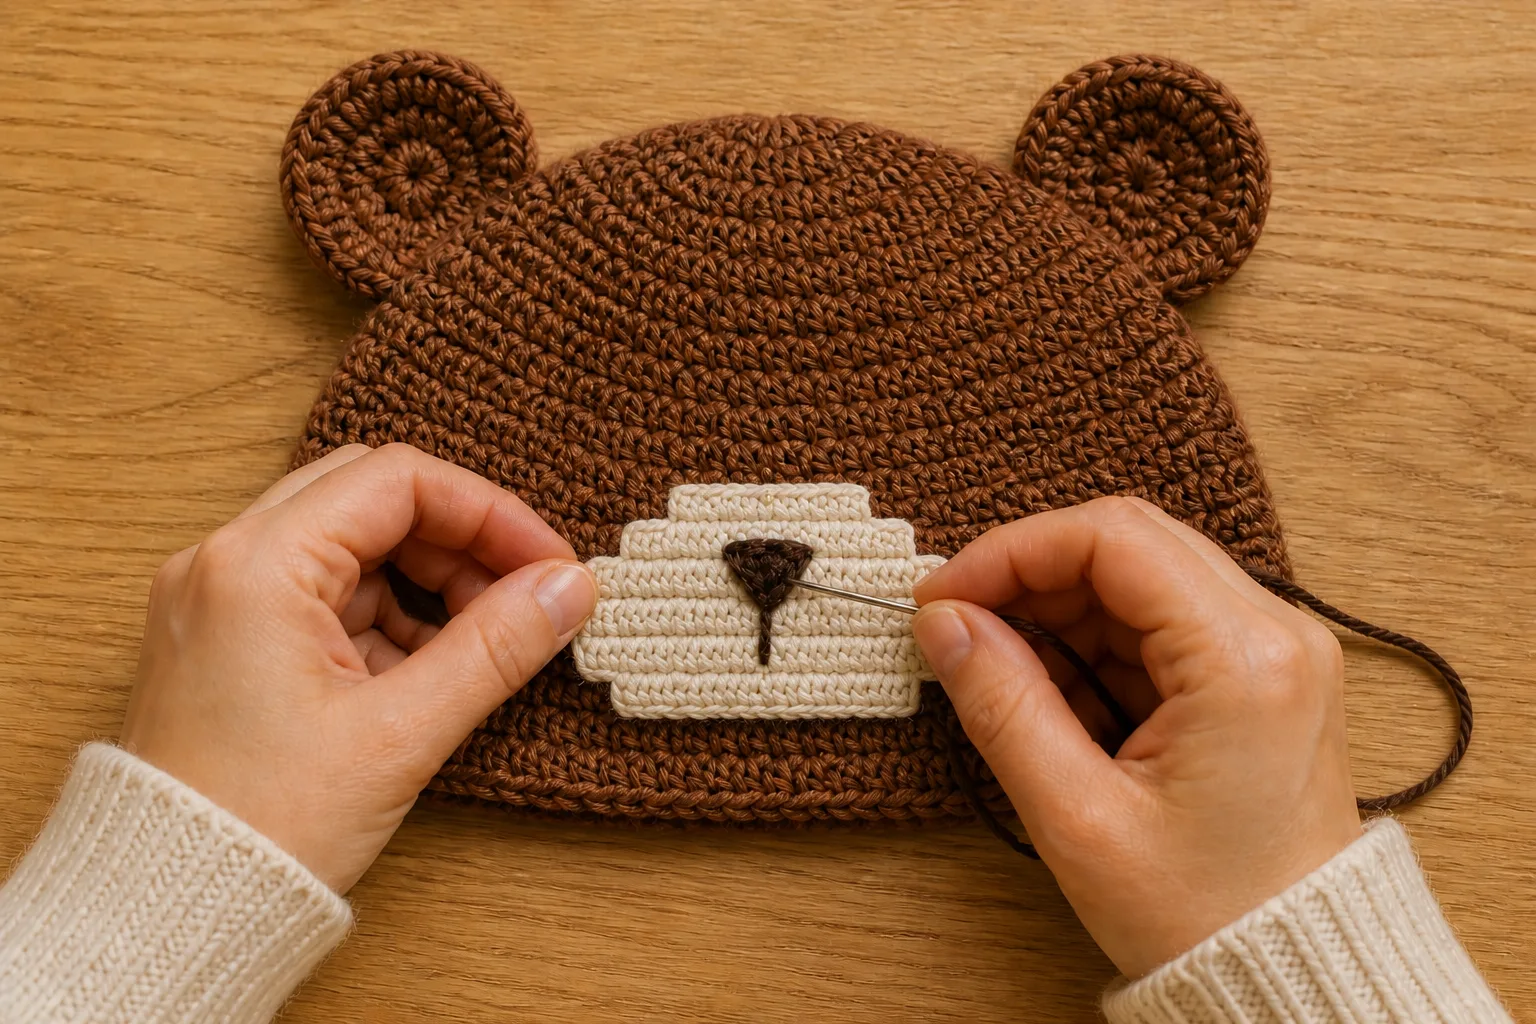
Optional Flat Embroidery
With the hat off the wearer, mark the muzzle’s center. Embroider a small inverted triangle nose and one short relaxed vertical mouth line. Optional closed eyes are two short curves on the cap above and outside the muzzle. Keep every stitch close to the surface and secure ends inside without long floats.
Do not add buttons or plastic safety eyes as the default. A product name does not prove that a hard post or backing is appropriate inside a stretched wearable. For a child, keep the face textile-only unless the complete finished product has been separately evaluated for that wearer.
Muzzle and Face Gate
- The panel contains the complete 4, 6, 8, 10, 10, 8, 6, 4 row ledger.
- The panel’s vertical axis matches F and its bottom edge is three rounds above the accepted lower edge.
- The perimeter lies flat without a tight ridge, scallop or body pucker.
- Nose, mouth and optional eyes are short relaxed surface stitches with no long internal floats.
- No hard part presses against the wearer or changes the opening’s stretch.
Fit, Attachment and Movement Gate
Hold the cap body, not an ear or the muzzle. Press each ear base gently forward, backward, left and right. Slide a fingertip around the complete base. Neither base should rotate, expose an open edge or lift at one end. Press the muzzle perimeter; it should stay flat without transferring tension to the lower edge.
Put the hat on the wearer after every pin, temporary marker and loose tail is removed. The wearer turns left and right, looks down, looks up and raises both shoulders. The hat stays centered. Both round ears remain above and outside the sight line. The muzzle stays clear of the real eyes and does not pull the lower edge upward.

If one ear rotates, return to its first loose base stitch. If both ears tilt because the cap rotates, return to the body fit choice. If the muzzle lifts the lower edge, return to its first tight perimeter stitch. Do not solve a textile-fit failure by adding hidden rigid support.
Worked Example: 19-Inch Head
For an actual 19 in / 48.3 cm head, use e = 6%, the same body gauges and L = 7.25 in.
C_target = 19 × 0.94 = 17.86 in
N_raw = 17.86 × 14 / 4 = 62.51 stitches
The legal body neighbors are 56 and 64. A 56-stitch cap models 16 in / 40.6 cm and 15.79% negative ease, which is too aggressive for the starting plan. Choose 64 only after the washed stretch check.
C_actual = 64 × 4 / 14 = 18.2857… in
estimated negative ease = (19 − 18.2857…) / 19 = 3.7593…%
The crown ends after eight total rounds: one starting round and seven increase rounds. Eleven full-count rounds model a depth of 7.3102… in.
For the ears, use a different washed ear gauge g_e = 16 SC per 4 in and Q = 2 in.
E_raw = π × 2 × 16 / 4 = 25.1327… stitches
The legal neighbors are 24 and 30. Choose E = 24 after the disc-shape check. Four rounds still produce the disc, but the denser gauge changes physical diameter:
Q_actual = 24 × 4 / 16 / π = 1.9098… in
The six-stitch open base models 1.5 in in the ear fabric.
For placement, use P = 3.5 in.
S_raw = 3.5 × 14 / 4 = 12.25 stitches
Round to even S = 12. With F = 32, centers are 26 and 38. The six-stitch bases span 23–29 and 35–41, leaving six unclaimed intervals between them.
For the muzzle, use g_ms = 16 SC and g_mr = 18 rows per 4 in, M_w = 2.5 in, M_h = 1.6 in and U = 1 in.
M_width_raw = 2.5 × 16 / 4 = 10 stitches
M_rows_raw = 1.6 × 18 / 4 = 7.2 rows
Choose the same 10-stitch maximum and round to eight symmetric rows. The modeled panel is 2.5 × 1.7777… in.
U_raw = 1 × 10 / 4 = 2.5 body rounds
Round half up to three rounds, for a modeled 1.2 in lower offset.
This case shows why a smaller hat is not the adult count scaled by age. The cap count, ear diameter, center span, muzzle dimensions and lower offset are calculated from their own current inputs. If the 64-stitch tube or 24-stitch disc fails its washed physical gate, change the relevant fabric instead of forcing an illegal count.
Troubleshooting by Return Point
| Symptom | Likely cause | Minimum correction | Earliest safe return point |
|---|---|---|---|
| Crown ruffles | Doubled increase or excessive radial growth for the fabric | Recount all eight sectors; if correct, change hook/fabric | First increase round after which the wave persists |
| Crown forms a rigid bowl | Missing increase or round-height/radial-growth mismatch | Find the missing sector increase; otherwise reswatch | First affected crown round |
| Opening is tight | Wrong legal count or stretched swatch measurement | Compare the other legal neighbor or reswatch | Circumference calculation |
| Hat rotates before parts | Opening too loose or body fabric unstable | Correct body fit before attaching any component | Body count or washed-gauge choice |
| One ear disc ruffles | Mismatched increase or different tension | Reopen to the first unequal round and recrochet | First unequal disc round |
| Ear forms a rigid cup | Ear hook too small or radial growth incompatible with fabric | Reswatch the flat-disc fabric; keep six-sector count legal | Ear sample |
| Finished ears differ | One panel count, seam or wash behavior differs | Recount all four panels and reopen the first mismatch | First unequal panel or seam stitch |
| Ear bases overlap | Center span too narrow for two six-stitch bases | Increase P symmetrically or rebuild smaller legal ears | Ear span/base decision |
| One ear sits closer to front | Centers counted from different references | Remove both temporary positions and recount from the same boundaries | Placement marking |
| One ear rotates or lifts | One end or one sewing pass is loose | Remove that attachment and make two opposing passes across all six pairs | First loose base stitch |
| Muzzle is off center | Panel was centered by eye instead of F | Remove temporary tacks and recenter the vertical axis on F | Muzzle marking |
| Muzzle puckers the cap | Perimeter stitches or embroidery are too tight | Undo to the first tight stitch and resew with short relaxed stitches | First visible pucker |
| Details enter the sight line | Cap depth, component offset or hat rotation is wrong | Correct fit first; then move the whole component from its calculated center | Earliest failed fit/placement gate |
Final Acceptance Gates
- Count: the crown ends at the chosen multiple of eight and every body round preserves that count.
- Shape: the washed crown is smooth, not persistently waved or rigidly cupped.
- Fit: the opening passes comfortably, recovers to the wear line and stays centered before and after parts are attached.
- Depth: crown center to lower edge matches the wearer-selected position.
- Ear construction: all four discs share one 6, 12, 18, 24 ledger; each finished ear has six open base pairs and contains no wire, stuffing or hard insert.
- Symmetry: both ear centers are the same stitch distance from front and the two marked bases do not overlap.
- Attachment: neither six-stitch base rotates, lifts or exposes an open edge under a gentle four-direction check.
- Muzzle: the panel has the complete symmetric row ledger, is centered on F and lies flat at the calculated lower offset.
- Face: optional details are flat relaxed embroidery with no hard parts or long internal floats.
- Movement: the wearer turns, looks up/down and raises the shoulders without the hat rotating, an ear entering the sight line or the muzzle pulling the lower edge.
For a child, a responsible adult completes the same checks and rechecks all textile attachments before each use. Remove the hat if the wearer repeatedly pulls, mouths or catches the ears. Recalculate from current measurements rather than copying the adult default count.
Frequently Asked Questions
Is this a free crochet bear hat pattern?
Yes. The complete 72-stitch default cap, four ear panels, two-ear assembly, flat muzzle, placement formulas, worked example and acceptance gates are included on this page. The default numbers are examples for the stated measurements and gauges, not one universal size.
Is this only a crochet baby bear hat?
No. The default is an adult-capable fitted beanie because the method starts with actual head circumference instead of an age label. For a baby or child, use a current measurement, recalculate every legal count and keep the same fit, attachment and movement gates. Do not reduce the adult count by an age percentage.
How do I crochet round bear ears for a hat?
Work a six-sector flat SC disc: 6 stitches in Rnd 1, then increase to 12, 18 and 24. Make four identical panels. Pair two per ear, join eighteen edge-stitch pairs and leave six pairs open as the broad attachment base. Change the legal count only in multiples of six.
How do I make both bear ears the same size?
Convert one physical diameter through the washed ear gauge, select one legal six-sector count and work all four panels from the same round ledger. Wash them together, compare both pairs under one relaxed tape and seam corresponding stitches. Do not finish one ear and use its stretched visual outline as the second ear’s pattern.
Where should bear ears be sewn on a crochet hat?
Mark the back join and the opposite boundary as true front. Convert the chosen physical center span to an even body-stitch distance, place both centers at equal half-spans around front and mark both complete six-stitch bases before sewing either ear. Physical silhouette and sight-line checks remain required.
Do the bear ears need stuffing or wire?
Not for this low round design. Two matched textile layers create enough body while remaining flexible. If the ear collapses, use a denser accepted flat-disc sample; if it forms a rigid cup, change the hook or fabric. Do not add hidden wire or plastic to force the shape.
Can I make the muzzle as a crocheted oval in rounds?
That is a different component ledger. This page uses a flat eight-row panel because its width, height and lower offset can be measured independently and its perimeter remains thin against the cap. If you substitute a round-worked oval, reswatch it, record its finished dimensions and repeat the pucker and movement gates.
Can I use buttons or plastic safety eyes?
The default face is flat embroidery. A product name such as “safety eye” does not prove that the post and backing are appropriate inside a stretched wearable for every person. Keep a child’s version textile-only unless the complete product has been separately evaluated.
Can I add earflaps and braided ties?
They are outside this default because they change the lower-edge map and introduce additional moving lengths. Use a complete measured crochet earflap-hat construction, then recheck the full finished hat rather than copying a fixed tie location.