

Calculate the body fit, staged fullness and worn drop
A crochet ruffle hat should look playful on purpose—not as though a flat brim accidentally turned wavy. The difference is control. First fit the crown and body to the wearer. Then choose a ruffle ratio, distribute the extra stitches in sectors, and stop the ruffle at a measured drop that keeps the eyes clear.
Ruffle Fullness and Drop Planner
Open the tool in a separate page. The article also retains the manual formulas and worked checks.
JavaScript is optional: use the manual calculation method and worked examples in the article.
What This Pattern Solves
Many ruffle-hat instructions say to work two or three stitches into every stitch. That is easy to copy, but it hides the decision. Two stitches in every stitch produces a 2.0× ratio; three produces 3.0×. Those results can behave very differently after the ruffle becomes several rounds deep.
This pattern separates four variables that are often mixed together:
- Body fit: the circumference that holds the hat at the intended wear line.
- Fullness: how many ruffle stitches exist compared with the fitted body count.
- Distribution: where the added stitches enter the fabric.
- Drop: how far the completed ruffle hangs from its attachment line.
Changing one variable at a time makes correction possible. If the hat body fits but the ruffle is too flat, change fullness. If the waves look good but cover the eyes, change drop. Do not tighten the whole hat to repair the decorative edge.
Choose the Ruffle You Actually Want
Use these ratios as starting ranges, then judge the washed fabric. A stiff cotton and a soft acrylic can make different silhouettes at the same number.
| Fullness ratio | Visual result | Best starting use | Main check |
|---|---|---|---|
| 1.35–1.50× | Gentle wave | Subtle cloche edge or short ruffle | Make sure it reads as intentional, not nearly flat |
| 1.60–1.85× | Controlled classic ruffle | Everyday ruffle bucket hat | Check even wave distribution |
| 1.90–2.15× | Full ruffle | Statement brim in medium fabric | Check weight and eye clearance |
| 2.25–2.50× | Dramatic ruffle | Lightweight yarn, shorter drop | Check crowding at the attachment line |
| Above 2.50× | Extreme volume | Costume or highly sculptural style | Swatch the complete edge before committing |
The ratio is not a size. A child’s 1.75× ruffle and an adult’s 1.75× ruffle have the same proportional fullness but different stitch counts. Calculate from the actual fitted body count.
Use the Automatic Ruffle Fullness & Drop Planner
The web version of this article includes the Ruffle Fullness & Drop Planner. It opens with a complete 56 cm adult example and updates instantly when you change a measurement.
Enter:
- actual head circumference at the intended wear line;
- negative ease chosen from the washed body fabric;
- body stitch and round gauge;
- depth from crown center to the ruffle attachment line;
- construction multiple or number of sectors;
- desired ruffle ratio and drop;
- washed ruffle round gauge;
- one or two transition rounds.
The planner returns a usable body count, recalculated fit, crown checkpoint, ruffle-round counts, increases per sector, actual ratio after rounding and predicted drop. It also warns when high fullness, long drop and heavy fabric are likely to work against one another.
The formulas remain visible:
- target body circumference = head circumference × (1 − ease percentage);
- raw body stitches = target circumference × stitches per unit;
- usable body stitches = raw result rounded to the chosen multiple;
- target ruffle stitches = body stitches × fullness ratio, rounded to the same sector multiple;
- ruffle rounds = desired drop × rounds per unit.
Rounding is not an error. It makes the count usable. Always read the recalculated circumference and actual ratio after rounding.
Measure the Wearer at the Real Wear Line
Place a flexible tape where the lower fitted body will sit: usually across the mid-forehead and around the widest part at the back. Keep the tape level and comfortably close. Measure over the hairstyle normally worn under the hat.

If the wearer alternates between loose hair and a high-volume protective style, record both circumferences. Either choose one intended wearing condition or plan enough recovery for the required range. Do not solve hair volume by selecting a generic “large” count.
Negative ease is the difference between head circumference and the relaxed hat opening. Start conservatively:
- 3–5% for firm cotton or a fabric with limited recovery;
- 5–8% for a resilient, stretchy fabric;
- near 0% for a structured body that should sit without stretching.
These are starting ranges, not promises. Stretch a washed swatch, release it and check whether it returns close to its original width before choosing more negative ease.
Make Two Useful Washed Swatches
The fitted body and the ruffle do different jobs. They may also use different stitches or hook sizes, so one gauge number may not describe both.
- Make the body swatch in half double crochet or the planned body stitch.
- Make it larger than the measuring area.
- Wash and dry it as the finished hat will be handled.
- Measure stitches and rows across the relaxed center, away from edges.
- Make a small ruffle strip on one edge of the swatch using the planned ratio.
- Wash again if the edge construction changes the fabric noticeably; measure the ruffle round depth and observe weight.
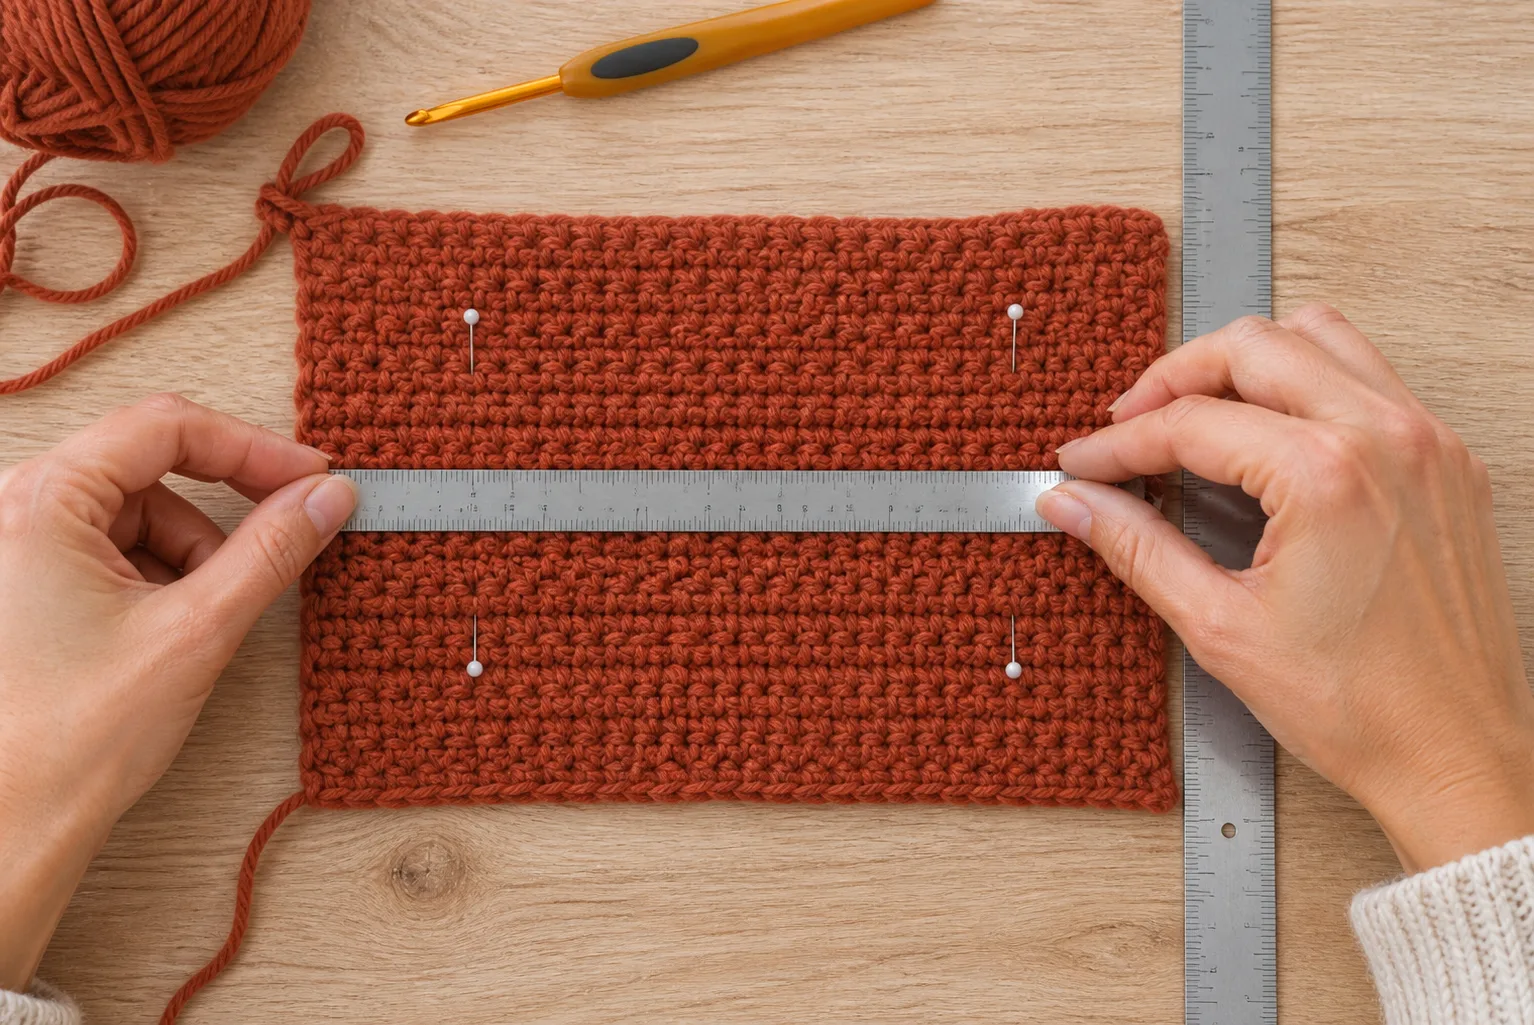
A five-centimeter ruffle swatch can answer more than a large unfinished hat. Hold it vertically. If the waves collapse into a heavy curtain, reduce the ratio, shorten the drop, use a taller but lighter stitch, or select a lighter yarn. Change one condition and compare again.
Materials and Abbreviations
For the worked example:
- approximately 180–260 yd / 165–238 m of medium-weight yarn; exact use changes with size, stitch, ratio and drop;
- 5 mm crochet hook, or the size that produces the planned washed fabric;
- eight removable stitch markers plus one contrasting round-start marker;
- flexible measuring tape, ruler, scissors and yarn needle.
US crochet terms:
- ch — chain;
- dc — double crochet;
- hdc — half double crochet;
- sc — single crochet;
- sl st — slip stitch;
- st(s) — stitch(es);
- inc — work two stitches into one stitch.
The Craft Yarn Council’s abbreviations and yarn-weight system are useful shared conventions. The number printed on a yarn label does not replace a washed gauge swatch.
Worked Example: From 56 cm to a 1.75× Ruffle
This example shows the calculation path. Replace every input with the wearer’s measurements and the project’s washed gauge.
| Input or result | Calculation | Worked value |
|---|---|---|
| Head circumference | measured | 56 cm / 22 in |
| Negative ease | chosen from washed recovery | 5% |
| Target body circumference | 56 × 0.95 | 53.2 cm |
| Body stitch gauge | measured | 18 sts / 10 cm |
| Raw body count | 53.2 × 1.8 | 95.76 sts |
| Usable body count | nearest multiple of 8 | 96 sts |
| Recalculated circumference | 96 ÷ 1.8 | 53.3 cm |
| Chosen ruffle ratio | classic | 1.75× |
| Final ruffle count | 96 × 1.75 | 168 sts |
| Two-round ramp | 96 → 136 → 168 | +5 then +4 per sector |
| Ruffle round gauge | measured | 8 rounds / 10 cm |
| Desired drop | selected | 6.0 cm |
| Ruffle depth | 6.0 × 0.8 | about 5 rounds |
The two-round ramp uses eight equal sectors. At 96 stitches, each sector begins with 12 stitches. Round one takes each sector from 12 to 17 stitches, so add five stitches evenly in that sector. Round two takes each 17-stitch sector to 21 stitches, so add four evenly. The total becomes 168 without requiring one abrupt 72-stitch jump.
Complete Top-Down Crochet Ruffle Hat Pattern
This method uses joined half-double-crochet rounds for a clear starting point. A chain at the beginning of a round does not count as a stitch. Join to the first actual hdc unless your established joining method requires a different convention. Keep that convention consistent.
Build a Flat Crown in Sectors
Begin with eight hdc in an adjustable ring. Place a marker after each stitch to establish eight sectors. In every crown increase round, add one stitch inside each sector: eight total added stitches per round.
- Round 1: 8 hdc.
- Round 2: 2 hdc in each stitch — 16 sts.
- Round 3: increase once in each two-stitch sector — 24 sts.
- Continue, keeping one increase in each sector per round.
As the crown grows, move the increase position within each sector by one or two stitches from round to round. This reduces visible spokes. Count the completed round before moving the round-start marker.
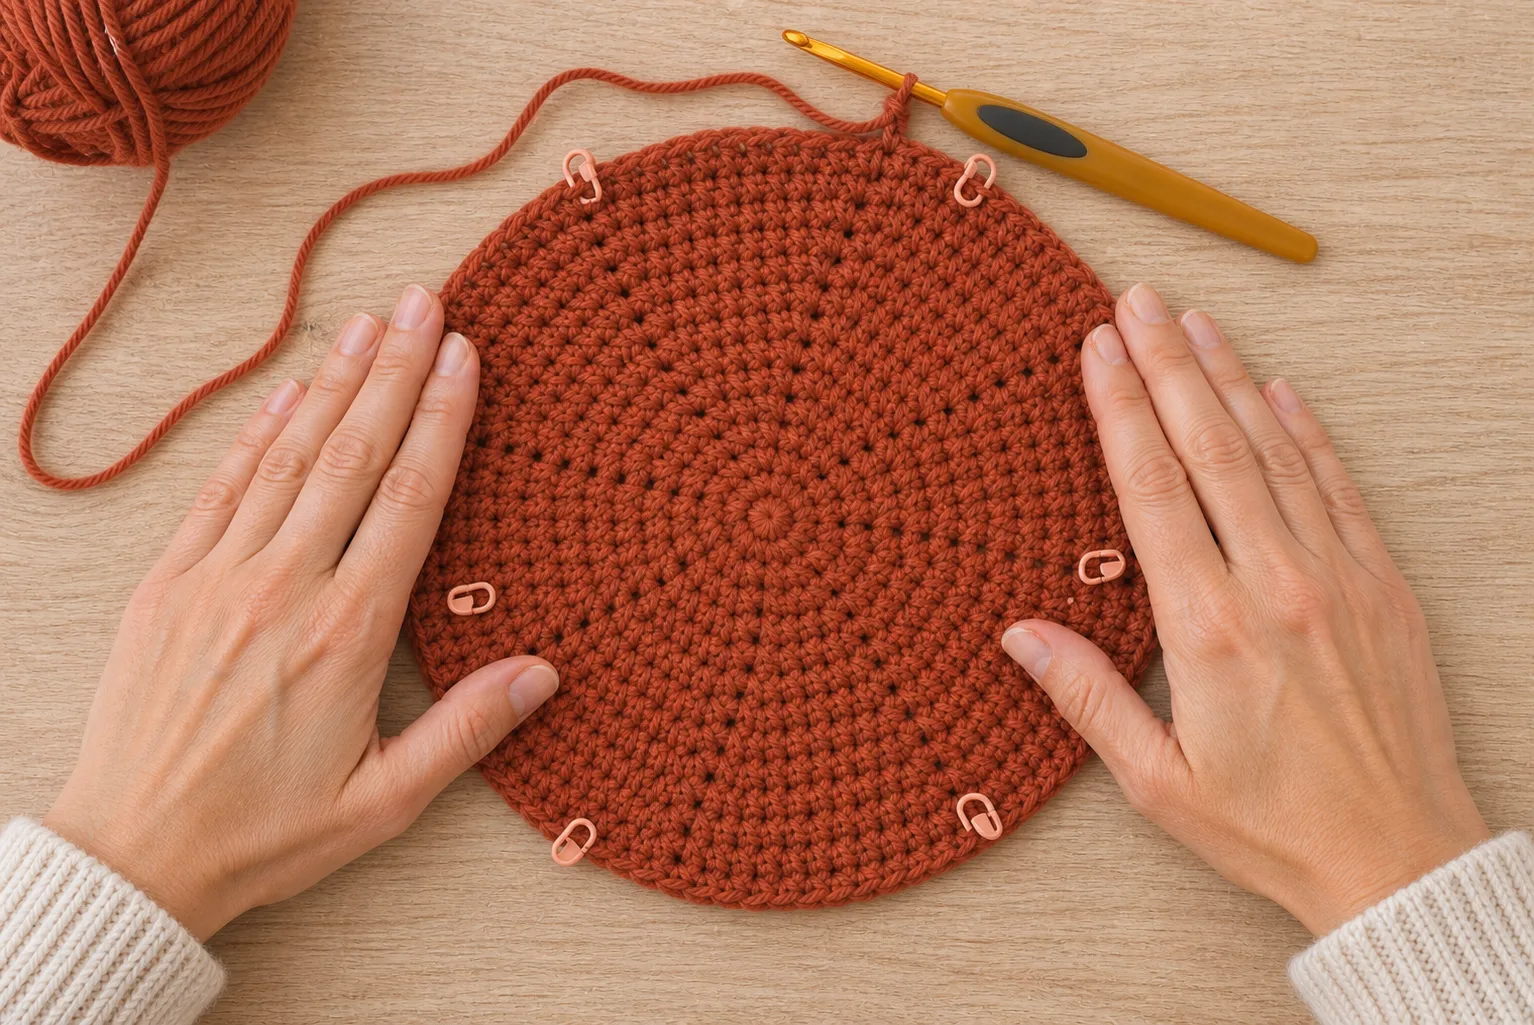
Stop adding crown rounds when both checkpoints agree:
- the completed count is the usable body count from the planner; and
- the relaxed crown diameter is close to usable body circumference ÷ π.
For the worked example, 53.3 ÷ 3.1416 gives about 17.0 cm. If the count is right but the circle cups early, the fabric may need a slightly different increase rhythm. If it ripples before the intended ruffle, increases are entering too quickly. Correct the crown before building the body.
Work the Fitted Body
Work one hdc in every stitch without increasing. Continue until the distance from crown center to the lower edge is just short of the planned ruffle attachment depth.
Try the hat on or place it on the intended wearer. Confirm:
- the opening passes over the head without strain;
- the body stays at the intended wear line after the hands release it;
- the attachment line sits high enough for the planned ruffle drop;
- the crown does not pull upward when the wearer turns the head.
Add or remove body rounds to place the attachment line. Do not begin the ruffle merely because another pattern used a fixed number of rounds.
Mark Equal Ruffle Sectors
Confirm the body count. Divide it by eight and place markers at equal intervals. The worked example has 96 body stitches, so each sector contains 12 stitches.
If your body count uses a different repeat, choose the number of sectors in the calculator before rounding. Every sector must begin a transition round with the same count. A remainder means a marker is misplaced or the round count needs correction.
Work Ruffle Ramp Round One
Use the first target returned by the planner. In the example, each 12-stitch sector must become 17 stitches. Work one hdc in every original stitch and place five extra hdc as evenly as possible within that sector.
Do not stack all five increases beside a marker. Spread them from the first third through the final third of the sector. Repeat the same spacing logic in all eight sectors. Count 136 stitches at the end of the round before continuing.
Work Ruffle Ramp Round Two
The example now has 17 stitches per sector and needs 21. Add four stitches evenly within every sector, ending with 168 stitches. Move the markers to the new sector boundaries as you work.
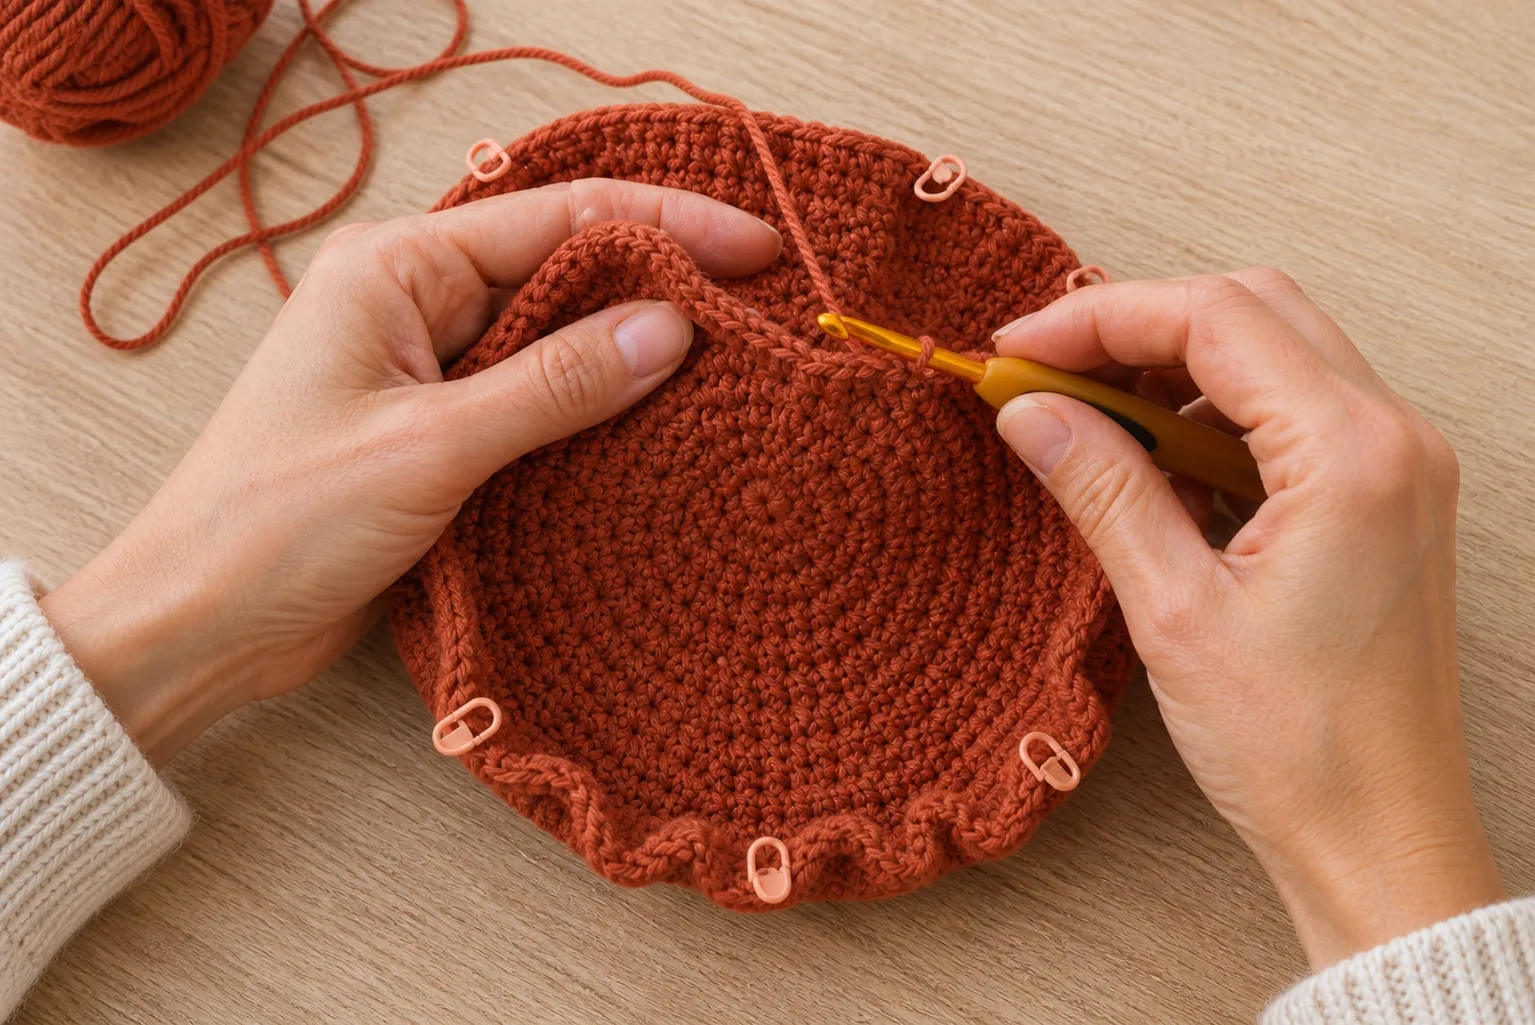
Pause after the round. Lay the hat on a table, then hold it in wearing position. You should see deliberate waves beginning below a stable attachment line. A firm horizontal ledge suggests the jump was too abrupt or the ruffle stitch is too rigid. A nearly flat edge needs more ratio, not more body circumference.
Build the Ruffle Drop
Work one stitch in every stitch without further increasing until the measured ruffle depth reaches the planned drop. The worked example uses about five total ruffle rounds at eight rounds per 10 cm, including the two ramp rounds.
Measure vertically from the attachment line to a low point while the hat is held in wearing orientation. Do not stretch the wave flat on a table. Gravity is part of the result.
For a lighter, more fluid edge, switch from hdc to dc after the transition. Re-swatch the round gauge before relying on the original depth calculation. Taller stitches can reach the same drop in fewer rounds and may also swing more freely.
Finish Without Making the Edge Rigid
For a simple finish, work one round of sc in every stitch using relaxed tension. If the sc edge contracts, use a slightly larger hook or skip the edging. A decorative edge should not pull the ruffle into a bowl.
Fasten off and weave the tail through several neighboring stitches without cinching them together. Wash or steam only as appropriate for the yarn, then let the hat reach its normal finished state before evaluating it.
Pass Four Acceptance Gates
Gate 1: Body Fit
The fitted body stays at the wear line without pressure, sliding or eyebrow creep. If it fails, correct body circumference or recovery; do not change the ruffle ratio first.
Gate 2: Fullness
Walk around the hat and compare sectors. The wave amplitude should be distributed rather than concentrated at one join. Count any suspicious sector before removing markers.
Gate 3: Eye and Ear Clearance
The lowest front wave remains above the chosen eye-clearance line when the wearer looks down and turns the head. The side wave should not rub the ear unless that coverage is intentional.

Gate 4: Recovery and Weight
Wear the hat for several minutes, remove it, and place it flat without stretching. The fitted body should return close to its relaxed opening. If the ruffle pulls the body wider over time, reduce ruffle weight, drop or ratio rather than tightening the opening excessively.
Troubleshoot by Changing One Variable First
| Symptom | Most likely cause | Change first |
|---|---|---|
| Ruffle looks almost flat | Ratio too low for this fabric | Raise target ratio by about 0.10–0.20 and swatch |
| Dense bunching at attachment | Too many increases in one round | Split the same final count across two ramp rounds |
| One side is fuller | Uneven distribution or missed count | Recount each marked sector |
| Ruffle covers eyes | Drop too long or fabric too fluid | Remove one depth round before changing fullness |
| Ruffle feels heavy | Dense yarn, high ratio and long drop combined | Reduce one of those three conditions |
| Hard horizontal shelf | Abrupt transition or rigid stitch | Stage the increase and/or use a more fluid ruffle stitch |
| Body becomes loose after finishing | Ruffle weight stretches weak-recovery fabric | Shorten/lighten ruffle; reassess body recovery |
| Join climbs diagonally | Round-start convention changed | Use one consistent join and mark the first actual stitch |
An intentional ruffle and an accidental wavy brim are different projects. If you wanted a flat or angled brim and it began waving, use the separate brim-transition diagnostic rather than increasing the wave further.
Add a Ruffle to an Existing Hat
You can add this edge to a finished hat if the lower opening already fits.
- Count the available edge stitches or evenly spaced attachment points.
- Choose a sector number that divides that count cleanly.
- Enter the count and desired ratio in the planner; use 0% ease if you are preserving the existing opening.
- Join yarn at a side or back point.
- Work a setup round only if the edge lacks stable stitch tops.
- Apply the one- or two-round ruffle ramp, then add measured depth.
Do not force a ruffle onto a tight, non-stretchy opening. The decorative edge will not repair the underlying fit.
Personalize for Hair Volume and Styling
Measure the head with the intended hairstyle in place. For locs, braids, curls or a protective style, also mark where the added volume sits. Volume high at the crown may require more crown depth; volume around the sides may require a larger body circumference. Those are different corrections.
If the hat will be worn in two substantially different hair conditions, make the fitted body recover across that measured range before adding the ruffle. The ruffle count follows the final usable body count, so resolve the fit window first.
Frequently Asked Questions
How many stitches should I put in each stitch for a ruffle hat?
There is no single answer. Two stitches in every stitch is 2.0× fullness; three is 3.0×. Select the ratio from the desired look and washed fabric, then distribute the exact required increases across sectors. A 1.75× ruffle cannot be expressed as the same simple action in every stitch, which is why the planner gives sector counts.
Is a 2.0× ruffle always too full?
No. It can make a clear, balanced ruffle in a light or medium fabric. It becomes risky when combined with dense yarn, a long drop or a stiff stitch. Judge the combination, not the ratio alone.
Can I use continuous rounds?
Yes. Mark the first stitch and every sector boundary. Checkpoints still occur at the completed count for each planned round. Do not let the spiral hide a missed increase.
Can I make the body in single crochet and the ruffle in double crochet?
Yes. Measure separate washed gauges. The body stitch gauge sizes the opening; the ruffle round gauge estimates the drop. Changing stitch height without changing the depth calculation is a common reason a brim becomes longer than expected.
Why did my ruffle grow after washing?
The yarn may relax, the taller stitches may lengthen, or water weight may pull the edge during drying. Dry the swatch and finished hat in the planned manner without hanging a wet ruffle. Use the finished-state round gauge for the next calculation.
Should the ruffle begin above or below the ears?
That is a wearer choice. Mark the attachment line on the wearer, then subtract the planned ruffle drop from the lowest acceptable edge position. This keeps style and clearance connected.
Final Check Before You Fasten Off
Confirm the body fit first, the final ratio second, the worn drop third and the recovery last. Record the finished body count, ruffle count, ratio, number of depth rounds and yarn used. Those five facts are more reusable than an “adult size” label and make the next hat faster to customize.
References