

Calculate the band, preserve the crown, and center the visor
A crochet newsboy hat is not a beanie with a brim added at the end. Its recognizable shape comes from four decisions that must agree: a crown that is intentionally fuller than the head opening, a secure lower band, a short visor centered on the wearer’s forehead, and enough structure to hold that visor without forcing it over the eyes.
Newsboy Hat Fit and Visor Planner
Open the tool in a separate page. The article also retains the manual formulas and worked checks.
JavaScript is optional: use the manual calculation method and worked examples in the article.
What Makes This a Newsboy Hat Instead of a Beanie With a Brim
A fitted beanie normally keeps almost the same working circumference from the body into the lower edge. A projected all-around brim grows around the entire hat. A newsboy cap uses a different relationship: the upper body has extra circumference for a rounded, slightly relaxed profile, the lower band removes that extra room and anchors the hat, and only the front section receives a short peak.
Judge the shape in this order:
- Crown/body fullness: enough extra circumference to create a rounded cap rather than a close beanie, but not so much that all the fabric collapses into one fold.
- Fitted band: secure at the intended wear line, with recovery after stretching and no pressure point at the forehead.
- Visor attachment arc: centered on the wearer and narrow enough to stop before the side of the head.
- Visor projection: long enough to read as a peak, short enough to preserve eye clearance when the head tilts down.
- Structure: added only after the size, curve, and placement already work.
A decorative top button or short strap can strengthen the classic style, but neither feature can rescue the wrong proportions. Solve fit and visor placement first.
Choose Starting Ranges, Then Let the Fabric Decide
The following ranges describe design directions, not fixed body measurements. The washed swatch and wearer check remain the acceptance gates.
| Decision | Useful starting range | What changes when the value rises |
|---|---|---|
| Band negative ease | 3–8% for moderately recovering fabric; up to about 10% only when the swatch rebounds well | The band becomes smaller relative to the head |
| Crown/body fullness above band count | 6–10% trim; 10–16% classic; 16–22% full | The upper cap becomes rounder and roomier |
| Visor attachment arc | About 36–44% of the finished band circumference for a classic front peak | The visor spreads farther toward the sides |
| Visor projection | About 3.5–4.5 cm short; 4.5–6 cm classic; above 6 cm requires closer structure and eye-clearance checks | The peak reaches farther forward and carries more leverage |
| Front-edge width after taper | About 65–80% of the attachment count | A higher ratio keeps a squarer front; a lower ratio creates stronger side taper |
Start near the middle of a range only when there is no established personal sample. If the wearer prefers a trim cap, lower fullness before changing band fit. If the visor looks like it wraps around the face, shorten its attachment arc before making the front edge narrower.
Materials and Measurement Setup
Use a yarn that produces an opaque, resilient hat fabric at the planned main gauge. Medium or light-medium yarn is convenient for the worked example, but the worked calculation does not require a yarn category. It requires the washed gauge made by the actual yarn, hook, stitch, and hands.
Prepare:
- Main yarn plus enough reserve for a second visor layer if desired.
- A hook that produces the planned half-double-crochet body fabric.
- A hook that produces a dense but still workable single-crochet visor fabric; this may be the same hook or a smaller one.
- Locking stitch markers in at least two colors.
- Flexible measuring tape, ruler, yarn needle, and smooth pins or clips.
- Optional purpose-designed flexible millinery plastic or visor insert whose care instructions suit the finished hat.
US crochet terms are used. The abbreviations are: ch for chain, hdc for half double crochet, sc for single crochet, sl st for slip stitch, inc for two stitches worked in one stitch, hdc2tog for a half-double-crochet decrease, sc2tog for a single-crochet decrease, and st(s) for stitch(es). A beginning chain does not count as a stitch unless the user intentionally changes that convention and records it.
Measure Two Gauges, Not One Label
Make the body swatch larger than the measuring window, finish it as the hat will be finished, let it relax, and measure in the center. Record stitches and rows per 10 cm. Make a separate dense visor swatch if the hook or stitch changes.
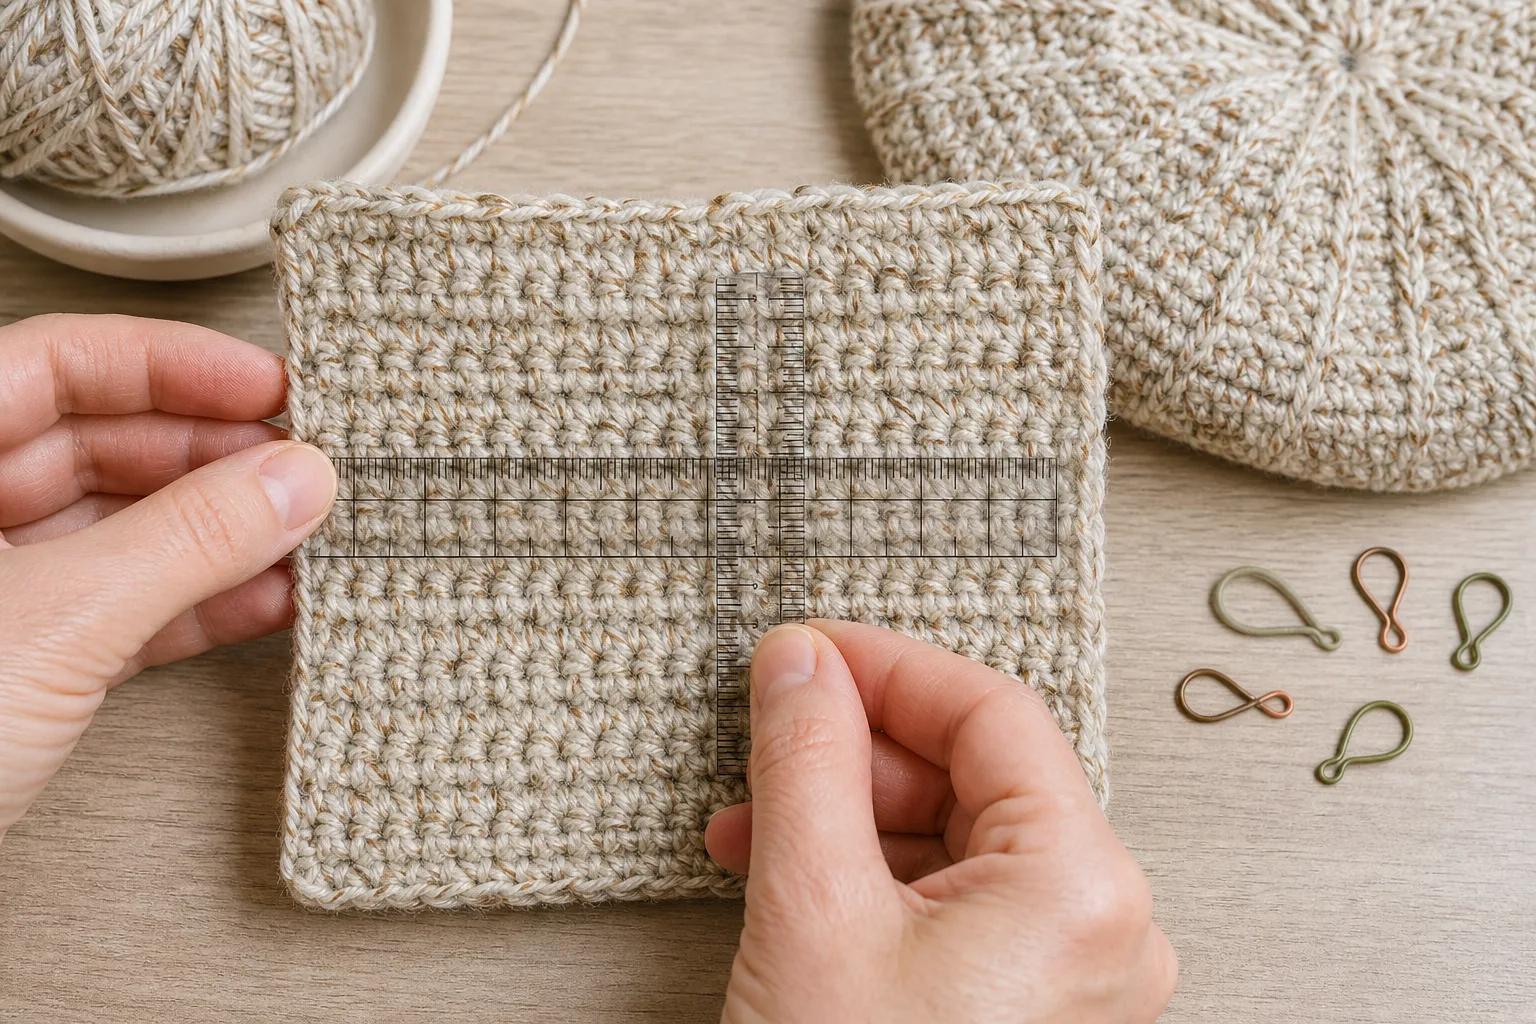
The body calculation uses main stitch gauge to convert the fitted circumference into stitches. Main round gauge estimates where the band begins, but the physical crown-center-to-edge measurement overrules the estimated row count. Visor row gauge converts the desired projection into turning rows. Mixing gauges from different stitches is a common reason a mathematically centered visor still becomes too long or too shallow.
Also run a recovery check on the proposed band fabric:
- Mark a relaxed 10 cm section of the washed swatch.
- Stretch it only as far as it would need to travel over the head.
- Release it for one minute without smoothing.
- Measure the same marks again.
- Choose a smaller negative-ease percentage if the section does not return close to its starting length.
Negative ease should come from recoverable fabric, not from forcing a rigid band around the head.
Apply the Newsboy Fit and Visor Method
Use the wearer’s measured hat line, washed main and visor gauges, and the marked front arc. The worked example shows the count changes; the wearer gate determines final visor width, taper and structure.
The main relationships are:
The worked method rounds the band to an even usable count so an odd visor span can have one true center stitch. It rounds the body upward to complete crown sectors. It reports the estimated ease and fullness after rounding so the user can see what the usable stitch counts really created.
Complete default example
| Calculated decision | Default result | Meaning |
|---|---|---|
| Fitted band target | 96 sts; about 53.3 cm relaxed circumference | About 4.8% estimated negative ease after usable-count rounding |
| Fuller crown/body target | 112 sts | About 16.7% fullness after rounding upward to eight sectors |
| Approximate crown diameter gate | 19.8 cm | A check on the relaxed circle, not a fixed adult standard |
| Depth before band | 17.5 cm | Measure from crown center to band start on the wearer |
| Band depth | About 6 rounds at the example row gauge | Stop by physical depth if the row estimate differs |
| Body-to-band reduction | 16 decreases over 2 rounds | Eight evenly distributed hdc2tog points per round |
| Centered visor attachment | 41 sts | One center stitch plus 20 stitches on each side |
| Visor projection | About 11 rows | Based on 22 dense visor rows per 10 cm |
| Front edge | 29 sts | Six paired edge-decrease rows reduce 41 to 29 stitches |
These are example outputs, not promised counts for every 56 cm head. A different washed gauge, repeat multiple, recovery result, or style preference changes them.
Make the Fuller Crown and Body
The baseline construction uses joined half-double-crochet rounds and eight sectors. Continuous rounds can also work, but the beginning marker must move every round and the final band/visor center must be established on the wearer rather than inferred from the spiral start.
- Make an adjustable ring. Round 1: ch 1, work one hdc per planned sector into the ring, join to the first hdc, and confirm the count. The default example begins with 8 hdc.
- Round 2: ch 1, work 2 hdc in every stitch, join, and confirm twice the sector count.
- Round 3: ch 1, repeat (hdc in the next stitch, 2 hdc in the next stitch) once per sector, then join.
- For each later increase round, add one ordinary hdc to every sector before its increase. In general, Round k repeats (hdc in the next k − 2 stitches, 2 hdc in the next stitch) once per sector.
- Continue until the calculated body target is reached. The example reaches 112 stitches after fourteen total crown rounds: one 8-stitch starting round followed by thirteen eight-sector increase rounds.
- Work even at the body target until the cap measures the calculated pre-band depth from crown center to the lower working edge.
Run a relaxed crown-shape gate while increasing. If the crown forms a persistent bowl while still below the target, let the next round add more evenly distributed increases and still stop at the target. If it develops a persistent ruffle, insert an even round before adding more increases. This changes how quickly the target is reached; it does not authorize an unknown final count.
At the full body count, the cap should look intentionally roomier than the final opening. The extra fabric must be distributed around the head, not pulled into one fold at the back.
Reduce the Body Into a Fitted Band
Subtract the fitted band count from the body count. The method spreads that difference across as many reduction rounds as needed without placing more than one decrease in each crown sector per round.
For the default example, reduce 112 stitches to 96 stitches:
| Reduction round | Begin | Change | Finish | Placement |
|---|---|---|---|---|
| 1 | 112 sts | 8 hdc2tog | 104 sts | One decrease in each of eight nearly equal sections |
| 2 | 104 sts | 8 hdc2tog | 96 sts | One decrease in each section, offset from the previous round |
Do not stack every decrease directly above the previous one. Offset the second set so the transition does not form eight hard darts. Also avoid concentrating decreases at the forehead to “make space” for the visor; that can pull the band upward and make the visor appear crooked.

After the final reduction round, work the band at the calculated count until it reaches the chosen physical depth. Keep the lower edge elastic. If a decorative texture is used, its repeat must fit the band count and its washed recovery must support the selected ease.
Put the Cap On Before Marking the Visor
The round join, spiral start, back fullness, and yarn tail are construction landmarks—not anatomical center front. Put the cap on the intended wearer with the lower band at its normal wear line. Let the crown fullness settle naturally.
Place one marker at center forehead. Measure half of the chosen attachment arc along the curved band to the wearer’s right and place an endpoint marker. Repeat to the left. Count the band stitches between the endpoints, including the center stitch. Adjust the endpoints by the same number of stitches so the final attachment count is odd and centered.
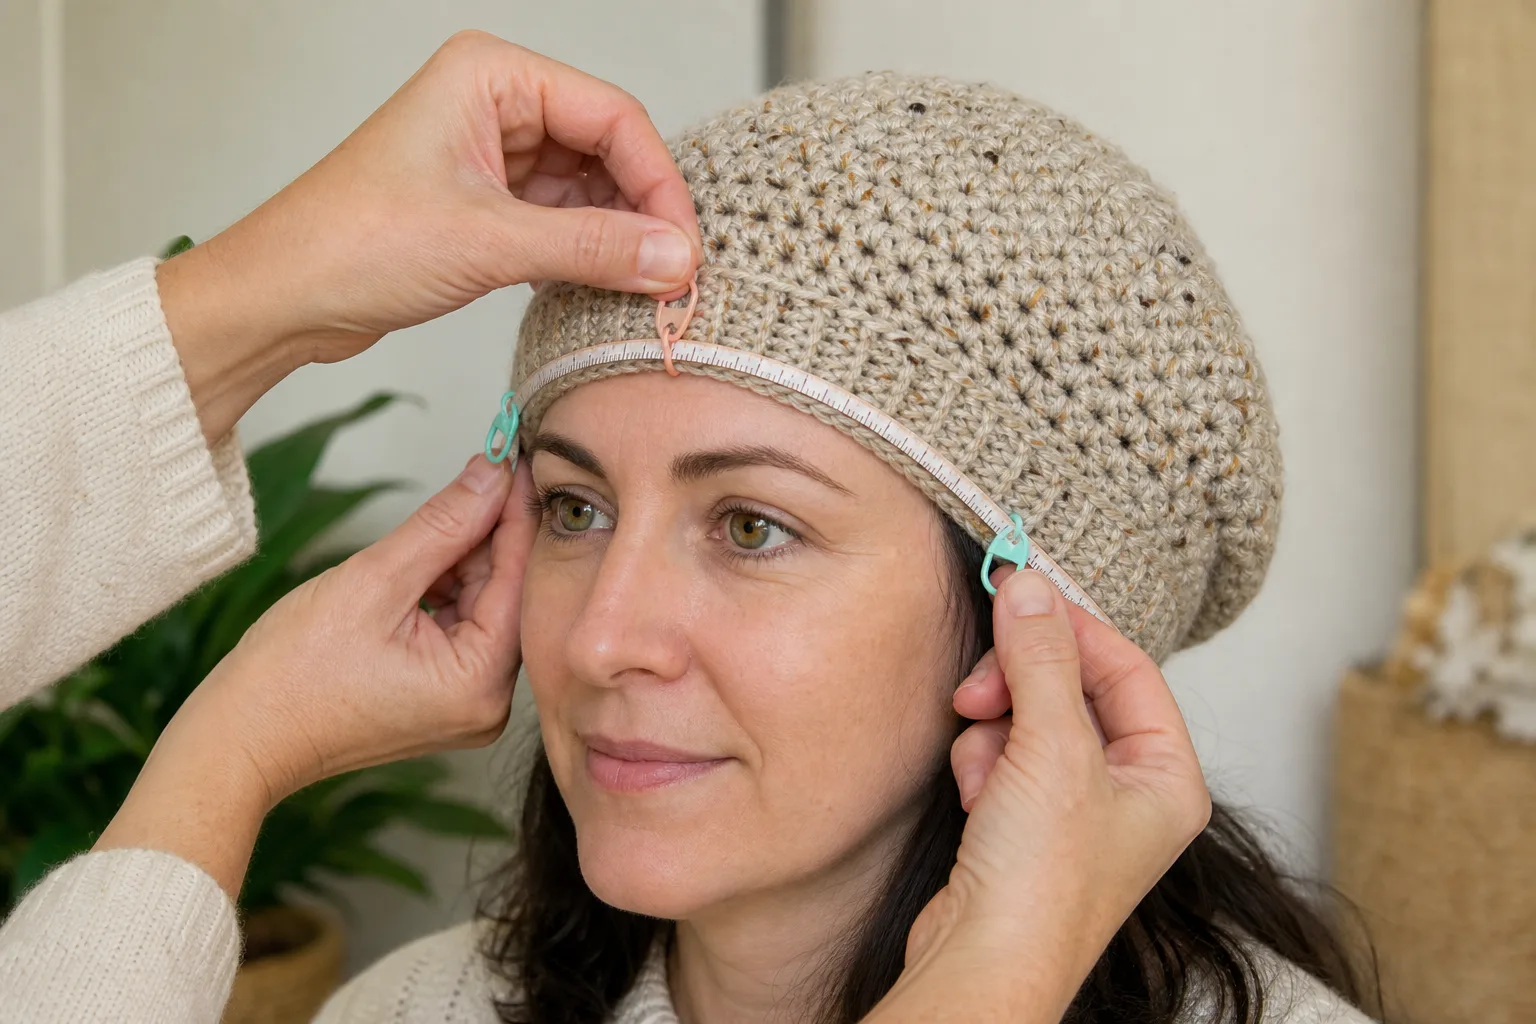
Before crocheting, look at the cap from the front and both sides. The endpoint markers should stop well before the ears. The lower band should remain above the eyebrows without being pushed backward. If not, correct the band position or attachment arc now.
Crochet the Centered Tapered Visor
Use dense single crochet for the baseline visor. The turning chain does not count as a stitch. Work the first row directly across the marked front band span.
- With the cap facing right side out, attach yarn at one endpoint marker. Ch 1 and sc across every marked band stitch through the opposite endpoint. Count the complete attachment row.
- Ch 1 and turn. Work the worked calculation’s next row. On a taper row, sc2tog over the first two stitches, sc across, then sc2tog over the final two stitches.
- On an even row, sc across without changing the count.
- After every row, compare the left and right side edges. Confirm that the center stitch remains aligned with the center-front marker.
- Stop at the calculated projection, then put the cap on before fastening off or adding structure.
The default 41-stitch, 11-row visor schedule is:
| Visor row | Begin | Action | Finish |
|---|---|---|---|
| 1 | 41 sts | Attach and sc across the centered marked span | 41 sts |
| 2 | 41 sts | Work even | 41 sts |
| 3 | 41 sts | sc2tog at both row edges | 39 sts |
| 4 | 39 sts | sc2tog at both row edges | 37 sts |
| 5 | 37 sts | Work even | 37 sts |
| 6 | 37 sts | sc2tog at both row edges | 35 sts |
| 7 | 35 sts | Work even | 35 sts |
| 8 | 35 sts | sc2tog at both row edges | 33 sts |
| 9 | 33 sts | sc2tog at both row edges | 31 sts |
| 10 | 31 sts | Work even | 31 sts |
| 11 | 31 sts | sc2tog at both row edges | 29 sts |
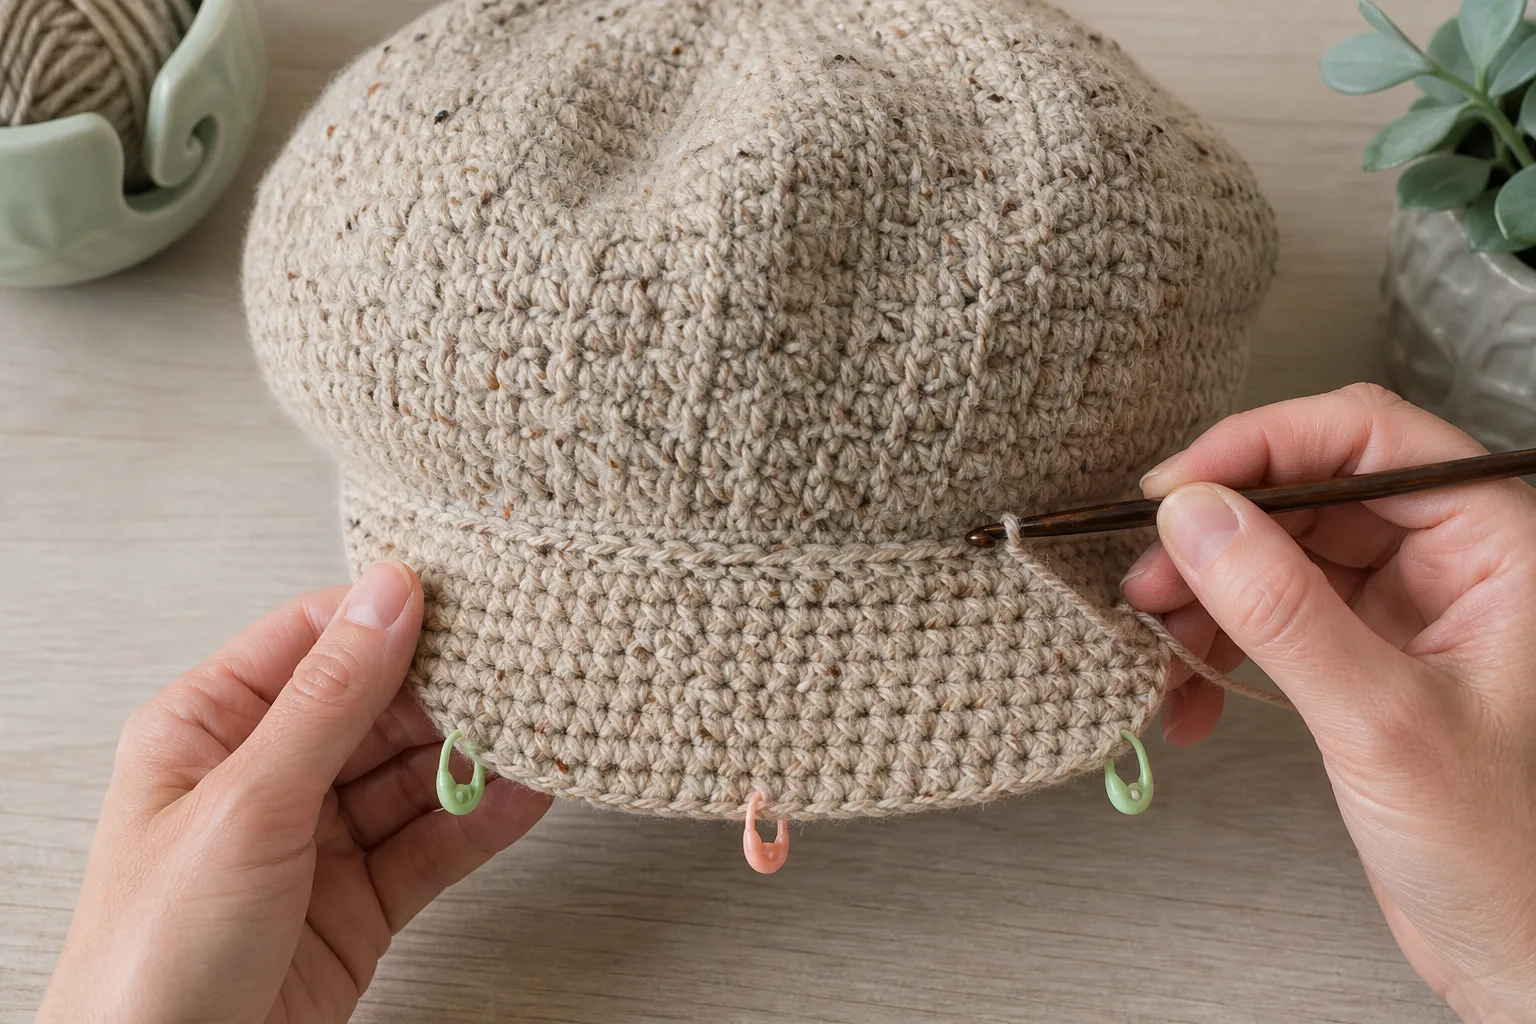
Do not force all paired decreases into the first few rows. A sudden reduction makes the sides angle sharply and can create a narrow point. Spreading the taper through the projection keeps the front edge broad enough to read as a newsboy peak.
Run the Wearer Gate Before Adding Structure
Put the cap on in its normal position and release it—do not hold the visor up for the evaluation.
- Look straight ahead. The eyes and eyebrows should remain visible as intended.
- Tilt the head down as if reading or walking down steps. The visor should not drop into the line of sight.
- Turn to each side. The two visor endpoints should finish at matching positions and stop before the ears.
- Press one finger at the center-front band while gently lifting the visor. The band should not pull away from the forehead.
- Remove the cap and compare both tapered edges stitch by stitch.
If the visor covers the eyes, identify whether the cap sits too low or the visor projects too far. Shortening the visor cannot correct a band that is already below its intended wear line. If the visor wraps around the face, remove the visor and shorten the attachment span; extra side taper does not erase a too-wide foundation.
Add a Second Layer or Insert Only When Needed
A short visor may hold its shape with dense single crochet alone. If the relaxed geometry and eye clearance pass but the visor still folds, add structure without changing its footprint.
For a crochet-only second layer, chain enough stitches to reproduce the attachment count, work the same row schedule as a separate piece, and place it under the attached visor with wrong sides together. Join the side and outer edges evenly, then secure the inner straight edge to the band without tightening it.
For an insert, make the underside first and use it to establish the available interior space. Use a purpose-designed flexible millinery plastic or visor insert compatible with the intended care method. Trim it smaller than the crochet perimeter, round every corner, and make sure no hard edge reaches the seam. Join most of the visor layers, slide the insert into the pocket, recheck the curve and eye clearance, then close the remaining edge completely.
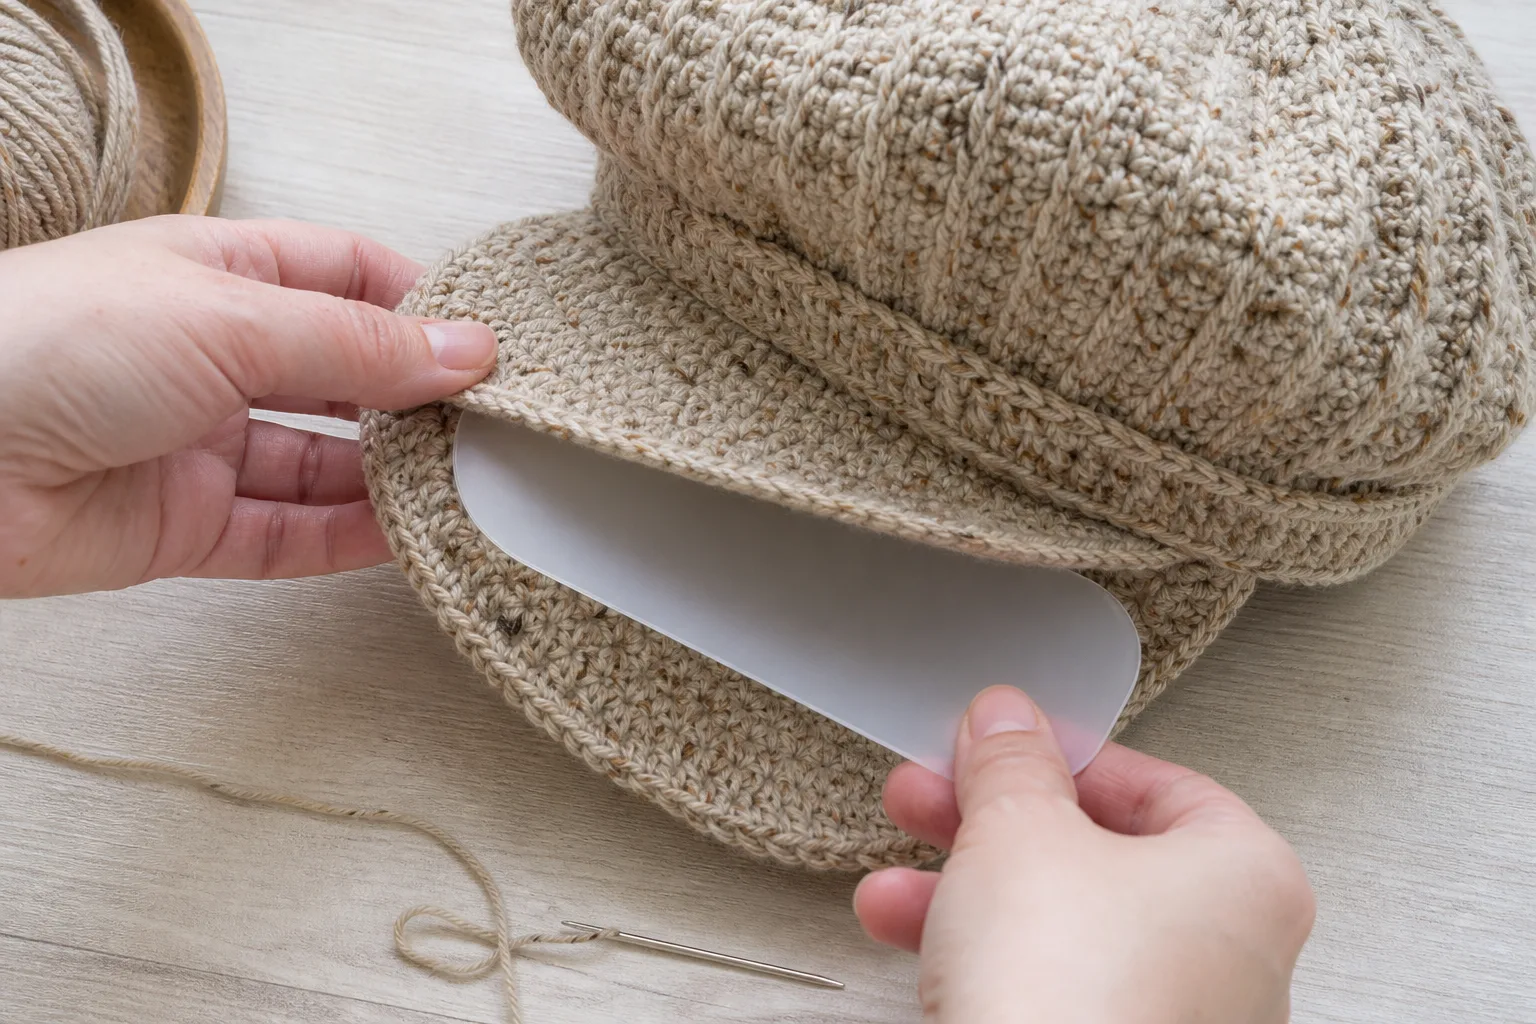
Avoid exposed wire ends, sharp improvised plastic, cardboard that conflicts with washing, or any support material whose care behavior is unknown. Follow the insert manufacturer’s handling and care directions.
Read the Finished Hat’s Error Fingerprint
| What the wearer sees or feels | Most likely cause | Controlled correction |
|---|---|---|
| Cap looks like a close beanie with a small shelf | Too little body fullness, or fullness removed too early | Recalculate body target; preserve fullness until the planned body-to-band transition |
| Crown collapses into one large back fold | Too much fullness for the fabric, or decreases concentrated in one area | Lower fullness or redistribute reductions around marked sections |
| Band slides while visor pulls it forward | Band circumference too large or fabric recovery too weak | Correct band fit; do not make the visor narrower to hide a sliding opening |
| Band becomes tight only after visor Row 1 | Attachment row worked tighter than the band | Remove Row 1 and reattach with relaxed tension or a suitable hook; keep the same centered span |
| Visor reaches toward the ears | Attachment arc too wide | Shorten both sides equally and rebuild from a centered odd count |
| Visor points to one side | False center-front mark, unequal endpoint counts, or unequal row edges | Mark center on the wearer, recount each half, and compare every row |
| Visor covers the eyes | Band sits too low, projection is too long, or fabric collapses | Correct wear line first, then shorten projection; add structure only if geometry already passes |
| Visor is flat on the table but folds when worn | Fabric structure is insufficient | Keep the count; test denser fabric, a second layer, or a suitable insert |
| Visor cups upward even without an insert | Edge tension too tight or taper too aggressive | Relax the outer edge and spread fewer paired decreases across more rows |
Change one cause at a time. If both visor placement and stiffness are altered together, the next version does not reveal which correction worked.
Final Acceptance Check
- Record actual head circumference, finished washed band circumference, main gauge, visor gauge, hook sizes, yarn, and final stitch counts.
- Confirm the band stays at the intended wear line through normal head movement without pressure.
- Confirm the crown fullness is distributed around the cap and the body-to-band transition has no gathered front patch.
- Confirm the visor center stitch aligns with the wearer’s center forehead.
- Confirm both visor endpoints stop before the ears and occupy matching band positions.
- Confirm the wearer can look forward and down without the peak blocking the intended view.
- Confirm both taper edges contain the same number of rows and decreases.
- If an insert is present, confirm every edge is smooth, fully enclosed, and compatible with the planned care method.
- Photograph the front, both sides, and back while worn; those views reveal placement errors that a flat-table photo can hide.
The recorded result becomes the user’s personal pattern. “Adult size, 96 stitches” is incomplete. “56 cm head; washed gauge 18 stitches per 10 cm; 96-stitch band at 53.3 cm; 112-stitch body; 41-stitch centered visor; 11 rows tapering to 29 stitches” can be understood, adjusted, and repeated.
Frequently Asked Questions
Can I use the round join as center back and count halfway around for the visor?
Only if a wearer check confirms that the join actually settles at center back. Crown spirals, seam drift, and the way fullness falls can rotate the cap. Mark center front on the wearer, then count equal stitches to both endpoints.
Can a smaller hook fix a floppy visor?
It can produce denser fabric, but it also changes both stitch and row gauge. Make a visor swatch and recalculate the attachment and row counts. Do not silently change hook size while keeping counts calculated from the old gauge.
Should the visor be the same width for every hat size?
Not automatically. Head size, band circumference, facial preference, yarn gauge, and the distance between the desired endpoints all change the usable span. Measure the arc on the wearer and convert that measurement through the project gauge.
Can I add more taper to stop the visor wrapping around the face?
Taper changes the outer edge, not the width attached to the band. If the sides begin too far toward the ears, shorten the attachment arc equally on both sides and rebuild the visor.
References