
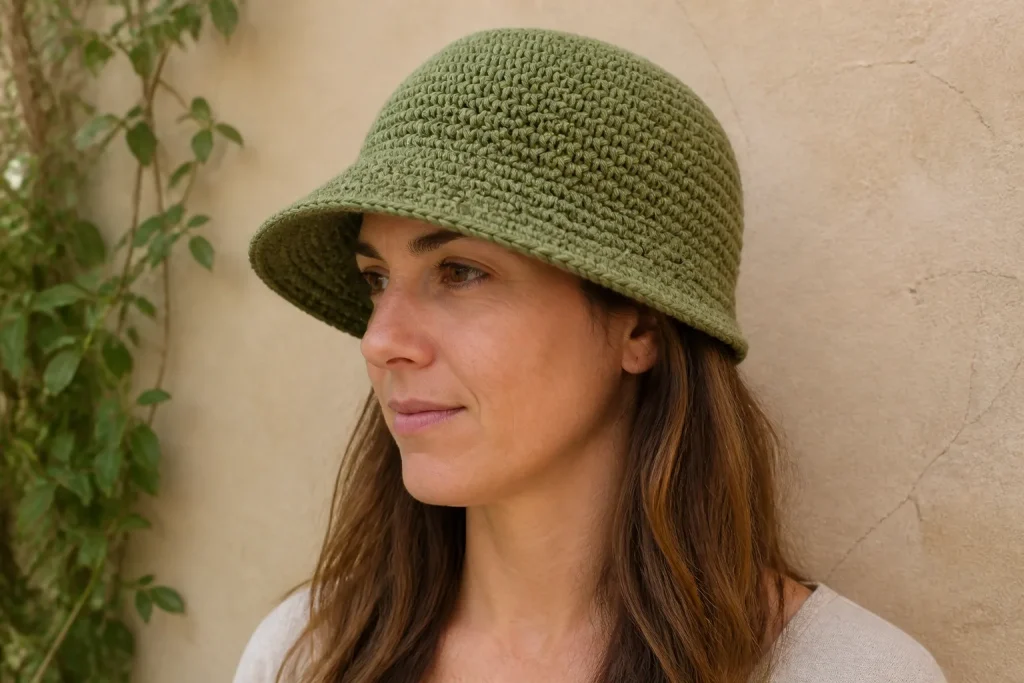
Calculate the transition, read the fabric, and control the edge
A crochet hat with a brim should not depend on one universal instruction such as “increase six times in every round.” That shortcut can work for one stitch, hook, yarn, and tension, then ruffle or cup when any of them changes. A more reliable brim begins with the stitch count of a hat body that already fits, uses both parts of the washed gauge, and checks the fabric after every new round.
This guide shows how to add a projected brim to an existing top-down hat body. It does not replace the complete Bucket Hat Pattern or Sun Hat Pattern on this site. Instead, it solves the transition they share: how to move from a fitted cylinder to an outward brim, calculate a personal starting plan, distribute increases without corners, and recognize whether the next correction belongs to the stitch count or the fabric structure.
Crochet Hat Brim Transition Planner
Open the tool in a separate page. The article also retains the manual formulas and worked checks.
JavaScript is optional: use the manual calculation method and worked examples in the article.
First, Confirm Which Kind of Brim You Mean
The word “brim” leads to two different constructions. A fold-up beanie cuff is usually a band that hugs the head and turns upward against the body. A projected hat brim leaves the lower edge and travels outward to create shape, shade, or a visor-like line. This article is for the second construction.
Do not begin the projected brim to correct a hat body that is too tight, too loose, or too shallow. The body stitch count becomes the inner circumference of the brim. If that circumference is wrong, the brim can hide the problem on a table but cannot repair the way the hat sits on a person.
Before the first brim round, put on the unfinished hat and confirm four things: the lower edge reaches the intended wear line; the body feels secure without pressure; the back does not lift when the wearer looks down; and the last body round has a verified stitch count. If the body is too small, correct the body. Do not add a sudden group of increases at the hinge and expect the hat opening to become comfortable.
The Brim Has Two Different Problems to Solve
Shape and support are related, but they are not the same problem.
Geometry is the relationship between the distance the brim moves outward and the number of stitches available around each new outer round. Excess circumference has nowhere to lie, so it buckles into waves. Insufficient circumference pulls the edge inward, so the brim cups, rolls, or angles down more sharply than intended.
Structure is the fabric’s resistance to gravity, movement, washing, and wear. A geometrically correct brim can lie perfectly flat on a table and still droop over the wearer’s eyes. Adding more stitches to that brim usually makes it larger and more flexible; it does not automatically make it stronger.
Use this separation as the main troubleshooting rule:
- If the brim cannot lie smoothly on a flat surface, correct the stitch plan first.
- If it lies smoothly but collapses only when lifted or worn, evaluate yarn, hook, stitch density, brim width, and edge support.
- If only one section misbehaves, recount and examine increase placement, the round join, and local tension before changing the total.
Collect Five Inputs From Your Own Project
The calculator needs information from the fabric in front of you, not from an age label or a generic “adult” size.
- Body count: count the stitches in the final complete hat-body round. Place a marker every 10 or 12 stitches while counting, then reconcile the sections with the total.
- Washed stitch gauge: work the actual brim stitch pattern, finish the swatch as the hat will be finished, let it rest, and count stitches across the center of a 4 in / 10 cm span without stretching.
- Washed round gauge: in the same swatch, count complete rows or rounds in the vertical 4 in / 10 cm span. The calculator uses this to translate the desired brim projection into a number of rounds.
- Brim projection: measure from the body-to-brim hinge to the planned outer edge. Do not measure across the entire hat diameter.
- Repeat multiple: enter 1 for plain single crochet, or the number of stitches required by a repeated texture. The tool rounds each target count to a usable multiple.
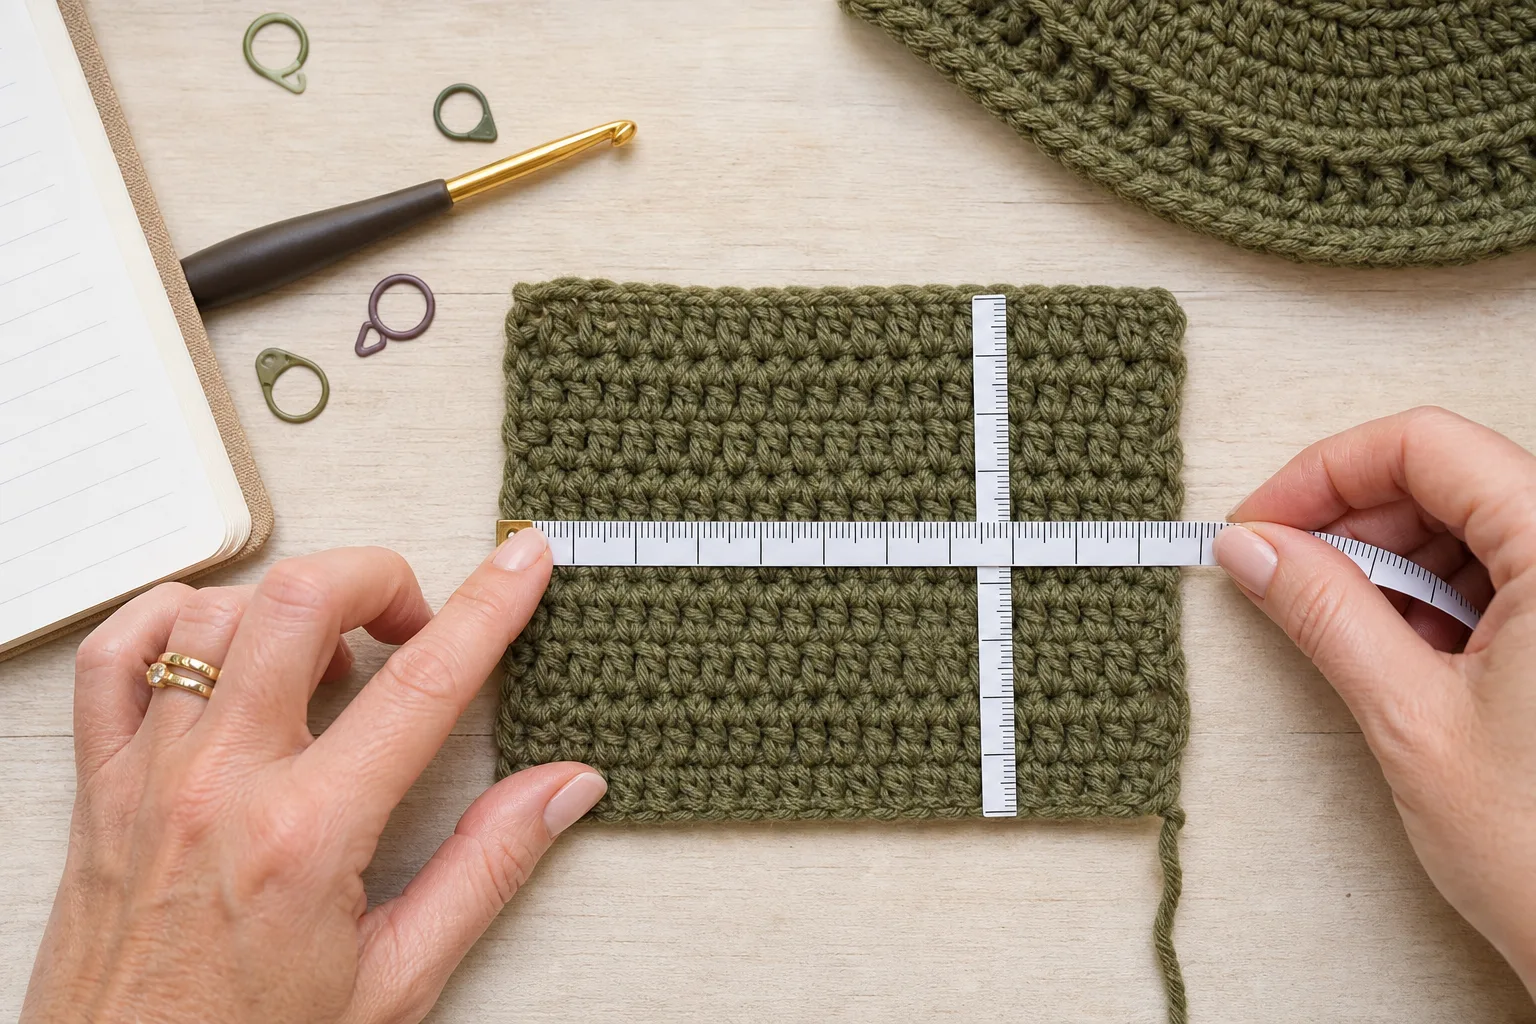
The Craft Yarn Council describes gauge as the number of stitches and rows in a measured area and recommends measuring inside a larger swatch so distorted edge stitches do not control the result. That matters especially here: a brim formula that uses horizontal gauge but ignores row height assumes every person’s stitches move outward by the same amount per round.
Optional: Use the Crochet Hat Brim Transition Calculator
The web version of this article includes an optional Crochet Hat Brim Transition Calculator. Enter the five project values, choose the intended starting profile, and select the symptom shown by the current fabric. The result contains a complete round schedule rather than an empty worksheet. The formulas, worked example and lay-flat gate remain usable without opening it.
The optional calculator calculates a flat geometric baseline from the circumference relation, then rounds each target to the repeat multiple. In compact form:
Both gauge numbers must use the same measuring span. For example, 18 stitches and 20 rounds per 10 cm can be used together. Do not mix stitches per 4 inches with rounds per 1 inch.
The formula is a starting forecast, not permission to crochet ten rounds without looking. Yarn compressibility, stitch anatomy, hook motion, and the hinge construction can change the physical result. The schedule therefore includes repeated lay-flat gates. The most recent smooth round is always more useful than a theoretical future count.
What the three starting profiles do
Flat baseline uses the calculated circumference growth without an intentional bias. Start here when you want a brim that rests close to one plane.
Gentle downward angle begins with slightly slower growth. It is useful as a first comparison when the brim should leave the body and travel down rather than straight out. It is not a fixed recipe: if the edge pulls or rolls, return toward the flat target.
Intentional soft wave begins with slightly faster growth. It creates room for a decorative ripple, but the wave still needs even distribution. If several small folds bunch on one side and one large fold appears elsewhere, the problem is usually placement or count drift, not simply the total number of increases.
Complete default example
The calculator opens with a complete usable example: 72 body stitches; 18 stitches and 20 rounds per 10 cm; a 5 cm projected brim; repeat multiple 1; flat baseline. Five centimeters at this round gauge is approximately 10 brim rounds. The formula predicts about 5.7 increases per round, so the rounded schedule alternates between five and six added stitches.
| Brim round | Target total | Add this round | Distribution across previous round |
|---|---|---|---|
| 1 | 78 sts | +6 | (11 plain sts, inc) six times |
| 2 | 83 sts | +5 | Five gaps: three with 15 plain sts and two with 14, then one inc after each gap |
| 3 | 89 sts | +6 | Six nearly equal gaps, then one inc after each gap |
| 4 | 95 sts | +6 | Six nearly equal gaps, then one inc after each gap |
| 5 | 100 sts | +5 | Five nearly equal gaps, then one inc after each gap |
| 6 | 106 sts | +6 | Six nearly equal gaps, then one inc after each gap |
| 7 | 112 sts | +6 | Six nearly equal gaps, then one inc after each gap |
| 8 | 117 sts | +5 | Five nearly equal gaps, then one inc after each gap |
| 9 | 123 sts | +6 | Six nearly equal gaps, then one inc after each gap |
| 10 | 129 sts | +6 | Six nearly equal gaps, then one inc after each gap |
These counts belong only to the stated example. A body with 72 stitches but a different horizontal-to-vertical gauge ratio can need a different increase rate. A user whose texture requires a multiple of four will also receive different rounded totals. The useful result is not “129 is the correct final number”; it is a personal sequence plus a checkpoint after every round.
Build the Body-to-Brim Hinge Without Changing the Fit
A loop-only round can create a visible fold line, but it does not determine the correct number of increases. Treat the hinge and the perimeter plan as separate decisions.
For a distinct change of direction, work the first brim round in the loop specified by the design and fold the new fabric outward as it develops. For a softer transition, work through both loops. In either case, keep the final body count available, mark the round start, and use the calculator’s target for the first completed brim round.
Avoid pulling the first stitch and final join unusually tight. A local tight spot can imitate a global shortage: the brim may look correct everywhere except near the seam. For joined rounds, compare the join area with the opposite side after every round. For continuous rounds, move the start marker before counting again.
Distribute Increases Without Making Corners
The calculator states how many increase points are needed and divides the ordinary stitches into gaps that differ by no more than one stitch. When the division is not exact, do not force all extra stitches into the final gap. Spread the longer and shorter gaps around the round.
Use removable markers for the first placement, but move the increase locations in the next round. If every increase sits directly above the previous one, visible rays or corners can develop even when the total count is correct.
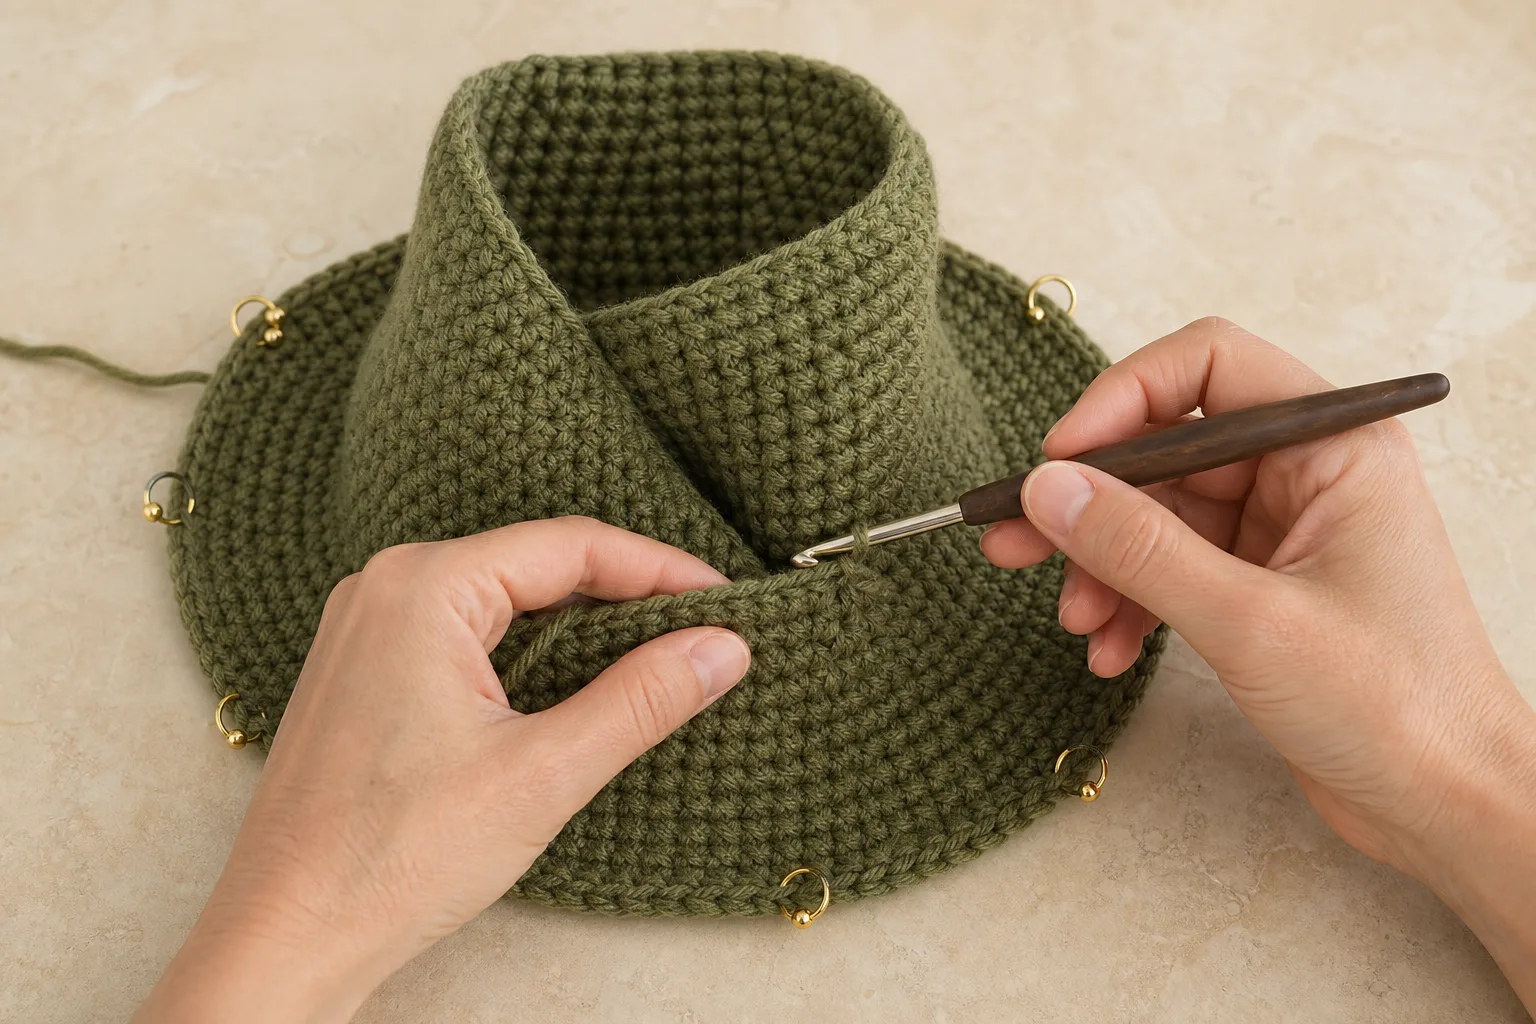
For joined rounds, also move the beginning of the distribution relative to the seam. For example, if a round begins with 11 plain stitches before the first increase, begin the next comparable round halfway through one planned gap. Record the count at the end of the round, not after the next round has already begun.
Run the Lay-Flat Gate After Every Round
Do not stretch, pin, steam, or add support during this diagnostic. Place the hat body upright or loosely folded in the center and let the brim rest on a smooth surface. Smooth it once with open hands, then release it.
- Count: confirm the completed target count and the number of increase points.
- Observe: look at the whole outer edge from above. Identify repeated waves, an inward pull, or one local distortion.
- Lift: raise the inner hinge slightly while leaving the outer edge free. This reveals whether the brim keeps the intended plane or collapses only when unsupported.
- Compare: inspect the round start and the area directly opposite it. A single tight join should not trigger a full-round increase change.
- Decide: keep the next calculated target, reduce it by one repeat, increase it by one repeat, or repeat the current count for an even round.
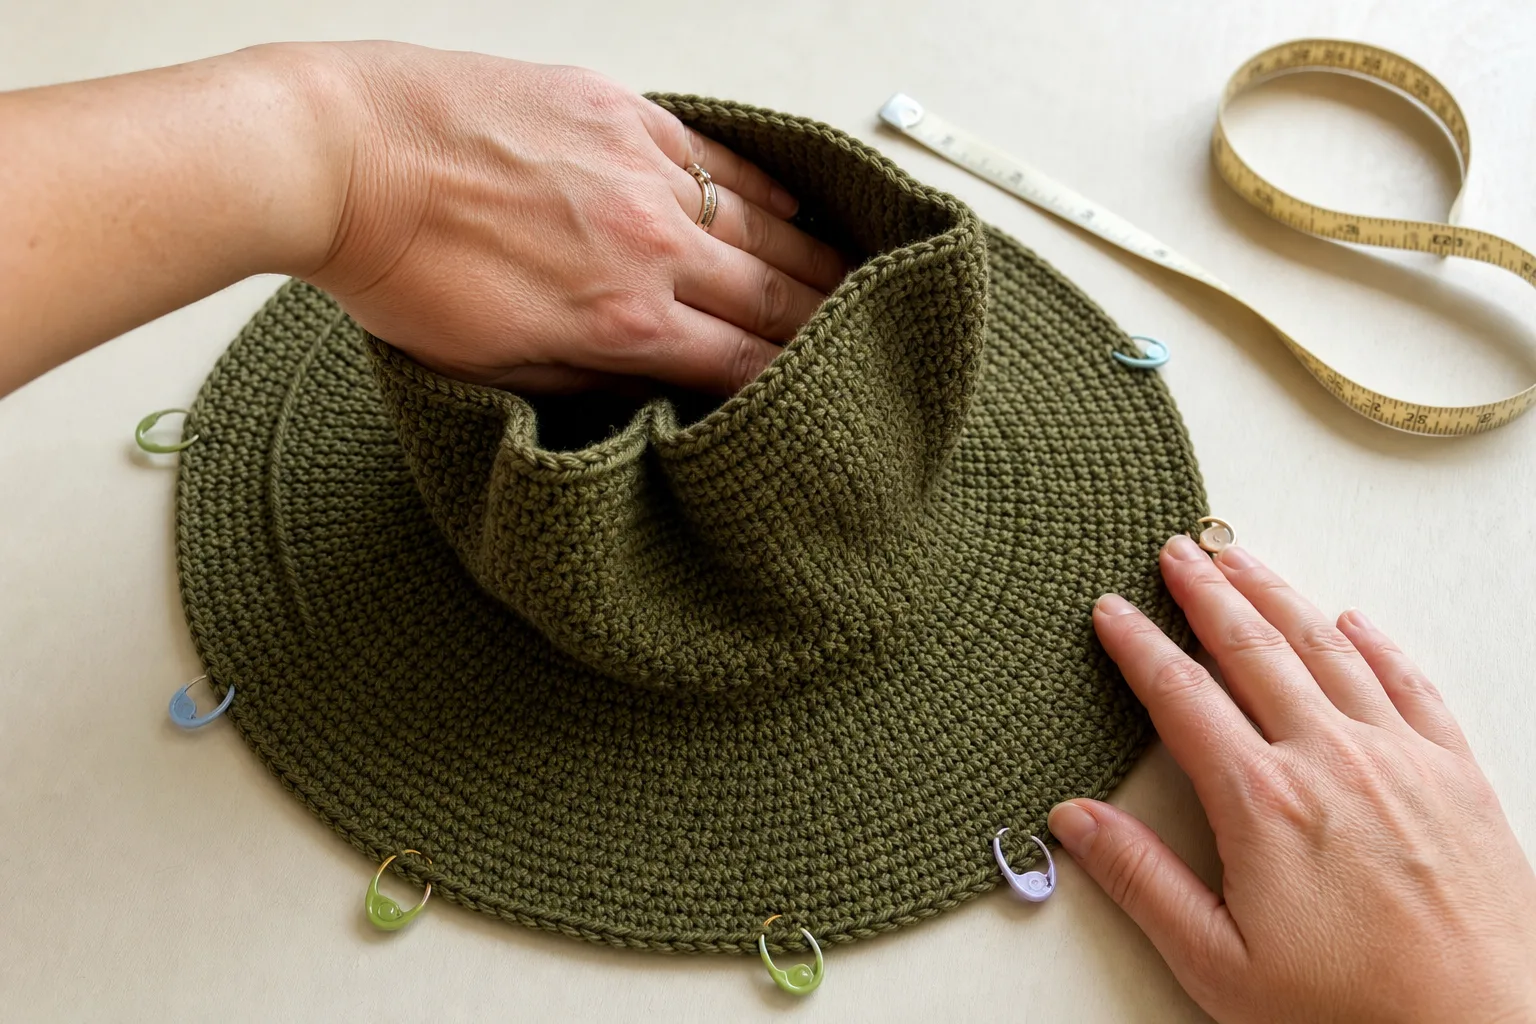
Preserve a lifeline or removable marker in the last round that behaved correctly. If the next round develops deep folds or a strong cup, remove only the affected round and change the next target. Continuing several more rounds makes the correction larger and harder to localize.
Read the Brim’s Error Fingerprint
Three hats made from the same stitch can behave differently because the outer circumference grew at different rates. Diagnose what the fabric does, not what a generic round number says it should do.
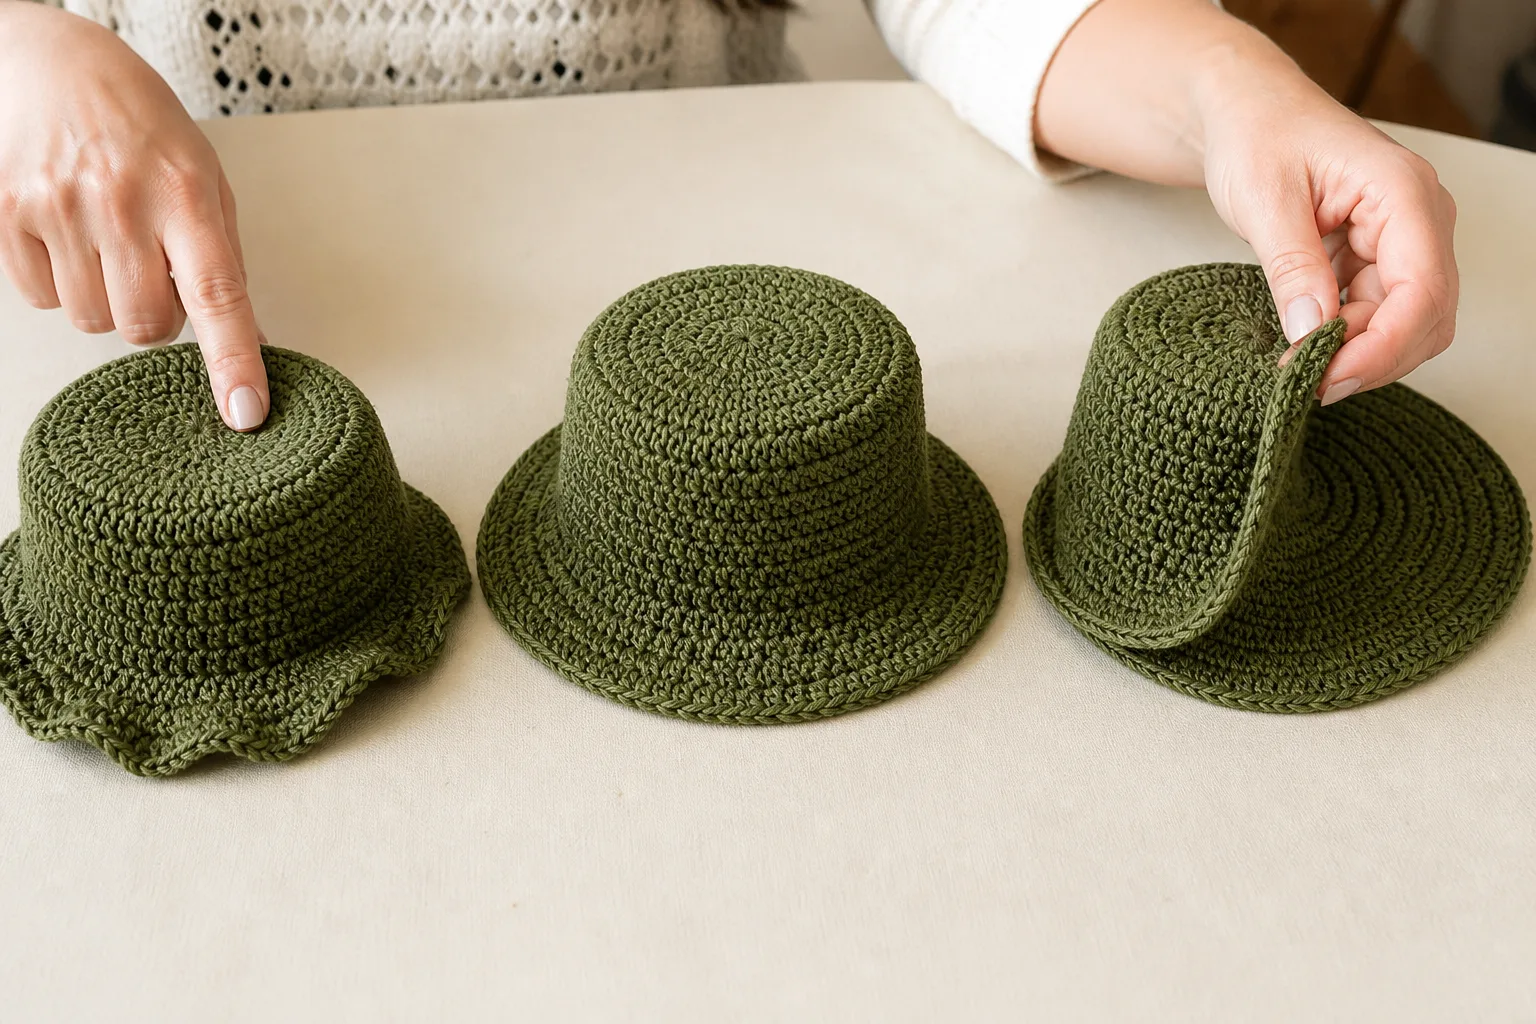
| What you see | Most likely category | Check before changing the total | Next controlled action |
|---|---|---|---|
| Repeated soft waves around the full brim | Perimeter surplus | Count accidental increases; compare actual and planned target | Return to the last smooth round; reduce the next target by one repeat or insert an even round |
| Deep folds that grow with every round | Large perimeter surplus | Confirm the wrong round began where expected | Remove the recent affected rounds; blocking or edge support will not remove excess fabric |
| Brim cups or rolls upward around the full edge | Perimeter shortage | Look for missed stitches and a tight slip-stitch join | Add one repeat’s worth of evenly distributed increases to the next target |
| One side waves or one corner forms | Local distribution or tension error | Compare increase positions, section counts, and seam tension | Correct that section; stagger markers and rotate the start before changing the full-round total |
| Brim lies flat but hangs over the eyes when worn | Structural weakness | Hold it by the inner edge and observe collapse without stretching | Keep the count; test denser fabric, a shorter projection, or suitable brim support |
| Intended waves vary from tiny bunches to one large fold | Uneven distribution | Count the gaps between increase points | Re-space the same number of increases so gaps differ by no more than one stitch |
If the brim waves
Do not immediately switch to a smaller hook. A smaller hook can create denser fabric, but it also changes gauge. First identify the last round that lay smoothly and compare the actual count with its planned target. Accidental extra stitches must be removed. If the count is correct but the full edge still waves, reduce the next growth step.
A mild temporary ripple in soft yarn may relax after the fabric carries more weight, but deep repeated folds are a strong signal of surplus circumference. Use the checkpoint, not hope, to decide. The earlier the correction, the less fabric must be removed.
If the brim cups, rolls, or points down too sharply
Check the edge tension and join before adding stitches. An overly tight final stitch can pull one section inward. If the entire round cups and the count is correct, the perimeter is not keeping pace with the outward distance. Raise the next target gradually and distribute the new increase points over the full round.
Do not add all correction stitches beside the seam. That repairs the total but creates a local bulge. If the planned texture has a repeat multiple, add one full repeat at a time, then run the gate again.
If the brim is flat but floppy
Leave the circumference plan alone. Compare a small brim swatch made with a slightly smaller hook, a denser stitch, or the yarn held as intended. The fabric must still be comfortable at the hinge and should not become board-like or difficult to work.
Projection amplifies droop. A wider brim places more fabric beyond the support of the hat body, so a material that holds a short brim can collapse at a wider width. Decide the required projection and support together rather than adding rounds until the visual size looks right.
Choose Brim Depth by Function, Then Calculate the Rounds
“Short,” “medium,” and “wide” are visual labels, not universal row counts. A tall stitch reaches the same projected distance in fewer rounds than a compact stitch. Use three planning categories to make the decision, then let round gauge translate the measurement.
Short shaping brim: choose the smallest projection that creates the intended silhouette or keeps rain and light away from the forehead. This category is usually easiest to hold without additional support, but it still needs the same count checks.
Medium everyday brim: choose enough projection to make the brim clearly visible from the side and to create useful face framing. Confirm eyebrow clearance on the wearer before completing the outer rounds.
Wide shade or statement brim: choose projection only after testing whether the washed fabric can carry it. Wide brims need more rounds, magnify small increase errors, and are more likely to need a deliberate structural solution.
For the default gauge of 20 rounds per 10 cm, example projections of 3 cm, 5 cm, and 8 cm translate to approximately 6, 10, and 16 rounds. Those are worked examples for that row gauge, not standard size rules. Enter your actual projection and round gauge in the optional calculator.
Add Support Only After the Geometry Gate Passes
Edge support can stabilize a correct brim, but it cannot remove excess circumference. Before adding any support, complete the lay-flat gate, verify the count, and confirm the brim’s full outer edge follows the intended path without forced pinning.
For a structured edge, use a purpose-designed millinery brim support or the material specified by the chosen hat design. Confirm that the product tolerates the intended washing and storage method. Measure it around the relaxed outer edge, follow the manufacturer’s joining method, make the join smooth, and enclose the support completely so no end can reach the wearer.
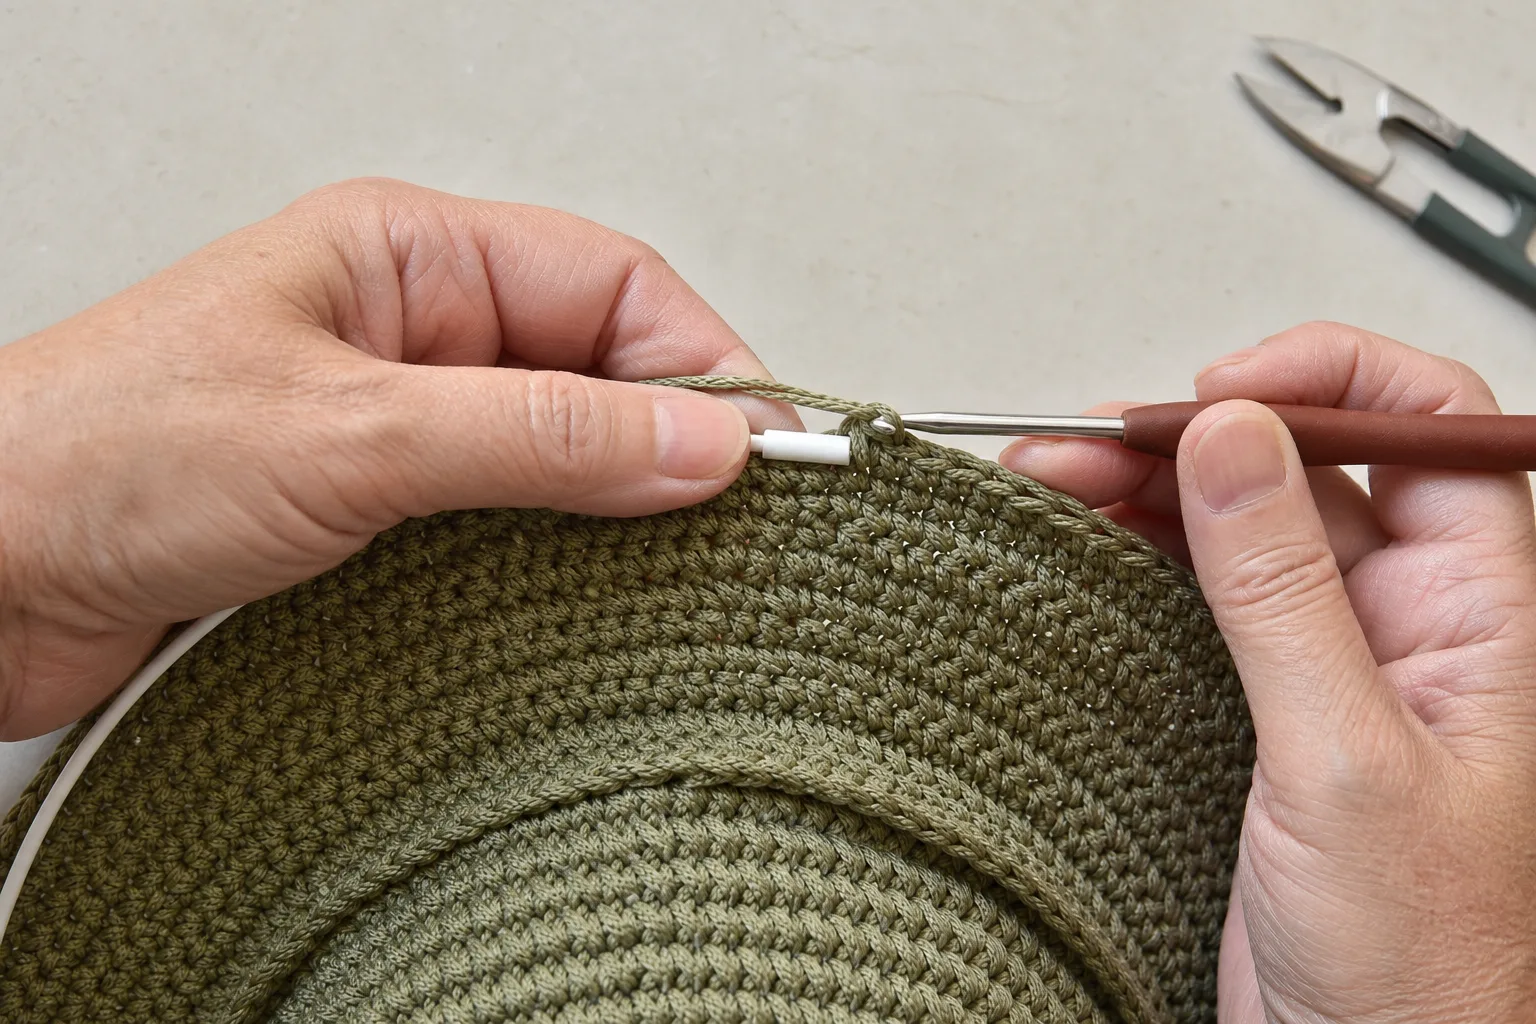
If the hat must be crushable, packable, or frequently machine washed, test the care behavior of the support separately and follow its product instructions. Do not use an exposed sharp wire end or an improvised material that can rust, kink, migrate through the stitches, or conflict with the item’s care method.
A Controlled Workflow From Fitted Body to Finished Edge
- Confirm the unfinished hat body fits at the intended wear line and record its final complete stitch count.
- Measure washed stitch and round gauge in the planned brim stitch pattern.
- Choose the physical projection from the hinge to the outer edge and enter it in the optional calculator.
- Enter the stitch-repeat multiple; start with the flat baseline unless a controlled angled or wavy comparison is intentional.
- Build the hinge round without tightening the join or using sudden increases to repair body fit.
- Distribute each round’s increase points evenly and stagger them relative to the previous round and the seam.
- Count and run the lay-flat gate after each round; preserve the last smooth round before continuing.
- Correct geometry before changing stiffness. Add edge support only when the relaxed brim shape already passes.
This workflow is deliberately reversible. Each decision occurs while only one new round is at risk. The user does not need to predict the perfect finished count before starting; the calculator narrows the first target, and the physical gate updates it with evidence from the actual yarn, hook, stitch, and hands.
Final Acceptance Check
Before fastening off, evaluate the hat on both the table and the wearer.
- The hat body still fits; the brim transition did not enlarge or constrict the head opening.
- The hinge begins at the intended wear line and is not pulled into a tight seam section.
- The full brim shows the intended profile: smooth flat, controlled downward angle, or evenly distributed decorative wave.
- The outer edge has no unexplained stitch-count drift, isolated corner, or cluster of stacked increases.
- When worn, the brim clears the eyes as intended and does not force the hat body backward.
- If support is present, its join is smooth, completely enclosed, and compatible with the planned care method.
- The final stitch count, projection, gauge, hook, and any adjusted round targets are recorded for the next version.
The last record is what makes the result repeatable. “I used six increases” is incomplete information. “I began with 72 body stitches, measured 18 stitches and 20 rounds per 10 cm, planned 5 cm of projection, and adjusted Round 5 from 101 to 100 after the lay-flat gate” explains both the method and the reason.
Frequently Asked Questions
Must every single-crochet brim increase six times per round?
No. Six is a familiar starting convention, not a law that overrides personal gauge. The relationship between stitch width and row height controls how much circumference a round needs as it moves outward. Use the optional calculator’s baseline and confirm it against the relaxed fabric.
Can blocking fix a wavy crochet hat brim?
Blocking can improve minor irregularity and presentation when the count is already close. It should not be used to hide deep repeated folds caused by excess circumference. Correct the affected increase round first, then finish the fabric according to the yarn’s care guidance.
Should I use front-loop-only or back-loop-only stitches at the hinge?
Either can create a visible directional line when it suits the design. Loop choice changes the hinge appearance and flexibility; it does not replace the circumference calculation. Keep the body count and first brim target separate from the loop decision.
Will wire make a wavy brim flat?
Support can hold an outer edge, but it does not remove surplus fabric between the hinge and that edge. A strongly ruffled brim may simply form supported ruffles. Pass the geometry gate before adding a structural material.
How often should I move the increase points?
Move them between comparable increase rounds so they do not stack into rays or corners. The total number of increases stays controlled; only their positions rotate. Also offset the distribution from a joined-round seam.
What if my calculated target is not divisible by the stitch pattern?
Enter the repeat multiple in the optional calculator. It rounds the target to a usable total. If the rounded result fails the lay-flat gate, change by one full repeat rather than breaking the texture in one isolated section.
References