
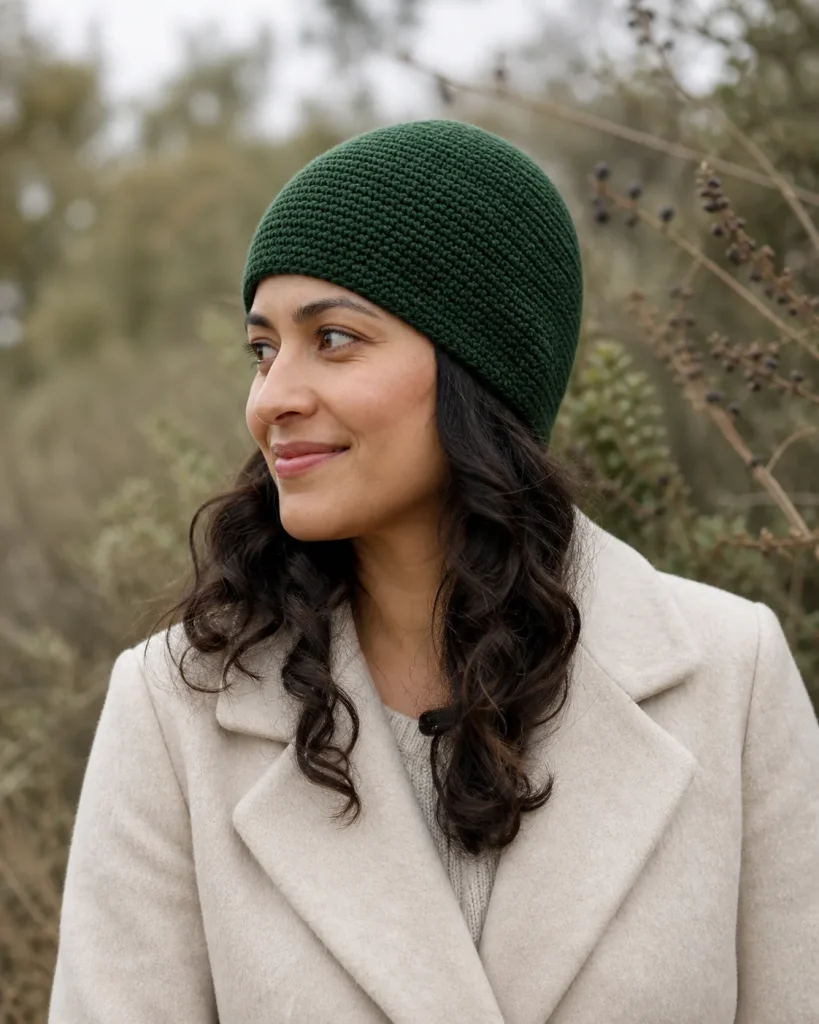
PATTERN + FIT calculation
Calculate a dense, flexible fit from your own washed gauge and measurements
Use washed stitch and row gauge to plan the crown, circumference, and depth – without turning your beanie into a rigid tube.
Single crochet makes a warm, durable beanie with small gaps and a clean surface. It also makes a denser fabric than taller stitches. That is why a single crochet hat can look correct on the table but feel too stiff, too tight, or too shallow on a real head.
This pattern does not ask every crocheter to force the same stitch count onto a different head, yarn, hook, and tension. You will first decide whether your fabric bends comfortably. Then you will use your own washed gauge and measurements to choose a usable stitch count and estimate the remaining body rounds.
Single Crochet Beanie Density and Depth Planner
Open the tool in a separate page. The article also retains the manual formulas and worked checks.
JavaScript is optional: use the manual calculation method and worked examples in the article.
What this pattern helps you decide
By the end, you will know:
- whether your single crochet fabric is suitable for a close-fitting beanie;
- how to calculate stitches from actual head circumference and washed gauge;
- why two nearby usable stitch counts can create noticeably different fits;
- when to stop crown increases without treating one diameter as a universal rule;
- how to keep a six-increase crown round instead of sharply hexagonal;
- how many even body rounds remain after measuring the crown section;
- what to change when the crown ruffles, cups, buckles, or feels too rigid.
The pattern is written in US crochet terms and worked top down in continuous rounds.
Materials
- Smooth yarn that feels comfortable against the forehead and ears. A medium-weight yarn is a practical starting point, but the worked calculation works with other yarns because it uses your gauge.
- Crochet hook that produces the fabric you want, not simply the size printed on a label.
- Two hook sizes nearby for swatch comparison.
- At least seven locking stitch markers: one for the first stitch and six optional sector markers.
- Flexible measuring tape.
- Yarn needle and scissors.
The Craft Yarn Council publishes typical single-crochet gauge and hook ranges by yarn category, but describes them as guidelines. Your washed swatch is the measurement that controls this hat.
Abbreviations
- ch: chain
- sc: single crochet
- inc: work 2 sc in the same stitch
- st(s): stitch(es)
- rnd(s): round(s)
Step 1: Build a fabric you would actually wear
Make a swatch wider and taller than the area you plan to measure. Work in single crochet with the same yarn, hook, loop placement, and hand tension you will use for the hat. Wash and dry it as the finished beanie will be cared for. Let it rest before measuring.
Do not measure along a foundation edge or the outermost rows. Count across a calm area in the center.
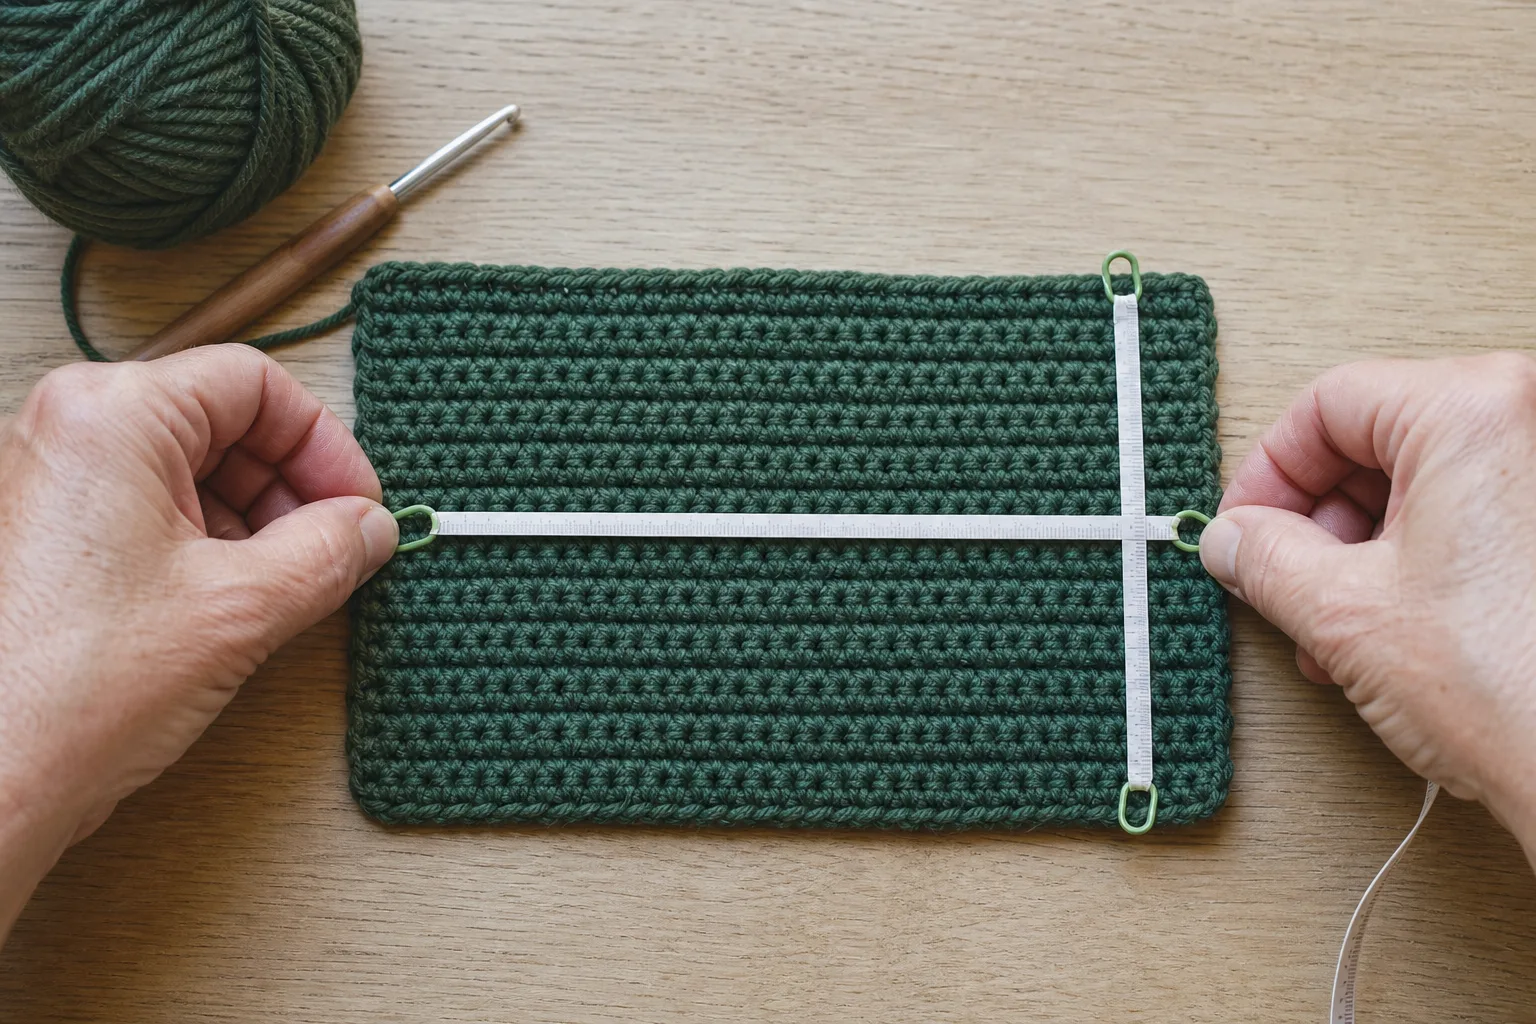
Record:
- stitches across a known width;
- rows across a known height;
- the width and height in inches or centimeters;
- how far the swatch stretches comfortably sideways before it begins to feel strained;
- whether it returns close to its original width after release.
The three-part fabric gate
Before calculating a hat, ask three physical questions.
- Bend: Can the swatch curve around two or three fingers without forming a hard crease?
- Stretch: Can it widen enough to cover your planned negative ease without feeling forced?
- Recover: After stretching, does it return close to its resting width rather than remaining baggy?
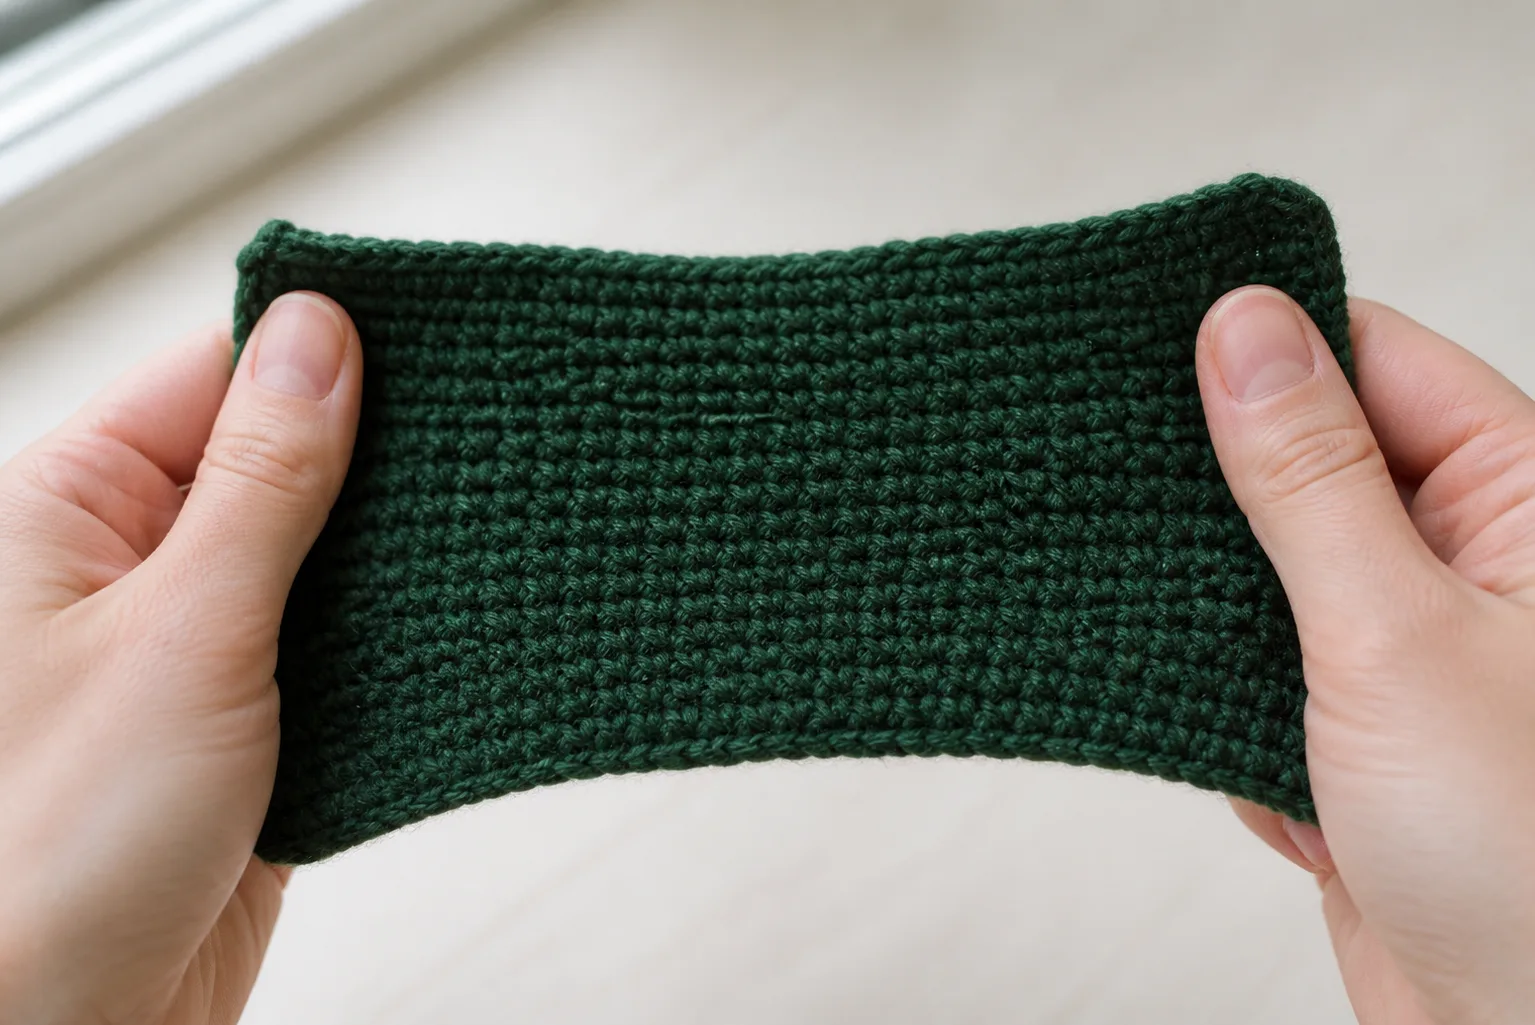
If the swatch fails the bend test, try a larger hook or a different yarn and swatch again. If it bends but does not recover, reducing negative ease will not create recovery; consider a yarn with better resilience or a separate ribbed lower edge. If it passes all three, use that washed swatch for the calculations below.
Step 2: Measure the wearer, not an age label
Measure actual head circumference around the fullest part of the head, passing above the eyebrows and over the ears where the lower edge will sit. Keep the tape level and comfortably close without compressing hair.
Also measure from the center top of the head to the intended lower edge. This personal crown-to-wear-line depth is more useful than assuming every adult or every child needs the same hat length.
If you cannot measure the wearer, a size range can provide a starting point, but it cannot promise fit. When the actual measurement becomes available, use it.
Step 3: Let the calculation compare two usable stitch counts
The website version of this article includes the Single Crochet Beanie Density & Depth method. It starts with complete sample values; the reader replaces them and receives immediate results.
The worked example uses:
- actual head circumference;
- desired negative ease percentage;
- washed stitches per measured width;
- comfortable swatch stretch percentage;
- the crown increase multiple, normally 6 for this pattern;
- personal crown-to-edge depth;
- measured crown-section depth after the transition;
- edging or band height;
- washed rows per measured height.
It returns:
- target finished circumference;
- raw calculated stitch count;
- the lower and upper stitch counts divisible by 6;
- estimated circumference and estimated negative ease for both options;
- a stretch warning when an option asks more from the fabric than the swatch comfortably gives;
- a crown-diameter checkpoint for each option;
- estimated even body rounds needed to reach the personal depth.
The formulas behind the results
Let:
- H = actual head circumference;
- E = desired negative ease as a decimal;
- G = washed stitches per unit;
- B = crown multiple, normally 6.
Then:
The raw result usually is not divisible by 6. Instead of silently rounding to one answer, the worked calculation shows the nearest lower and upper multiples of 6. For each option:
This is the decision that fixed-count patterns hide. The lower option is usually firmer; the upper option is usually roomier. Choose by comparing the estimated ease with the swatch’s comfortable stretch and recovery, not by assuming lower or higher is always better.
Worked example – not a universal adult count
Suppose the measurements are:
- head circumference: 22 in;
- desired negative ease: 6%;
- washed gauge: 18 sc in 4 in, or 4.5 sc per inch;
- six-increase crown structure.
The target circumference is 20.68 in and the raw count is 93.06 stitches. The two usable counts are:
| Option | Usable stitches | Calculated circumference | Estimated negative ease | What it means |
|---|---|---|---|---|
| Firmer | 90 | 20.00 in | 9.1% | Better only if the swatch stretches comfortably beyond this and recovers well. |
| Roomier | 96 | 21.33 in | 3.0% | Less pressure and safer for a dense fabric with modest stretch. |
These numbers describe only this sample gauge and head measurement. A different swatch can produce a different count for the same head.
Step 4: Crochet a six-sector single crochet crown
Start with an adjustable ring or another closed-center method you can work confidently. The construction model below begins with 6 single crochet and adds 6 stitches in every increase round.
- Rnd 1: 6 sc into the center. (6)
- Rnd 2: inc in each st around. (12)
- Rnd 3: [sc in next st, inc in next st] 6 times. (18)
- Rnd 4: [sc in next 2 sts, inc in next st] 6 times. (24)
- Rnd 5: [sc in next 3 sts, inc in next st] 6 times. (30)
Continue the same logic: each increase round has six increases, with one more ordinary sc between increases than the previous increase round.
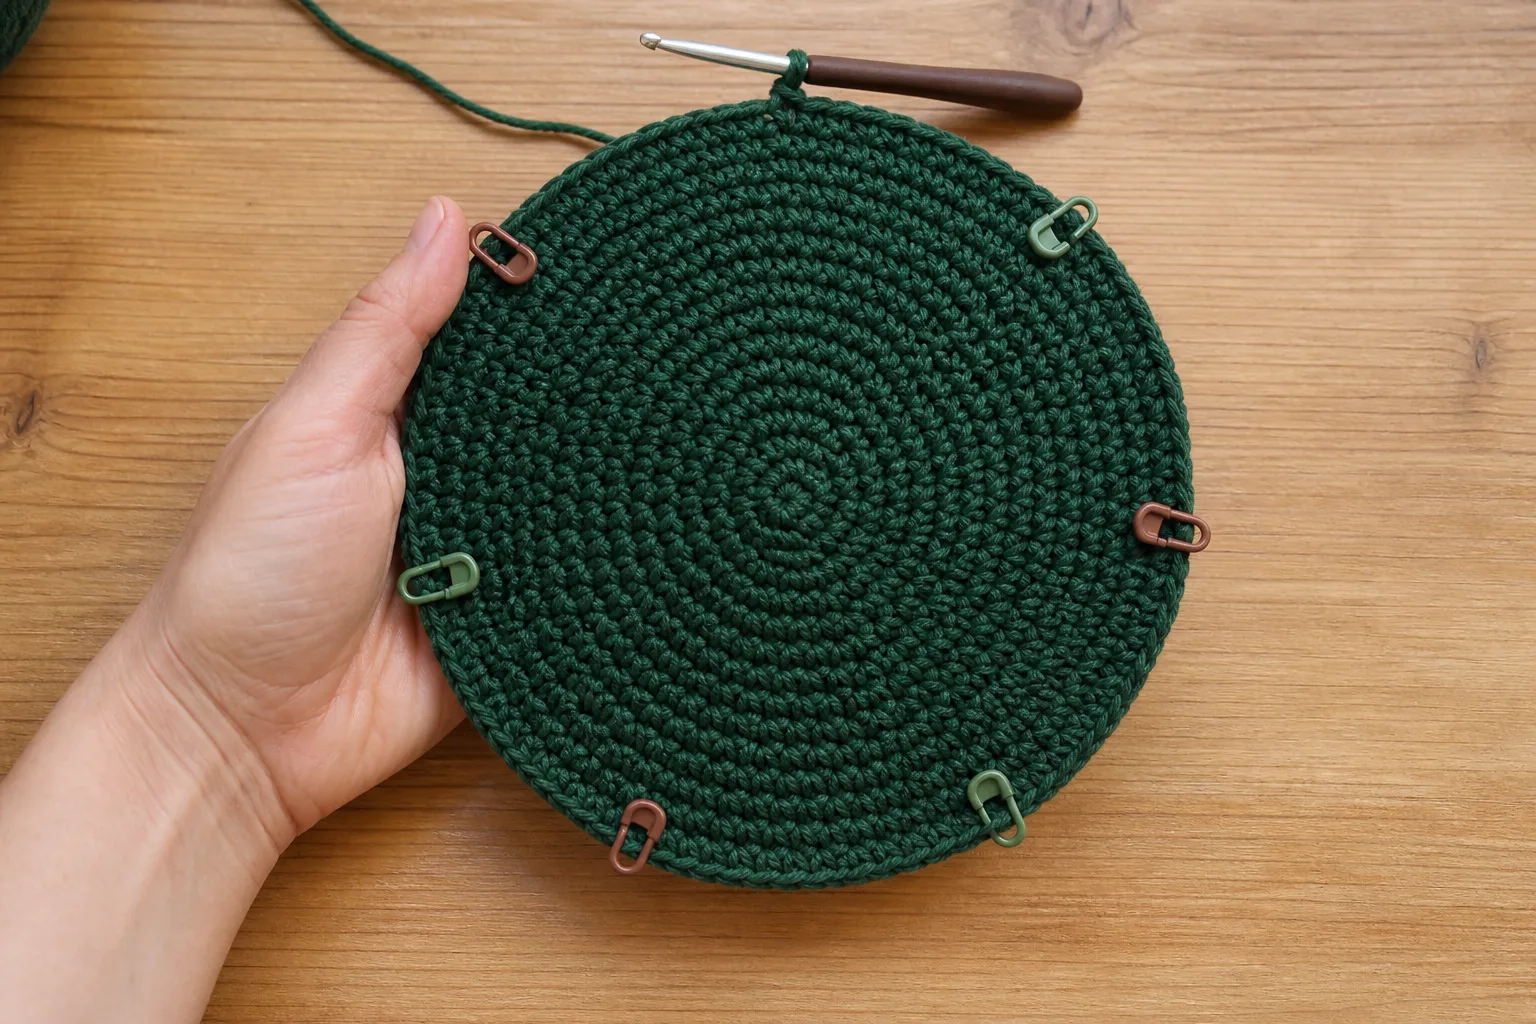
Keep the crown round, not sharply hexagonal
If every increase remains directly above the previous increase, six vertical corners can become visible. Stagger the increase location while keeping six evenly distributed increases and the correct final count.
For example, when a repeat contains an even number of ordinary stitches, split those stitches around the increase:
- instead of [sc 4, inc] around;
- work [sc 2, inc, sc 2] around.
On the next increase round, shift again. The exact starting point is less important than preserving six evenly spaced increases and the intended total count.
Use three checks after every increase round
- Count: Does the round contain the expected total?
- Flatness: When placed down without stretching, is it broadly flat?
- Shape trend: Is it beginning to ruffle, cup, or form hard corners?
If the edge ruffles, verify the stitch count first. Extra stitches or duplicated increases are common causes. If the count is correct but the circle still waves, the gauge may be looser than the six-increase rhythm wants; alternate an increase round with a plain round, or remake the swatch/crown with a fabric you prefer.
If the crown cups too early, check for missed increases or an accidentally tight round. A gently shaped crown near the transition is acceptable, but a small hard bowl long before the target circumference usually signals a count or gauge problem.
Step 5: Mark the first stitch in continuous rounds
Continuous rounds avoid a visible joined seam, but they remove the visual boundary between rounds. Clip a locking marker into the first stitch of the round, not into the working loop or the gap beside it. Move it into the new first stitch each time you begin another round.
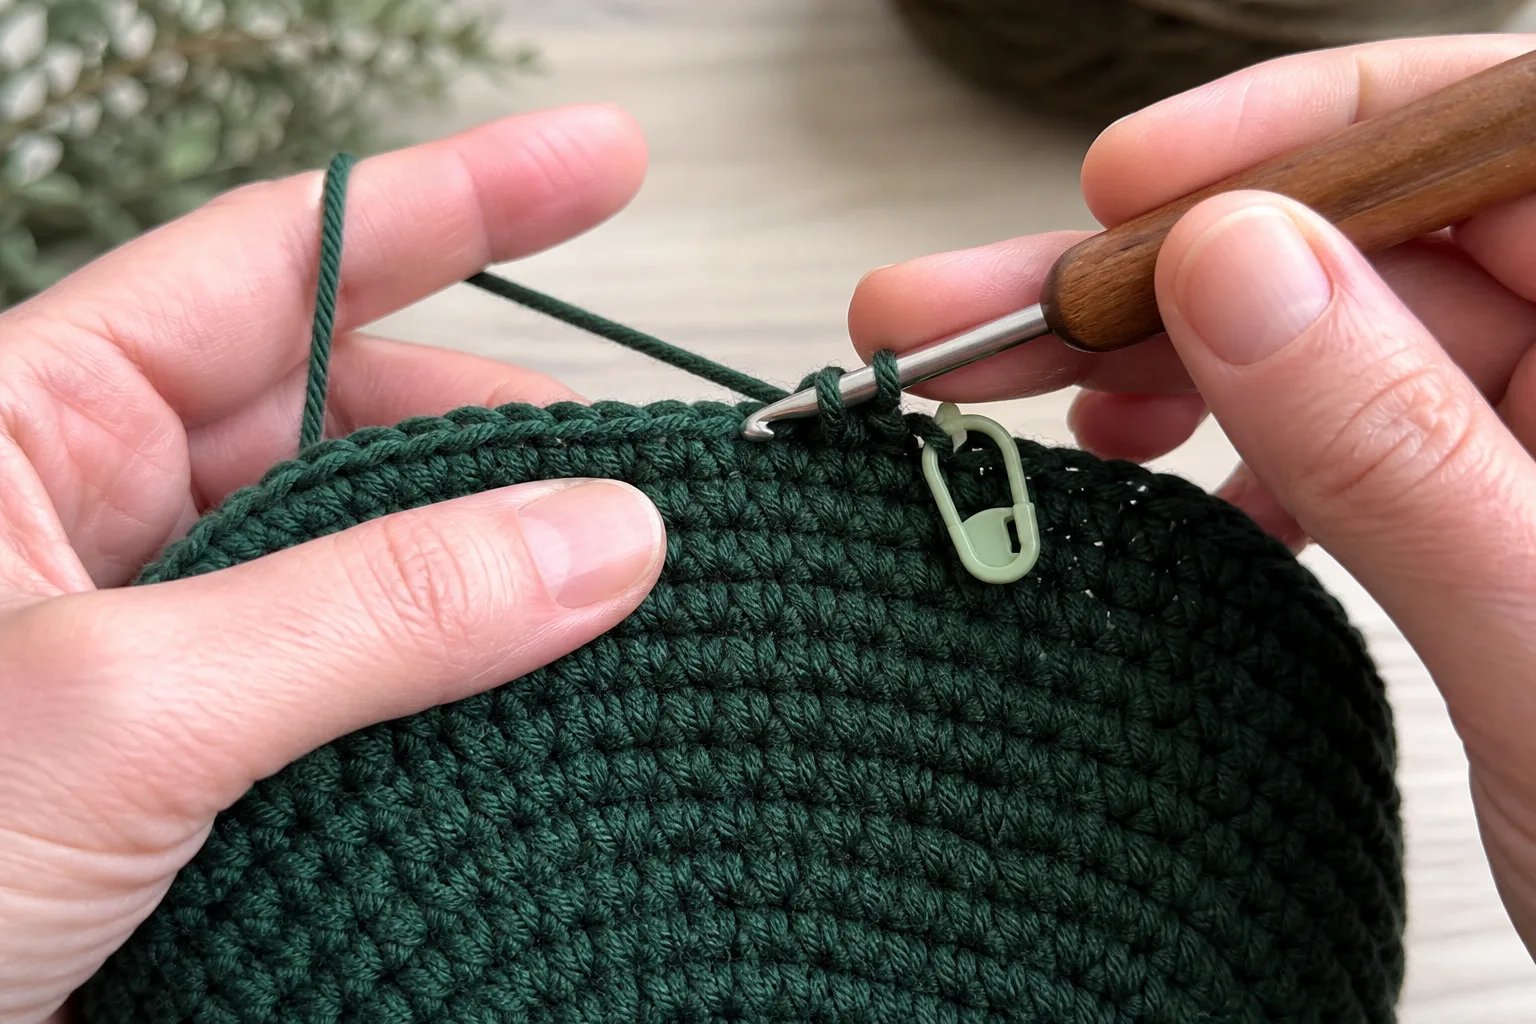
For the crown, six optional sector markers can serve as checkpoints. When you reach a sector marker, that sector should contain its planned share of stitches. This catches an error within one sixth of the round instead of at the very end.
Step 6: Decide when to stop increasing
Use three signals together.
Signal 1: usable stitch count
The most important stop signal is the stitch count you selected from the worked calculation. If you selected 96, the crown must reach 96 stitches before you begin working even.
Signal 2: calculated circumference
At the selected count, confirm that count divided by washed stitch gauge produces the finished circumference you intended.
Signal 3: crown-diameter checkpoint
The worked calculation also shows:
This helps detect a major mismatch, but it is not a rigid stop command. A crocheted crown is not a paper circle. Fabric stretch, stitch height, transition shaping, and the way the crown begins to curve can change what you measure.
If the stitch count and washed gauge say the circumference is correct but the physical crown is far from the checkpoint, stop and investigate before adding the body. Recheck gauge, count, and whether the crown has been stretched during measurement.
When the target count is not a standard increase-round total
With 6 initial stitches and 6 increases per full increase round, standard totals are 6, 12, 18, 24, and so on. Any selected multiple of 6 is reachable with a complete six-increase round.
If you use a different starting structure or a decorative repeat, use its required multiple in the worked calculation. Preserve the repeat and distribute any final increases evenly rather than placing them together.
Step 7: Work the body to measured depth
Once the selected stitch count is reached, work 1 sc in each stitch around. Keep moving the first-stitch marker. Count periodically; a dropped stitch can make the lower hat progressively tighter even though no decrease was written.
Do not finish after a universal number of body rounds. Single crochet row height changes with yarn, hook, tension, and washing.
Measure the work from the crown center to the current lower edge without stretching. Then measure or plan the height of any final band or edging.
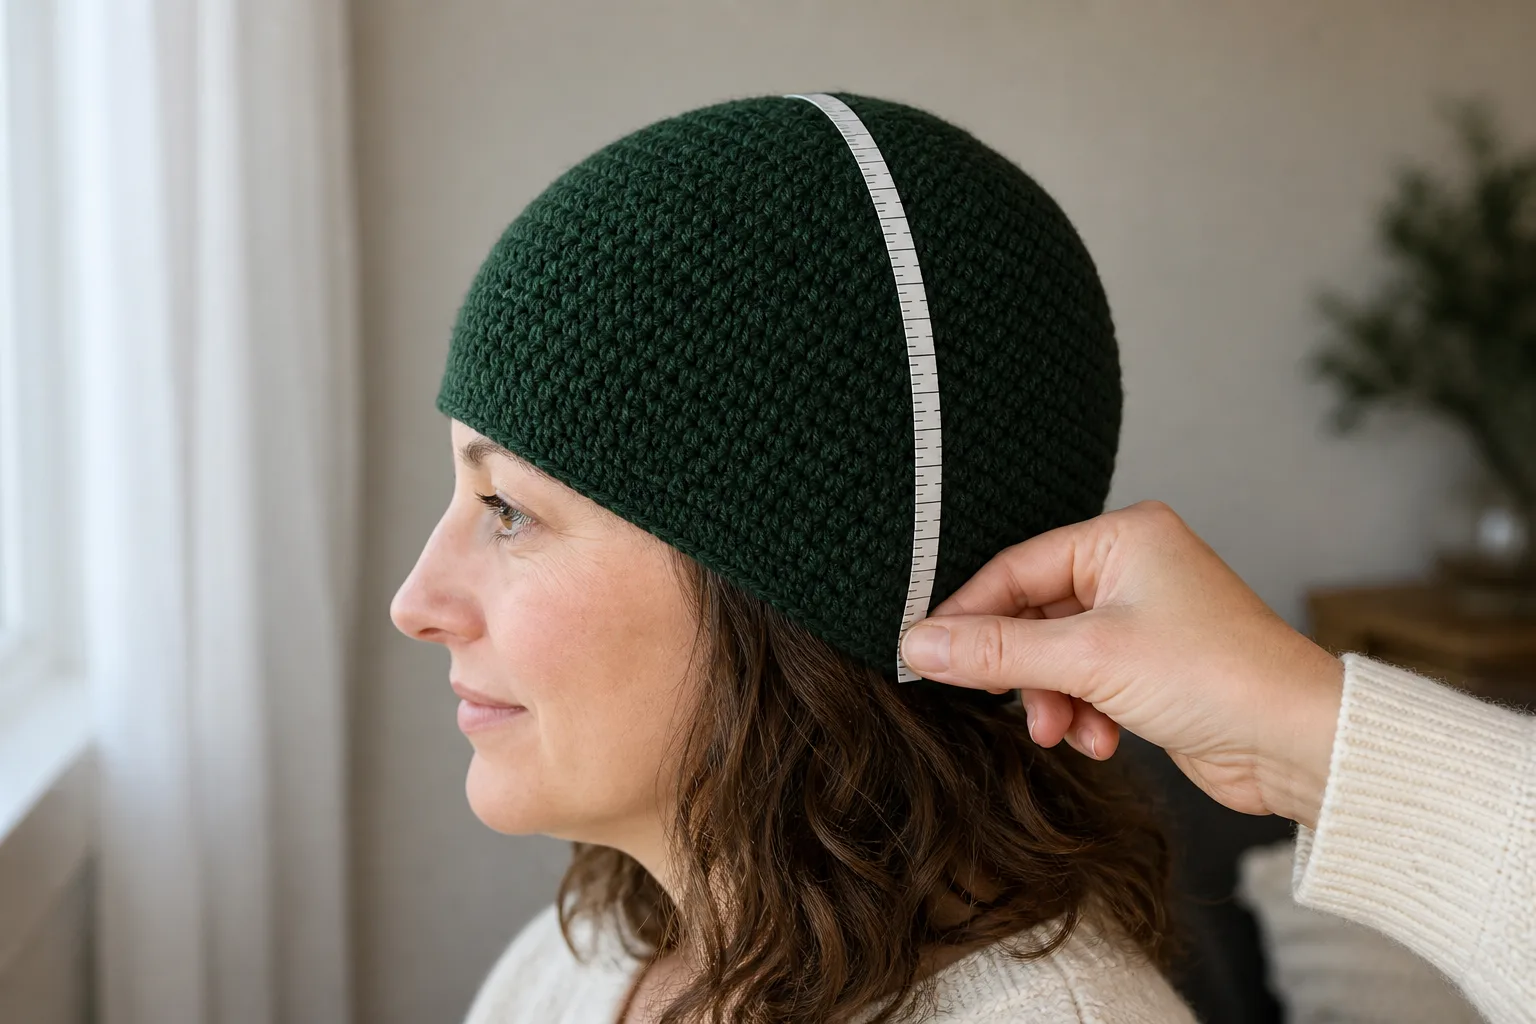
The worked example estimates:
Round to a practical whole round, crochet close to that estimate, then measure the real hat again. The estimate is a starting point; the physical measurement decides when to stop.
Step 8: Choose the lower edge by the fabric you made
Single crochet worked around the entire hat may be warm but not especially elastic. Choose one of three endings.
Plain single crochet edge
Best when the body already stretches comfortably and the wearer wants a clean, compact finish. Work the last round at normal tension and finish with a gradual, invisible end.
Back-loop single crochet rounds
These create subtle horizontal definition. They change texture more than they create true ribbing, so do not assume they will rescue a rigid body.
Separate vertical ribbing
Best when the ears need more adaptable stretch and recovery. Crochet short rows of back-loop single crochet vertically and attach them around the lower edge. Swatch the ribbing separately because its row count around the hat must fit the body circumference without flaring or gathering.
A complete sample path
This sample shows how the decisions connect; replace every measurement with your own.
- A washed swatch measures 18 sc and 20 rows over 4 in.
- It bends comfortably, stretches 12% sideways without strain, and recovers well.
- The wearer measures 22 in around and wants a close but not compressive fit.
- At 6% desired negative ease, the worked example gives 90 and 96 as usable six-stitch multiples.
- The 90-stitch option creates 9.1% estimated negative ease; the 96-stitch option creates 3.0%.
- Because the fabric is dense and the wearer prefers less pressure, choose 96 stitches.
- Increase by six stitches per increase round until the crown contains 96 stitches, staggering increase placement.
- Work even rounds, measuring rather than relying on the sample’s round count.
- If target total depth is 8.5 in, the current crown section is 3.25 in, and the final edge is 0.5 in, 4.75 in of plain body remains.
- At 5 rows per inch, the estimate is 23.75, rounded to about 24 body rounds. Measure again near round 22 rather than waiting until the end.
Troubleshooting by symptom
| What you see or feel | Check first | Likely correction |
|---|---|---|
| Swatch or hat stands up by itself | Bend and comfortable-stretch gate | Try a larger hook or different yarn, then recalculate from the new washed gauge. |
| Crown ruffles | Stitch count and duplicated increases | Remove extra stitches; if count is correct, space increases differently or adjust the increase rhythm for the gauge. |
| Crown cups too early | Missed increases and tight rounds | Restore missing increases or correct the tight section before continuing. |
| Six hard crown corners | Stacked increase positions | Stagger the six increase locations while preserving the count. |
| Hat becomes tighter toward the edge | Current round count versus selected count | Find dropped stitches; correct before adding more depth. |
| Circumference is right but hat is too short | Row gauge and personal depth | Add body rounds from measured remaining depth, not from another person’s round count. |
| Lower edge feels tight | Edge tension and structure | Use a larger hook for the last round or add separately swatched vertical ribbing. |
| Hat feels loose after wear | Recovery, not only circumference | Use a more resilient yarn/fabric or choose the firmer calculation option if its estimated ease stays within comfortable stretch. |
Frequently asked questions
Is single crochet good for a beanie?
Yes, when you want warmth, small gaps, durability, and a close surface. The fabric must still pass the bend, stretch, and recovery checks. Single crochet is a poor choice for a soft slouch if the swatch already behaves like a rigid panel.
How many single crochet stitches make an adult beanie?
There is no reliable universal number. Calculate from actual head circumference, chosen negative ease, and washed stitches per unit. Then compare usable counts that preserve the crown or pattern multiple.
Should the crown be perfectly flat?
During the early increase rounds, it should lie broadly flat without pronounced ruffling or premature cupping. Near the transition, a gentle tendency to curve is normal. Count and fabric behavior matter more than forcing it against the table.
Can I use a larger hook if the hat is stiff?
You can try a larger hook, but it changes the fabric and gauge. Make and wash a new swatch, check its flexibility, stretch, and recovery, then recalculate the stitch count from the new gauge. Use the wearer’s measured depth to decide where to stop the body.
Why does my hat fit around the head but not cover the ears?
Circumference and depth are separate calculations. Use washed row gauge and the wearer’s crown-to-edge measurement to plan the remaining body rounds.
Are continuous or joined rounds better?
Continuous rounds remove the repeated join line and suit short single crochet well, but require a reliable first-stitch marker. Joined rounds make each boundary explicit but can show a seam or step. This version uses continuous rounds because the marker system makes the count visible.
Final fit check before fastening off
Confirm all four conditions:
- the lower edge reaches the intended point;
- the hat follows the head without a rigid gap;
- the edge is secure but not painful;
- the crown is smooth, without ruffles, hard corners, or a compressed peak.
If one condition fails, diagnose that variable only. Circumference problems come from stitch gauge, stitch count, or ease. Depth problems come from row gauge and personal length. Rigidity problems come from yarn, hook, tension, and stitch structure. Separating those causes prevents random changes from creating new errors.
References