

A measurement-adaptive bottom-up chunky beanie with washed-gauge sizing, a stretch reserve check, gauge-matched decrease sectors and a small final opening instead of a bulky full-edge cinch.
Chunky Beanie Crown Fit Planner
Open the tool in a separate page. The article also retains the manual formulas and worked checks.
JavaScript is optional: use the manual calculation method and worked examples in the article.
Quick answer
A good chunky crochet beanie is not simply a regular hat made with thicker yarn. Bulky stitches create fewer stitches around the head and fewer rounds from brim to crown. That low count magnifies every sizing and shaping decision: one extra stitch can change the circumference noticeably, one extra round can add too much height, and gathering a wide upper edge can stack several thick folds at the top.
This pattern solves those three problems separately. First, it calculates a personal body count from the wearer’s actual head circumference, intended negative ease and the washed stitch gauge. Second, it compares the washed fabric’s comfortable stretch with the selected negative ease, so a thick but rigid swatch does not become a painful hat. Third, it calculates the number of crown sectors from both stitch gauge and round gauge, then chooses a nearby body count that divides evenly into those sectors.
The complete worked example uses a 22-inch / 55.9-cm head, 8% intended negative ease, a desired finished depth of 8.5 inches / 21.6 cm, and a washed half-double-crochet gauge of 8 stitches and 6.5 rounds per 4 inches. The method selects 40 body stitches and eight decrease sectors. The crown then narrows through 40, 32, 24, 16 and 8 stitches. Its final opening is about 4 inches around—20% of the body circumference—so only a small opening is drawn closed.
The example begins crown shaping at approximately 6.04 inches / 15.3 cm from the lower edge. At the measured round gauge, four decrease rounds add about 2.46 inches / 6.3 cm. That produces a calculated finished depth close to 8.5 inches without relying on an age chart or a universal stitch count.
Why chunky yarn changes more than speed
Chunky yarn is appealing because the fabric grows quickly and the stitches are easy to see. The same scale that makes it fast also makes it less forgiving.
- Circumference moves in larger steps. At 2 stitches per inch, adding two stitches adds roughly 1 inch of relaxed circumference. At a finer gauge, the same two-stitch decision may change the size by less than half as much.
- Each round adds visible height. At 1.625 rounds per inch, one round is about 0.62 inch tall. An extra round is not a tiny correction.
- A wide opening contains thick folds. Pulling 40 bulky stitches into one center point forces the full upper edge to occupy almost no space. The result can be a hard knob, radiating pleats or four to five large lobes.
- Abrupt decreases make a ledge. Removing too many stitches in one round can make the crown turn sharply inward instead of following the head.
- Too few decreases make a long peak. Removing only a small number per round can create a tall cone before the opening becomes small enough to close.
- Hook changes affect two axes. A larger hook can increase both circumference and round height. Correcting width without checking height can move the crown start to the wrong place.
The useful question is therefore not “How many stitches does a chunky adult hat use?” It is “What count matches this wearer and this washed fabric, and how should that count decrease at this fabric’s proportions?”
Bulky and super bulky are categories, not interchangeable gauges
The Craft Yarn Council’s Standard Yarn Weight System gives broad single-crochet gauge ranges of about 8–11 stitches per 4 inches for category 5 bulky yarn and about 7–9 stitches per 4 inches for category 6 super bulky yarn. Those ranges overlap. Fiber, construction, loft, twist, hook, stitch and the maker’s tension can place two yarns with the same category number at different gauges.
Use the yarn label as a shopping clue, not as the pattern’s final measurement. The gauge in this tutorial comes from the exact stitch, hook, yarn and finishing method used for the hat. If a substitution produces a different washed gauge, use the new gauge in the method. Do not keep the example’s 40 stitches merely because both yarn labels say “bulky.”
A super-bulky yarn can also be physically harder to gather. Substituting it into a pattern that closes the entire body edge may produce a hat that fits around the head but cannot close cleanly. This pattern avoids that dependency by reducing the opening before gathering it.
The original gauge-matched crown method
Many instructions offer preset sizes and fixed crown rounds. Those can work when the maker reproduces the designer’s gauge. This method instead connects the crown’s horizontal change to its vertical change.
Imagine the body circumference becoming smaller as the crown rises. Removing one stitch from each sector per decrease round means the number of sectors controls how quickly the circumference shrinks. The method begins with this gauge-derived estimate:
For the example:
The nearest practical sector count is eight. The method checks sector counts from five through ten and examines nearby whole stitch counts that divide evenly. It balances two errors: how far a candidate circumference moves from the personal target, and how far the candidate sector count moves from the gauge-derived ideal.
This is a maker’s planning model, not an industrial sizing standard. Crochet stitches do not form a mathematically perfect surface, and heads are not spheres. The value of the model is that it exposes the tradeoff before the full hat is made. The physical checkpoints remain decisive.

Measure the actual wearer
Measure around the intended wear line with a soft tape. Keep it level across the forehead and around the fullest point at the back of the head. Decide whether the lower edge will sit above the ears, touch the upper ear or cover part of the ear before measuring. Thick hair, protective styles, hearing devices and personal sensitivity can change the preferred line.
The tape should touch without compressing the hair or skin. Repeat the measurement. If two careful readings differ, use the larger one as the starting record and verify the lower-edge ring on the wearer.
Next, decide the finished depth: measure from the center top of the head, following the head’s surface, to the desired lower edge. Do not measure straight through the air. The example uses 8.5 inches / 21.6 cm for a close adult beanie without a folded cuff. A deeper style needs a larger personal depth; a folded cuff requires a separate cuff plan rather than silently adding generic inches.
The two personal inputs are therefore:
- actual head circumference: 22 inches / 55.9 cm;
- desired finished depth: 8.5 inches / 21.6 cm.
Make and wash the exact chunky swatch
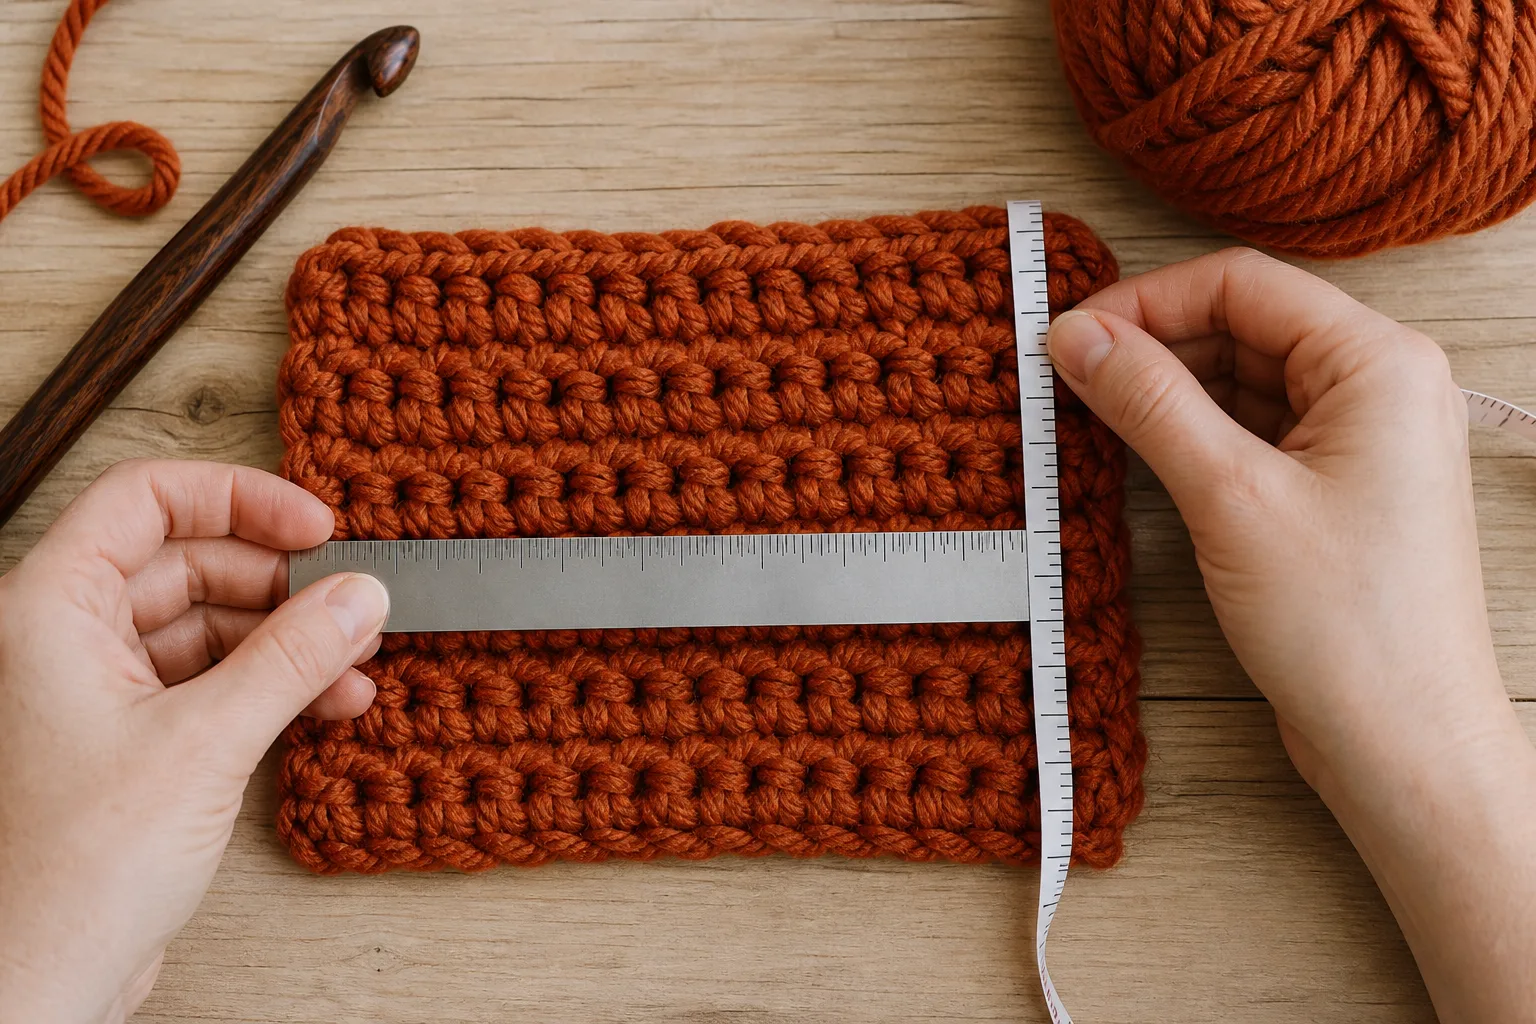
Work a swatch large enough to measure in the center, away from the starting chain and side edges. Use the intended yarn, hook, half double crochet, joining method and working tension. A useful chunky swatch is at least 6 inches / 15 cm square when practical; measuring only four or five stitches makes one misread loop disproportionately important.
Wash and dry it as the finished hat will be cared for, then let it rest flat. Count stitches across a centered 4-inch / 10-cm span and rounds across a centered vertical span. Do not pull the fabric while counting.
The example measures:
- 8 half-double-crochet stitches per 4 inches, or 2 stitches per inch;
- 6.5 rounds per 4 inches, or 1.625 rounds per inch.
Measure the texture you actually want to wear. If the swatch is board-like, changing to a larger hook may improve comfort, but it also changes the numbers. If large openings appear between stitches, changing to a smaller hook may increase density, but forcing the hook through painful tension is not a sound solution. Make another swatch and recalculate with the measured values.
Round gauge matters as much as stitch gauge in a chunky crown. Two makers can both obtain 8 stitches per 4 inches but have different round gauges because of loop height. Their hats may need the same body count and different crown-start heights.
Run the stretch-and-recovery gate
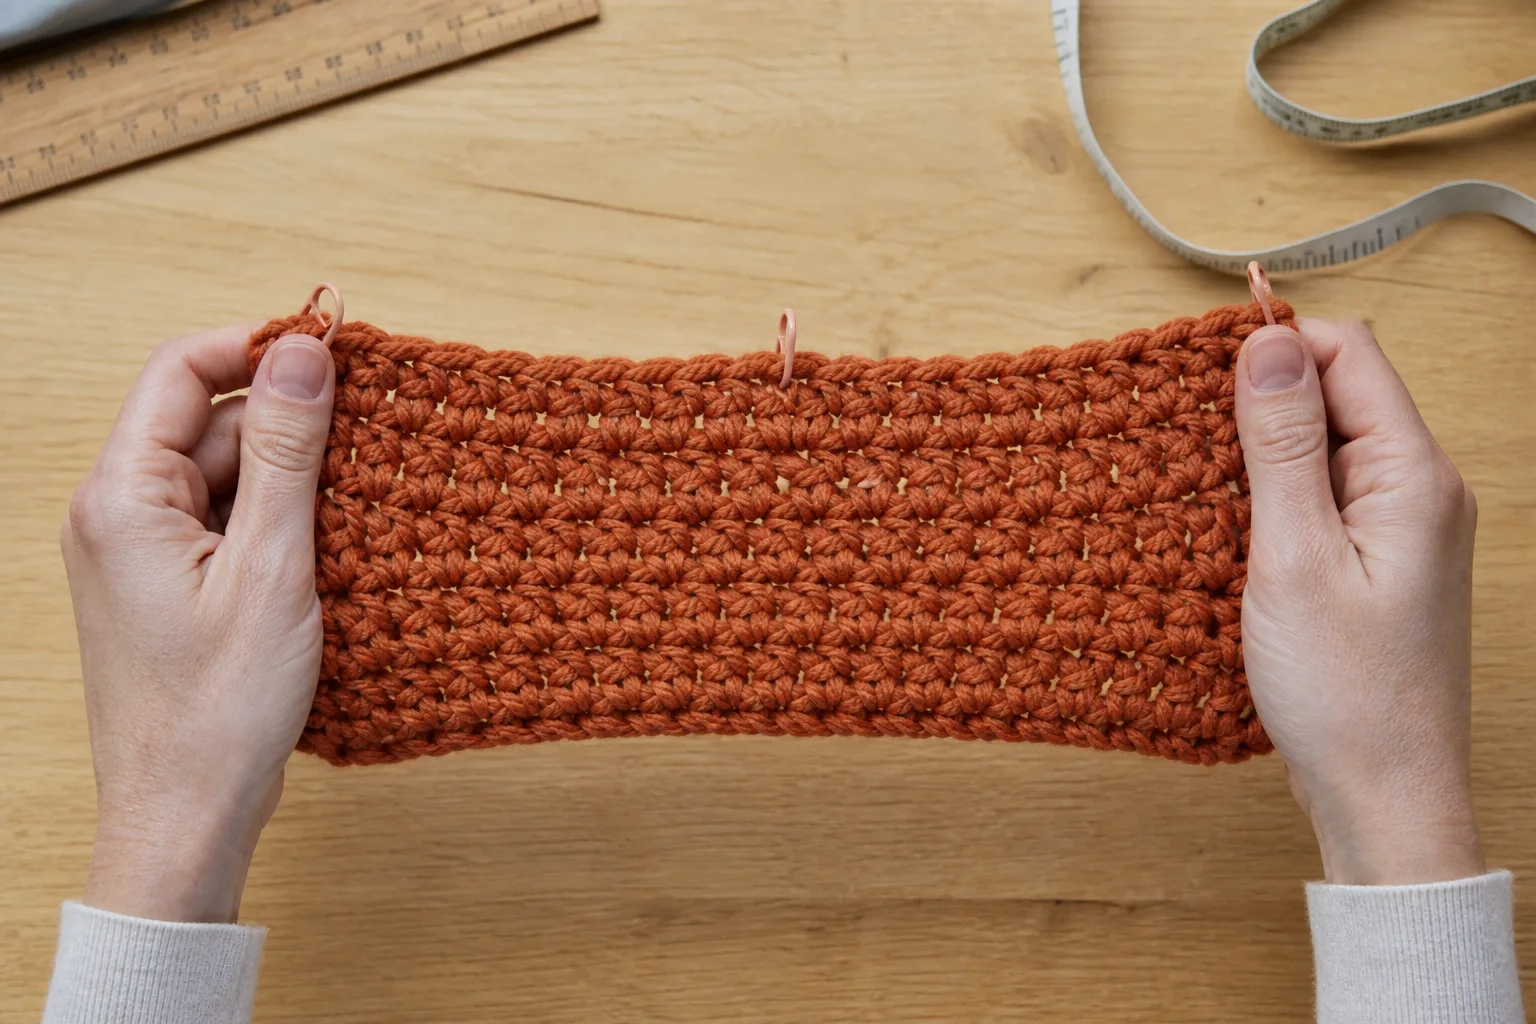
Negative ease means the relaxed hat is smaller than the head so the fabric stretches to stay in place. Thick does not necessarily mean stretchy. A tightly worked chunky swatch may have very little comfortable extension.
On the washed swatch, mark a centered horizontal span and record three values:
- A: relaxed length before stretching;
- B: length under a comfortable, wearable stretch—not the maximum force possible;
- C: length after release and a short rest.
Calculate:
Assume for this example that a span begins at 4 inches, stretches comfortably to 5.2 inches and recovers to 4.1 inches. Available stretch is 30%; residual growth is 2.5%. With the example gauge, the selected 40-stitch body calculates to 20 inches around, so its estimated negative ease on a 22-inch head is about 9.1%. The remaining estimated stretch reserve is about 20.9 percentage points.
As a conservative maker’s checkpoint, keep at least five percentage points between comfortable available stretch and estimated negative ease. Treat residual growth up to about 3% as a stable starting result, 3%–5% as a warning to verify recovery carefully, and more than 5% as a reason to reswatch or reduce planned negative ease. These are transparent project heuristics, not textile-industry thresholds.
If the lower edge leaves a deep mark, triggers discomfort or needs force to pass over the widest part of the head, the physical result overrides the percentage. Increase the circumference, improve the foundation’s elasticity or choose a more flexible fabric.
Calculate the body count
Begin with the intended negative ease:
For the example:
Convert the target circumference to a raw stitch count:
A half stitch cannot be worked, and the crown needs a count divisible by the selected sector count. The method selects 40 stitches, divisible by eight. Its relaxed circumference is:
Its estimated negative ease is:
This calculated circumference is only the first gate. The finished lower-edge ring must still pass comfortably over the head and return to the wear line.
Calculate the taper before crocheting the body
With 40 body stitches and eight sectors, each decrease round removes eight stitches. The taper is:
The number of decrease rounds is:
Convert those four rounds to height:
Now subtract that from the personal finished depth:
Work the body until it physically measures about 6.04 inches from the lower edge, then begin decreasing. At the example gauge that is approximately ten even HDC rounds, depending on how the foundation round is counted. The measurement is the controlling checkpoint; the approximate round count is a convenience.
The final eight-stitch opening has an estimated circumference of:
The closure ratio is:
As a chunky-yarn maker’s heuristic, a final opening no more than about 22% of the body circumference is a promising draw-close candidate. About 22%–28% deserves a careful physical check; above 28% suggests adding a planned decrease round, selecting another divisible count or changing the crown plan. This ratio does not guarantee a smooth crown—the yarn’s compressibility also matters—but it is more informative than “cinch tightly.”
The taper occupies about 29% of the desired depth. A maker window of roughly 24%–35% is a useful balanced starting point for a close beanie in this stitch. Below about 20% often produces an abrupt, bunched crown; above about 40% may look tall or pointed. These proportions are project diagnostics, not universal anatomy rules.
Apply the Smooth-Crown Decrease Method
- target and selected body circumference;
- selected whole stitch count and decrease sectors;
- estimated negative ease and stretch reserve;
- taper sequence, taper rounds and taper height;
- the physical height at which crown shaping begins;
- approximate even-round count;
- final opening size and closure ratio;
- crown-height share and clear pass/caution/revise messages.
No field is left blank, and the user does not need to copy a worksheet or perform the calculations by hand. The article still shows the formulas so the result is understandable and auditable.
Complete worked example
| Decision | Example result | Why it matters |
|---|---|---|
| Actual head circumference | 22 in / 55.9 cm | Personal input, not a size label |
| Desired finished depth | 8.5 in / 21.6 cm | Controls crown-start location |
| Intended negative ease | 8% | Starting preference, not a promise |
| Washed stitch gauge | 8 sts per 4 in / 10 cm | Converts circumference to stitches |
| Washed round gauge | 6.5 rounds per 4 in / 10 cm | Converts taper rounds to height |
| Raw body count | 40.48 sts | Before divisibility adjustment |
| Selected body count | 40 sts | Divisible by eight sectors |
| Estimated body circumference | 20 in / 50.8 cm | 40 ÷ 2 sts per inch |
| Estimated negative ease | 9.09% | Used in the stretch-reserve gate |
| Selected sectors | 8 | Close to the gauge-derived 7.73 |
| Taper sequence | 40→32→24→16→8 | Removes one stitch per sector per round |
| Taper height | 2.46 in / 6.3 cm | Four rounds at 1.625 rounds per inch |
| Begin taper | 6.04 in / 15.3 cm | Measured from lower edge |
| Final opening | about 4 in / 10.2 cm | Small area to draw closed |
| Closure ratio | 20% | Candidate for a smooth finish |
| Crown share | about 29% | Balanced planning window |
Materials
- Category 5 bulky yarn that produces a comfortable washed fabric at the entered gauge; total yardage varies with yarn density, head size and depth, so weigh the swatch and track the first skein rather than relying on a universal amount.
- Crochet hook that produced the washed gauge and fabric you selected.
- Optional hook one size larger for a loose starting chain.
- Eight contrasting locking stitch markers plus one beginning-of-round marker.
- Flexible measuring tape, ruler and yarn needle.
- Scissors.
Use one continuous yarn when possible. If joining yarn near the crown, secure the join away from a decrease stitch so the shaping remains easy to read.
Abbreviations and stitch method
- ch: chain
- st(s): stitch(es)
- sl st: slip stitch
- HDC: half double crochet
- HDC2tog: half double crochet two together
- rnd: round
Standard HDC: yarn over, insert the hook in the next stitch, yarn over and draw up a loop, yarn over and draw through all three loops.
HDC2tog: yarn over, insert in the next stitch and draw up a loop; yarn over, insert in the following stitch and draw up a loop; yarn over and draw through all five loops. Do not tighten the first half of the decrease so aggressively that the crown becomes rigid.
The instructions use joined rounds for clear checkpoints. Join each round with a slip stitch to the first HDC. A chain at the start does not count as a stitch. Keep the seam at the back and move the marker every round. If you prefer continuous rounds, the count and sector logic remain the same, but mark the first stitch carefully and expect a slight height transition at the last round.
Part 1: make an elastic 40-stitch lower edge
For the example, foundation HDC 40 and join to the first foundation stitch without twisting. This method avoids a separate chain that may be tighter than the body.
If foundation HDC is unfamiliar, use a hook one size larger to chain 40 loosely. Lay the chain flat, confirm it is not twisted, and join. Return to the gauge hook. Chain 1 and work 1 HDC in each chain around; join—40 HDC.
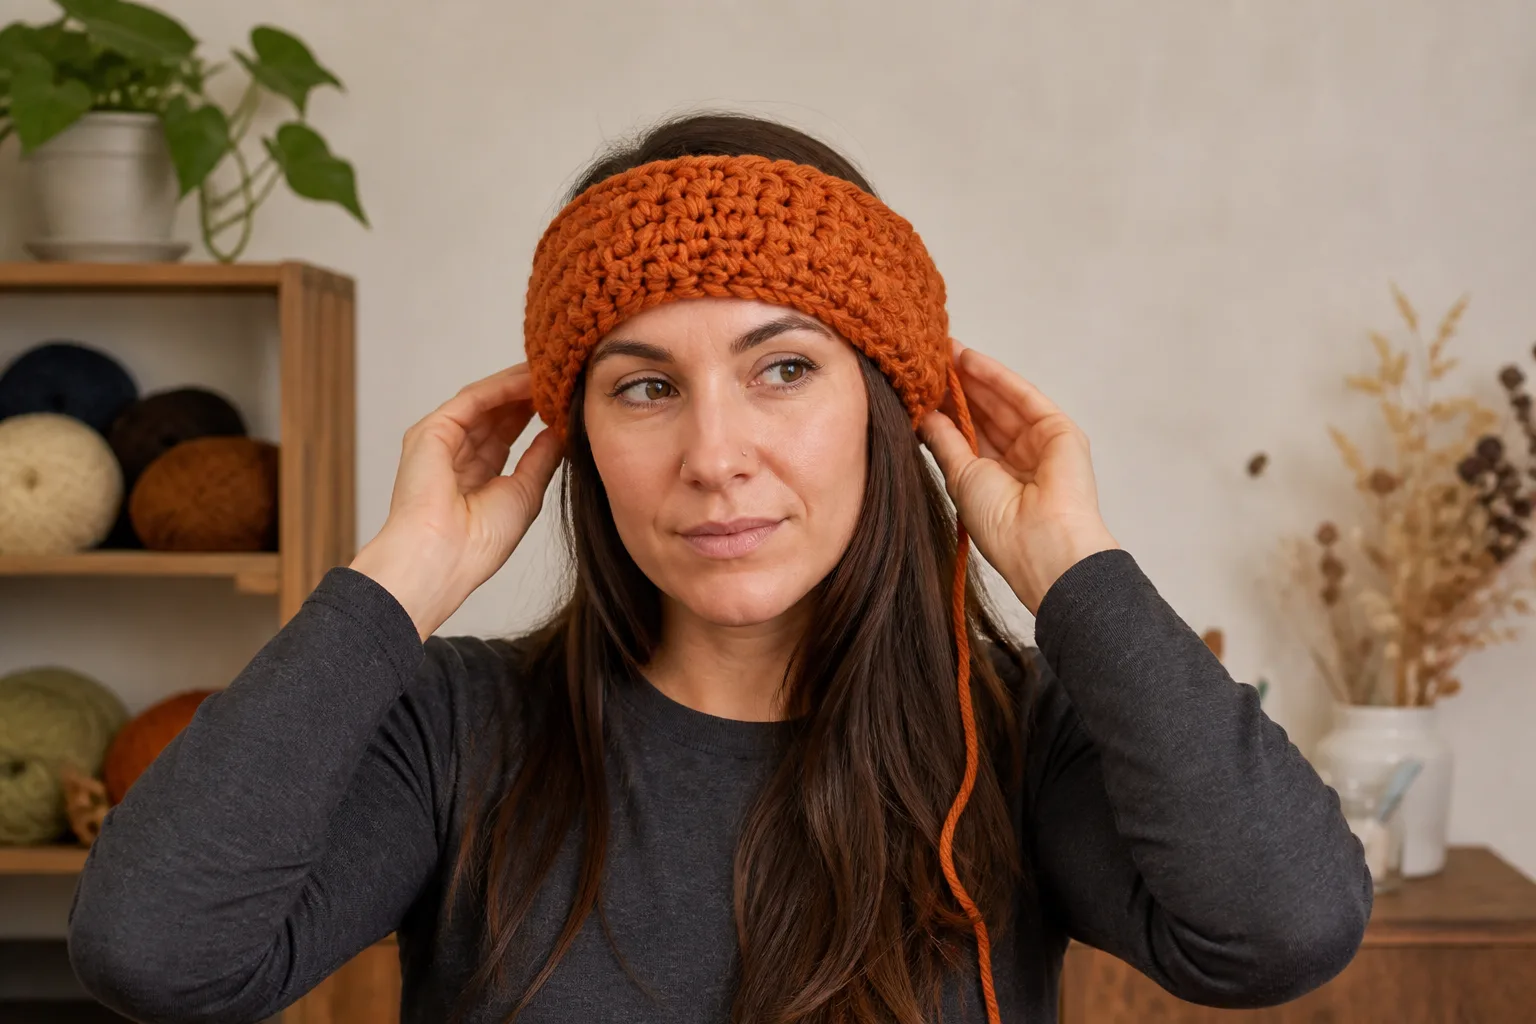
Before continuing, pull the ring over the widest part of the wearer’s head and place it at the intended wear line. It should pass without force, settle without slipping and not leave a painful indentation. This is the lower-edge gate.
If the ring fits but the chain edge does not stretch enough, remake only the foundation rather than enlarging the whole hat. If the entire ring is too tight, recalculate with less negative ease or a nearby divisible count. If it is loose, do not simply use a smaller hook on the edge unless the finished edge still passes the head; recalculate or choose a better-recovering yarn.
Part 2: work the body to the physical taper line
Round 1 and following even rounds: chain 1, HDC in every stitch around, join to the first HDC—40 stitches.
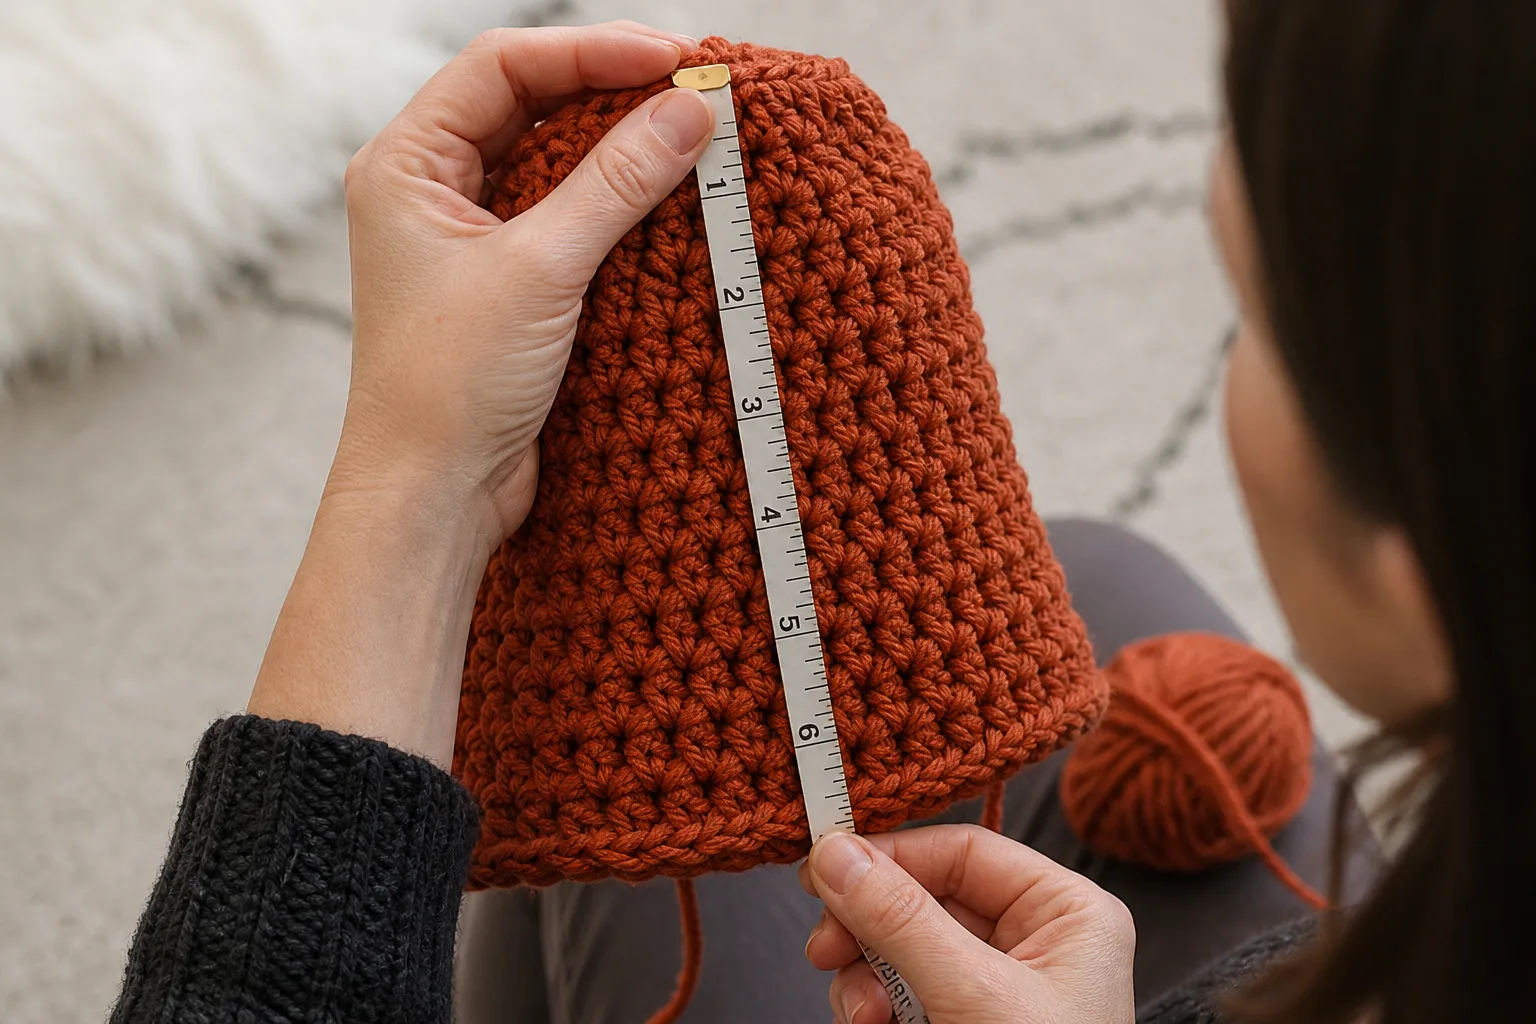
Continue until the work measures 6.04 inches / 15.3 cm from the lower edge for the example. This is approximately ten even rounds at 6.5 rounds per 4 inches. Measure the hat laid naturally, without stretching it lengthwise and without including a loop on the hook.
Try the open tube on once more. Confirm that the lower edge sits where intended and the open upper edge reaches the calculated taper-start line. If the circumference feels correct but the height differs from the estimate, trust the physical measurement. Round gauge can shift slightly when working a tube instead of a flat swatch.
Do not continue to the full desired depth before decreasing. The crown rounds add height. Beginning the taper at 8.5 inches would make this example nearly 11 inches deep.
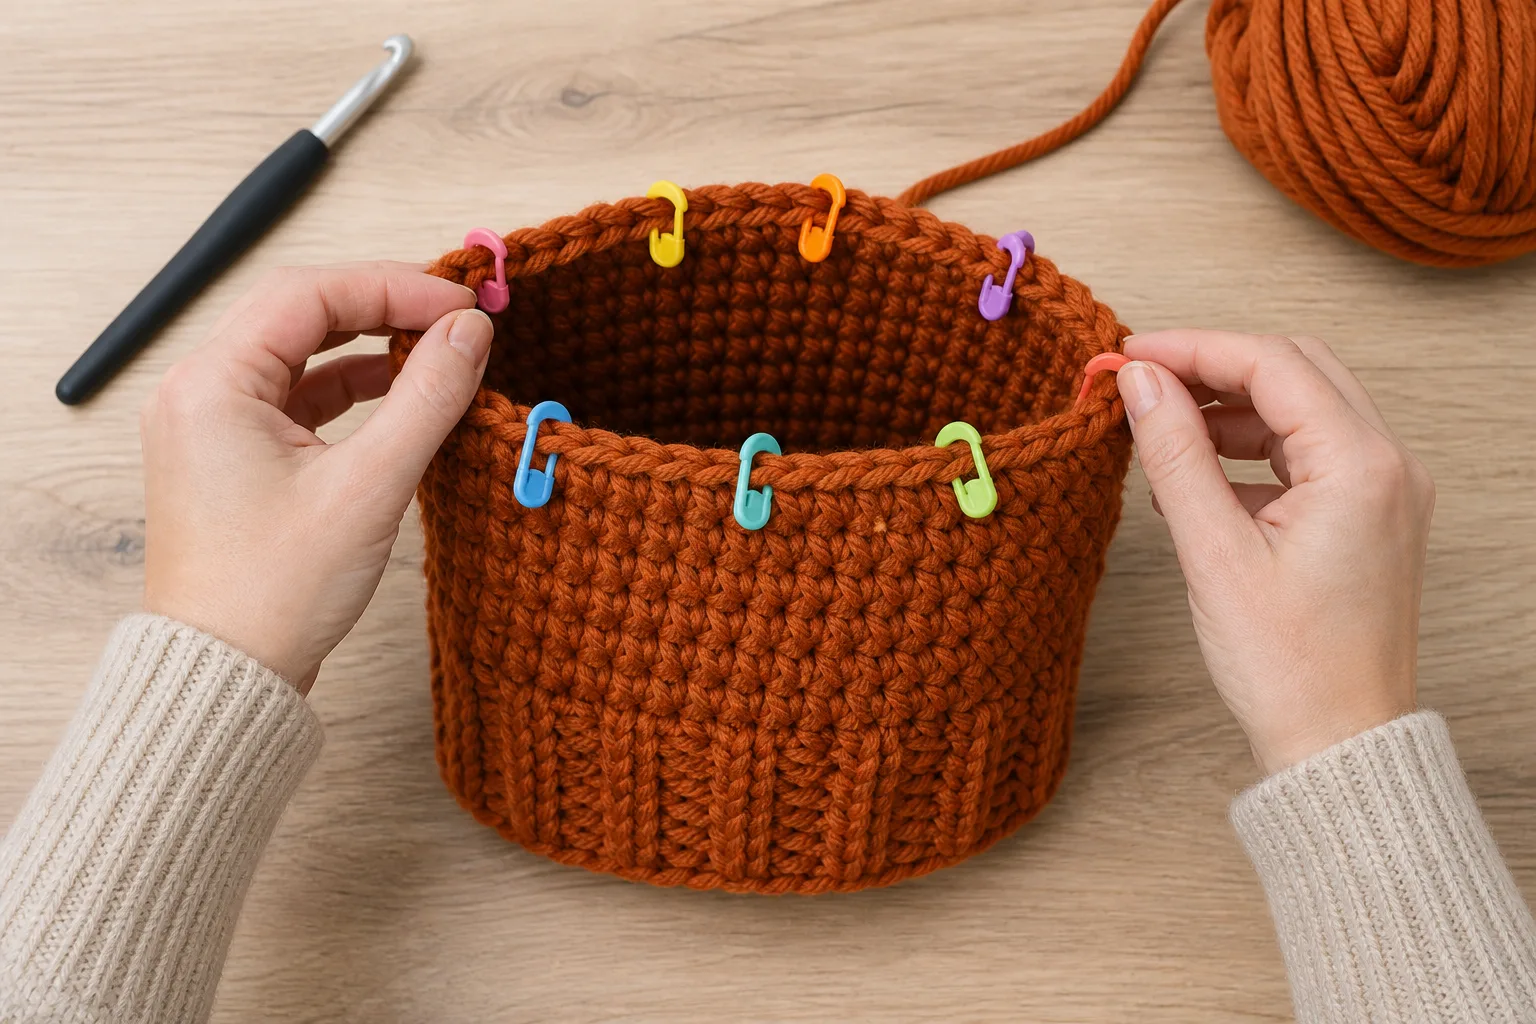
Part 3: place eight decrease-sector markers
With 40 stitches, each of the eight sectors contains five stitches. Place a marker after every fifth stitch around. Count the spaces twice:
Markers are not decoration; they prevent small counting errors from collecting at the end of the round. Each decrease is worked at the same relative location in its sector. Move each marker upward as the crown narrows.
For another calculation result, divide the selected body count by the selected sector count. That quotient is the starting number of stitches per sector. Do not reuse “five stitches per sector” unless your result is also 40 stitches and eight sectors.
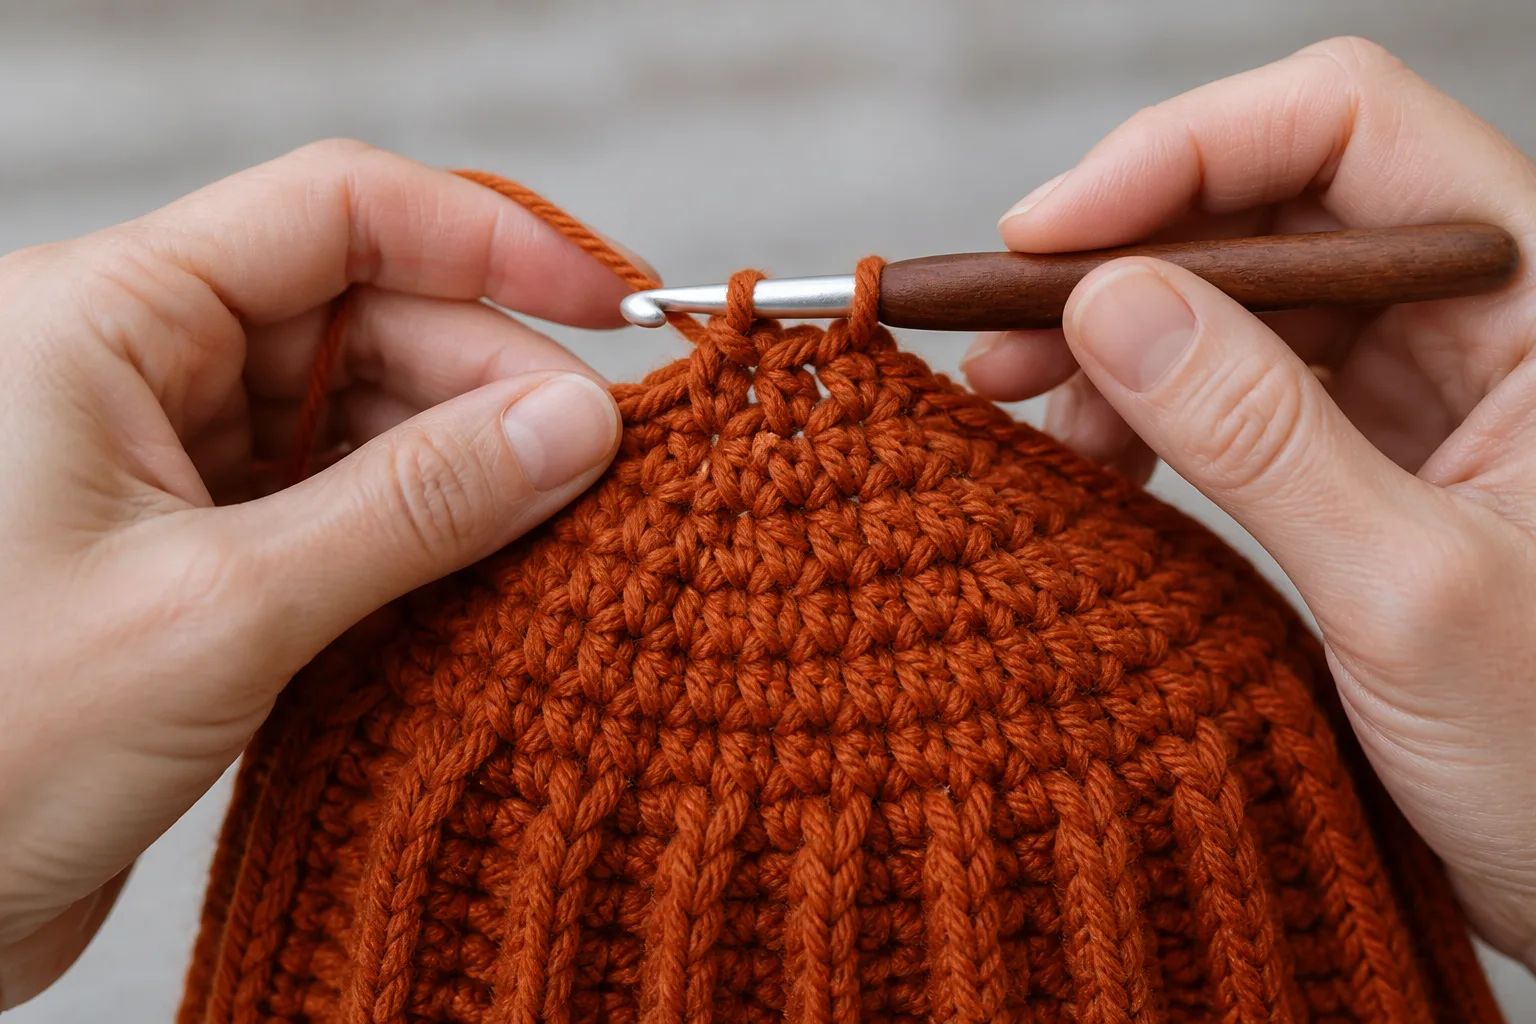
Part 4: shape the four-round crown
For the example, work one decrease at the end of each marked sector in every crown round.
- Crown round 1: chain 1, repeat HDC in next 3 stitches, HDC2tog eight times, join—32 stitches.
- Crown round 2: chain 1, repeat HDC in next 2 stitches, HDC2tog eight times, join—24 stitches.
- Crown round 3: chain 1, repeat HDC in next stitch, HDC2tog eight times, join—16 stitches.
- Crown round 4: chain 1, HDC2tog around eight times, join—8 stitches.
After crown round 2, place the unfinished hat on the wearer carefully or set it over a rounded form close to the wearer’s head shape. Look for a smooth turn rather than a flat shelf. After crown round 3, the crown should still distribute the fabric around the full circle; one side should not contain a cluster of extra stitches.
If your own plan has more starting stitches per sector, each round reduces that number by one. For example, a six-stitch sector becomes five, four, three, two and then one stitch. The worked calculation provides the exact count sequence; write the counts beside the round marker before starting.
Part 5: close only the small opening
Cut the yarn, leaving a tail long enough for a secure closure and weaving. Thread the yarn needle. Pass through the front loop of each of the final eight stitches in order. Pull gradually, moving around the opening in two or three passes rather than yanking once. The thick loops should nest toward the center instead of stacking into one hard knot.
Pass the tail across the closed center in more than one direction on the inside, then weave it through several stitches without creating a stiff lump. Stretch the crown gently between the hands and smooth the eight decrease lines.
Do not thread the tail through the original 40-stitch upper edge and gather the entire tube. The four decrease rounds are what reduce the amount of bulky fabric that must occupy the center.
The five physical checkpoints
The formulas make a plan; these checkpoints decide whether the plan belongs on this wearer.
- Washed-fabric checkpoint: the swatch has a comfortable hand, correct measured gauge and acceptable recovery.
- Lower-edge checkpoint: the ring passes over the widest head point, settles at the wear line and does not create pressure.
- Taper-line checkpoint: at the calculated start height, the open tube reaches the location where the head begins curving toward the crown.
- Mid-crown checkpoint: after approximately half the decrease rounds, the shaping follows the head instead of making a ledge, flat plate or tall cone.
- Finished-depth checkpoint: after closure and settling, measure from crown center to lower edge and compare both sides. Let the hat rest before deciding whether a small adjustment is needed.
Because chunky rounds are tall, make corrections early. Removing one body round before the taper is easier than trying to hide more than half an inch of excess depth after closure.
Troubleshooting by symptom
The hat is much larger than the pattern example
Do not diagnose from yarn category alone. Measure the washed stitch gauge. If your fabric has fewer stitches per 4 inches than the example, the same 40 stitches produce a larger circumference. Enter your real gauge and use the selected divisible count.
Also check whether the swatch was measured relaxed. Measuring a horizontally stretched swatch reports fewer stitches per inch than the relaxed fabric and can lead to an undersized hat when that gauge is used to calculate the count.
The foundation fits around the head but will not pass over it
The chain edge is the restriction. Remake it with foundation HDC, a larger hook for the chain only, or another elastic foundation. Do not add body stitches until you confirm the body circumference itself is too small.
The hat feels stiff or stands like a bucket
The fabric may be too dense for the yarn, or the crown may begin too late. Wash the swatch, evaluate its drape and verify round gauge. A larger hook may improve flexibility, but it requires a new gauge calculation. If the fabric is pleasant and only the crown turns abruptly, review the crown-height share and begin a longer taper with a suitable sector plan.
The crown forms a flat ledge
The shaping is removing circumference faster than the height can rise. Confirm that you did not work multiple decreases inside each sector or skip an intended plain stitch. Compare the actual sector count with the gauge-derived result. A very low round gauge can require fewer sectors or an occasional even round, followed by a new depth calculation.
The crown is tall or pointy
The taper occupies too much of the total depth, or circumference is shrinking too slowly. Confirm the body count, sector count and actual round gauge. Do not remove a random round from the middle; recalculate the taper and its start height so the finished depth remains intentional.
Four or five thick lobes appear at the top
The final opening was probably too large, the decreases were clustered, or the full edge was cinched without enough shaping. Check the closure ratio and confirm that all sectors contained the same number of stitches. Redistribute the markers before the next round. If necessary, reopen the closure and add a properly distributed decrease round.
The final hole will not close cleanly
Do not pull harder until the yarn or stitches deform. Check how many stitches remain and calculate the opening circumference. If the yarn is very firm, even a ratio near 22% may need a smaller final count. Add another controlled decrease round when the count permits, or divide the remaining stitches into evenly spaced decreases without stacking them in one area.
One decrease line looks heavier
The beginning-of-round join may be adding visual bulk, or a marker may have drifted. Count every sector. Keep the turning chain from becoming an extra stitch. On the next version, stagger the join one stitch while preserving sector positions, or use a carefully marked continuous spiral.
The hat is the right circumference but too deep
Round gauge or taper-start placement is the issue, not stitch count. Remove body rounds before the crown and begin shaping at the physical height returned by the method. One example round adds about 0.62 inch, so “just one more” is a meaningful change.
The hat is the right depth but too tight
Do not add height. Revisit circumference, negative ease and stretch reserve. Select a larger nearby divisible count or a fabric with more comfortable stretch. Changing the hook requires new stitch and round gauges.
The yarn splits during HDC2tog
Slow the first draw-up loop, rotate the hook slightly downward and avoid over-tightening the working loop. A rounded hook head may handle loosely plied yarn better. If hand strain develops, stop and adjust the tool or fabric; speed is not worth painful tension.
How to adapt the plan without losing the crown logic
Different head size
Use the wearer’s measured head circumference and desired depth. Let the method choose a nearby stitch count divisible by a practical sector count. Verify the lower-edge ring on the wearer. A “small adult” label is not a substitute for those steps.
Different chunky gauge
Enter both washed gauges. A gauge of 9 stitches per 4 inches changes the body count; a round gauge of 5.5 rounds per 4 inches changes the crown height. Both values affect the sector choice. Recalculate rather than proportionally scaling only the stitch count.
Less or more negative ease
Use the fabric’s comfortable stretch and the wearer’s preference. Sensitive wearers, dense stitches and low-recovery fibers may need less negative ease. A flexible, springy fabric may tolerate more, but the lower-edge pass test still decides. Keep a visible reserve instead of using all measured stretch as negative ease.
Add a folded cuff
A folded cuff changes finished depth and creates a two-layer lower zone. Plan the unfolded cuff depth separately, confirm stretch after folding, and calculate the body-to-crown distance from the cuff attachment. Do not simply add a generic number of rounds to this single-layer example.
Use another stitch
Make and wash the exact stitch swatch. Enter its stitch and round gauges. Check whether its decrease is visually and physically smooth. Tall stitches and strongly textured stitches may need a modified decrease or an occasional even round. Preserve the underlying method: personal target, divisible count, gauge-derived sectors, calculated taper height and physical checkpoints.
Care and rechecking fit
Finish the hat using the same washing and drying method used for the swatch. Let it rest, then remeasure relaxed circumference and depth. Repeat the lower-edge and crown checks on the wearer.
Store the hat without hanging it from the crown, which can stretch the closure. After repeated wear, compare the relaxed lower edge with its original measurement. If recovery changes, gentle washing according to the yarn instructions may help the stitches settle. A permanently enlarged edge is a fabric or construction issue; pulling the crown tighter will not correct circumference.
Inspect the center closure periodically. Chunky yarn exposes abrasion at a small number of large loops. If a tail begins to emerge, weave it through several directions inside the crown without knotting a hard bump against the head.
Frequently asked questions
How many stitches should an adult chunky crochet beanie have?
There is no single reliable number. The count depends on actual head circumference, intended negative ease, washed stitch gauge, stretch recovery and the divisibility needed for the crown. In the complete example, those inputs select 40 stitches. Another yarn or wearer can require a different count even when the yarn category is the same.
Can I use super bulky yarn instead?
Yes, if you make and wash a new swatch, like the fabric, and recalculate both body and crown. Do not substitute by label and keep the example counts. Super-bulky yarn may produce fewer stitches, taller rounds and a less compressible final opening.
Why not crochet a rectangle and cinch one end?
That construction can be quick, but a chunky full-edge gather concentrates every thick row end at the crown. This pattern reduces circumference through evenly distributed sectors so only a small opening is closed. The result uses more planning and usually less crown bulk.
Must I use exactly eight sectors?
No. Eight belongs to the example because its gauge-derived estimate is 7.73 and 40 divides evenly by eight. The method searches practical choices from five through ten. Use the result for your gauge and count, then inspect the physical crown.
Should I add an even round between decrease rounds?
Not automatically. An even round adds chunky height without reducing circumference and may make the crown taller. Add one only when the measured fabric and mid-crown checkpoint show that the crown is turning inward too quickly; then recalculate the total taper height and move the taper start downward by that added height.
What if the method’s selected count differs from the raw count?
Divisibility sometimes requires moving to a nearby whole number. Compare the selected circumference and estimated negative ease with the fabric’s stretch reserve. A small circumference difference can be acceptable; a painful or loose physical ring is not. The worked calculation shows the consequences instead of hiding the rounding.
Is the 22% closure ratio a rule?
It is a conservative maker’s heuristic for planning chunky closures, not an external standard. Soft, compressible yarn may close smoothly at a somewhat larger ratio; firm or roving-style yarn may need a smaller opening. Use it as an early warning and verify the physical crown.
Which direction should the final needle pass through the stitches?
Passing through the front loops reduces the volume collected at the center. Move through the remaining stitches in order, draw the opening smaller gradually, and secure the tail in multiple directions on the inside.
What makes this tutorial different
This tutorial does not treat a yarn-weight label, age label or preset adult count as the answer. It combines the wearer’s measurements with washed gauge on both axes. It tests whether the selected negative ease fits inside the fabric’s comfortable stretch rather than assuming thick yarn is elastic.
Its main difference is the gauge-matched crown. The number of decrease sectors comes from the relationship between stitch gauge and round gauge, then the method selects a nearby divisible body count. The article shows the resulting crown height before the body is made, calculates the final opening and flags a closure that may be too large for chunky yarn.
It also replaces the usual instruction to “cinch the top” with eight marked sectors, exact round counts, a small-opening target and five physical checkpoints. When something goes wrong, the troubleshooting section separates circumference, foundation elasticity, taper rate, height and closure bulk, so the maker knows which variable to change.
References