
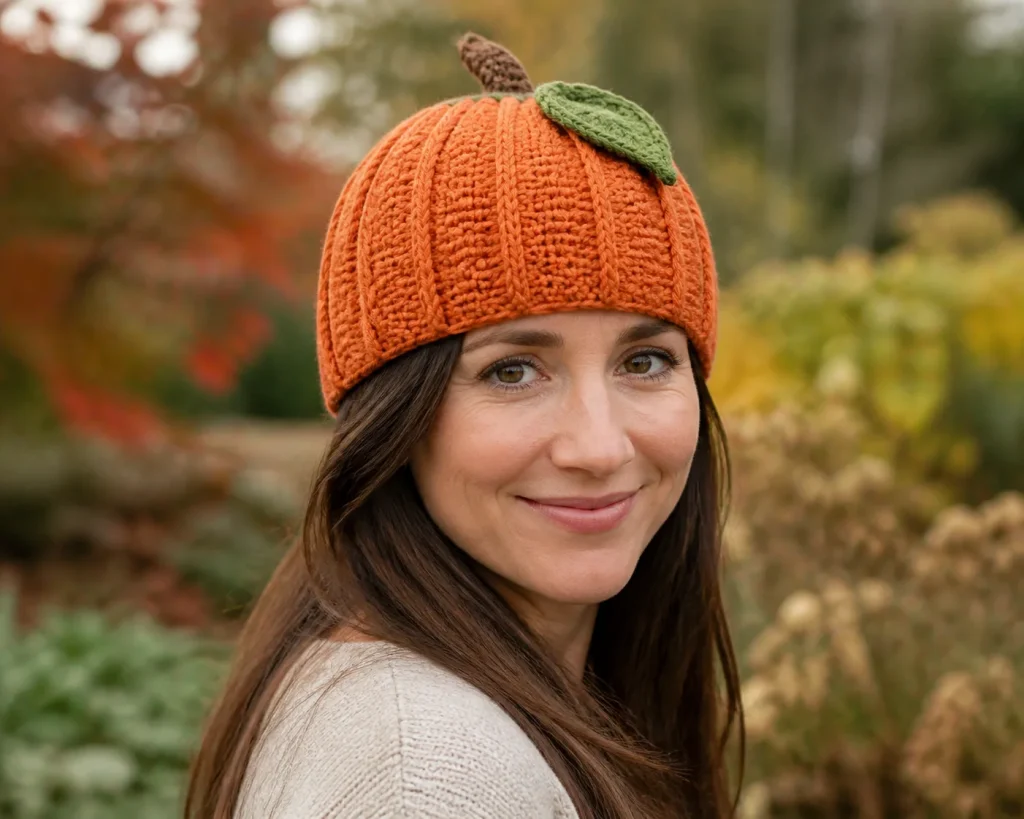
Fit twelve ribs, calculate the depth, and secure a short stem
This measurement-led crochet pumpkin hat pattern makes a fitted orange beanie with twelve continuous raised lobes, a smooth top-down crown, and a short unstuffed stem with a flat leaf. The default adult pattern finishes at 72 stitches; the method lets you choose a different legal count from actual head size and washed gauge.
What This Pattern Makes
This pattern makes a close pumpkin beanie for an actual measured wearer. It is worked from the crown downward in joined rounds. Twelve front-post double-crochet lines begin near the center, remain aligned through every increase, and continue to the lower edge. A small brown stem and one flat green leaf finish the top.
It does not make a pumpkin bucket hat, an earflap hat, an amigurumi pumpkin, a side-to-side ribbed rectangle or a pet hat. It also avoids wire, a long dangling vine and a heavily stuffed topper. Those are different outcomes with different fit and attachment risks.
The default is an adult example, but the method is not age grading. For another wearer—especially a child, a gift recipient or anyone who cannot try the hat on—use a current head measurement and a washed sample. Do not scale the 72-stitch example by age label alone.
Project Overview
| Item | Default project |
|---|---|
| Skill level | Confident intermediate |
| Terms | US crochet terms |
| Construction | Top-down joined rounds with 12 FPdc lobe lines |
| Yarn | Medium / weight 4 in orange, with small amounts of brown and green |
| Hook | Size needed for the washed post-stitch gauge; 4.5–5.5 mm is only a swatching range |
| Default wearer | 22 in / 55.9 cm actual head circumference |
| Default washed gauge | 14 body stitches and 7 joined rounds per 4 in / 10 cm |
| Chosen circumference count | 72 stitches, a multiple of 12 |
| Estimated circumference at the chosen count | 20.57 in / 52.2 cm |
| Estimated negative ease at the chosen count | 6.49% |
| Crown path | 12, 24, 36, 48, 60, 72 stitches |
| Plain body | 9 rounds at 72 stitches |
| Modeled depth | 8.42 in / 21.4 cm before wearer-led adjustment |
The modeled dimensions are planning values. Yarn recovery, post-stitch height, joining tension, washing and the wearer’s comfort determine the accepted result.
Materials
- medium / weight 4 yarn: about 180–240 yd / 165–220 m orange for the default adult hat;
- about 8 yd / 7.5 m brown for the stem;
- about 10 yd / 9 m green for the leaf;
- crochet hook needed to meet the washed gauge;
- 13 locking markers—one distinct first-stitch marker and 12 lobe markers;
- flexible tape measure, rigid ruler, calculator, tapestry needle and scissors.
Yardage is a purchasing allowance, not measured consumption. Yarn construction, hook size, crown adjustment and leaf size all change the total. If yardage matters, weigh the washed swatch, compare its area with the planned hat surface and add an allowance for swatching and finishing.
Do not put wire in the stem. The default stem is unstuffed. If the hat is for a child or a wearer who may pull at decorations, omit dangling vines, sew through the full base of every topper piece, bury tails inside the hat and recheck the attachment before each use.
US Abbreviations and Round Convention
| Abbreviation | Meaning |
|---|---|
| ch | chain |
| dc | double crochet |
| FPdc | front-post double crochet |
| MR | adjustable / magic ring |
| sc | single crochet |
| sl st | slip stitch |
| st(s) | stitch(es) |
| rnd(s) | round(s) |
| RS / WS | right side / wrong side |
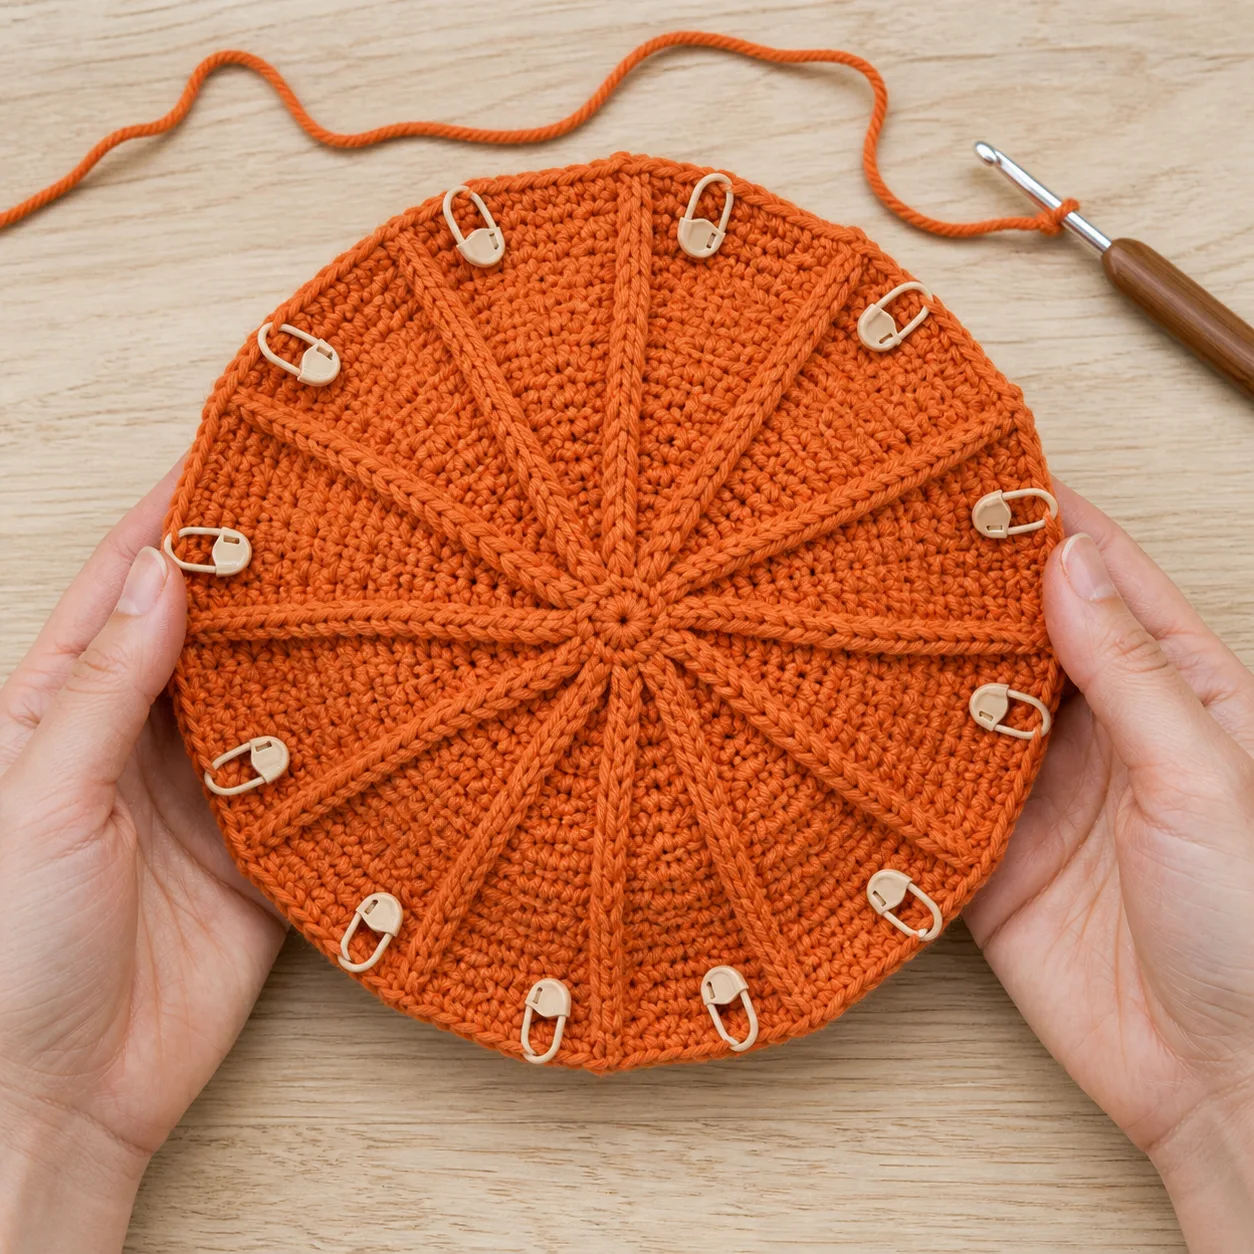
Join each structural round with a slip stitch to its first stitch. A starting chain does not count as a stitch. Move the distinct first-stitch marker every round. Place the other 12 markers in the FPdc stitches after each round; every interval must hold the same number of stitches.
If you use UK terminology, US dc is UK tr, and US sc is UK dc.
Make a Construction-Matched Washed Swatch
The body alternates FPdc ribs with ordinary dc, so a flat plain-dc square is not the right evidence.
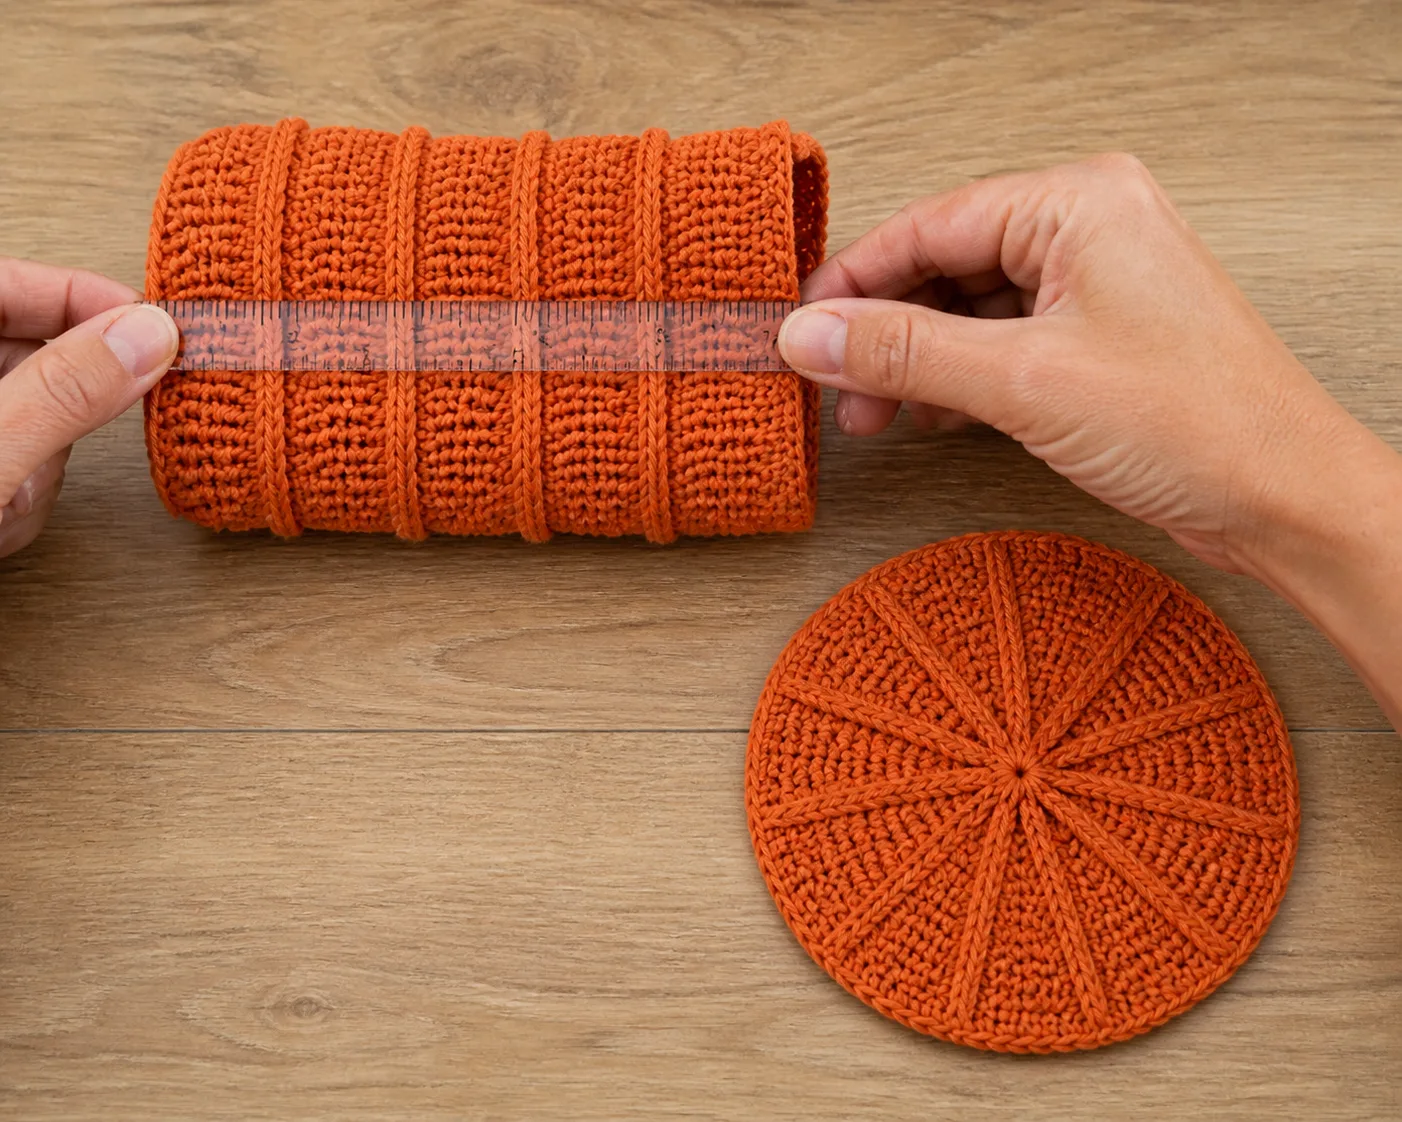
Make a joined-round tube at least 6 in / 15 cm around and 5 in / 12.7 cm deep. Use a repeat of one FPdc and five dc, the same starting-chain convention and the same join you plan for the hat. Wash and dry it according to the yarn label, then let it rest flat.
Measure two values without stretching:
- g_s: body stitches per 4 in / 10 cm across several complete lobe repeats;
- g_r: joined rounds per 4 in / 10 cm vertically, away from the join.
Also make a small crown through Rnd 4. It should lie substantially flat or form only a gentle cup after washing. A persistent wave or rigid bowl means the fabric and increase pace disagree; change the hook or yarn and reswatch before calculating a full hat.
The Lobe-Crown-Stem Map
Use inches with gauge per 4 in, or centimeters with gauge per 10 cm. Keep full precision until a stitch or round count must be chosen.
Choose the fitted circumference
Let:
- H = actual head circumference at the wearing line;
- e = starting negative-ease decimal;
- g_s = washed body stitches per 4 in;
- N = chosen legal stitch count.
Start with a modest 4–8% negative-ease range for this fabric. It is a planning range, not a universal rule.
C_target = H × (1 – e)
N_raw = C_target × g_s / 4
Compare the multiples of twelve immediately below and above N_raw. For each candidate:
C_actual = N × 4 / g_s
estimated negative ease = (H – C_actual) / H
Choose only after checking the candidate circumference against the washed tube’s comfortable stretch. If both legal neighbors are uncomfortable, change the hook or fabric and swatch again; do not break the twelve-lobe structure.
Convert the count to a crown target
Use the estimated circumference at the chosen count to estimate the flat crown diameter:
D_crown = C_actual / π
The crown begins with 12 stitches and gains exactly 12 on every increase round. Therefore:
crown rounds = N / 12
The diameter formula is a geometric planning shortcut. Measure the actual washed or relaxed crown across its widest line. If it reaches the count but not the physical diameter or shape gate, change fabric or hook rather than forcing it with blocking.
Convert chosen depth to plain body rounds
Let L be the wearer-selected distance from crown center to lower edge. Estimate the crown’s contribution to depth as its radius:
R_crown = D_crown / 2
B_raw = (L – R_crown) × g_r / 4
Round half up to plain body rounds B, then back-calculate:
L_actual = R_crown + B × 4 / g_r
This approximation treats the crown radius as axial depth. A real crown curves and the wearer’s head is not a perfect hemisphere, so the try-on check after several body rounds is the final authority.
Default calculation
Use H=22 in, e=6%, g_s=14, g_r=7 and L=8.5 in.
C_target = 22 × 0.94 = 20.68 in
N_raw = 20.68 × 14 / 4 = 72.38
The legal neighbors are 72 and 84. Choose 72.
C_actual = 72 × 4 / 14 = 20.5714… in
estimated ease = (22 – 20.5714…) / 22 = 6.4935…%
D_crown = 20.5714… / π = 6.5480… in
R_crown = 3.2740… in
B_raw = (8.5 – 3.2740…) × 7 / 4 = 9.1454…
Round half up to 9 plain body rounds.
L_actual = 3.2740… + 9 × 4 / 7 = 8.4169… in
How to Crochet a Pumpkin Hat
- Work a 12-stitch center and establish one marked rib per sector.
- Add 12 stitches on each crown increase round until the chosen legal count.
- Check crown count, diameter, flatness and rib alignment.
- Continue the same twelve ribs without increases to the planned depth.
- Make a short unstuffed stem and one flat leaf.
- Sew the topper across a broad base, then complete fit, attachment and movement gates.
Default 72-Stitch Pattern
Crown
With orange, make an MR.
Rnd 1: Ch 2, work 12 dc in MR. Join. 12 sts
Rnd 2: Ch 2, (FPdc around next dc, dc in the top of the same dc) 12 times. Join. Mark every FPdc. 24 sts
Rnd 3: Ch 2, (FPdc around next marked FPdc, 2 dc in next dc) 12 times. Join. 36 sts
Rnd 4: Ch 2, (FPdc around next FPdc, dc in next dc, 2 dc in next dc) 12 times. Join. 48 sts
Rnd 5: Ch 2, (FPdc around next FPdc, 2 dc in next dc, dc in next 2 dc) 12 times. Join. 60 sts
Rnd 6: Ch 2, (FPdc around next FPdc, dc in next 2 dc, 2 dc in next dc, dc in next dc) 12 times. Join. 72 sts
Each interval now contains one FPdc rib and five ordinary dc. The increase moves within the orange field instead of stacking in one straight line.
Crown gate
Stop before beginning the body and verify:
- count 72 exactly;
- 12 ribs and 12 equal six-stitch intervals;
- about 6.55 in / 16.6 cm across for the default fabric;
- substantially flat or only gently cupped, without a persistent ruffle;
- join line does not steal a stitch or lean sharply through one sector.
If the crown waves, verify every interval first. If the count is correct but the fabric still waves, return to the first increase round after which the wave persists and change the hook/fabric. Do not remove random stitches from one sector. If it bowls rigidly, check for a missing increase before changing materials.
Body
Rnds 7–15: Ch 2, (FPdc around next FPdc, dc in next 5 dc) 12 times. Join. 72 sts each round
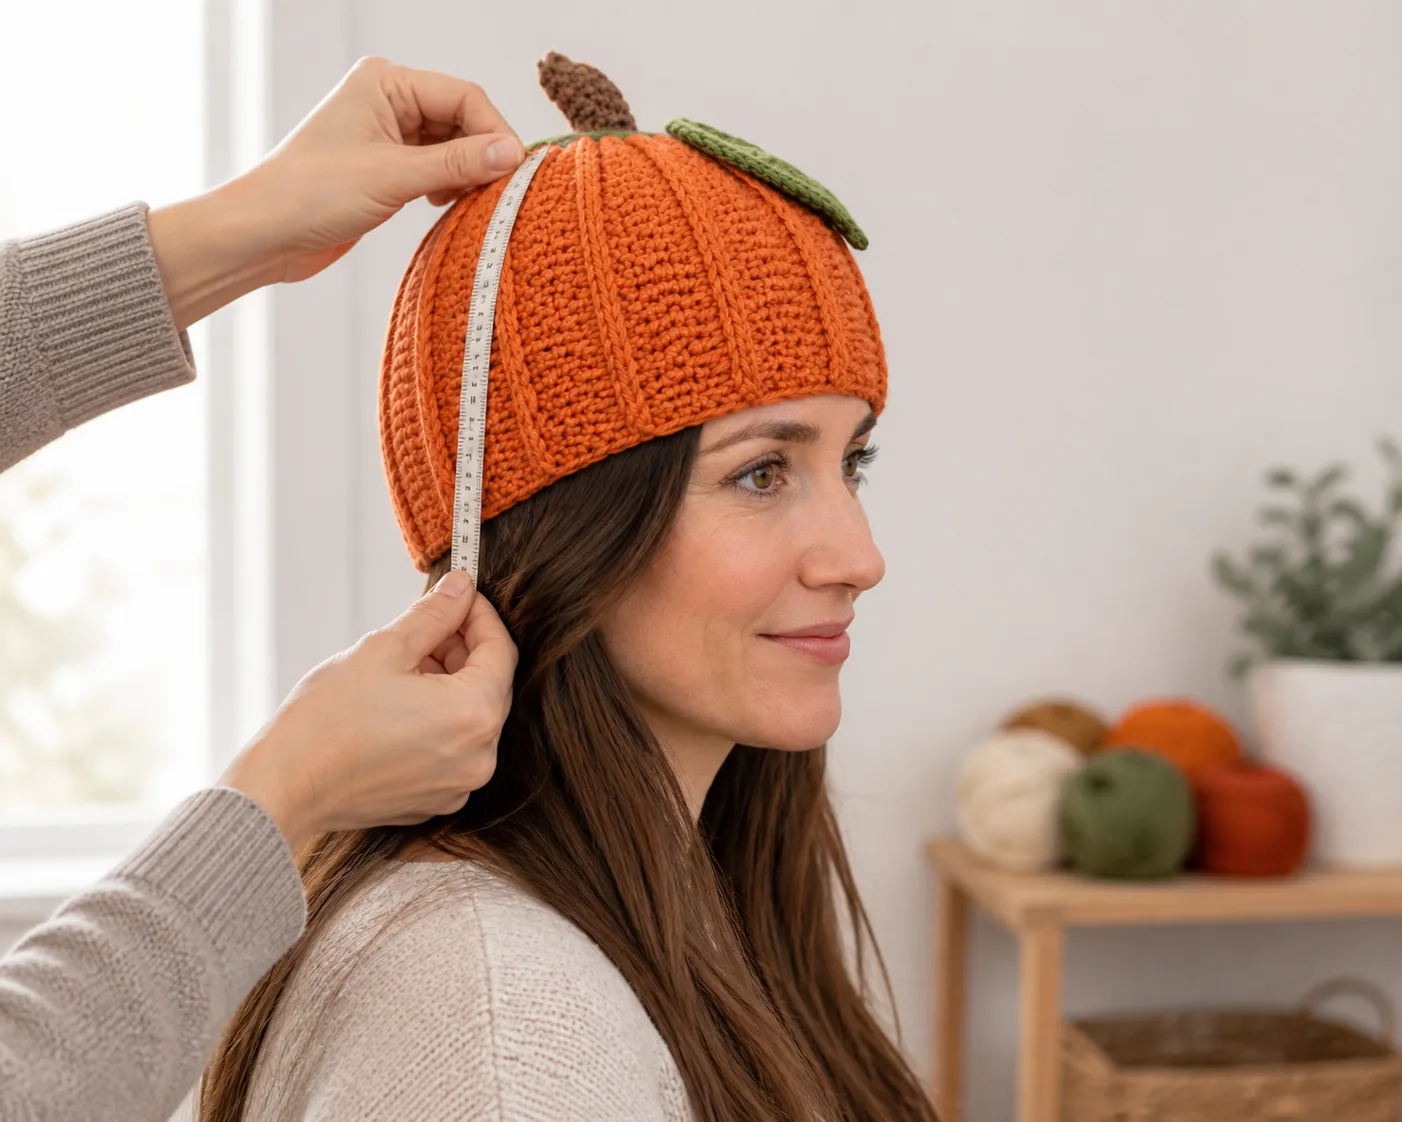
After Rnd 12, try the hat on if possible. Measure from crown center to the lower edge without stretching. Continue only until the planned wear line is reached. The default ends after Rnd 15 at a modeled depth of about 8.42 in / 21.4 cm.
Fasten off orange after the accepted final body round. Do not add a tightening decrease round; that would change the measured opening and interrupt the twelve-lobe ledger.
Body and fit gate
- The lower edge stretches over the head without force and recovers to the wear line.
- All 12 ribs reach the edge; no rib disappears into the join.
- The final round still contains 72 stitches.
- The edge sits above the eyes and at the wearer-selected ear position.
- The crown is smooth rather than puckered around the center.
Short Unstuffed Stem
With brown, make an MR.
Stem Rnd 1: 6 sc in MR. Join. 6 sts
Stem Rnds 2–4: Ch 1, sc in each stitch around. Join. 6 sts
Fasten off, leaving a 20 in / 50 cm sewing tail. Do not stuff. The narrow tube can remain softly upright; a bend is acceptable.
Flat Leaf
With green, ch 10.
Beginning in the second chain from the hook, work: sl st, sc, hdc, dc in next 3 chains, hdc, sc, sl st. Ch 1. Working along the unused loops on the opposite side of the foundation chain, repeat: sl st, sc, hdc, dc in next 3 loops, hdc, sc, sl st.
Fasten off, leaving a 20 in / 50 cm sewing tail. The leaf should lie flat. If it cups sharply, remake it with a larger hook or looser foundation chain.
Attach the Topper
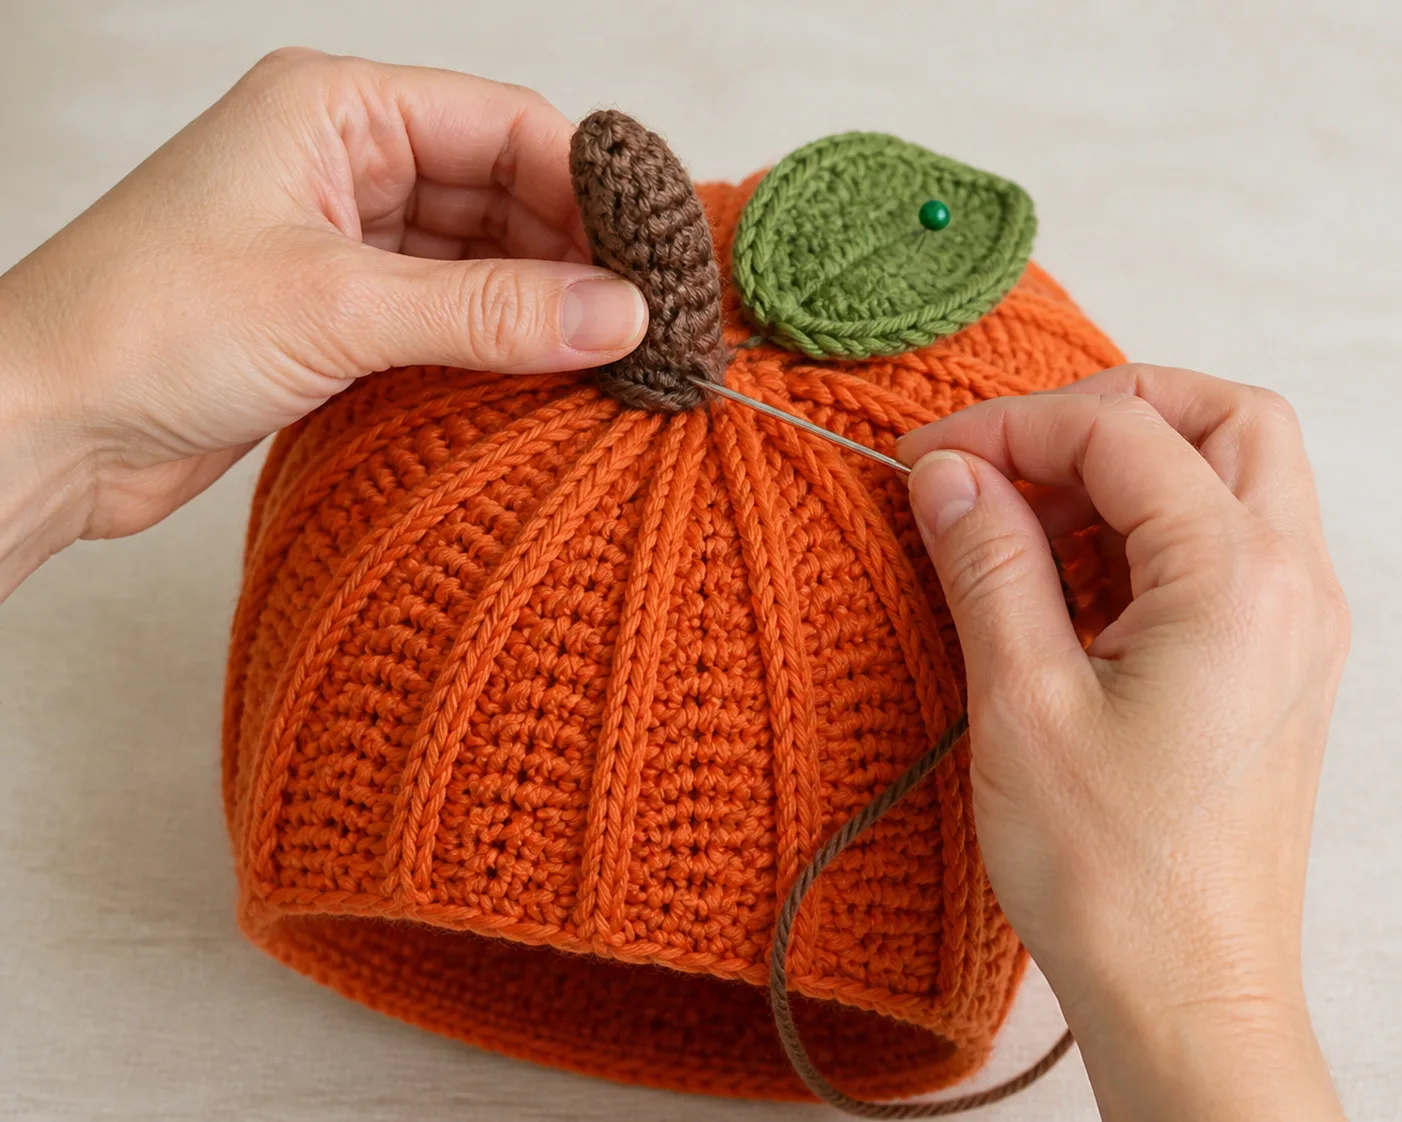
Place the stem over the crown center. With its long tail, sew through the full six-stitch base and through the hat fabric surrounding—not only through the adjustable-ring strands. Make two complete passes around the base, changing stitch direction on the second pass. Knot on the inside and bury the tail through several inches of fabric.
Place the leaf beside the stem, keeping its tip flat against the crown. Sew the center spine and outer base to the hat so a finger cannot easily hook beneath it. Bury the tail inside.
Attachment gate
Hold the hat—not the yarn tail—and tug the stem gently in four directions. Slide a finger around its base. The stem must not expose the center ring, lift on one side or rotate freely. Repeat with the leaf. If either part moves, return to the first loose attachment stitch and resew a broader base.
Worked Example: 18-Inch Head
For an actual 18 in / 45.7 cm head, use e=5%, g_s=14, g_r=7 and chosen depth L=7 in.
C_target = 18 × 0.95 = 17.10 in
N_raw = 17.10 × 14 / 4 = 59.85
The legal neighbors are 48 and 60. Choose 60 for this example. Its estimated circumference is 60 × 4 / 14 = 17.1428… in, giving 4.76% estimated negative ease. The crown path is 12, 24, 36, 48 and 60. Seven plain body rounds model a 6.73-in depth.
This example shows why an age label is not the input. Verify the actual head, hairstyle, washed fabric and intended wear line. For a gift without try-on, include adjustment time and do not promise fit from a category name.
Troubleshooting by Return Point
| Symptom | Likely cause | Minimum correction | Earliest safe return point |
|---|---|---|---|
| Crown ruffles | too much circumference for actual radial growth, or a doubled increase | recount each sector; if counts are correct, change hook/fabric | first increase round after which the wave persists |
| Crown forms a rigid bowl | missing increase or round height/radial growth mismatch | find the missing sector increase; otherwise reswatch | first affected round |
| One lobe is wider | a sector contains an extra dc | remove the extra stitch and restore equal intervals | last round with 12 equal sectors |
| Rib leans into the join | first stitch or join was misplaced | undo to the first round where the marker shifted | first shifted join |
| Lower edge is tight | wrong legal count or swatch was stretched during measurement | compare the other legal neighbor or reswatch | circumference calculation, not the topper |
| Hat is too shallow | target depth or round gauge was wrong | add full 72-stitch body rounds and recheck | accepted last body round |
| Hat covers the eyes | too many body rounds or loose opening | remove full body rounds; if it slides, reopen circumference choice | first round below the accepted wear line |
| Stem flops | tube is too tall or base is too narrow | remove a stem round and resew the full base | stem before attachment |
| Stem rotates or lifts | attachment catches too little hat fabric | remove the attachment and make two broad passes | first loose attachment stitch |
| Leaf cups | foundation chain or edge stitches are too tight | remake with looser chain or larger hook | leaf foundation chain |
Final Acceptance Gates
- Count: crown finishes at the chosen multiple of twelve; every body round preserves it.
- Lobes: exactly twelve ribs run from crown to lower edge with equal intervals.
- Shape: crown is smooth, not persistently waved or rigidly cupped.
- Fit: opening passes over the head comfortably, recovers to the wear line and stays above the eyes.
- Depth: crown center to lower edge matches the wearer-selected position.
- Attachment: stem and leaf do not rotate, lift or expose the center ring under a gentle four-direction check.
- Movement: wearer turns left/right, looks down and raises the shoulders without the hat shifting into the sight line.
For a child, complete the same checks with responsible adult supervision. Omit any decorative element that the wearer repeatedly pulls, mouths or catches on clothing.
Frequently Asked Questions
Is this a free crochet pumpkin hat pattern?
Yes. The complete default 72-stitch pattern and the recalculation method are on this page. The example count is not universal; change it only through actual head size and the washed joined-round gauge.
How do I crochet a pumpkin hat for a baby?
Use a current head measurement rather than a generic age label. Make the same construction-matched washed swatch, compare adjacent multiples of twelve, and verify the legal choice against comfortable stretch. Keep the stem short and unstuffed, omit dangling vines, and use responsible adult supervision.
Can I make the pumpkin hat larger?
Yes. Recalculate N_raw, choose a larger legal multiple of twelve, and add one twelve-stitch crown increase round for each step. A count of 84 needs seven crown rounds. Continue the new count without increases and recalculate depth from the washed round gauge.
Why are there twelve ribs?
Twelve sectors provide a repeat that can grow by exactly twelve stitches per crown increase round while keeping one permanent lobe line per sector. Fewer or more lobes are possible, but they require a new legal-count system and a separately checked pattern.
Can I use back-loop ribbing instead of FPdc?
Not as a direct substitution. BLO ribbing is usually built along a different construction axis and needs its own stretched row gauge, panel width, seam and crown closure. Use a side-to-side ribbed beanie method rather than swapping stitches inside this round-based ledger.
Does the stem need stuffing or wire?
No. The short six-stitch tube can stand softly without stuffing. Do not add wire. A flexible stem that bends under pressure is preferable to a rigid projection on a wearable hat.
Can I add a curly vine?
You can add one for a supervised adult costume, but it is outside the default. Keep it short and anchor both ends. Omit dangling or looped decorations for a child or any wearer likely to pull or catch them.