

Fit whole cable panels, finish the crossing cycle, and shape a smooth crown
A cable hat should not be sized from a flat single-crochet swatch and then forced into a cable repeat. Raised post stitches draw fabric inward, while a crossing round changes both width and thickness. This pattern sizes the fabric that will actually be worn.
What This Pattern Owns
This is a bottom-up adult beanie with a narrow single-crochet ribbed band, repeated 2-over-2 post-stitch cables and a six-sector half-double-crochet crown. The pattern shows how cable-repeat gauge relates to circumference, how to finish each crossing cycle, and how to transfer the cable body to the crown.
For general head-size calculations, use the Crochet Hat Size Ranges and Stitch Calculator. For a basic top-down hat, use the Free Crochet Beanie Pattern for Beginners. For a plain ribbed rectangle, use the Ribbed Beanie Crochet Pattern. For bulky-yarn closure, use the Chunky Crochet Beanie Pattern. For a different textured body, use the Puff Stitch Crochet Hat Pattern.
Project Specification and Limits
- Construction: bottom-up band, joined cable body, plain shaped crown
- Cable module: 6 stitches — 2 recessed BPdc columns plus 4 raised cable posts
- Cable cycle: 4 rounds — 1 crossing round plus 3 follow rounds
- Fit: start with 5–8% negative ease, then accept or reject by washed recovery and wearer comfort
- Skill level: intermediate or an adventurous beginner comfortable with post stitches
- Terms: standard US crochet terms
- Worked-example count: 84 body stitches / 14 cable panels; this count is not universal
Materials and US Terms
- Medium-weight yarn with clear stitch definition, approximately 220–300 yd (201–274 m) for an adult starting range
- 5 mm hook for the 22-inch worked-example fabric, or the size needed to match your washed repeat width
- Optional hook 0.5 mm smaller for the ribbed band
- Flexible tape, yarn needle, scissors and at least seven removable stitch markers
Abbreviations: ch chain, sc single crochet, dc double crochet, hdc half double crochet, BPdc back post double crochet, FPdc front post double crochet, FPtr front post treble crochet, hdc2tog half double crochet two together, sl st slip stitch, st(s) stitch(es), rnd round, RS right side.
UK terms: this pattern is written in US terms. US sc = UK dc, US hdc = UK htr, US dc = UK tr, US FPdc/BPdc = UK FPtr/BPtr, US FPtr = UK FPdtr, and US hdc2tog = UK htr2tog. The post placement and crossing order do not change; only the stitch names do.
The beginning chain does not count as a stitch. Join in the first real stitch. Do not turn the cable-body rounds.
Understand the Six-Stitch Cable Module
Each module uses six established posts:
- posts 1–2 become the recessed BPdc background;
- posts 3–6 become a four-post raised cable;
- on the crossing round, skip posts 3–4, work FPtr around posts 5–6, then work back around posts 3–4 in front of the stitches just made;
- on the next three rounds, work BPdc around the two background posts and FPdc around the four cable posts.
Use one marker at the start of a module while learning. The marker moves vertically, so a missing or extra stitch becomes visible before the next crossing.
Make and Wash the Cable Swatch
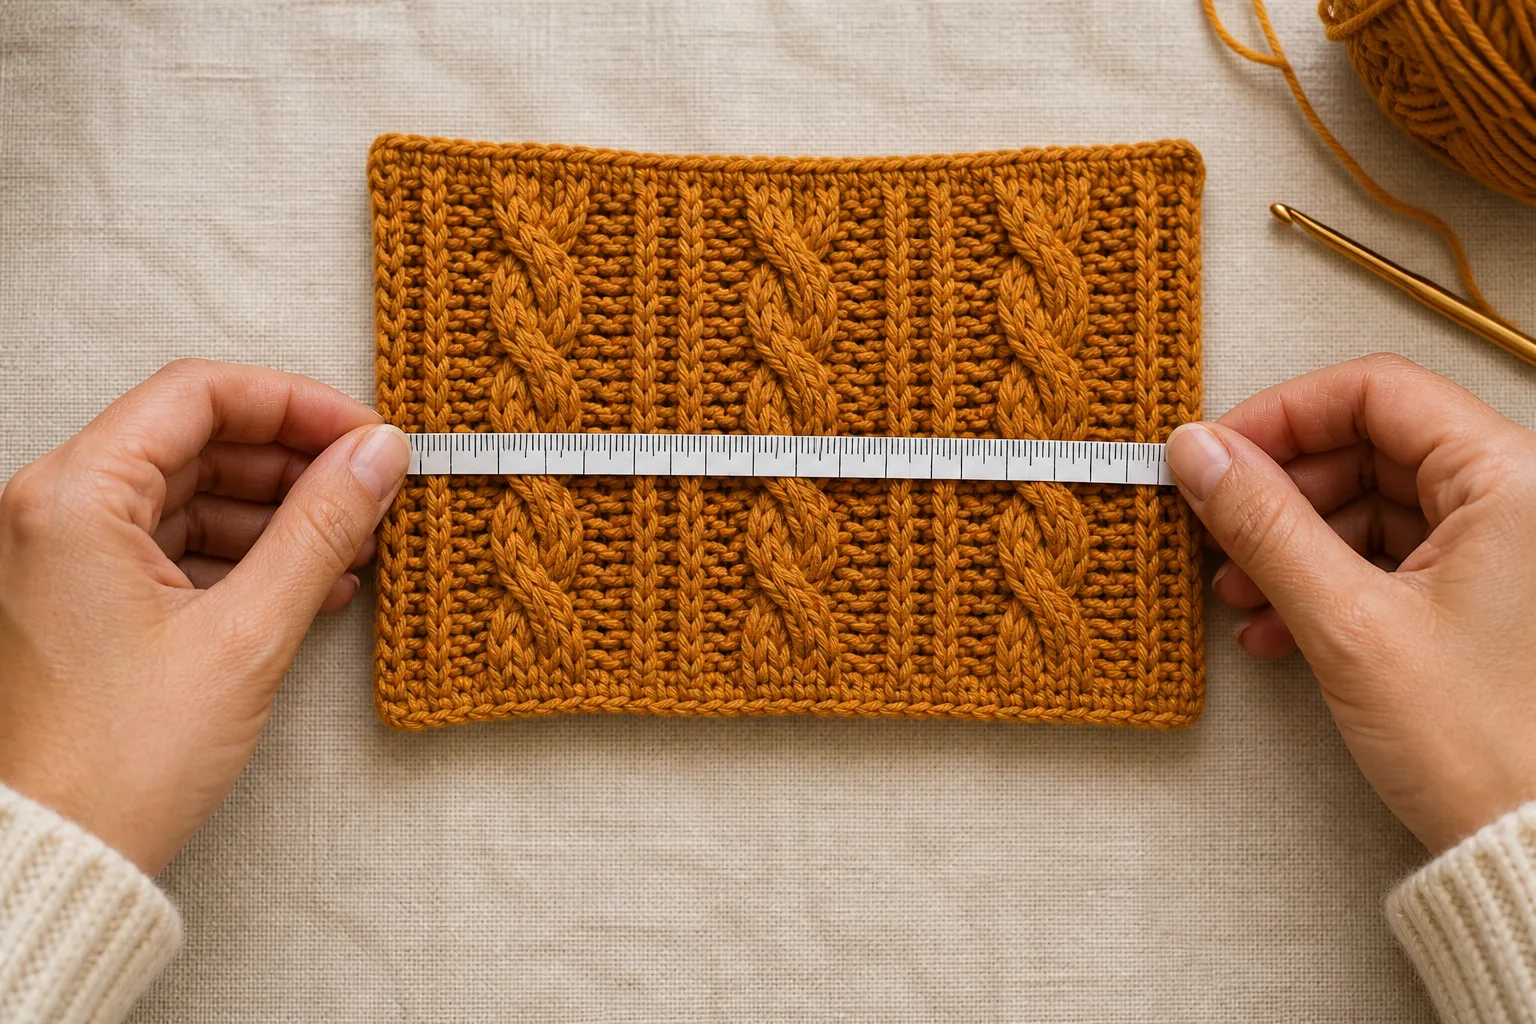
Work the gauge swatch as a small joined tube, not as a flat piece. Front- and back-post stitches reverse visually on wrong-side rows, so a flat swatch needs a different return-row crossing sequence and will not reproduce the all-right-side rounds used for the hat. A six-module tube gives three complete repeats across one flat layer and keeps the swatch construction faithful to the finished fabric.
- Chain 36 loosely, join without twisting, and work 1 dc in each chain around; join. 36 dc / 6 modules.
- Work a setup round of BPdc around next 2 posts, FPdc around next 4 posts six times; join.
- Work Cable Round A and follow Rounds B-D exactly as written in the hat instructions below.
- Repeat the complete A-D cycle once more, ending after Round D.
- Wash and dry the tube exactly as the finished hat will be treated.
- Lay the tube flat without stretching. Measure across three adjacent modules on the front layer at mid-height; do not include the back layer or the fold at either edge.
- Divide that width by three to obtain the washed repeat width w.
If you must make a flat swatch, swap FP and BP stitches on every wrong-side row and mirror the crossing order so the raised cable remains on the right side. Record that variation; do not mix measurements from an uncorrected flat swatch with this in-the-round hat.
Do not measure only the four raised posts. The two recessed columns are part of the repeat and occupy real circumference.
The Cable Repeat Integrity Map
Use one unit throughout.
| Symbol | Meaning | How to obtain it |
|---|---|---|
| H | head circumference at the wear line | measure the wearer |
| e | chosen starting negative ease | begin with 0.05–0.08 |
| C | target hat circumference | H × (1 − e) |
| w | washed width of one complete 6-stitch repeat | measure several repeats and average |
| p | legal number of cable panels | C ÷ w, rounded to a whole panel |
| B | legal body stitch count | 6 × p |
| C_a | estimated cable circumference | p × w |
| e_a | estimated negative ease after panel rounding | (H − C_a) ÷ H |
| g_b | comfortably stretched band rows per unit | washed rib sample |
| A | band row count | C × g_b, rounded to a whole row |
Check the estimated circumference and ease after panel rounding:
C = H × (1 − e)
p_raw = C ÷ w
p = a nearby whole panel count
B = 6 × p
C_a = p × w
e_a = (H − C_a) ÷ H
Check both neighboring panel counts. Reject a result that creates painful pressure, open holes or a loose rotating shell even if the arithmetic falls inside the starting envelope.
Worked Example: 22-Inch Head
The washed swatch measures 4.35 in across three complete repeats, so w = 1.45 in. The comfortably stretched rib sample measures 4.4 rows per inch. Choose 7% starting ease.
- C = 22 × 0.93 = 20.46 in
- p_raw = 20.46 ÷ 1.45 = 14.11 panels
- p = 14 panels
- B = 14 × 6 = 84 stitches
- C_a = 14 × 1.45 = 20.30 in
- e_a = (22 − 20.30) ÷ 22 = 7.7%
- A_raw = 20.46 × 4.4 = 90.02, so work 90 band rows
The 90-row band and 84-stitch body differ by six pickup points. Distribute the six skipped row ends evenly rather than bunching them at the seam.
Complete Bottom-Up Crochet Cable Hat Pattern
Make the Ribbed Band
Chain 11.
Band Row 1: Sc in second ch from hook and each ch across. Turn. 10 sc.
Band Row 2: Ch 1, sc in the back loop only of each stitch. Turn. 10 sc.
Repeat Band Row 2 until you have A rows; the 22-inch worked example uses 90 rows. With the band relaxed, join the first and last rows with a low-bulk slip-stitch seam. Do not fasten off.
The band should stretch over the head without pain and return close to its relaxed width. If it stays elongated, remake the band before adding the cable body.
Establish the Body Count
Pickup Round: Ch 1. Work B sc evenly around the long edge of the band; join. The 22-inch worked example works 84 sc across 90 row ends by repeating sc in the next 14 row ends, skip the next row end six times. 84 sc.
Post Foundation Round: Ch 2, dc in each stitch around; join. B dc.
Setup Round: Ch 2, repeat BPdc around next 2 posts, FPdc around next 4 posts around; join. Place a marker at the start of every module until the count is stable.
Work the Four-Round Cable Cycle
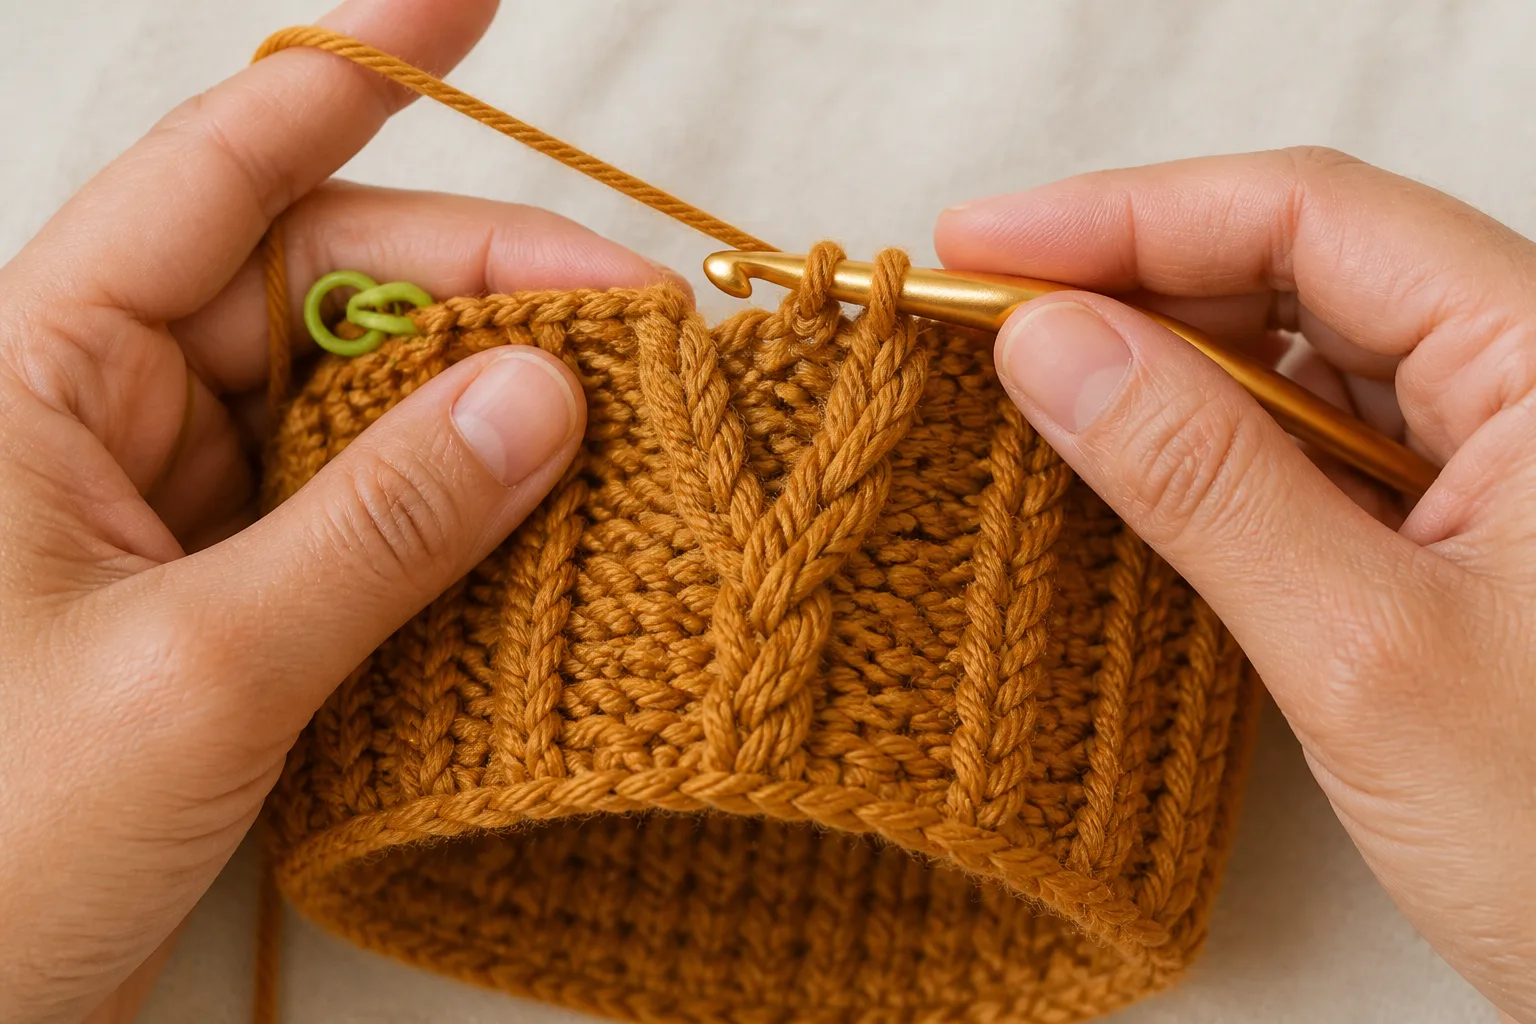
Cable Round A — crossing: Ch 2. Repeat around: BPdc around next 2 posts; skip the next 2 raised posts; FPtr around each of the following 2 raised posts; working in front of the stitches just made, FPtr around each of the 2 skipped posts. Join. B sts.
Cable Rounds B–D — follow: Ch 2. Repeat BPdc around next 2 posts, FPdc around next 4 posts around; join. B sts.
Repeat Rounds A–D until the hat reaches the planned crown-transfer depth, ending after Round D. For a close adult beanie, try the hat on and begin the crown approximately 2.75–3.25 in (7–8.3 cm) below the intended finished top. This is a starting range; round height and preferred slouch change the answer.
Keep a ledger such as A / B / C / D on four reusable markers. Do not begin crown shaping after A, B or C simply because the height looks close. Finish D, reassess the depth, and remove one whole cycle if necessary.
Pass the Cable-Cycle Gate
Proceed only when:
- every module still contains 2 background posts and 4 cable posts;
- all crossing rounds occur at the same vertical interval;
- the latest cycle ends after follow Round D;
- no crossing is pulled tight enough to open persistent holes beside the cable;
- the tube fits securely without painful pressure or rotation.
Transfer to a Plain Crown
Transfer Round: Ch 1, hdc in the top loops of every stitch around; join. B hdc.
This round gives the crown ordinary top loops and prevents the first decrease from being worked through the middle of a cable crossing.
Place six sector markers, each separated by B ÷ 6 stitches. For the 22-inch worked example, each sector begins with 14 stitches.
Shape the Six-Sector Crown
For any current sector length x of at least 4, work hdc2tog, hdc in next x − 4 stitches, hdc2tog in each of six sectors. Every decrease round removes 12 stitches and reduces each sector by two.
The 22-inch worked example:
- Crown Round 1: [hdc2tog, hdc in next 10, hdc2tog] six times. 72 sts.
- Crown Round 2: Hdc around. 72 sts.
- Crown Round 3: [hdc2tog, hdc in next 8, hdc2tog] six times. 60 sts.
- Crown Round 4: Hdc around. 60 sts.
- Crown Round 5: [hdc2tog, hdc in next 6, hdc2tog] six times. 48 sts.
- Crown Round 6: Hdc around. 48 sts.
- Crown Round 7: [hdc2tog, hdc in next 4, hdc2tog] six times. 36 sts.
- Crown Round 8: [hdc2tog, hdc in next 2, hdc2tog] six times. 24 sts.
- Crown Round 9: [hdc2tog twice] six times. 12 sts.
Fasten off with a long tail, pass the tail through the remaining front loops, close the opening without crushing the fabric into a hard knot, and secure the tail inside.
Four Physical Acceptance Gates
Gate 1: Band Recovery
The band stretches over the head, rests without pain and returns close to its relaxed width. A permanently elongated band fails even if its row count matches the calculation.
Gate 2: Repeat Integrity
Count six stitches in every marked module after Setup, after each crossing and before the crown. A seven-stitch module cannot be hidden by changing the next crossing.
Gate 3: Crossing Tension
The raised strands travel across the skipped posts without pulling the neighboring fabric into a hole. If the crossing puckers, undo that round and remake the FPtr with enough loop height; do not enlarge the whole hat first.
Gate 4: Crown Transfer
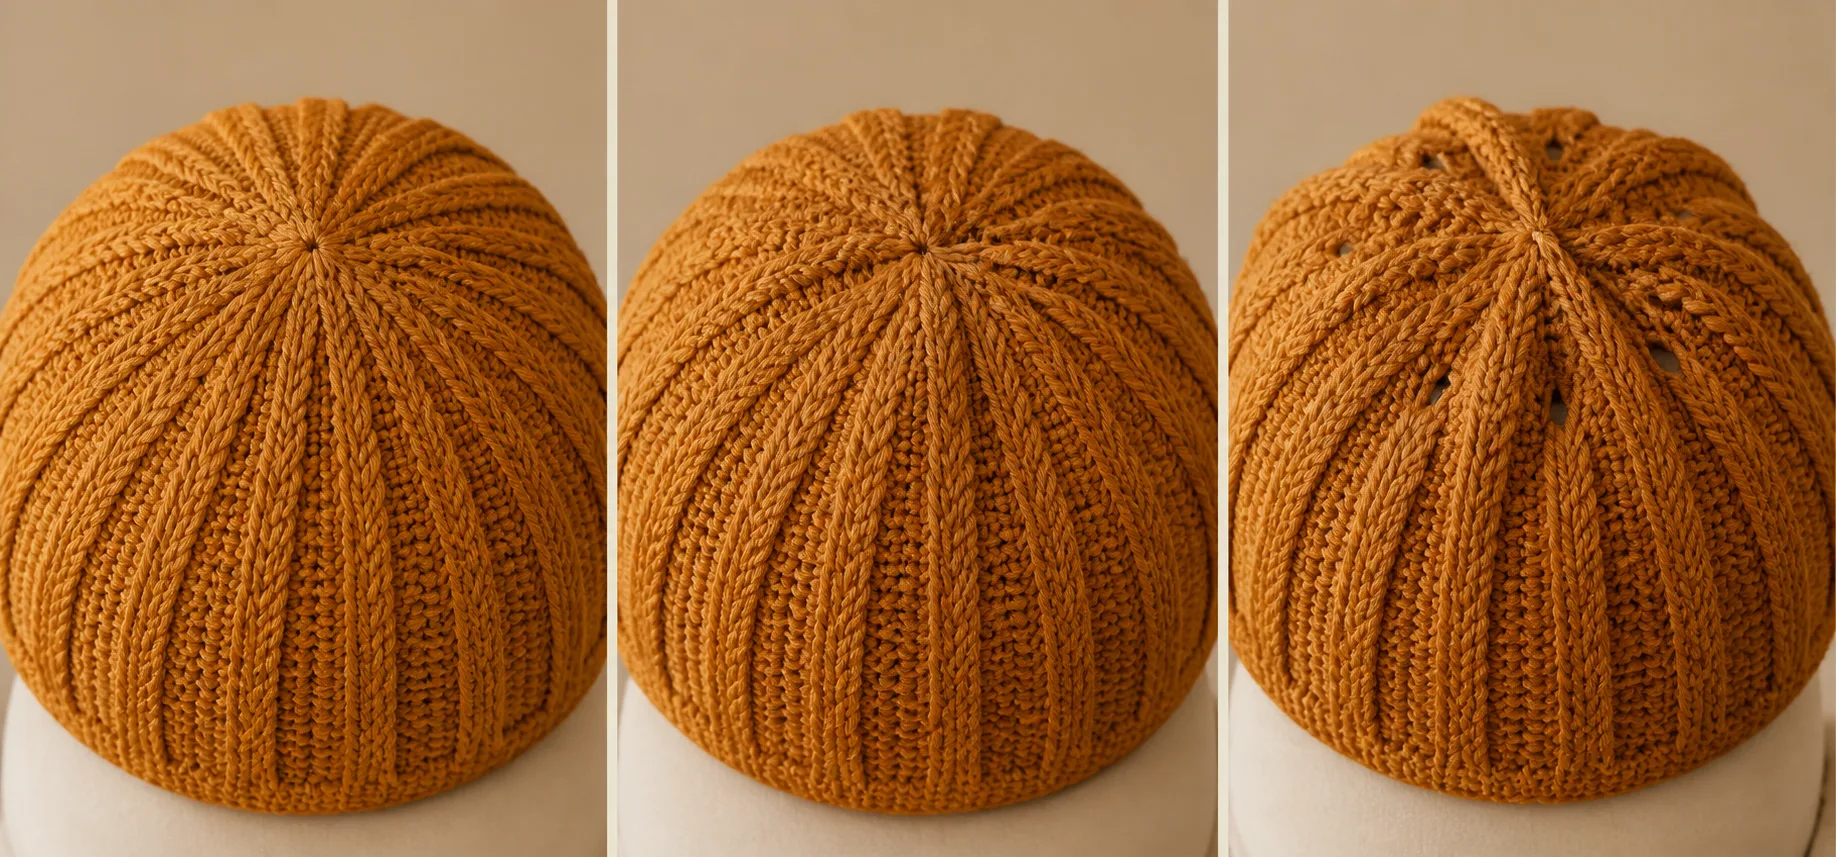
The final cable cycle is complete, the transfer round is level, and the six decrease sectors begin above—not inside—the last crossing. The crown should round smoothly without six hard ridges.
Worked Example: 23-Inch Head
Suppose a different washed swatch measures 4.65 in across three repeats, so w = 1.55 in. Choose 6% starting ease.
- C = 23 × 0.94 = 21.62 in
- p_raw = 21.62 ÷ 1.55 = 13.95 panels
- p = 14 panels
- B = 84 stitches
- C_a = 14 × 1.55 = 21.70 in
- e_a = (23 − 21.70) ÷ 23 = 5.7%
The same 84-stitch worked-example count happens to be legal, but it produces a different circumference because the repeat is wider. That coincidence does not make 84 a universal adult count.
If a neighboring choice of 13 panels gives 20.15 in and 12.4% negative ease, reject it unless the washed recovery and wearer explicitly support that much compression. Panel rounding is a fit decision, not a command to choose the closest integer blindly.
Sizing for a Child or a Gift
The repeat-width method works for smaller heads, but do not scale from the 84-stitch adult example. Use the recipient’s current wear-line measurement when possible; otherwise start from the age range in the site’s sizing guide, choose the less aggressive neighboring panel count, and keep the final decision subordinate to washed recovery.
For a gift without a try-on, make the band first and confirm that it stretches comfortably over a head form or another known circumference before adding the cable body. Record the finished relaxed opening, comfortable stretched opening, and planned depth with the gift. Avoid long ties or loosely attached embellishments for young children.
Troubleshooting: Repair the Right Layer
| Symptom | Likely cause | Minimum correction | Return point |
|---|---|---|---|
| Hat rotates or feels loose | measured repeat width or estimated ease was not checked | recalculate p, C_a and e_a from washed cable fabric | Repeat Map |
| Band flares below body | too many band rows or pickup stitches crowded | recheck stretched band gauge and distribute pickups | Band / pickup |
| One cable drifts sideways | module gained or lost a stitch | return to last correct six-stitch module | Latest cycle |
| Holes beside crossings | traveling loops pulled too short | remake crossing with adequate FPtr height | Crossing round |
| Cables look flat | fuzzy yarn, loose post stitches or insufficient contrast | change swatch yarn/hook before remaking hat | Swatch |
| Crossing intervals differ | cycle ledger was lost | return to last confirmed A–D sequence | Cycle ledger |
| Crown cuts through a cable | shaping began before Round D and transfer | remove crown, finish cycle, work transfer | Crown transfer |
| Crown forms six hard ridges | decreases stacked without enough early even rounds | restore one or more early even rounds | Crown schedule |
| Top is too tall | transfer began too late or too many even rounds | remove a whole body cycle or an early even crown round | Depth check |
Blocking can settle small differences after the structure is correct. It cannot restore a missing post, erase an interrupted crossing or convert the wrong number of panels into a comfortable fit.
Final Acceptance Checklist
- Washed cable repeat width and care method are recorded.
- Panel count is a whole number and body count is divisible by six.
- Estimated circumference and estimated negative ease were checked after rounding.
- Band recovery passes on the wearer.
- Every module contains two background posts and four cable posts.
- Crossing intervals are consistent and the final cycle ends after Round D.
- The plain transfer round separates cables from crown decreases.
- Six crown sectors remain balanced through closure.
- The finished hat stays secure without pressure, rotation, large holes or a hard crown point.
Frequently Asked Questions
Are crochet cables the same as knitted cables?
No. Both create raised crossing lines, but this crochet version forms them by working tall stitches around existing posts and crossing the order in which those posts are used. The fabric is usually thicker than a visually similar knitted cable fabric.
Why do holes form beside crochet cables?
The traveling post stitches may be too short for the distance they cross. Pull up a taller loop before completing each FPtr, keep the skipped posts visible, and check the swatch after washing. Changing the entire hat hook size is unnecessary if only the crossing round is tight.
Can I use a different cable repeat?
Yes, but replace both the module size and the cycle instructions. Measure the complete washed replacement repeat, round only to a whole number of those repeats, and choose a crown sector count that divides the resulting body count.
Can I add a folded brim or pompom?
A folded band needs extra band width and changes the depth budget. A pompom can be attached after the crown passes, preferably with a removable tie or interior button that does not reopen the closure.
Can I start the crown in the middle of a cable cycle to fix height?
Do not cut through the crossing. Remove one complete four-round cycle or finish the current cycle and shorten the plain crown by removing an early even round, provided the crown remains deep enough for the wearer.
Should I measure gauge before or after washing?
After washing and drying by the intended care method. Measure several complete cable repeats together without stretching. Record both the repeat width and the care method so the result can be reproduced.