

A measurement-adaptive crochet toddler hat with a fold that releases extra depth—without making the opening loose today.
Most “toddler” and “child” hat patterns ask you to choose an age, copy one stitch count, and hope that your yarn, gauge and child land in the same place as the sample. This pattern takes a different route. You measure the head and a washed swatch, choose how much future circumference you want to evaluate, and check the same stitch count at two moments: now and at that future reference size. Then you add a folded lower edge that can release extra depth later.
The result is not a promise that a hat will fit for a certain number of months. It is a transparent plan: the opening must hold without sliding now, must remain within the fabric’s comfortable stretch later, and must have enough adjustable depth to keep the wear line where you want it.
Toddler and Child Growth-Window Planner
Open the tool in a separate page. The article also retains the manual formulas and worked checks.
JavaScript is optional: use the manual calculation method and worked examples in the article.
Quick answer
For the best fit, use the child’s actual head circumference rather than age alone. Wash the swatch before measuring gauge. Record how wide the swatch is relaxed and how far it stretches comfortably. Enter those numbers in the current-fit and growth-window method with a future circumference allowance that you choose. The worked example shows a workable stitch count, the effective ease now and later, relaxed flat width, crown diameter, and both folded and unfolded depths.
For the complete example in this guide, an 18.5-inch / 47.0-cm current head, a 0.5-inch / 1.3-cm future allowance, 3% target future ease, and a washed gauge of 14 HDC per 4 inches / 10 cm produce a 64-stitch body. That body measures about 18.29 inches / 46.4 cm relaxed. It has about 1.2% negative ease now and 3.8% at the 19-inch / 48.3-cm future reference. A 7.25-inch / 18.4-cm current depth plus a 0.75-inch / 1.9-cm fold reserve gives an 8-inch / 20.3-cm unfolded hat.
That 64 is an example produced by one head, one swatch and one planning choice. It is not the toddler or child answer for every maker.
Why age alone is not enough
The Craft Yarn Council lists broad head-circumference references of 16–18 inches / 40.5–46 cm for toddler, 18–20 inches / 45.5–51 cm for child, and 20–22 inches / 51–56 cm for tween. The ranges overlap at their boundaries, and children of the same age can sit at different points inside them. The labels are useful when no measurement is available, but the range—not the label—is the important information.
The finished hat is also not supposed to equal the head automatically. A flexible beanie is normally smaller at rest so it stretches to hold. How much smaller depends on the fabric. Dense cotton HDC, springy wool-blend HDC and loose acrylic HDC can have the same stitch gauge yet behave differently when pulled and released. That is why this method measures both gauge and comfortable stretch.
Use the chart only as a fallback starting point:
| Planning label | Head circumference reference | How to use it |
|---|---|---|
| Toddler | 16–18 in / 40.5–46 cm | Choose a point only when an actual measurement is unavailable |
| Child | 18–20 in / 45.5–51 cm | Do not assume every school-age child is the midpoint |
| Tween | 20–22 in / 51–56 cm | Measure if possible; this range overlaps small adult heads |
These are head measurements. They are not relaxed hat circumferences, flat widths or stitch counts.
The four numbers that control this hat
This project separates four jobs that are often mixed together.
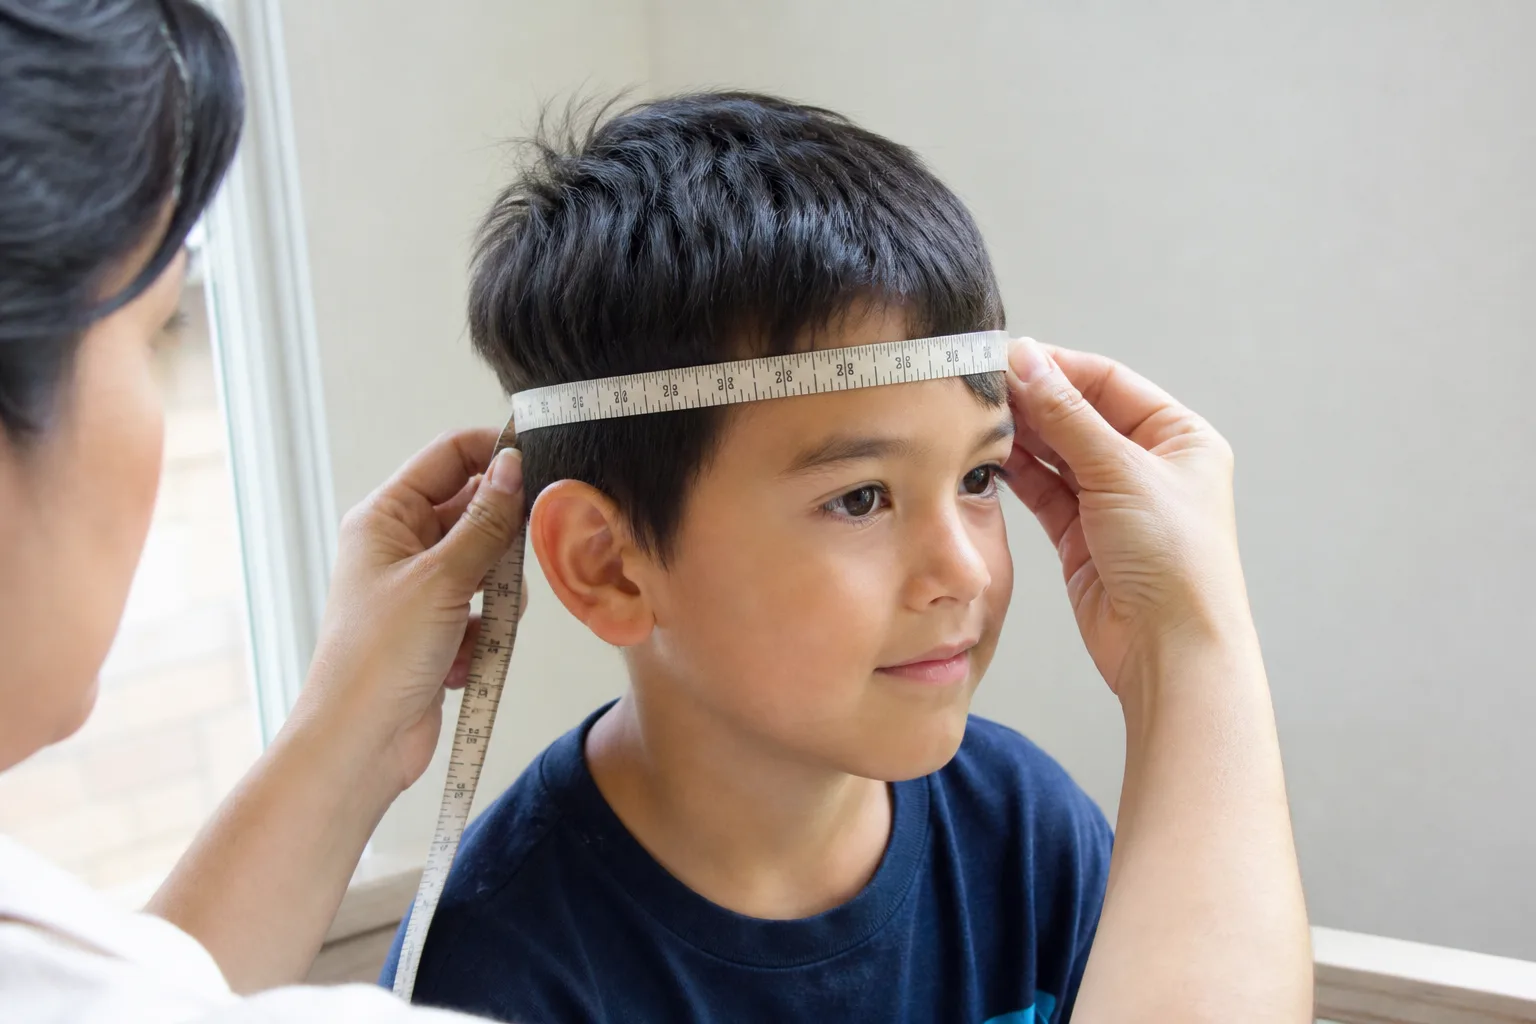
- Current head circumference answers, “Will the opening stay in place today?” Measure around the intended wear line, passing across the forehead and above the ears, with the tape level and snug but not compressing.
- Future reference circumference answers, “What later head size do I want to test?” It is the current measurement plus an allowance chosen by the maker or caregiver. It does not predict growth.
- Relaxed circumference is the finished opening before stretching. Gauge and chosen stitch count determine it.
- Crown-to-edge depth controls ear coverage and how high the hat rides. The fold changes depth; it cannot correct a circumference that is too loose or too tight.
If you remember only one principle, use this one: width growth and depth growth are separate. Do not add several inches to the opening and call it growing room. A large opening can slide toward the eyes now. Give width only the range the washed fabric can handle, and store extra depth in the fold.
Make a swatch that answers two questions
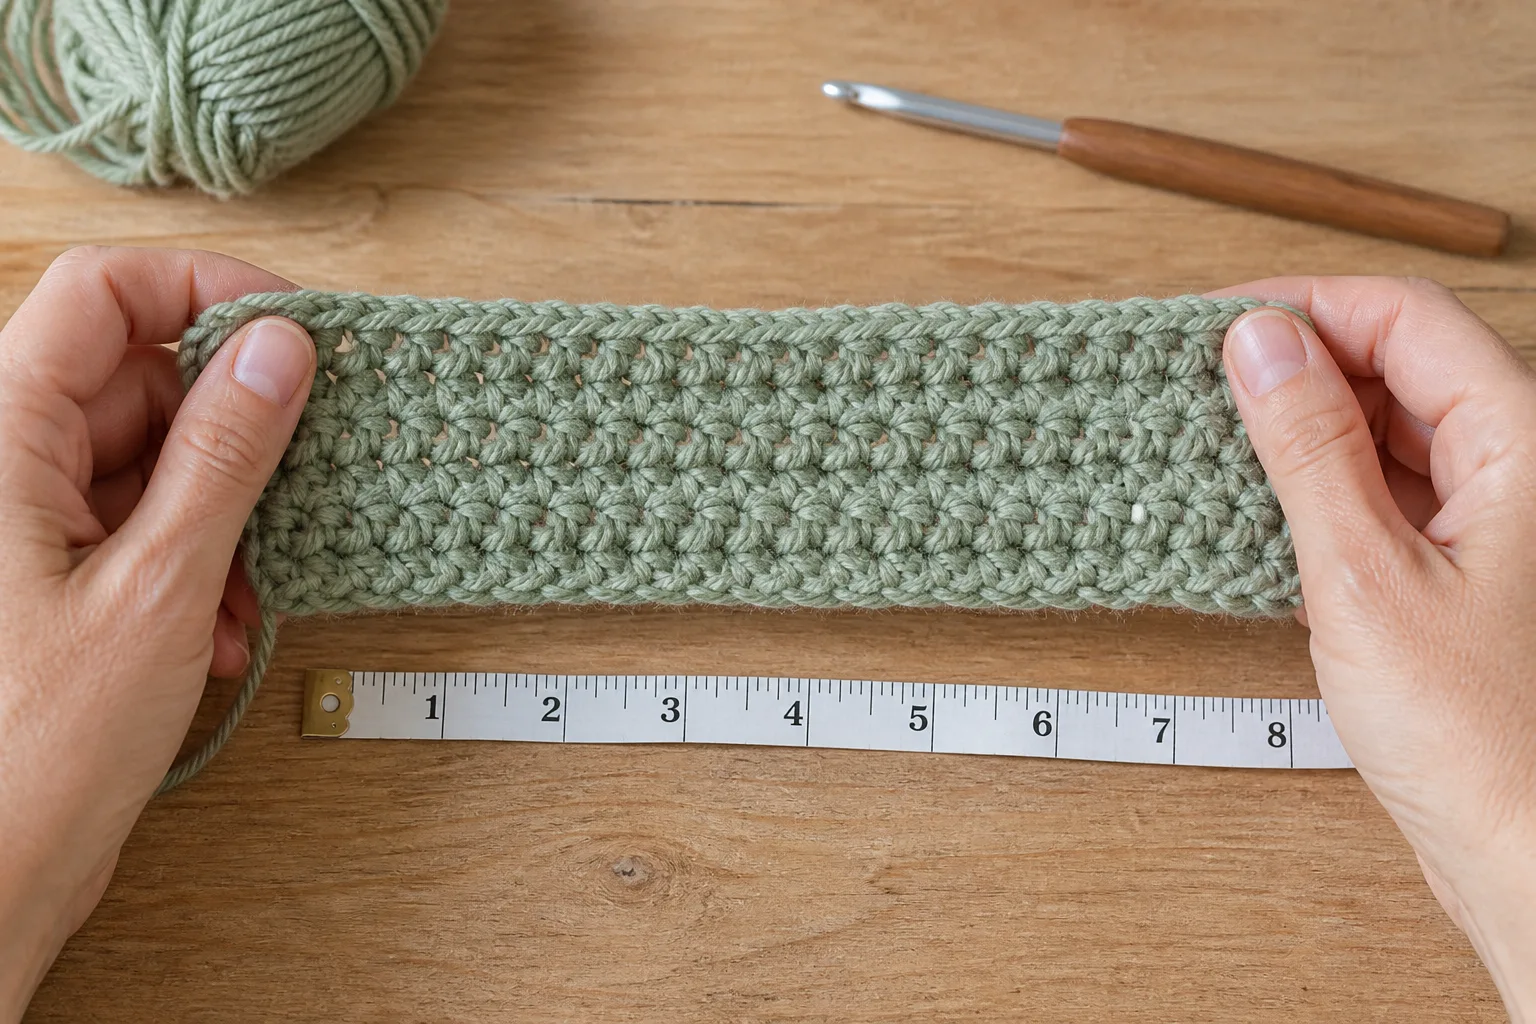
Crochet a swatch at least 6 inches / 15 cm wide and tall in half double crochet. Use the yarn, hook and round-turning method planned for the hat. Wash and dry it the same way the finished hat will be cared for. Let it rest before measuring.
Question 1: how many stitches make a known width?
Count stitches across the center 4 inches / 10 cm, avoiding the edges. Divide the counted stitches by the measured width.
In the example:
- 14 stitches across 4 inches;
- stitch gauge = 14 ÷ 4 = 3.5 stitches per inch;
- the metric input can remain 14 stitches across 10 cm; the same formula handles either unit consistently.
Changing hook size until your count matches somebody else’s sample is not the goal. The worked example uses the fabric you actually like.
Question 2: how far does the washed fabric stretch comfortably?
Measure a marked section of the swatch relaxed. Then widen the same section until it feels comfortably wearable—not to its absolute limit—and record that width. Release it. The swatch should return close to its starting width; if it remains visibly longer, the fabric has poor recovery and is a weak choice for a holding edge.
In the example, a 4-inch section stretches comfortably to 4.6 inches. Its expansion is 15%. That does not mean the hat should use 15% negative ease. The equivalent negative-ease ceiling is:
For 15% stretch, the ceiling is 0.15 ÷ 1.15, or about 13.0%. The formula performs this conversion. It then checks both the current and future fit against the ceiling.
Treat the ceiling as a limit, not a target. A child’s preferences, sensory comfort, hairstyle and the lower-edge construction can require less tension.
Decide what “later” means before calculating
Enter the current head circumference first. Then choose a future circumference allowance. The default example uses 0.5 inch / 1.3 cm because it creates a useful demonstration; it is not a recommended growth rate or a prediction about a child.
Ask two practical questions:
- Would the relaxed opening still be smaller than the head today?
- At the future reference size, would the fabric remain below its comfortable stretch ceiling?
If the answer to the first question is no, the hat is being made for later rather than for now. Reduce the allowance or select the lower usable stitch count. If the answer to the second is no, select the upper count, use a fabric with more comfortable stretch, or shorten the planning window.
This makes “grow with me” testable. The page does not hide an oversized current fit behind an age label.
Apply the Current-Fit and Growth-Window Method
Enter:
- current head circumference;
- future circumference allowance;
- target ease at the future reference size;
- stitches counted across the washed gauge width;
- relaxed and comfortably stretched widths of the same swatch section;
- the stitch multiple required by the crown plan;
- desired current crown-to-edge depth;
- fold reserve.
The worked method shows the lower, nearest and upper usable counts. Select each option and watch both ease values. A useful choice must not create positive ease now, must not exceed the swatch limit now, and must not exceed it at the future reference size.
The worked method also reports flat width and crown diameter. Those are gift-maker checks: they can be verified without putting the hat on the child.
Complete worked calculation
Here is the default example from beginning to end.
| Field | Example value | What it means |
|---|---|---|
| Current head | 18.5 in / 47.0 cm | Actual measurement now |
| Future allowance | 0.5 in / 1.3 cm | User-selected planning value |
| Future reference head | 19 in / 48.3 cm | Current head plus allowance |
| Target future ease | 3% | Desired hold at the later checkpoint |
| Washed gauge | 14 sts per 4 in / 10 cm | 3.5 stitches per inch |
| Swatch response | 4 in to 4.6 in | 15% comfortable expansion |
| Compatible ease ceiling | about 13.0% | Calculated fabric limit |
| Raw stitch count | 64.51 | Before rounding to a usable multiple |
| Selected count | 64 | Nearest count divisible by four |
| Relaxed circumference | 18.29 in / 46.4 cm | 64 ÷ 3.5 |
| Effective ease now | about 1.2% | Small amount of current hold |
| Effective ease later | about 3.8% | Hold at the 19-inch reference |
| Flat width | 9.14 in / 23.2 cm | Relaxed circumference ÷ 2 |
| Crown diameter | 5.82 in / 14.8 cm | Relaxed circumference ÷ π |
| Folded depth now | 7.25 in / 18.4 cm | Crown to current lower edge |
| Fold reserve | 0.75 in / 1.9 cm | Depth that can be released |
| Unfolded depth | 8 in / 20.3 cm | Total construction depth |
The future ease is slightly higher than the 3% target because rounding down from 64.51 to 64 makes the relaxed opening a little smaller. The worked calculation reports the resulting 3.8% rather than pretending the rounded count still gives exactly 3%.
Pattern overview
This is a top-down half-double-crochet beanie in joined rounds. The crown grows in eight sections. Full increase rounds add eight stitches; an optional bridge adds four. Therefore every selected body count must be divisible by four. The extended lower section folds outward for double-layer coverage at the ears and can be folded less later.
Skill level: advanced beginner
Terminology: US crochet terms
Construction: top down, joined rounds, turned after the crown for a balanced reversible-looking body
Designed range: measured toddler, child or tween heads within approximately 16–22 inches / 40.5–56 cm; the calculation, not the age label, selects the count
Materials
- smooth, washable #4 medium-weight yarn; approximately 140–240 yards / 128–219 m depending on head size, depth, gauge and swatching;
- hook that produces a comfortable, recovering HDC fabric; the example may begin around 5 mm, but the swatch decides;
- flexible tape measure;
- eight removable stitch markers plus one contrasting round marker;
- yarn needle and scissors.
Choose a yarn that feels comfortable against the forehead after washing. Avoid relying on a fluffy halo to hide loose construction; it makes stitches harder to inspect and can change after laundering. If the fabric becomes limp or does not recover from the stretch check, change the yarn, hook or stitch fabric before calculating.
Abbreviations
- ch = chain
- HDC = half double crochet
- inc = work 2 HDC in the same stitch
- sl st = slip stitch
- st(s) = stitch(es)
The beginning chain does not count as a stitch. Join to the first HDC, not to the chain.
Before the first round
Write down five project targets where you can see them:
- selected body count;
- relaxed flat width;
- crown diameter;
- current folded depth;
- full unfolded depth.
For the example they are 64 stitches, 9.14 inches / 23.2 cm flat width, 5.82 inches / 14.8 cm crown diameter, 7.25 inches / 18.4 cm folded depth and 8 inches / 20.3 cm unfolded depth.
The body count tells you when to stop increasing. The crown diameter confirms the physical result. If the count is correct but the diameter is materially wrong, the real gauge has changed and the calculation should be refreshed.
Crown instructions
Make an adjustable ring, or chain 4 and join if that method is more comfortable.
Round 1: Ch 1. Work 8 HDC into the ring. Join to the first HDC. Place a marker after every stitch if helpful. (8 sts)
Round 2: Ch 1. Inc in every stitch around. Join. (16 sts)
Round 3: Ch 1. *Inc in the next stitch, HDC in the next stitch; repeat from * eight times. Join. (24 sts)
Round 4: Ch 1. *Inc, HDC in the next 2 stitches; repeat from * eight times. Join. (32 sts)
Continue the same sequence. Each full increase round adds one plain HDC between the increase and the next section boundary:
- Round 5: [inc, HDC in the next 3 stitches] eight times. (40)
- Round 6: [inc, HDC in the next 4 stitches] eight times. (48)
- Round 7: [inc, HDC in the next 5 stitches] eight times. (56)
- Round 8: [inc, HDC in the next 6 stitches] eight times. (64)
- Round 9: [inc, HDC in the next 7 stitches] eight times. (72)
Stop when you reach the largest multiple of eight that does not exceed the selected count.
Optional four-increase bridge
If the selected count is four more than that full-round count, add one bridge round. Divide the current count into four equal sections. Work plain HDC to the final stitch of each section, then inc in that final stitch. The round adds exactly four stitches.
Example: for a selected count of 60, stop the full rounds at 56. Each quarter contains 14 stitches. *Work HDC in the next 13 stitches, inc in the next stitch; repeat from * four times. (60 sts)
For the 64-stitch worked example, no bridge is needed.
Crown checkpoint: count and shape must agree
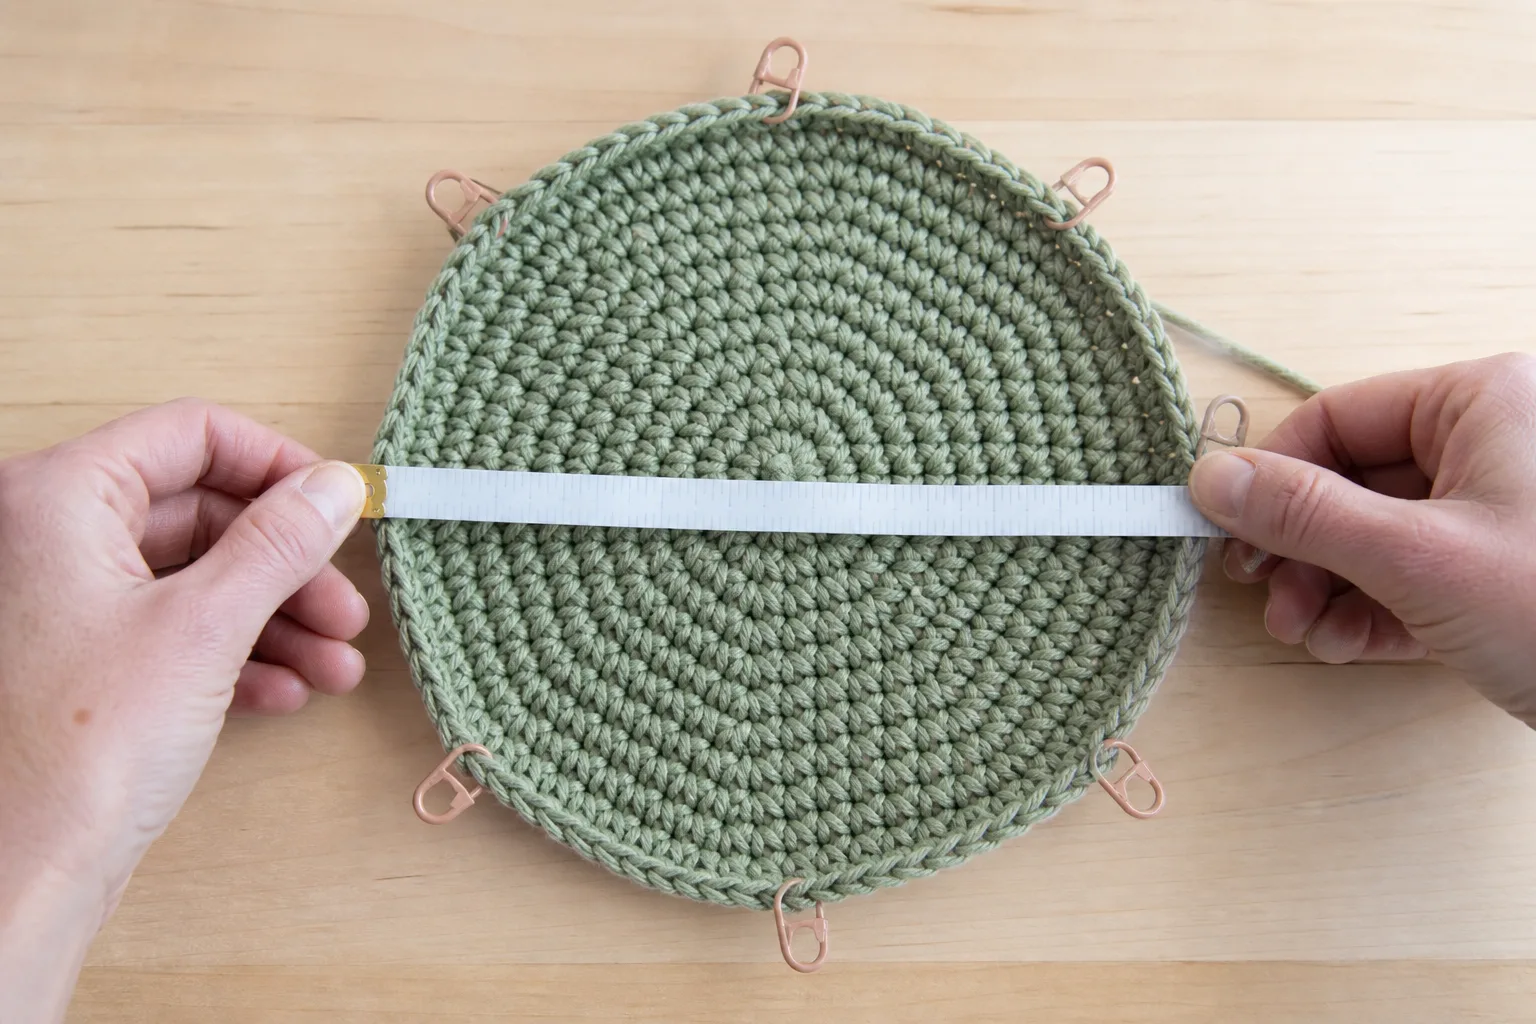
Lay the crown flat without pulling. Measure across the widest point, avoiding a diagonal that crosses a raised join. Compare it with the calculated crown diameter.
Then work two rounds even and inspect the shape:
- a gentle downward cup is expected as the sides begin;
- a flat disk that keeps spreading suggests the increases continued too long;
- waves around the edge suggest too many increases for the fabric;
- a sharp bowl before the target diameter suggests too few increases, a tighter gauge or an accidental missed increase.
Do not correct a count problem by tugging the circle into the expected diameter. Recount each section. If all counts are correct but the measurement is not, recalculate from the crown’s actual washed or rested gauge and choose again.
Body and adjustable fold
After the final increase or bridge, work HDC even around. Join to the first HDC, turn, ch 1, and work the next round in the opposite direction. Continue in joined, turned rounds. Turning balances the surface so the section revealed when the cuff is adjusted does not look like an accidental wrong side.
Work until the crown-to-edge measurement equals the full unfolded depth, not the current folded depth.
For the example, continue to 8 inches / 20.3 cm from the top center. Finish the final join neatly and weave in the tail through several directions without pulling the edge smaller.
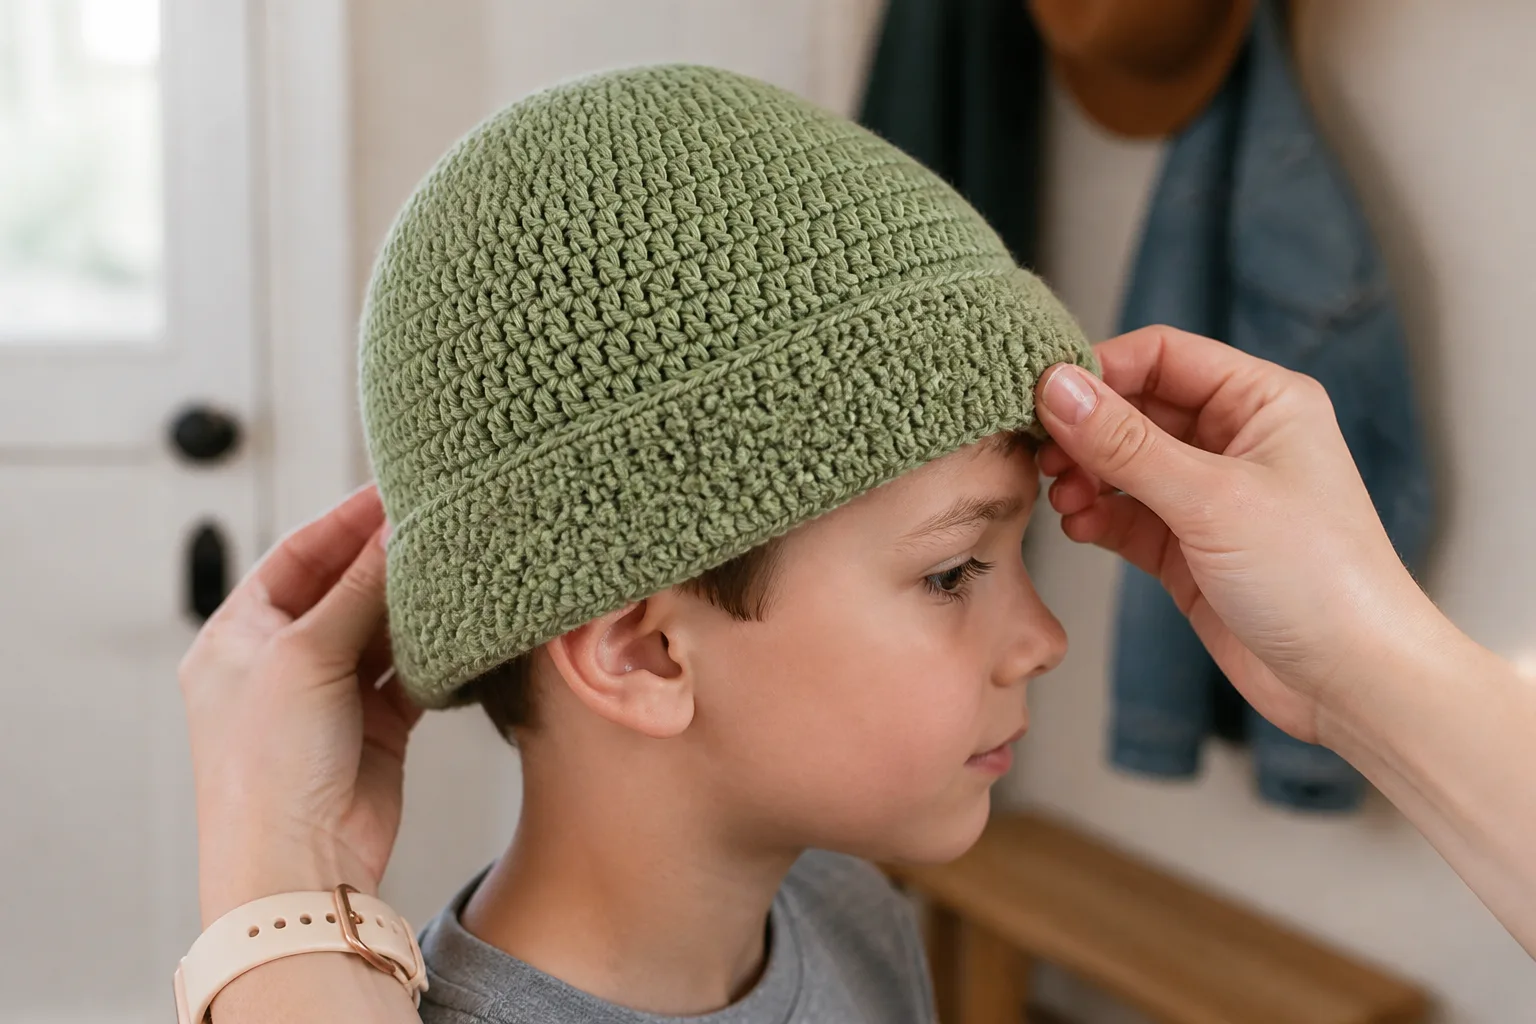
Measure 0.75 inch / 1.9 cm upward from the lower edge at four points and place removable markers. Fold the edge outward to those markers. The visible crown-to-edge depth is now approximately 7.25 inches / 18.4 cm. Do not sew the fold permanently if adjustability is the goal.
Two ways to choose depth
For a measured child, take both measurements from the crown center:
- standard coverage: to the preferred wear line across the ear;
- full ear coverage: to the preferred lower line at or near the earlobe.
Choose the current depth that matches the intended use. The difference between those two measurements is individual; it is more useful than adding a universal number of rounds.
For a gift with no wearer available, use these only as provisional planning bands: roughly 6.75–7.5 inches / 17–19 cm for toddler and 7.25–8.25 inches / 18.5–21 cm for child, before adding the fold reserve. Check a well-fitting ready-made hat if possible. The worked calculation keeps the chosen depth separate from circumference so neither number silently stands in for the other.
Three fit gates before finishing
Gate 1: relaxed opening
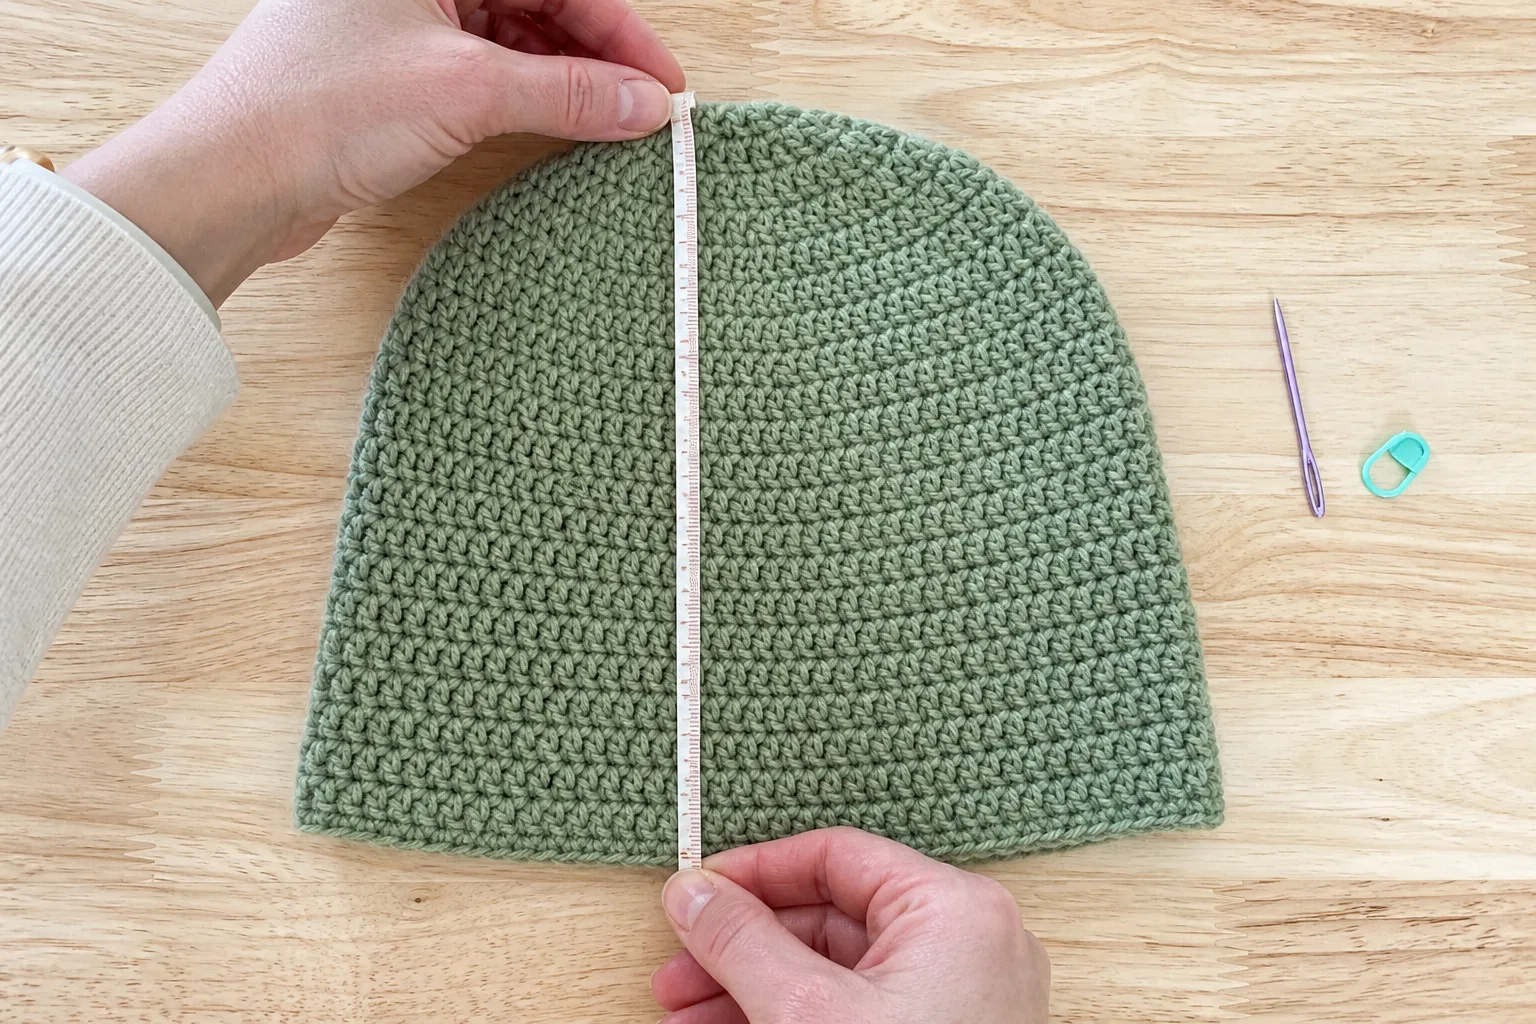
Lay the lower opening flat and measure straight across without stretching. It should match the worked example’s flat-width output. Measure at several points; a noticeably narrower final round can make an otherwise correct hat difficult to pull on.
If the child is available, the hat should pass over the widest part of the head without force, stay at the intended wear line during normal movement and leave no persistent pressure marks. Ask the child whether the forehead and ears feel comfortable; appearance alone does not measure comfort.
Gate 2: current depth with the fold
Fold to the marked reserve and measure from the crown to the visible edge. Check that the crown is seated rather than floating above the head. If the opening fits but the hat pops upward, add depth before blaming circumference.
Gate 3: future reference, recorded rather than assumed
Keep a small project record with the washed relaxed circumference, swatch stretch ceiling, full depth and date measured. Later, re-measure both the child and the washed hat. Compare the new head circumference with the worked calculation; do not rely on the original age label or the passage of time.
Release only as much fold as needed to restore the wear line. If the circumference has reached the fabric’s comfort limit first, extra depth does not make the hat wearable.
If the hat is a surprise gift
When the child cannot be measured, collect evidence in this order:
- Ask for a head circumference without calling it a hat measurement if the surprise must be preserved.
- Ask for the flat width and crown-to-edge depth of a soft beanie that currently fits.
- Use the CYC age range only if neither measurement is available.
- Select a count whose relaxed flat width is clearly documented, and include the full measurements with the gift.
Do not use “child size” as the only note. Write something useful, such as: “Washed relaxed circumference 18.3 inches / 46.4 cm; full depth 8 inches / 20.3 cm; currently shown with a 0.75-inch / 1.9-cm fold.” That gives the caregiver information they can compare with the child.
Troubleshooting by symptom
The calculated hat is loose now
The future allowance is probably too large for this stitch gauge and multiple, or the upper count was selected. Try the lower usable count and read the current ease again. If that count becomes uncomfortably tight later, shorten the future window rather than accepting a sliding current fit.
The count is right, but the opening is smaller than predicted
Measure the working rounds instead of the original swatch. Tension often tightens on a small circumference. Also inspect the joining stitch and the finishing tail; both can cinch the edge. Use the actual stitches-per-width in the worked calculation.
The hat stretches on but does not spring back
Gauge describes size, not recovery. Rewash the swatch and repeat the relaxed/comfortable stretch test. If the second relaxed width remains larger, reduce the planning window or select a yarn and fabric with better recovery. Adding more negative ease to weak recovery can make the initial fit tight without solving later sagging.
The hat fits around but rides above the ears
That is a depth problem. Seat the crown fully, then reduce the fold or add rounds if the full unfolded depth has not been reached. Do not increase the body count unless the circumference evidence also says it is too small.
The edge slides toward the eyes
First measure the relaxed opening. If it is larger than the current head, choose the lower count or reduce the future allowance. If the opening is smaller but still slides, the fabric may have poor recovery, the crown may be too deep, or a hairstyle may be changing the wear line.
The crown ruffles
Verify that each full increase round added exactly eight stitches and that the bridge, if used, added four only once. If the counts are correct, the fabric may need fewer increases before an even round. Alternate an increase round with an even round while preserving the final selected count and target diameter.
The crown forms a point
Spread the eight increases so they do not stack in the same vertical line. Begin alternate rounds at a different point, or shift the first increase by half a section. A gentle crown curve is expected; a pronounced point usually means the increases are too concentrated or the first rounds are too tight.
Care and recheck routine
Record measurements only after the same wash and dry routine the hat will receive. Reshape without pulling the opening wider. Once dry, check relaxed flat width, full crown-to-edge depth and swatch recovery again.
For active children, inspect the hat periodically for loose tails, damaged stitches and loss of recovery. Remove it from use if a damaged section could unravel. The plain design intentionally avoids ties and removable trim; if decoration is added, the caregiver should decide whether it suits the child’s age and use.
Frequently asked questions
How many stitches do I need for a toddler crochet hat?
There is no single reliable toddler count. Multiply the target relaxed circumference by your washed stitches per unit, then round to a construction-compatible multiple. In this pattern the multiple is four. The default example gives 64 stitches because its gauge is 14 stitches per 4 inches and its future reference target is 19 inches—not because 64 is universal.
Should I make the child size so a toddler can grow into it?
No. Size the opening for the child’s current measured head and the washed fabric’s comfortable stretch. If you want room for later, test a deliberately chosen future reference and store adjustable depth in the unsewn fold; do not start with a loose opening.
How much negative ease should a child’s crochet hat have?
Use the fabric’s measured behavior rather than one fixed percentage. The method converts comfortable swatch expansion into a compatible negative-ease ceiling and reports the actual percentage after stitch-count rounding. Treat that ceiling as a limit, then reduce tension if the wearer prefers a gentler fit.
Does the fold add room around the head?
No. The fold stores depth. It can move the lower edge farther down as the wearer needs more crown-to-ear length, but it cannot correct an opening that is too small or too large.
Can I skip the future allowance?
Yes. Set it to zero. The worked method then sizes the hat around the current measured head and still calculates the effect of the chosen count and swatch stretch.
What if the nearest usable count fails?
Compare the lower and upper multiples. If neither is comfortable now and later, the future allowance, stitch multiple or fabric is asking for incompatible goals. A smaller repeat multiple gives finer size steps; a more elastic fabric provides a wider comfortable range.
Why does the calculation show a different ease than I entered?
The entered percentage creates a raw target. Crochet needs a whole stitch count that also fits the crown multiple. Rounding changes the relaxed circumference, so the worked method recalculates and shows the effective ease you will actually make.
What makes this pattern different
This is not another age chart followed by one set of toddler parentheses and one set of child parentheses. It gives the maker a decision path:
- measure the child when possible;
- test washed gauge and comfortable stretch separately;
- choose a future reference without pretending to predict growth;
- compare the same stitch count now and later;
- reject an opening that is loose today;
- store adjustable length in an unsewn fold;
- verify the finished object by flat width, crown diameter and two depths.
The value is not that every child receives an exact guaranteed number. The value is that every number has a label, a formula and a checkpoint. When the fit changes, the maker can identify whether width, recovery or depth changed—and adjust the right part.
References