
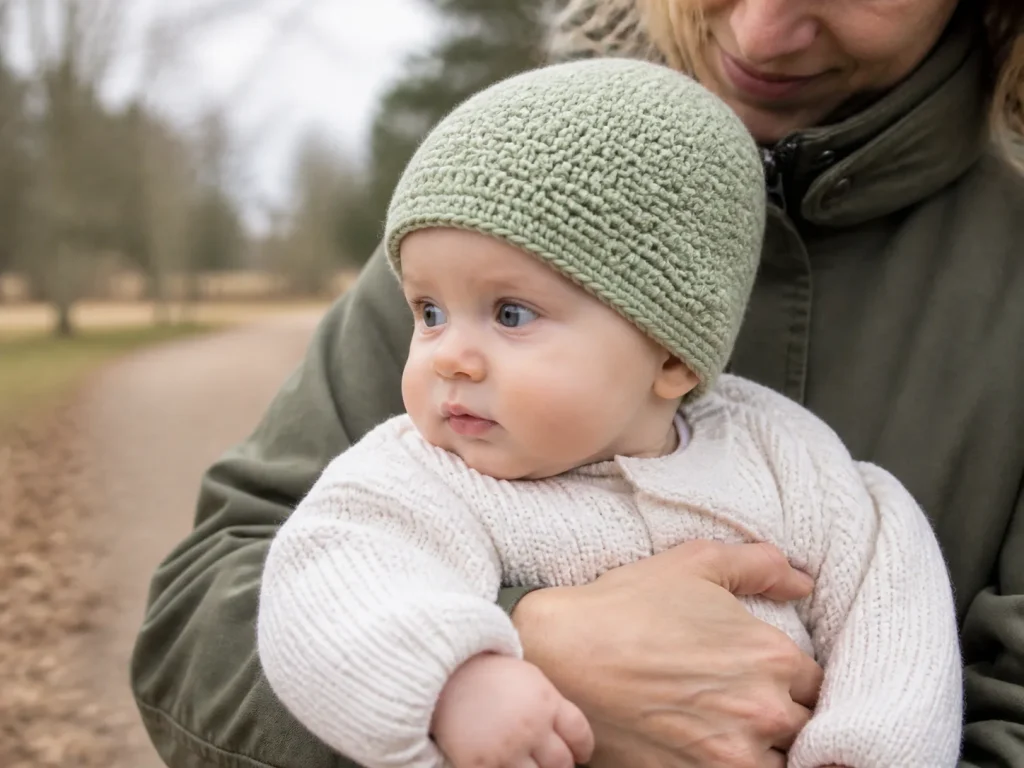
Crochet a plain baby beanie in continuous half double crochet rounds. This free pattern gives the complete 64-stitch calculation route, a plain lower edge, and instructions for adjusting the crown and depth from your own gauge. Age ranges are planning references; use the wearer’s measurements. For immediate newborn or preemie proportions, use the separate newborn pattern.
Start with the calculated 64-stitch example
For this calculation example, assume a head circumference of 15.75 in / 40 cm, a stitch gauge of 17 hdc per 4 in / 10 cm, and a target depth of 6.25 in / 15.9 cm. The formula selects 64 stitches and predicts about 15.06 in / 38.3 cm of relaxed circumference. Replace these planning inputs with your own head measurement and washed swatch gauge; the predicted result is not a measured finished hat.
- Match the gauge: wash the swatch and count stitches across its center before using the example’s 64-stitch count.
- Start the pattern: follow the complete 64-stitch round-by-round instructions, then use its crown, width, depth and finishing checks. The 64-stitch example follows the eight-round crown sequence (8, 16, 24, 32, 40, 48, 56, 64 stitches) and needs no four-stitch bridge.
- Check the fit: compare the in-progress width and depth with the wearer’s measurements. For another head measurement or gauge, use the fit planner and calculation before copying any stitch count.
Follow the article’s supervised-awake-wear guidance: remove the hat for sleep and keep the baby’s face uncovered.
Important use note before choosing yarn
This hat is intended for supervised, awake wear when a hat is appropriate for the weather. It is not sleepwear. The U.S. National Institute of Child Health and Human Development’s Safe to Sleep guidance recommends keeping a baby’s head and face uncovered during sleep and removing hats indoors because overheating increases risk.
Keep the finished design simple:
- Do not add chin ties, neck cords, drawstrings, bells, beads, buttons, or detachable pieces.
- Skip loose pom-poms and loosely sewn appliques on a baby’s everyday hat.
- Weave every yarn end securely through several stitch directions and trim it close.
- Check the hat before each use for pulled loops, loose ends, stretched openings, or detached fibers.
- Remove the hat if it slips toward the eyes or face, feels damp or hot, or no longer fits comfortably.
Decorations can be attractive in a photograph, but a smooth, decoration-free hat is easier to inspect, wash, and fit.
Materials
- Approximately 60-90 yd / 55-82 m of smooth DK or light worsted yarn for most 0-12 month sizes. Yardage changes with size, stitch height, yarn weight, and finishing depth.
- 4 mm crochet hook as a starting point for the example, or the hook that creates a soft, stable fabric at your measured gauge.
- One hook 0.5 mm larger for the final edge if your single crochet tends to tighten.
- Locking stitch marker.
- Flexible measuring tape.
- Blunt yarn needle.
- Scissors.
Choose the yarn by behavior, not the word “baby”
A yarn label can suggest a use but cannot show how the finished fabric will feel or recover. Make and wash the swatch before deciding.
Look for these properties:
- smooth, well-plied yarn that does not shed easily;
- soft fabric after washing according to the label;
- enough elasticity to stretch over the head and return close to its relaxed width;
- a care method the caregiver can realistically use;
- clear stitch definition so pulled loops and damage are easy to see.
Avoid heavily brushed, eyelash, sequined, wired, or loosely spun novelty yarns for this base pattern. If the fabric feels scratchy against the inside of your wrist, choose another yarn or hook combination.
Abbreviations and pattern language
US crochet terms are used.
| Abbreviation | Meaning |
|---|---|
| ch | chain |
| hdc | half double crochet |
| inc | work 2 hdc in the same stitch |
| sc | single crochet |
| sl st | slip stitch |
| st / sts | stitch / stitches |
| rnd | round |
The crown and body are worked in a continuous spiral. Move the marker to the first stitch of every round. A chain at the beginning of a round is not used and is not counted as a stitch.
Full top-down baby-hat pattern: 64-stitch example
Finished target for the example
- Intended head circumference: 15.75 in / 40 cm.
- Predicted relaxed hat circumference: 15.06 in / 38.3 cm.
- Predicted flat width: approximately 7.53 in / 19.1 cm.
- Predicted crown-diameter checkpoint: approximately 4.79 in / 12.2 cm.
- Target finished depth: 6.25 in / 15.9 cm.
- Example washed-swatch gauge input: 17 hdc across 4 in / 10 cm; measure your own swatch.
Start the crown
Make an adjustable ring. If you prefer not to use an adjustable ring, chain 2 and work the first round into the second chain from the hook. Leave a tail long enough to weave securely.
- Rnd 1: Work 8 hdc into the ring. Place a marker in the first hdc. [8]
- Rnd 2: Inc in each st around. [16]
- Rnd 3: Hdc in the next st, inc in the next st. Repeat around. [24]
- Rnd 4: Hdc in the next 2 sts, inc in the next st. Repeat around. [32]
- Rnd 5: Hdc in the next 3 sts, inc in the next st. Repeat around. [40]
- Rnd 6: Hdc in the next 4 sts, inc in the next st. Repeat around. [48]
- Rnd 7: Hdc in the next 5 sts, inc in the next st. Repeat around. [56]
- Rnd 8: Hdc in the next 6 sts, inc in the next st. Repeat around. [64]
For another full-round count, continue the same spacing rule: each new increase round adds one more ordinary hdc before every increase.
If the calculation selects a four-stitch bridge count
When the selected count ends in four after division by eight, stop at the previous full eight-stitch round and add only four increases.
For example, to move from 56 to 60 stitches:
General bridge formula:
Place four temporary markers first if that makes the spacing easier to see.
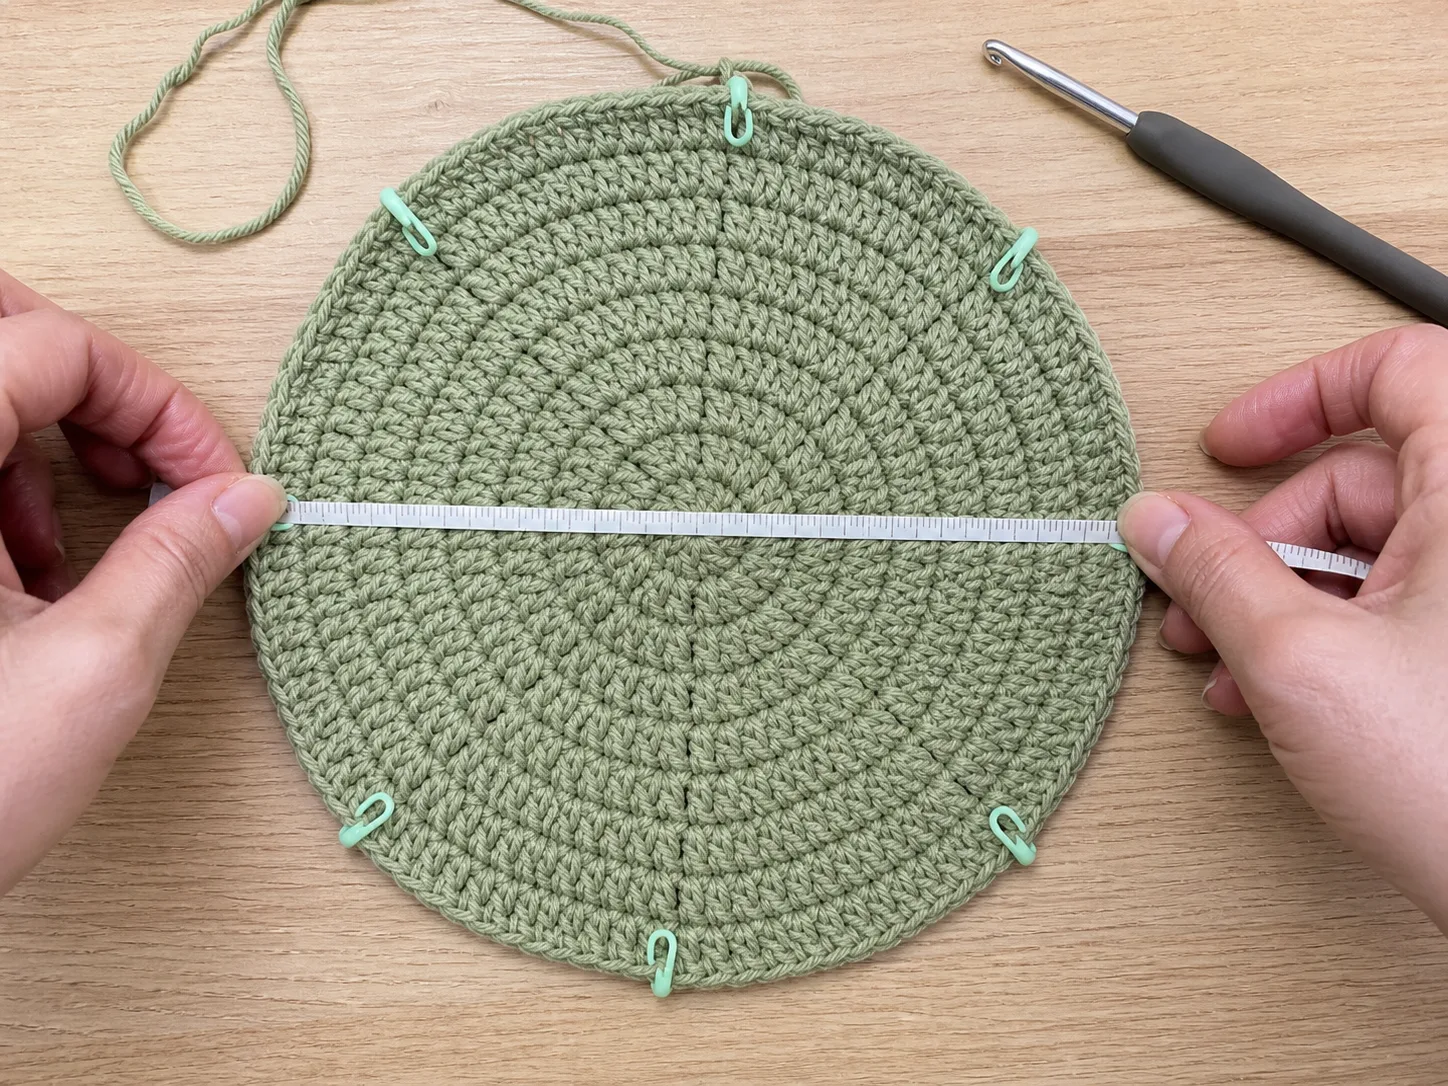
Checkpoint 1: crown count, diameter, and shape
Lay the crown flat without stretching it. Confirm all three conditions:
- The stitch count matches the worked calculation.
- The diameter is close to the calculated checkpoint.
- The crown is mostly flat, with no strong wave or deep bowl.
A very slight cup can relax when even rounds begin. A pronounced bowl usually means the working gauge is tighter or the increase spacing is insufficient. Strong waves usually mean the crown is gaining too much fabric. Correct the crown now; extra body rounds cannot repair its circumference.
Work the body without increasing
Rnd 9 and following: Hdc in each st around, moving the marker after every round. Maintain 64 stitches for the worked example.
After two even rounds, stop and measure again. The crown edge should begin turning downward without continuing to widen.
Checkpoint 2: flat width after two even rounds
Lay the piece flat with the side edges aligned but not stretched. For the example inputs, 7.53 in / 19.1 cm is the predicted flat-width checkpoint; measure your own piece.
If the width is more than about 0.5 in / 1.25 cm away from the prediction, recount the round and recheck gauge. Do not assume blocking will correct a major size difference.
If the baby is available and awake, briefly check that the crown settles around the head without pressure and that the lower edge is still well above the eyes. Remove the unfinished hat immediately after the check.
Continue to the chosen depth
Work even rounds until the hat is approximately one edge-round height shorter than the desired finished depth. For the example, stop near 6 in / 15.2 cm if the final single-crochet edge adds about 0.25 in / 0.6 cm.
Measure from the center top to the lower edge along the outside of the hat. Do not include a stretched curve across the crown.
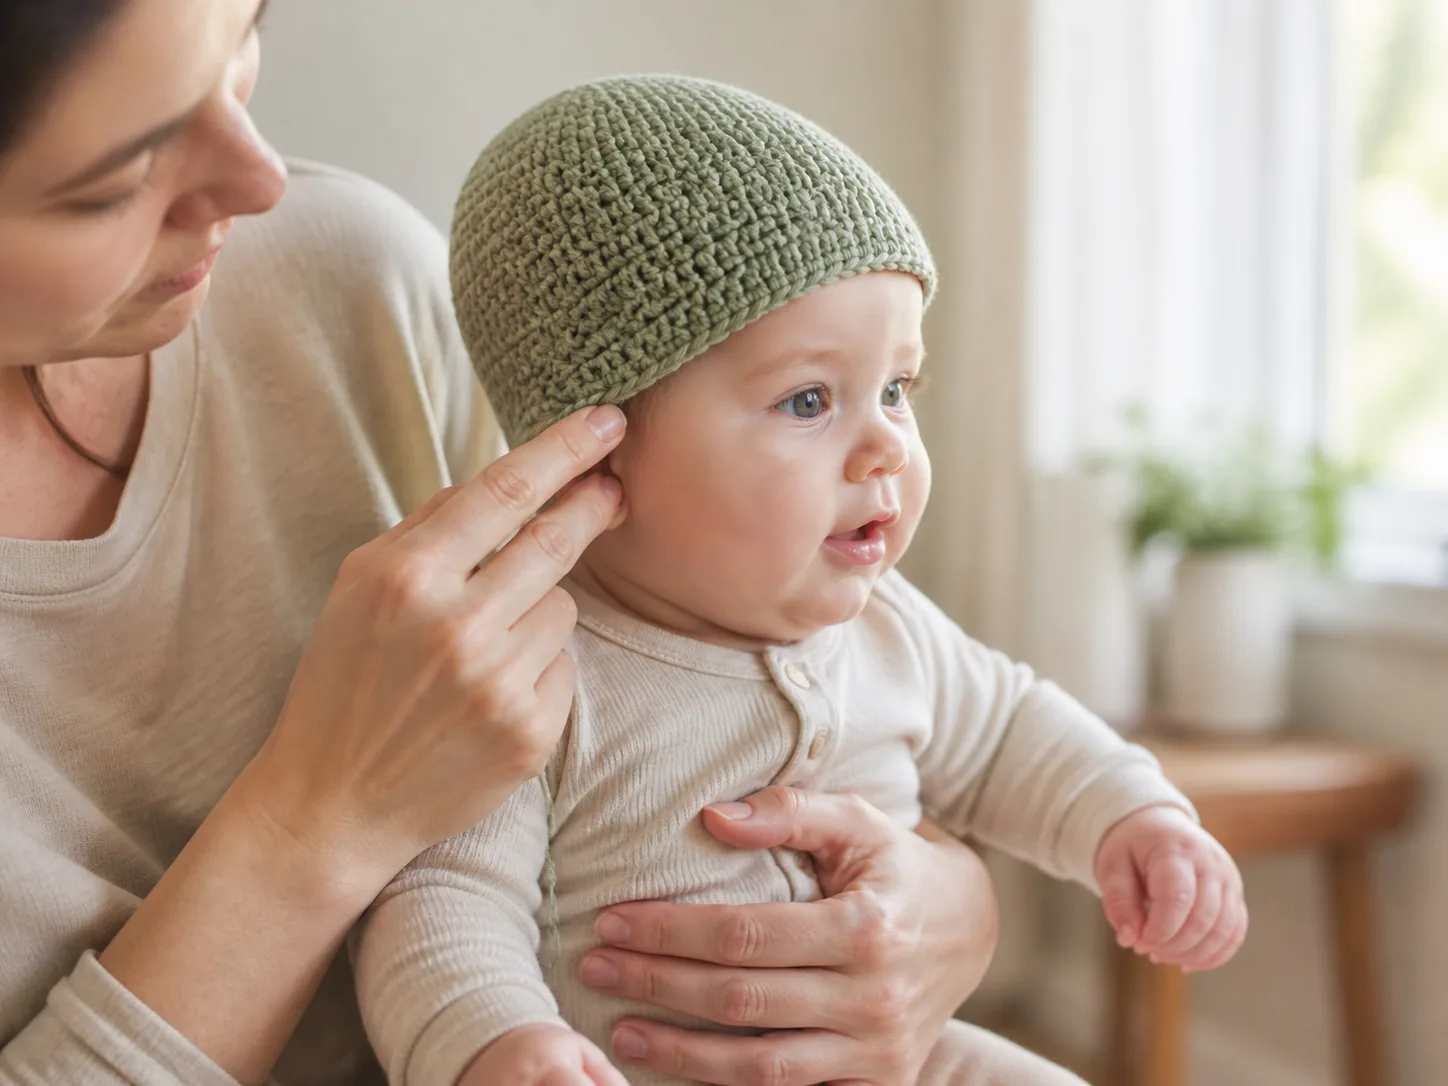
Checkpoint 3: ear coverage before the final edge
If the baby is available, check the hat while the baby is awake and supported by a caregiver. The final lower edge should reach the chosen point around the ears without approaching the eyes or bunching at the neck.
If the baby is not available, compare the depth with a currently fitting hat or the selected planning range. Circumference does not need to change when only the ear coverage is short.
Make a soft, stretchy final edge
Switch to the 0.5 mm larger hook if your single crochet tends to tighten.
Final rnd: Sc loosely in each st around. At the end of the round, cut the yarn and make a smooth invisible finish into the first sc. Do not pull the finishing loop tighter than the surrounding stitches.
The edge should stretch over the target head and return close to its relaxed width. If it acts like a firm cord, remove the round and remake it with the larger hook or with deliberately looser loops.
Secure the center and yarn ends
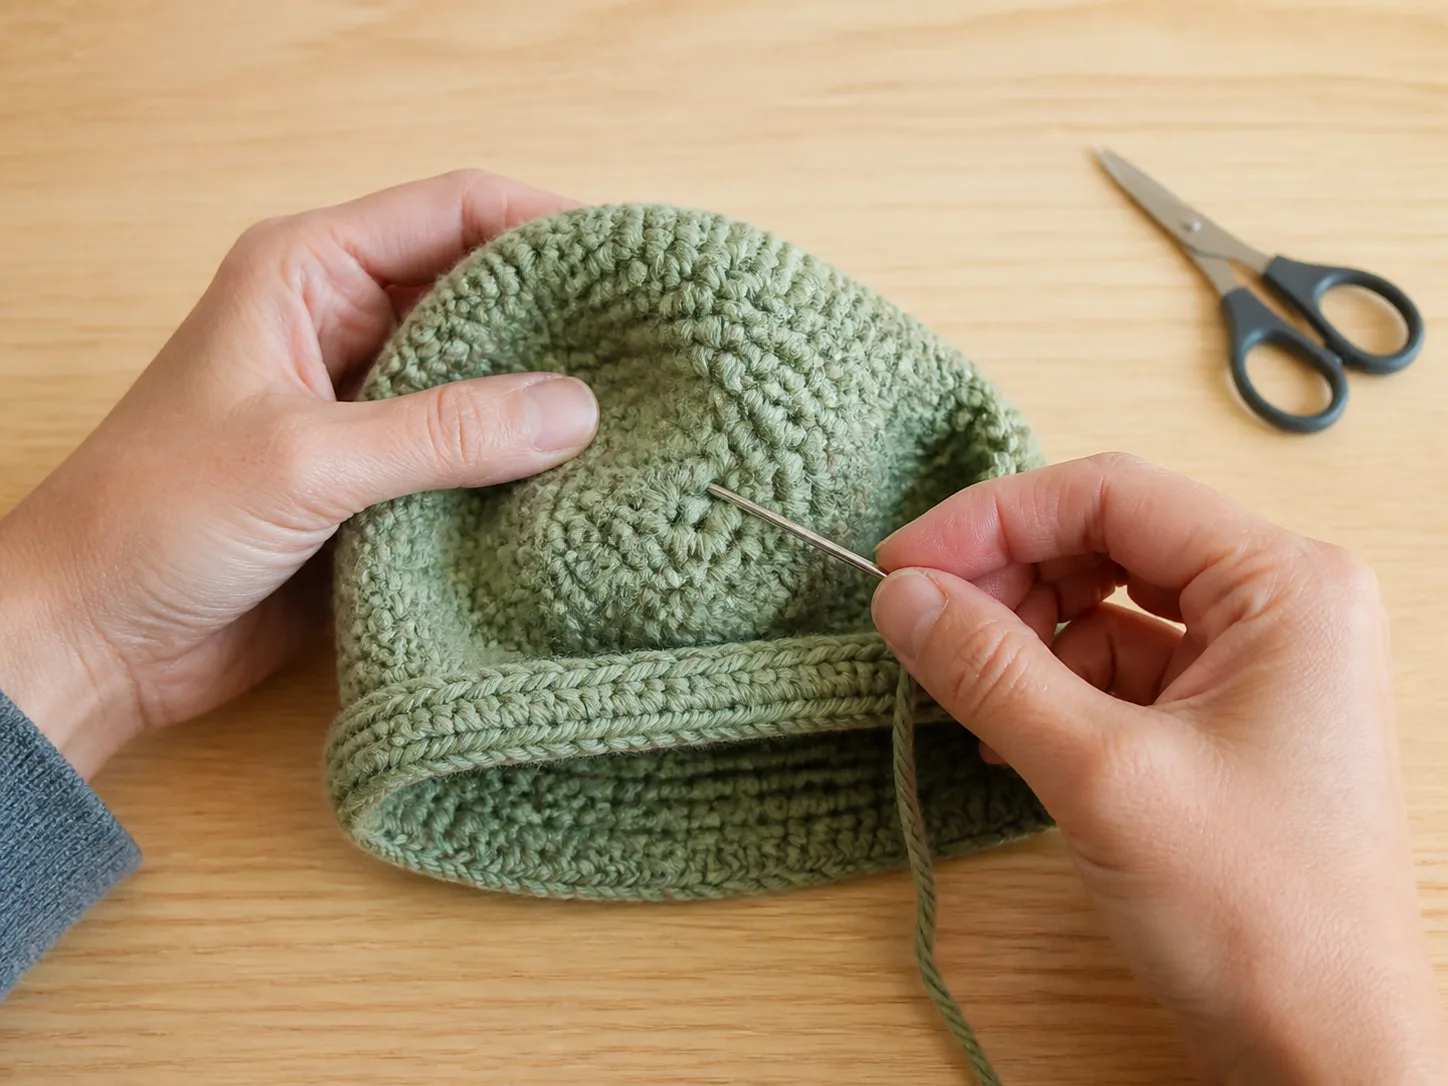
Close the adjustable ring until the center is neat. Thread the starting tail through the backs of several stitches in one direction, change direction, and pass through several more stitches. Repeat with the finishing tail. Trim only after checking that neither tail slides when the fabric is gently stretched.
Turn the hat inside out and run a fingertip around the entire surface. There should be no hard knot, long float, loose loop, or sharp yarn end against the head.
Quick answer
Begin with the stated age range only as a planning band. Replace it with the baby’s current awake measurement, washed gauge and the relaxed-width and depth checkpoints below.
For this calculation, assume a 15.75 in / 40 cm head. With 5% negative ease and a gauge of 17 half double crochet stitches across 4 in / 10 cm, the worked calculation chooses 64 stitches. That produces a predicted finished circumference of 15.06 in / 38.3 cm, a flat-width checkpoint of 7.53 in / 19.1 cm, and a crown-diameter checkpoint of 4.79 in / 12.2 cm.
Those are example numbers, not a claim that every 3-6 month baby needs 64 stitches. Your result may be 52, 56, 60, 64, 68, or another usable count because head size, yarn, hook, tension, and fabric recovery all matter.
What makes this baby-hat pattern different
Use the 64-stitch worked route when your head measurement and washed gauge match its assumptions. For a different wearer or fabric, calculate a new count before starting; the plain HDC construction stays the same.
This pattern separates five decisions that are often mixed together:
- The baby’s actual head circumference or the best available planning range.
- The date or age when the hat is expected to be worn.
- The amount of negative ease the fabric can comfortably recover from.
- The stitch count required by the maker’s own gauge.
- The depth required to reach the chosen point around the ears.
The worked calculation also reports a fit window for the selected stitch count. This is useful for gifts: instead of labeling a hat only “3-6 months,” you can record the approximate head range estimated for the selected stitch count.
Baby size ranges are starting points
Use the following ranges only when a current head measurement is unavailable. Babies of the same age can have different head circumferences, and growth does not follow one fixed schedule.
| Planning label | Head circumference starting range | Typical fitted depth | Use this range for |
|---|---|---|---|
| 0-3 months | 14-15 in / 35.5-38 cm | 5.5-6 in / 14-15 cm | A baby beyond the immediate newborn period |
| 3-6 months | 15-16 in / 38-40.5 cm | 6-6.5 in / 15-16.5 cm | A classic ear-covering baby beanie |
| 6-12 months | 16-18 in / 40.5-45.5 cm | 6.5-7 in / 16.5-18 cm | An older baby; actual measurement is especially valuable |
Newborn and preemie hats need their own smaller proportions and are covered separately in the newborn-hat guide. Do not reduce this pattern by guessing several rounds smaller for a NICU or donation project; follow the receiving organization’s current requirements.
Choose the planned wear date, not only today’s age
If the hat will be worn immediately, use a current measurement. If it is a shower gift for a later season, estimate the baby’s age at the beginning of that season and choose that planning range. When possible, ask the caregiver for the baby’s current head circumference shortly before finishing the lower edge.
Do not add positive ease simply to make the hat “last longer.” A loose hat can slide toward the face before the baby grows into it. A better strategy is to choose a flexible fabric, keep the edge stretchy, and make the selected stitch count’s fit window visible on the gift label.
Step 1: measure the head and the wear-line depth
Head circumference
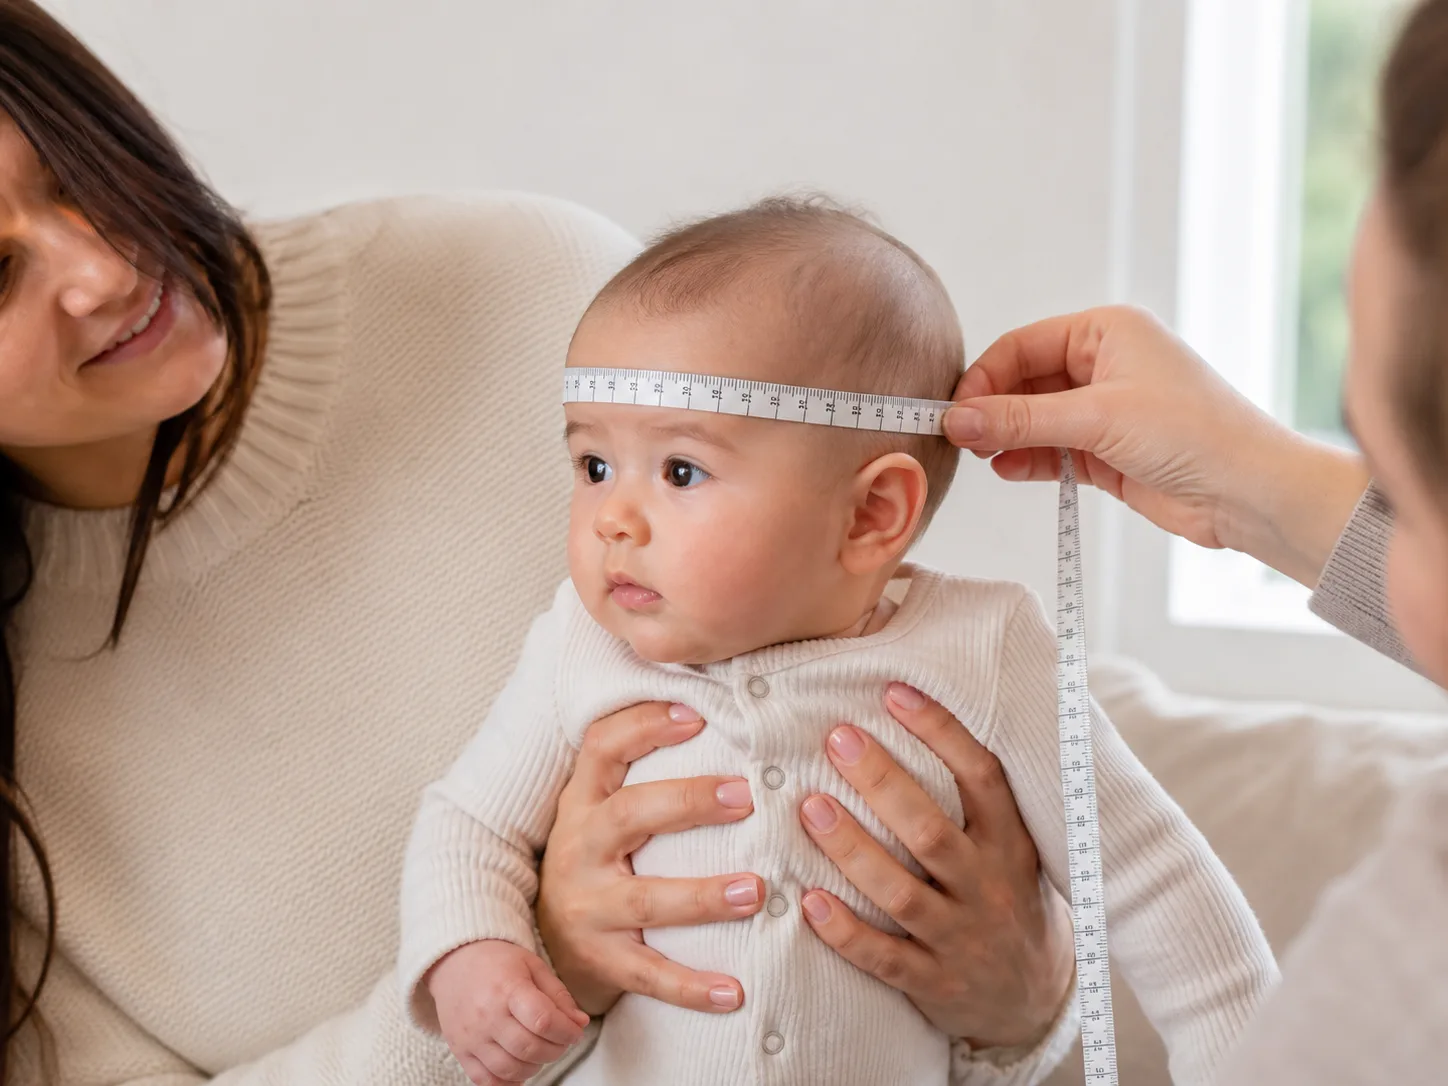
Measure around the fullest part of the head, keeping the tape level above the eyebrows, over the ears, and around the fullest back of the head. The tape should touch without indenting the skin. Record the measurement itself; do not subtract ease while measuring.
If the baby is not available, measure a soft hat that currently fits well. Lay it flat without stretching and double the width at the lower edge. That gives the hat’s relaxed circumference, not the baby’s exact head circumference, so also note how stretchy the fabric is.
Desired finished depth
Measure from the center top of the head to the point where the lower edge should sit. A classic baby beanie usually reaches around the base of the ears without covering the face or bunching against the shoulders.
Circumference and depth are independent. If the hat is wide enough but does not cover the ears, add depth rather than circumference. If it covers the ears but slides over the eyes, correct the width or shorten the depth instead of folding a bulky cuff.
Step 2: make and wash a useful swatch
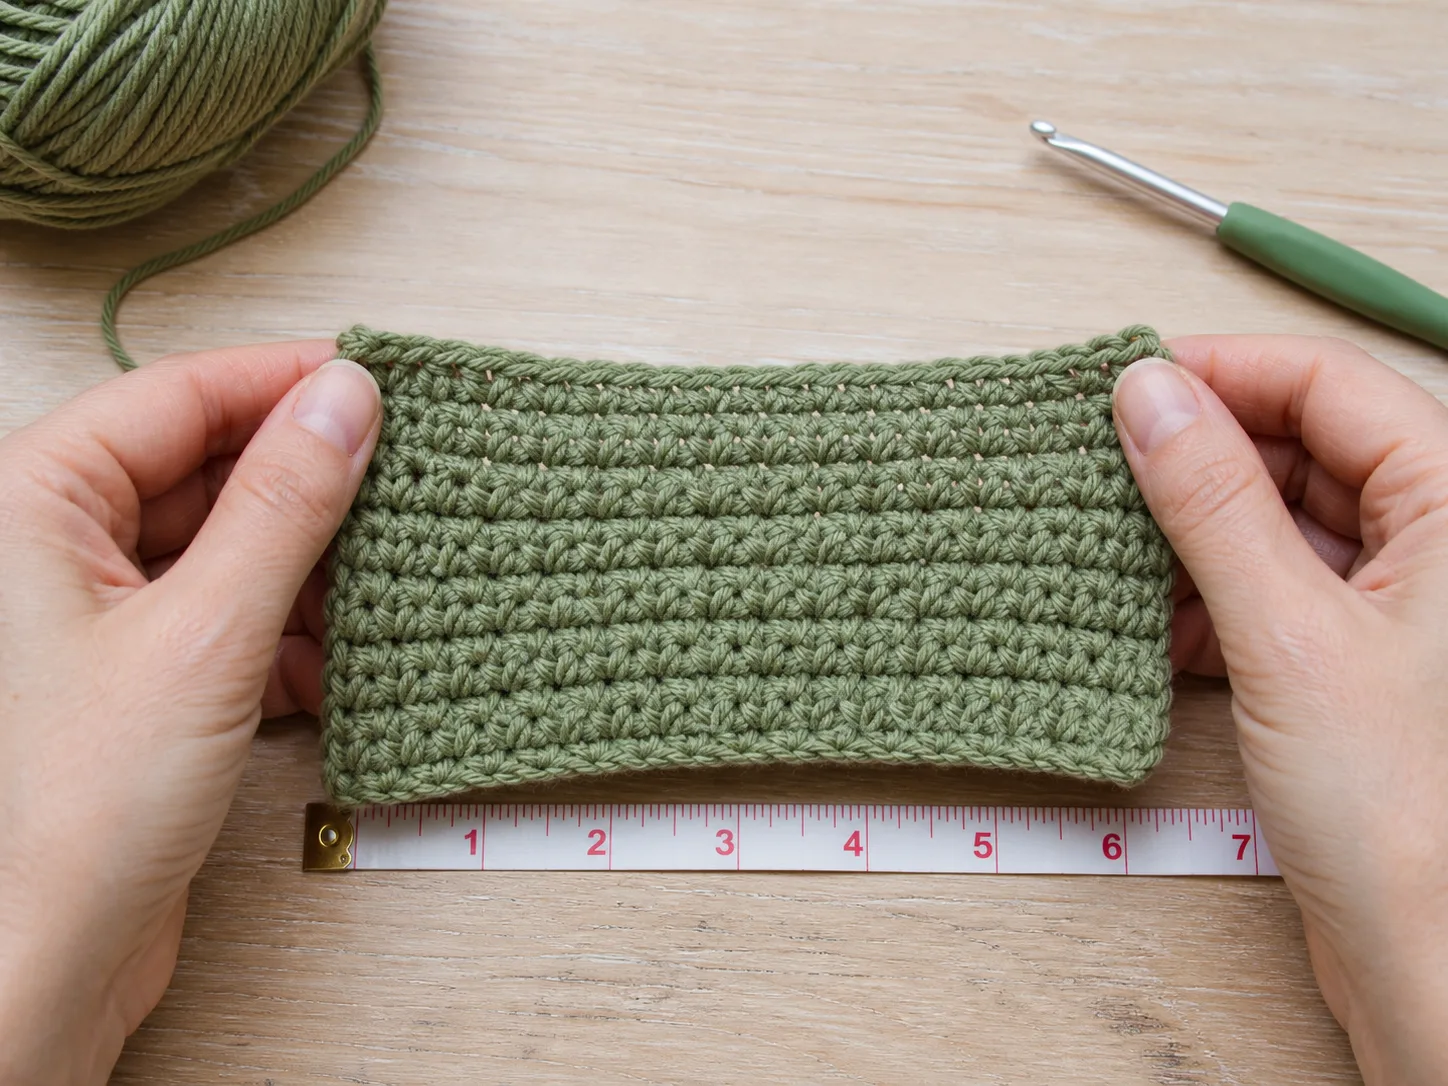
Work a swatch at least 5 in / 12.5 cm wide in half double crochet. Use the same yarn, hook, and working rhythm planned for the hat. Wash and dry it according to the yarn label, then let it rest flat before measuring.
Count stitches across the center 4 in / 10 cm. Do not count edge stitches. The calculation example assumes 17 hdc across 4 in / 10 cm; use your own washed swatch count for your hat.
Check stretch recovery
Measure a complete section relaxed, stretch it only as far as feels comfortable for wear, release it, and measure again.
| Swatch behavior | Starting negative ease | What to watch |
|---|---|---|
| Soft fabric with limited recovery | 3% | Avoid a loose edge; recheck after washing |
| Balanced stretch and recovery | 5% | Good starting point for this pattern |
| Springy fabric that returns promptly | 7% | Confirm it does not leave a pressure line |
These percentages are starting points. The worked calculation reports the effective ease after rounding to a usable stitch count, which may differ from the percentage entered.
Baby Hat Fit-Window Planner
Open the tool in a separate page. The article also retains the manual formulas and worked checks.
JavaScript is optional: use the manual calculation method and worked examples in the article.
Step 3: use the Baby Fit-Window Method
The website calculation is designed to be used directly on the article page. No form needs to be printed or filled by hand.
Choose an age-range preset only to load a starting example, then replace it with the actual head measurement whenever possible. Enter the negative ease, the number of stitches counted in the swatch, the measured swatch width, and the desired finished depth.
The method returns:
- the target finished circumference;
- the raw stitch count;
- the lower and upper counts divisible by four;
- the selected usable count;
- the predicted circumference and effective ease;
- the flat-width and crown-diameter checkpoints;
- the complete eight-round crown sequence and optional four-increase bridge round;
- the selected count’s approximate 3-7% negative-ease fit window;
- the target finished depth.
Why the count is divisible by four
Full crown rounds add eight stitches. If the nearest good count falls halfway between two full eight-stitch rounds, the pattern adds a four-increase bridge round. This gives smaller sizing steps than forcing every baby hat to jump by eight stitches.
The four-stitch bridge is especially useful for baby sizes because an eight-stitch jump can change the circumference by nearly 2 in / 5 cm at some gauges.
How the calculation works
The diameter is a visual checkpoint, not a replacement for stitch gauge. If the count is correct but the crown is far from the predicted diameter, the working gauge has changed.
Complete worked example
For this calculation, use 15.75 in / 40 cm as an example head circumference and 6.25 in / 15.9 cm as the target depth. Assume a washed HDC gauge of 17 stitches across 4 in / 10 cm and balanced recovery; the starting ease choice is 5%. Replace these assumptions with your own measurements.
The nearest multiple of four is 64 stitches.
The selected count is divisible by eight, so the crown follows the eight-round sequence in the full pattern above and does not need a bridge round.
Label the hat by measurements, not only age
For a gift, measure the finished hat after washing and include a size note. Use your actual results rather than copying the example’s predictions:
- relaxed circumference: your measured result;
- estimated head fit window from the worked calculation; confirm fit on the wearer if possible;
- finished depth: your measured result;
- fiber and washing instructions;
- supervised awake wear only; remove for sleep and when indoors.
This gives the caregiver more useful information than “3-6 months” alone.
If no baby is available for a fit check
Use three independent checks instead of guessing from appearance.
- Count every crown and body round.
- Measure relaxed flat width after at least two even rounds.
- Measure center-top-to-edge depth before and after the final edge.
A balloon, bowl, or mannequin can help display the hat, but it should not be used to stretch the fabric to a predetermined size. Record the measurements while the hat is relaxed on a flat surface.
Troubleshooting by symptom
| Symptom | Most likely cause | Corrective action |
|---|---|---|
| Crown forms a deep bowl during increases | Gauge is tighter than the swatch or too few increases were worked | Recheck count and gauge; use the worked calculation result rather than adding random body stitches |
| Crown waves strongly | Too many increases or looser working gauge | Return to the last stable round and confirm the selected count |
| Width is correct but hat is too short | Depth stopped early | Add even body rounds; do not add crown increases |
| Depth is correct but hat slides toward the eyes | Circumference is too large or fabric has weak recovery | Recheck washed gauge and recovery, then choose a lower usable count if it gives a comfortable opening. Recheck the lower edge and eye clearance before finishing. |
| Lower edge is tight but body fits | Final sc round is acting like a cord | Remake the edge with a larger hook or looser loops |
| Pattern size changed after washing | Swatch was not washed or yarn relaxed | Recalculate using washed gauge and remeasure the finished hat |
| One side looks longer | Marker drift, missed stitches, or inconsistent round height | Count stitches, align the fold, and measure at four points |
| Hat fits now but will be worn later | Wear date was not included in planning | Use the planned-age range or make the adjacent larger count and label its fit window |
Changing yarn or hook size
Changing the hook alone is not a controlled sizing method. A larger hook may increase circumference, height, holes, drape, and edge looseness at the same time.
When the yarn or hook changes:
- Make and wash a new swatch.
- Recheck softness, opacity, stretch, and recovery.
- Use the new stitch gauge in the worked calculation.
- Follow the new crown count and checkpoints.
- Expect yardage and round counts to change.
The written increase sequence is a construction method, not a fixed size chart.
Decoration choices
The base hat is intentionally plain. Color blocking, narrow stripes, and surface texture created by the stitches are lower-maintenance ways to personalize it without attaching separate objects.
If a caregiver requests an embellishment, discuss how the hat will be used, attach nothing that can loosen or enter the mouth, and inspect it before every wear. For everyday baby use, the decoration-free version remains the clearest choice.
Washing and reshaping
Follow the yarn manufacturer’s care label. Wash the finished hat once before gifting so any change in gauge appears before the fit is promised.
After washing:
- reshape it without stretching the edge over a rigid form;
- dry it completely;
- remeasure circumference, flat width, and depth;
- inspect the center, edge, and woven tails;
- update the finished-size note if the measurements changed.
Final fit and finish check
The hat is ready when all of the following are true:
- the relaxed circumference and flat width match the intended fit window;
- the lower edge stretches comfortably and recovers;
- the depth reaches the planned wear line without approaching the eyes;
- the crown is rounded without a large point or gathered lump;
- the inside surface is smooth;
- all tails are secure and trimmed;
- no cords, ties, buttons, beads, bells, or loose decorations are present;
- the caregiver has the fiber, care, finished measurements, and use note.
Frequently asked questions
What size should I crochet for a 0-3 month baby?
Use 14-15 in / 35.5-38 cm as a planning head-circumference range and 5.5-6 in / 14-15 cm as a planning depth range. Replace those ranges with the baby’s actual measurement whenever possible. Do not select a stitch count from age alone.
How many stitches do I need for a crochet baby hat?
There is no universal count. Multiply the target finished circumference by your stitches per inch or centimeter, then adjust to a count supported by the crown. The worked calculation chooses the nearest multiple of four and reports the resulting ease.
Why does the calculation sometimes add a bridge round?
Full crown rounds add eight stitches. A four-increase bridge creates an intermediate size so a small baby hat does not have to jump a full eight stitches.
Is a 5% negative ease always correct for a baby hat?
No. It is a balanced starting point for a fabric with useful recovery. A low-recovery fabric may begin closer to 3%, while a springier fabric may begin near 7%. Judge the washed swatch and review the effective ease returned after count rounding.
Can I make the next age size so the baby grows into it?
Only if the larger hat does not slip toward the face during current wear. It is usually better to label the selected count’s estimated fit window and use the hat when the baby’s measurement enters that range.
Can a baby sleep in this crochet hat?
No. Safe to Sleep guidance recommends keeping a baby’s head and face uncovered during sleep and removing hats indoors because overheating increases risk. Use the hat only for supervised, awake wear when appropriate for the weather.
Can I add a pom-pom, flower, button, or chin tie?
The base pattern does not use detachable decorations or ties. A smooth, decoration-free hat is easier to inspect and avoids introducing loose parts or cords.
Why is the finished hat longer than expected?
Circumference and depth are separate. Stop the even body rounds according to the center-top-to-edge measurement, not a generic round number. Row gauge and stitch height can change when the yarn or hook changes.
What if my selected count gives too much or too little effective ease?
Compare the lower and upper count options. If neither is suitable, adjust the hook or fabric, make a new swatch, and recalculate. Do not force the nearest count when the resulting fit percentage is uncomfortable or loose.
References