
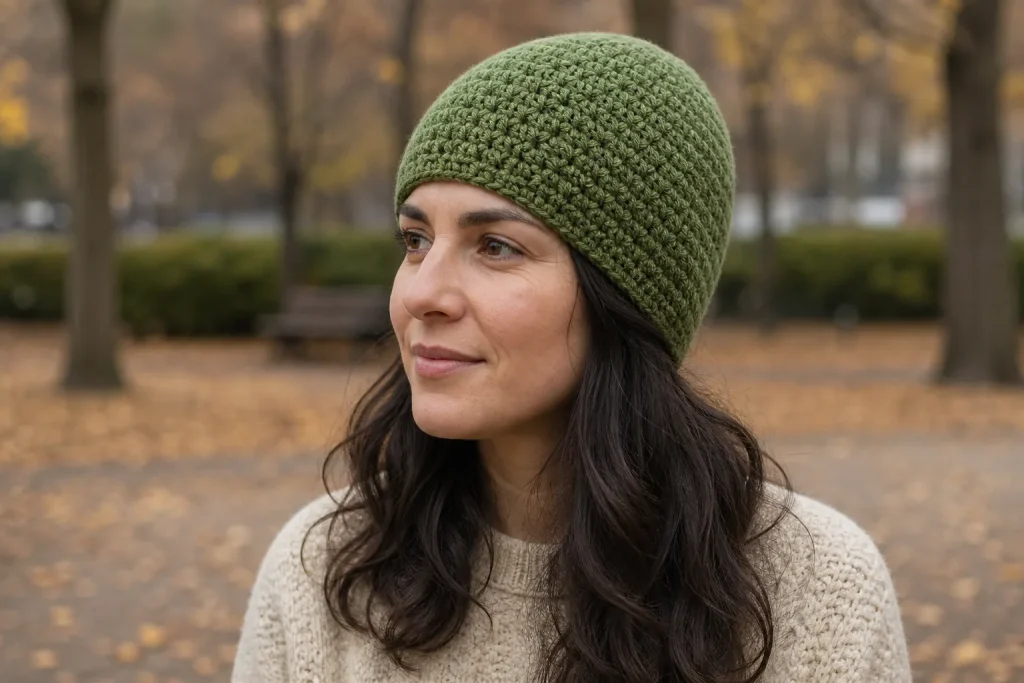
This free beginner beanie pattern makes a fitted, brimless hat from the top down in continuous half double crochet rounds. Follow the complete crown, body and lower-edge instructions using the 72-stitch calculation example if your gauge matches. For another head measurement or fabric, calculate the count first and check the fit as you work.
The result is a simple, fitted half-double-crochet beanie with no folded brim and no pom-pom. The instructions use US crochet terms and include inch and centimeter calculations.
Start here: a 22-inch calculation example
This is a worked calculation, not a measured finished hat. Assume a 22 in head, 14 hdc stitches per 4 in and 8% negative ease; replace these inputs with the wearer’s head measurement and your own gauge.
- Use the materials list and check the full calculation. It selects 72 stitches for this example, predicting about 20.57 in relaxed circumference at the assumed gauge.
- Follow the crown rounds from Round 1 through Round 9, ending with 72 hdc. Work two even body rounds at the same count, then check the opening and crown shape before continuing.
- Continue even rounds until the wearer’s intended depth, check the fit again, and finish the lower edge as instructed. Change the count or depth if your fabric and wearer need it.
This worked route is a starting example, not a tested universal adult size; the wearer’s measurements and the three fit checkpoints control the final decision.
Materials
- #4 Medium / Worsted yarn. For an adult standard-depth beanie, keep roughly 170-220 yd / 155-200 m available; smaller hats may use less, while a deeper hat may use more.
- A crochet hook that produces the fabric and gauge you want. A 5-5.5 mm hook is a practical starting range for many worsted yarns.
- Flexible measuring tape.
- Ruler for measuring the center of the swatch.
- Stitch marker.
- Scissors.
- Yarn needle.
Abbreviations
| Abbreviation | Meaning |
|---|---|
| ch | chain |
| hdc | half double crochet |
| inc | work 2 hdc in the same stitch |
| hdc2tog | half double crochet 2 stitches together |
| sl st | slip stitch |
| st / sts | stitch / stitches |
Pattern notes
- Work in continuous rounds. Do not join at the end of each round.
- Place a marker in the first stitch and move it up after every round.
- Count after every increase round. Fix a wrong count before continuing.
- Eight increases are used in each full crown round.
- The optional bridge round adds four evenly spaced stitches when your target falls between two full increase rounds.
- The calculated crown diameter is a starting target. The fit after two even rounds is the more useful confirmation.
Crochet the crown
Make a magic ring. If you prefer not to use one, chain 2 and work Round 1 into the second chain from the hook.
Round 1: Work 8 hdc into the ring. (8 sts)
Round 2: Work 2 hdc in every stitch. (16 sts)
Round 3: Hdc in next st, inc in next st. Repeat around. (24 sts)
Round 4: Hdc in next 2 sts, inc in next st. Repeat around. (32 sts)
Round 5: Hdc in next 3 sts, inc in next st. Repeat around. (40 sts)
Round 6: Hdc in next 4 sts, inc in next st. Repeat around. (48 sts)
Round 7: Hdc in next 5 sts, inc in next st. Repeat around. (56 sts)
Round 8: Hdc in next 6 sts, inc in next st. Repeat around. (64 sts)
Round 9: Hdc in next 7 sts, inc in next st. Repeat around. (72 sts)
Round 10: Hdc in next 8 sts, inc in next st. Repeat around. (80 sts)
Continue the same rule if your calculation requires a larger count: add one more hdc between increases on every new full increase round.
Stop at your chosen stitch count. If it is a multiple of 8, stop after the corresponding full increase round. If it is 4 stitches above a full-round count, use the bridge round below.
Optional bridge round: add only 4 stitches
Let K be the stitch count at the end of your last full increase round.
Work:
Examples:
| Starting count | Bridge-round repeat | New count |
|---|---|---|
| 56 | Hdc 13, inc. Repeat 4 times | 60 |
| 64 | Hdc 15, inc. Repeat 4 times | 68 |
| 72 | Hdc 17, inc. Repeat 4 times | 76 |
| 80 | Hdc 19, inc. Repeat 4 times | 84 |
This half-step lets you get closer to the calculated size instead of choosing between two options that are 8 stitches apart.
Checkpoint 1: Read the crown shape
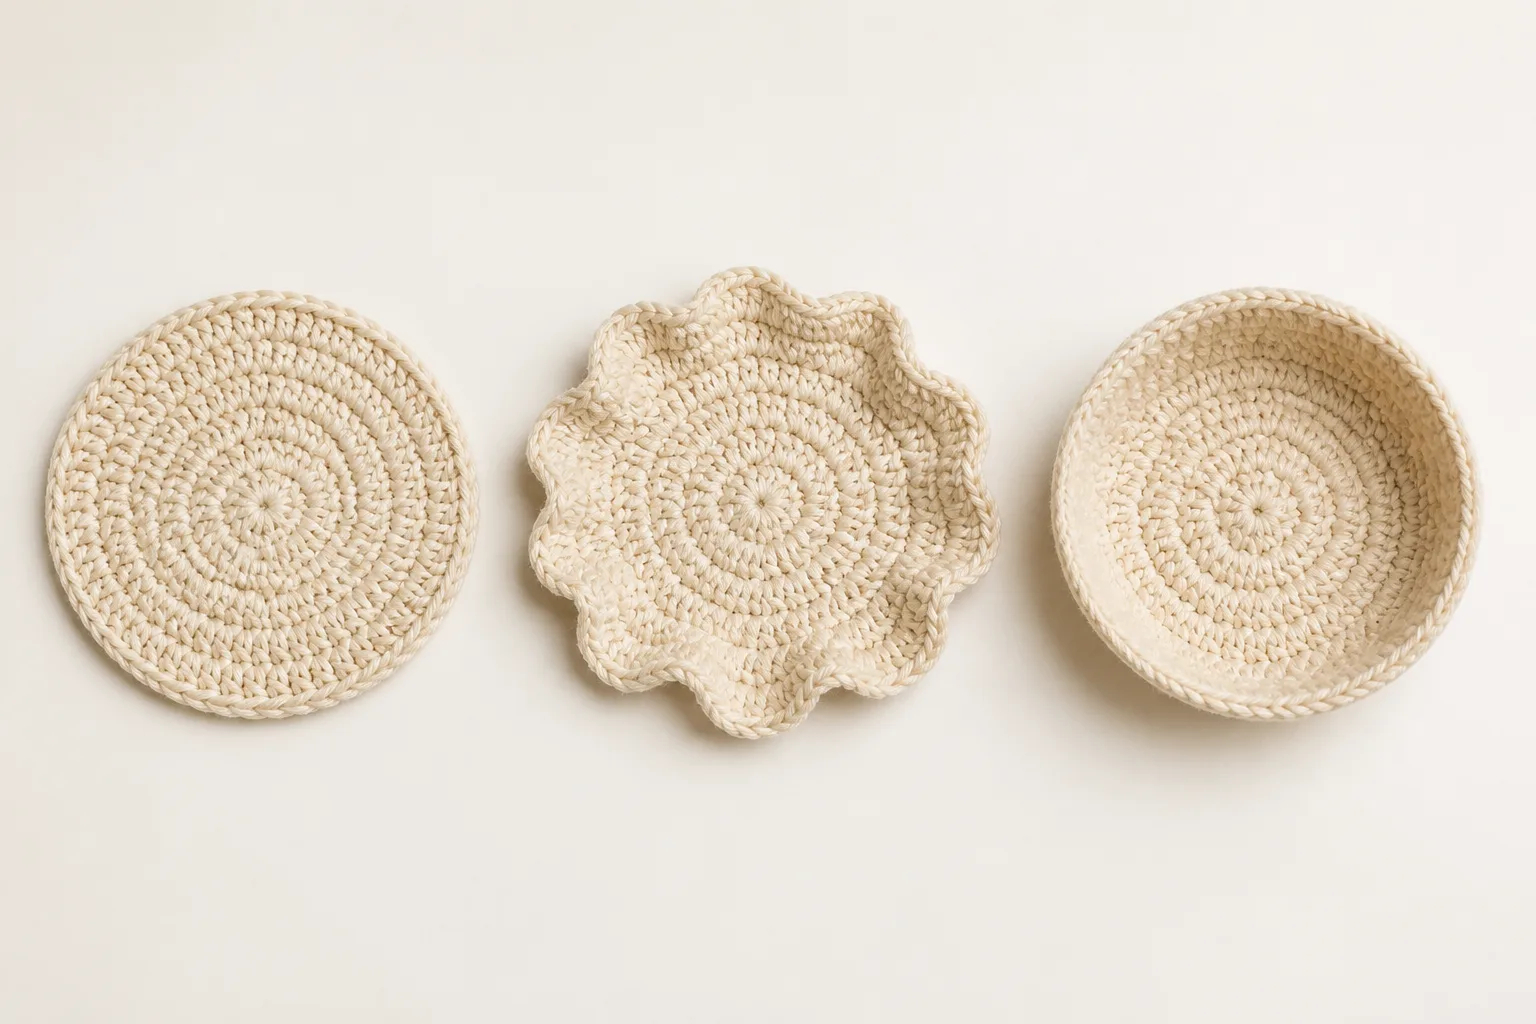
Lay the crown on a flat surface without stretching it.
- Reasonably flat or gently cupped: continue and compare the diameter with your target.
- Strong waves or ruffles: the crown is gaining width too quickly. Undo the last full increase round and consider the four-stitch bridge round instead.
- Deep bowl before reaching the target diameter: the crown is gaining width too slowly. Check the stitch count and gauge before adding another full increase round.
- A sharp point at the center: loosen the magic ring area and check that Round 1 contains all 8 stitches.
Do not force the crown to match a diameter while ignoring its shape. Shape and measurement must agree.
Establish the beanie body
Work 1 hdc in every stitch with no increases. Keep the same stitch count for two complete rounds.
After two even rounds, stop and measure again. The fabric may continue to move outward as the flat crown changes into the sides of the hat. This is why the first crown measurement is not the final decision.
Checkpoint 2: Confirm width after two even rounds
Try the work on carefully or measure the opening without stretching it.
- Comfortably snug: keep the current stitch count.
- Too loose: undo the two body rounds and use the lower four-stitch option. Alternatively, work one correction round with four evenly spaced hdc2tog decreases.
- Too tight: undo the body rounds and use the higher four-stitch option. Add four evenly spaced increases in one correction round.
- Fits at the opening but still flares outward: work one more even round before changing the count. Some fabrics need an extra round to settle into the side wall.
Width problems must be corrected here. Adding or removing body rounds changes depth, not circumference.
Continue to the required depth
Continue working 1 hdc in every stitch until the beanie reaches the intended lower edge.
Measure from the center top of the crown down the side to the current lower edge. For many adult standard beanies, 8-9.25 in / 20.5-23.5 cm is a useful checking range, but the intended wearer’s measurement controls the final depth.
- Stop higher for a shallow style that sits above the earlobes.
- Continue to the earlobes for standard coverage.
- Add depth for fuller ear coverage.
- For a single folded-brim variation, add the planned fold depth once: total crown-to-unfolded-edge depth = desired crown-to-folded-edge depth + fold depth. For example, an 8.5 in visible depth and a 2 in fold need a 10.5 in total depth. Fold the edge up and measure the visible depth before finishing.
Checkpoint 3: Check before the final edge
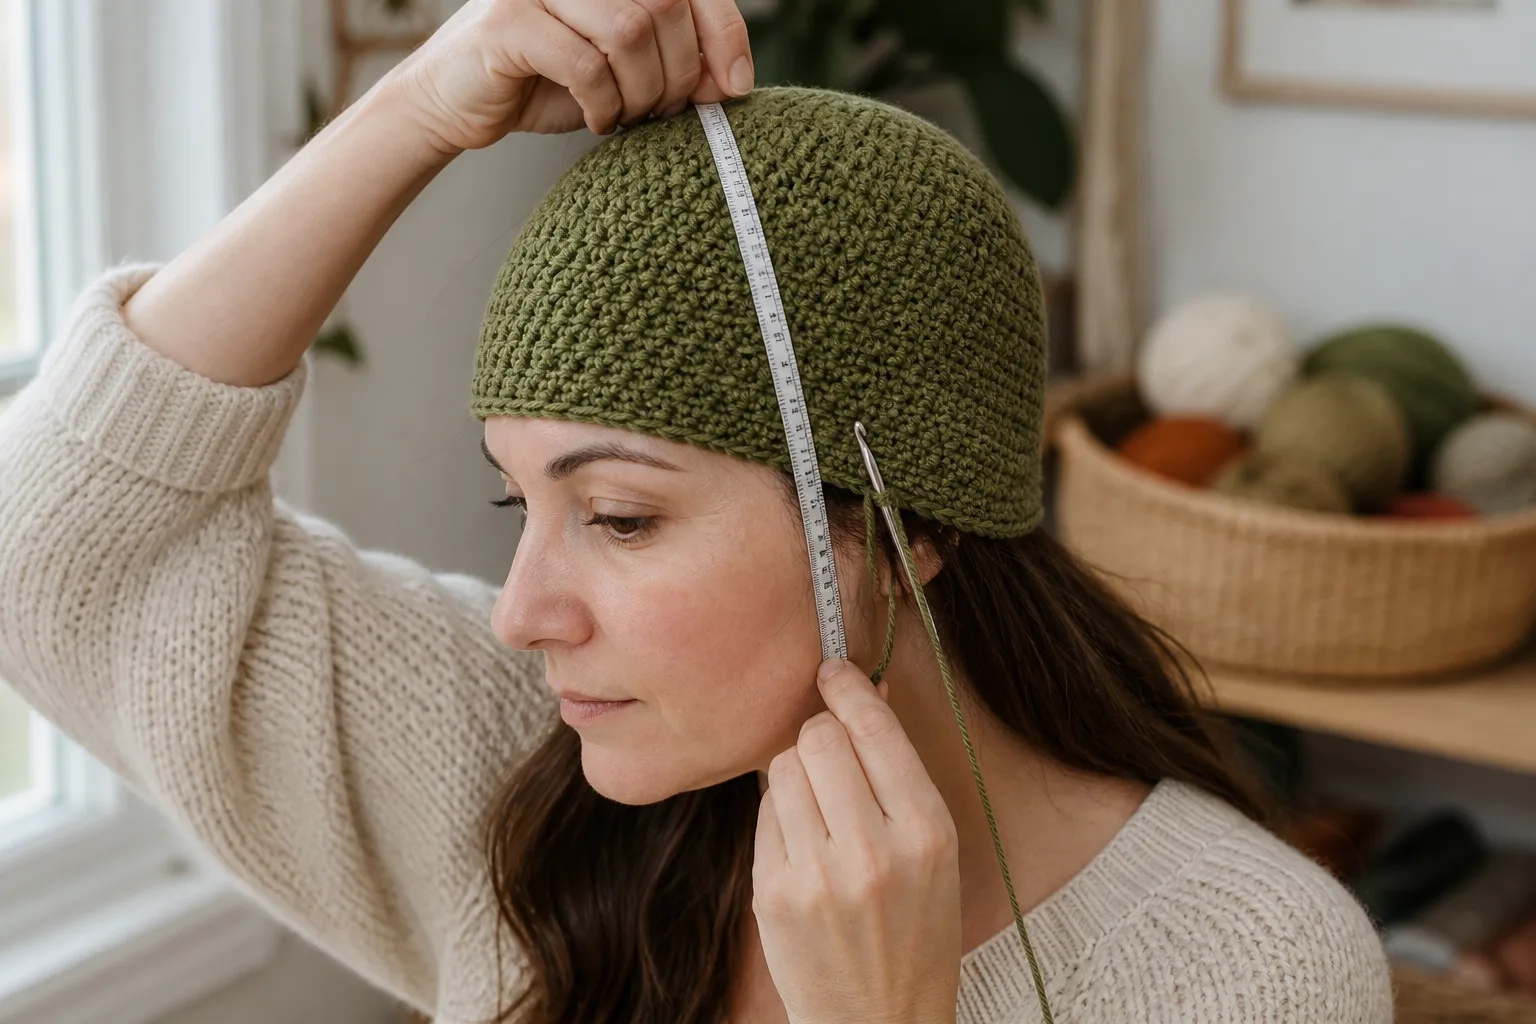
Before finishing, confirm all three:
- The lower edge stays in place without uncomfortable pressure.
- The beanie reaches the intended point around the ears.
- The crown is rounded without a large flat disk, point, or gathered excess.
If the circumference fits but the beanie is too short or too deep, change only the number of body rounds.
Finish the lower edge
Work one round of single crochet loosely around the lower edge. If your single crochet tightens the opening, use a hook 0.5 mm larger for this round or finish with one final round of hdc instead.
Slip stitch into the next stitch, cut the yarn, and pull the tail through. Weave in both ends securely. Shape the beanie gently and follow the washing instructions on the yarn label.
Pattern overview
| Field | This pattern |
|---|---|
| Skill level | Beginner-friendly |
| Construction | Top down, in continuous rounds |
| Main stitch | Half double crochet |
| Yarn | #4 Medium / Worsted is the easiest starting point |
| Hook | Start around 5-5.5 mm, then choose the hook that gives you a fabric you like |
| Fit method | Actual head circumference + swatch gauge + chosen negative ease |
| Adjustment unit | 4 stitches |
| Terminology | US crochet terms |
Why one stitch count cannot fit everyone
Two crocheters can use the same yarn label and hook size but produce different gauges. If one person makes 12 stitches in 4 inches and another makes 16, a 72-stitch hat calculates to 24 inches for the first person and 18 inches for the second. The stitch count is identical; the result is not.
For this pattern, use three pieces of information together:
- the intended wearer’s actual head circumference;
- your stitches per 4 inches / 10 cm in the half-double-crochet fabric;
- the amount of stretch and snugness you want.
Do not choose the final stitch count until all three are known.
Measure the head where the beanie will sit
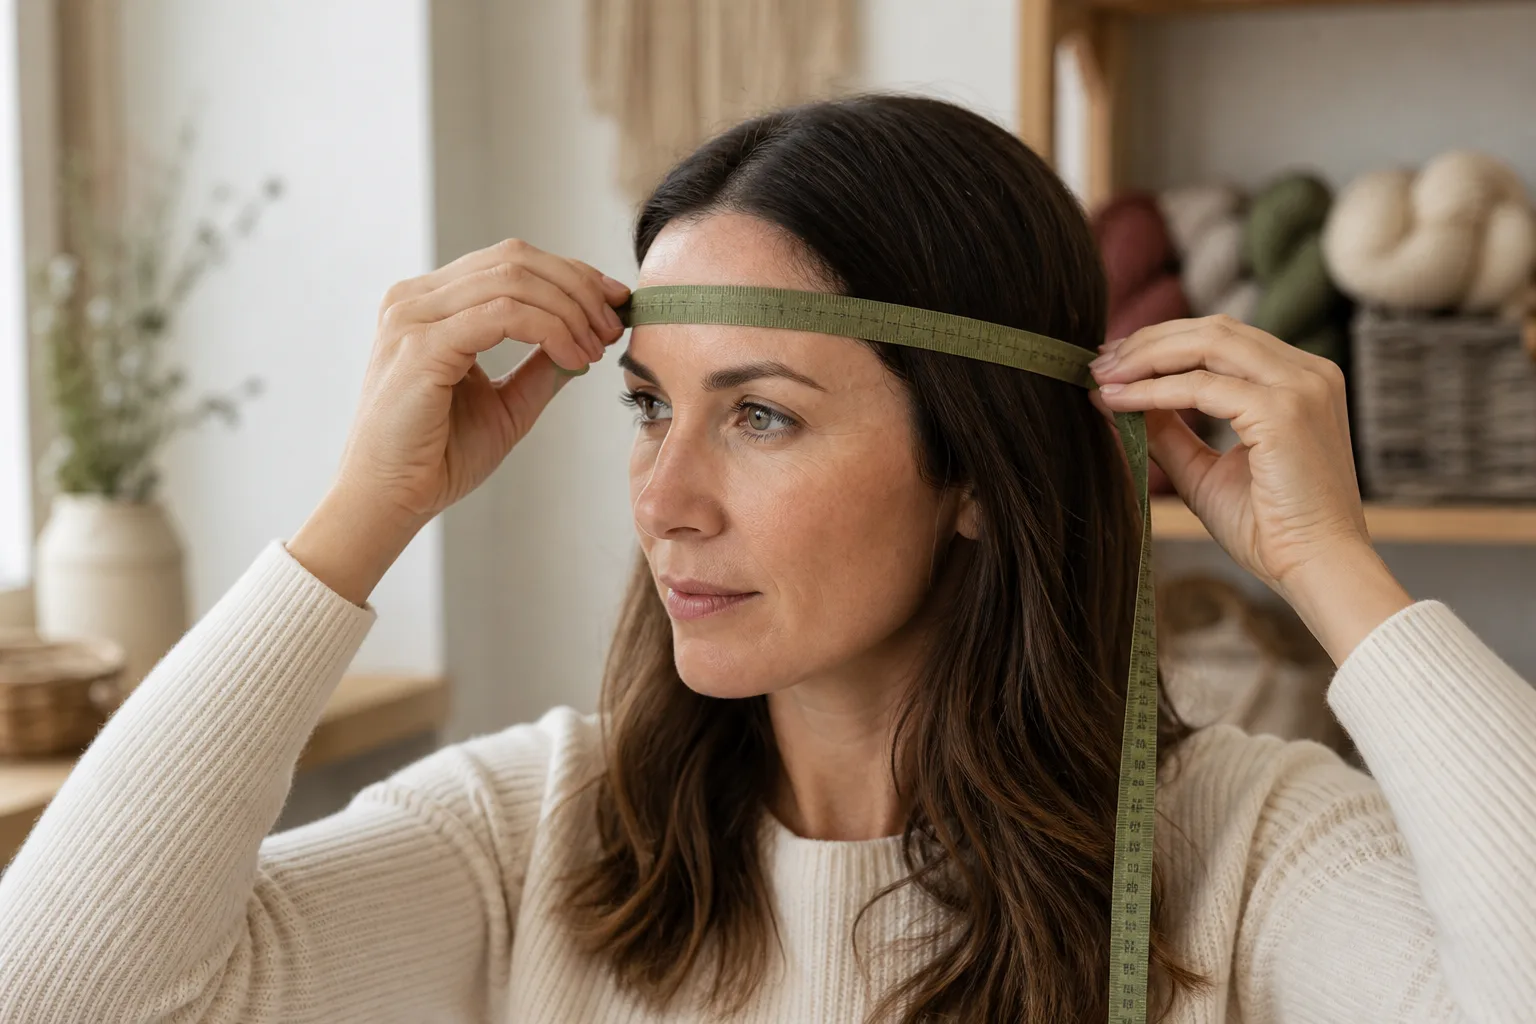
Place a flexible tape above the eyebrows, pass it above both ears, and keep it level around the back of the head. Hold it comfortably snug without pressing into the skin. Record the actual measurement before subtracting anything.
If you cannot measure the wearer, use the ranges in our Crochet Hat Size Chart and Calculator as a planning reference. An age label is a starting point, not a substitute for a real measurement.
Make a useful gauge swatch
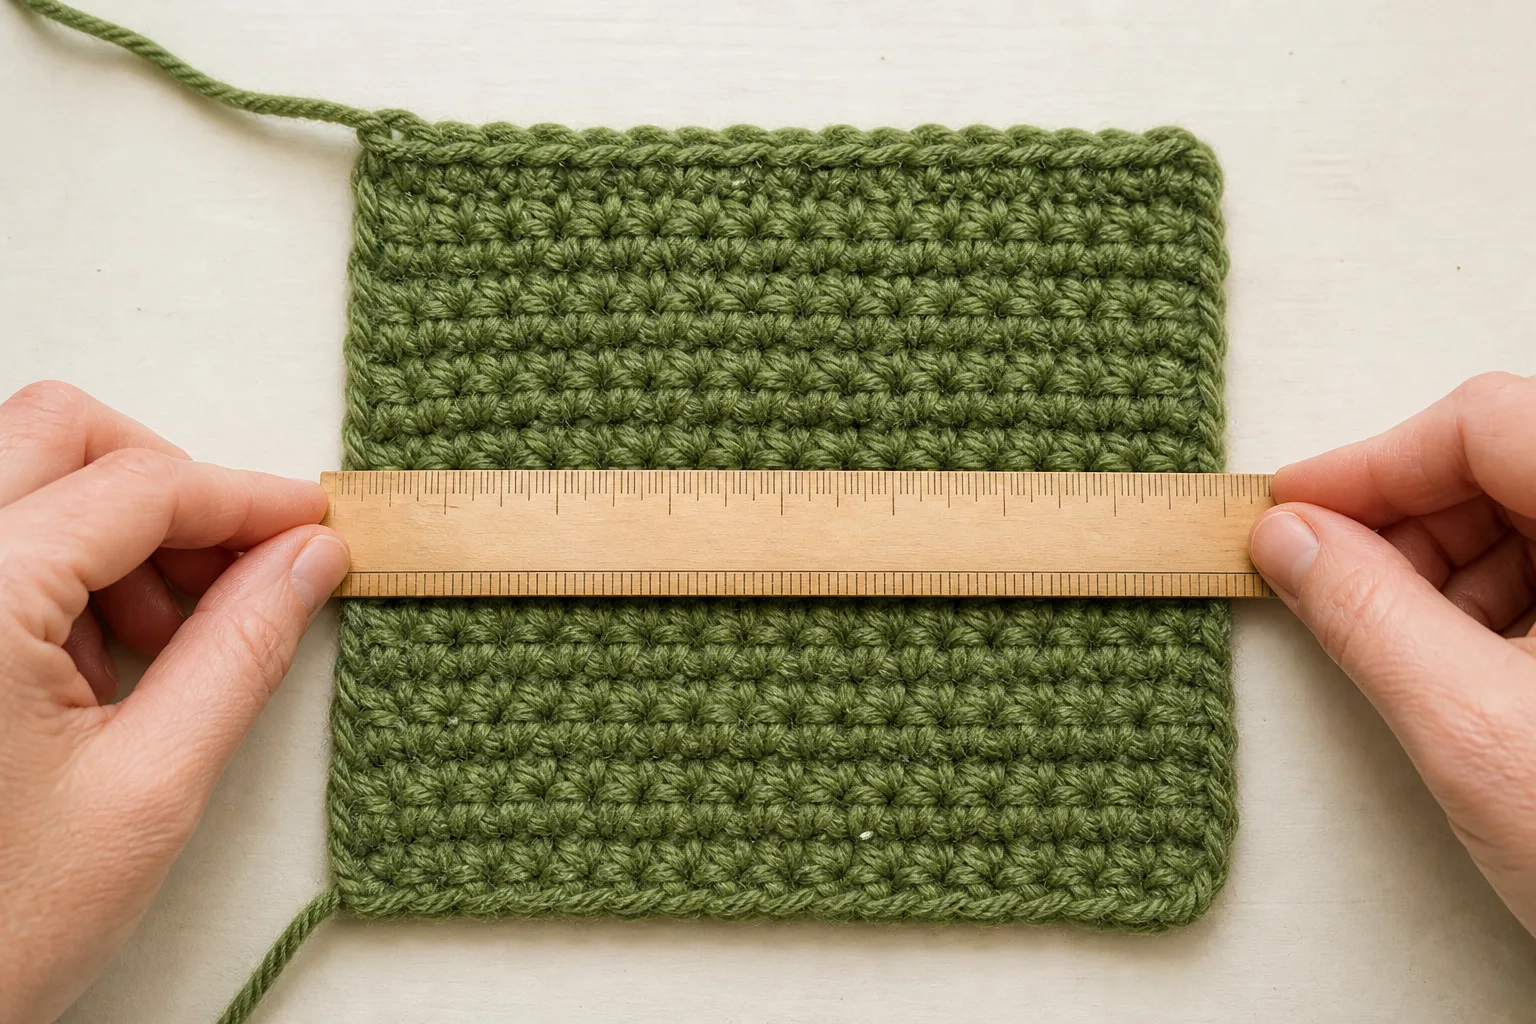
Use the yarn, hook, and half-double-crochet fabric you intend to use for the hat. Make a swatch at least 6 inches / 15 cm square so the outer edges do not distort the area you measure.
Lay the swatch flat without stretching it. Place a ruler across the center and count the number of complete stitches in 4 inches / 10 cm. Then turn the ruler vertically and count the rows in the same distance.
Record:
- S = stitches per 4 inches / 10 cm;
- R = rows per 4 inches / 10 cm.
The yarn label’s suggested hook is only a starting point. The Craft Yarn Council’s hook and gauge ranges are guidelines; your swatch is the evidence for this project.
A simple stretch check
Measure the swatch relaxed, then stretch it gently to the width that still feels comfortable and looks good. Use the following bands as planning guidance:
Record the relaxed width as L and the comfortable stretched width as T. Calculate the stretch percentage before choosing a range:
| Comfortable horizontal stretch | Starting negative-ease range |
|---|---|
| Less than about 10% | 3-5% |
| About 10-20% | 5-8% |
| More than about 20% | 8-12% |
These are decision ranges, not guaranteed fit. A firm fabric usually needs less negative ease than a springy fabric. If you dislike a tight hat, start at the lower end of the range.
Calculate your target circumference
Negative ease means the finished hat is smaller than the head, allowing the fabric to stretch and stay in place.
Example: a 22-inch head with 8% negative ease:
Metric example:
The target crown diameter is a starting estimate for a top-down hat:
For the example:
Convert your gauge into a stitch count
If you measure in inches
If you measure in centimeters
This pattern uses full increase rounds of 8 stitches and an optional half-step adjustment of 4 stitches. Therefore, compare the two multiples of 4 around your raw result.
Estimate the relaxed circumference each option predicts at your measured gauge:
Choose the option whose calculated circumference is closest to your target. If both are close, choose the lower option for a firmer fit or the higher option for a more relaxed fit.
Complete worked example
Suppose the head measures 22 inches / approximately 56 cm. The swatch has 14 stitches per 4 inches, and the fabric feels comfortable with 8% negative ease.
- Target circumference: 22 x 0.92 = 20.24 in.
- Target crown diameter: 20.24 / 3.1416 = 6.44 in.
- Raw stitch count: 20.24 x 14 / 4 = 70.84 stitches.
- The nearest multiples of 4 are 68 and 72.
- At 68 stitches, the calculated circumference is 68 x 4 / 14 = 19.43 in.
- At 72 stitches, the calculated circumference is 72 x 4 / 14 = 20.57 in.
For a target of 20.24 inches, 72 stitches is the closer option. That is the starting decision, but the crown and first two body rounds still need to be measured.
The same head can require different stitch counts
The table below uses the same 22-inch head and the same 8% negative ease. Only the gauge changes.
| Swatch gauge | Raw result | Practical option | Calculated circumference |
|---|---|---|---|
| 12 sts / 4 in | 60.72 sts | 60 sts | 20.00 in / 50.8 cm |
| 14 sts / 4 in | 70.84 sts | 72 sts | 20.57 in / 52.3 cm |
| 16 sts / 4 in | 80.96 sts | 80 sts | 20.00 in / 50.8 cm |
This is why copying another person’s 72-stitch count without checking gauge can fail.
Changing yarn, hook, or head size
Do not automatically change the hook just because your gauge differs from a sample.
Route A: Match a specific pattern gauge
Change hook size when you want to reproduce a stated gauge and like the fabric produced at that gauge.
Route B: Keep your own fabric
If you like the texture and flexibility of your swatch, keep the hook and recalculate the stitch count from your own gauge. This is often better than forcing a looser or stiffer fabric just to reach somebody else’s number.
When the wearer or yarn changes, repeat these four items:
- Measure the head.
- Make and measure the new swatch.
- Choose the negative-ease range from the new fabric.
- Recalculate and compare the nearest four-stitch options.
Troubleshooting
| Problem | Likely cause | What to change |
|---|---|---|
| Crown ruffles strongly | Too many increases for the yarn and tension | Undo the last full increase round; use the four-stitch bridge or an even round |
| Crown forms a deep bowl too early | Too few increases, missing stitches, or very tall/tight fabric | Recount; add the next increase round if the diameter is below target |
| Beanie is too loose after two body rounds | Chosen circumference is too large or fabric stretches more than expected | Reduce by 4 stitches and recalculate the estimated relaxed circumference |
| Beanie is too tight | Chosen circumference is too small or fabric is firmer than expected | Add 4 stitches or use less negative ease |
| Opening fits but hat is too short | Not enough body rounds | Add even rounds; do not add crown increases |
| Opening fits but hat is too deep | Too many body rounds | Remove even rounds; do not change the crown |
| Lower edge suddenly feels tight | Finishing round has a tighter gauge | Work the edge more loosely or use a slightly larger hook for the final round |
| Fabric has larger holes than wanted | Hook is large for the yarn or hdc fabric is too open | Try a smaller hook, reassess the fabric, then recalculate from the new gauge |
Frequently asked questions
Is this crochet beanie pattern suitable for a complete beginner?
Yes, if you can make half double crochet and basic increases. The calculations use simple multiplication and division, and the worked example shows every step.
Can I skip the gauge swatch?
You can, but then you lose the information that makes the stitch count meaningful. A short swatch is faster than remaking an entire hat that is several inches too large or too small.
What if my raw stitch count is exactly between two options?
Calculate the circumference produced by both options. Choose the lower option for a firmer fit or the higher option for a more relaxed fit, then confirm after two even rounds.
Why did the hat keep getting wider after I stopped increasing?
The flat crown needs time to turn into the side wall, and some stitch/yarn combinations continue to spread during the first even rounds. That is why Checkpoint 2 occurs after two no-increase rounds.
Can I make the beanie slouchy?
Yes. Keep the confirmed circumference and add body depth. Do not enlarge the crown just to create slouch; that changes the fit around the head.
Can I substitute single crochet or double crochet?
The measurement and gauge formulas still apply, but the crown-shaping schedule changes with stitch height. Do not use the 8-hdc increase instructions unchanged for a different stitch.
Should I choose a smaller hook to make a smaller size?
Not automatically. A smaller hook changes both size and fabric stiffness. For a different head size, calculate a new stitch count first. Change the hook only when you also want a different gauge or fabric.
The rule to remember
Do not trust a stitch count by itself. A reliable fit comes from using stitch count, gauge, fabric stretch, and actual measurement together – then checking the work before too much yarn has been invested.
References
Print the free crochet beanie pattern
Use the printer-friendly PDF for the complete top-down HDC pattern, the 22-inch worked calculation, all three fit checkpoints, adjustment formulas, troubleshooting, and finishing steps.
Download the free crochet beanie pattern PDF
The 22-inch route is a calculation example, not a measured finished hat or a universal size. Replace it with the wearer’s measurement and your own swatch gauge.