
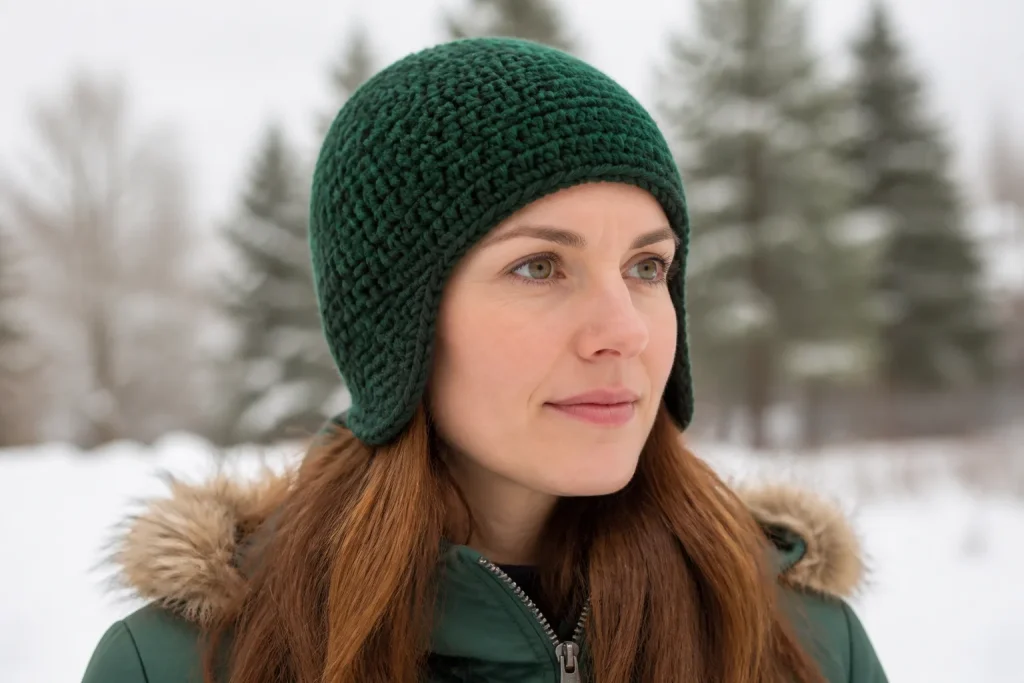
A measurement-adaptive top-down HDC hat with a four-region edge map, mirrored ear landmarks, physical coverage depth and a row-gauge taper schedule instead of unexplained “skip stitches” instructions.
Ear-Flap Landmark Planner
Open the tool in a separate page. The article also retains the manual formulas and worked checks.
JavaScript is optional: use the manual calculation method and worked examples in the article.
Quick answer
A crochet hat with ear flaps can fit around the head and still miss the ears. Circumference solves only the beanie. Earflap success depends on four additional decisions: where the clear forehead area ends, how wide each flap begins, how much space remains across the nape, and how far each flap must extend below the hat edge.
This pattern makes those decisions visible. The lower edge is divided into four regions:
The complete adult example uses a 22-inch / 55.9-cm head, 4% intended negative ease and a washed half-double-crochet gauge of 12 stitches and 9 rounds per 4 inches / 10 cm. The method selects 64 lower-edge stitches. The wearer measures a 10.5-inch / 26.7-cm clear arc across the forehead and chooses a 3.5-inch / 8.9-cm top width for each flap. After converting those measurements to compatible whole stitches, the edge becomes 32 front stitches, 11 left-flap stitches, 10 back stitches and 11 right-flap stitches.
The second flap is not found by guessing what “the back” means. Mark center front and center back first. From center front, leave 16 stitches on either side. Each next group of 11 stitches becomes a flap, and five stitches remain between each flap and center back. The sixth stitch of every 11-stitch flap is its center; that stitch must sit over the actual center of the wearer’s ear before crocheting begins.
Depth is calculated separately. A required 3.25-inch / 8.3-cm drop at a washed flap gauge of 10 rows per 4 inches gives eight rows. An 11-to-3-stitch taper needs four paired decrease rows, distributed on rows 2, 4, 6 and 8. The result is long enough to reach the chosen coverage point without decreasing every row into a short triangle.
Why fixed earflap placement fails
Current earflap patterns often work well when the wearer, yarn, hook and gauge match the designer’s sample. The difficulty begins when one of those changes.
- A fixed adult instruction may say to leave a certain number of front stitches, but that count represents a different physical width at a different gauge.
- “Skip stitches at the back” is ambiguous unless the maker already knows where center back and both flap edges are.
- Folding the hat in half can produce visual symmetry while placing the flaps too far forward or backward on the actual wearer.
- Starting every adult flap with the same number of stitches ignores edge gauge and the wearer’s ear area.
- Decreasing at both edges every row determines both width and length at once. A wide flap can become too short; a narrow flap can become a long point.
- Hair volume, ear position, head shape, hearing devices and the desired coverage point can differ even between people with the same head circumference.
The better starting question is not “How many stitches do I skip?” It is “Which four physical arcs must these lower-edge stitches represent?”
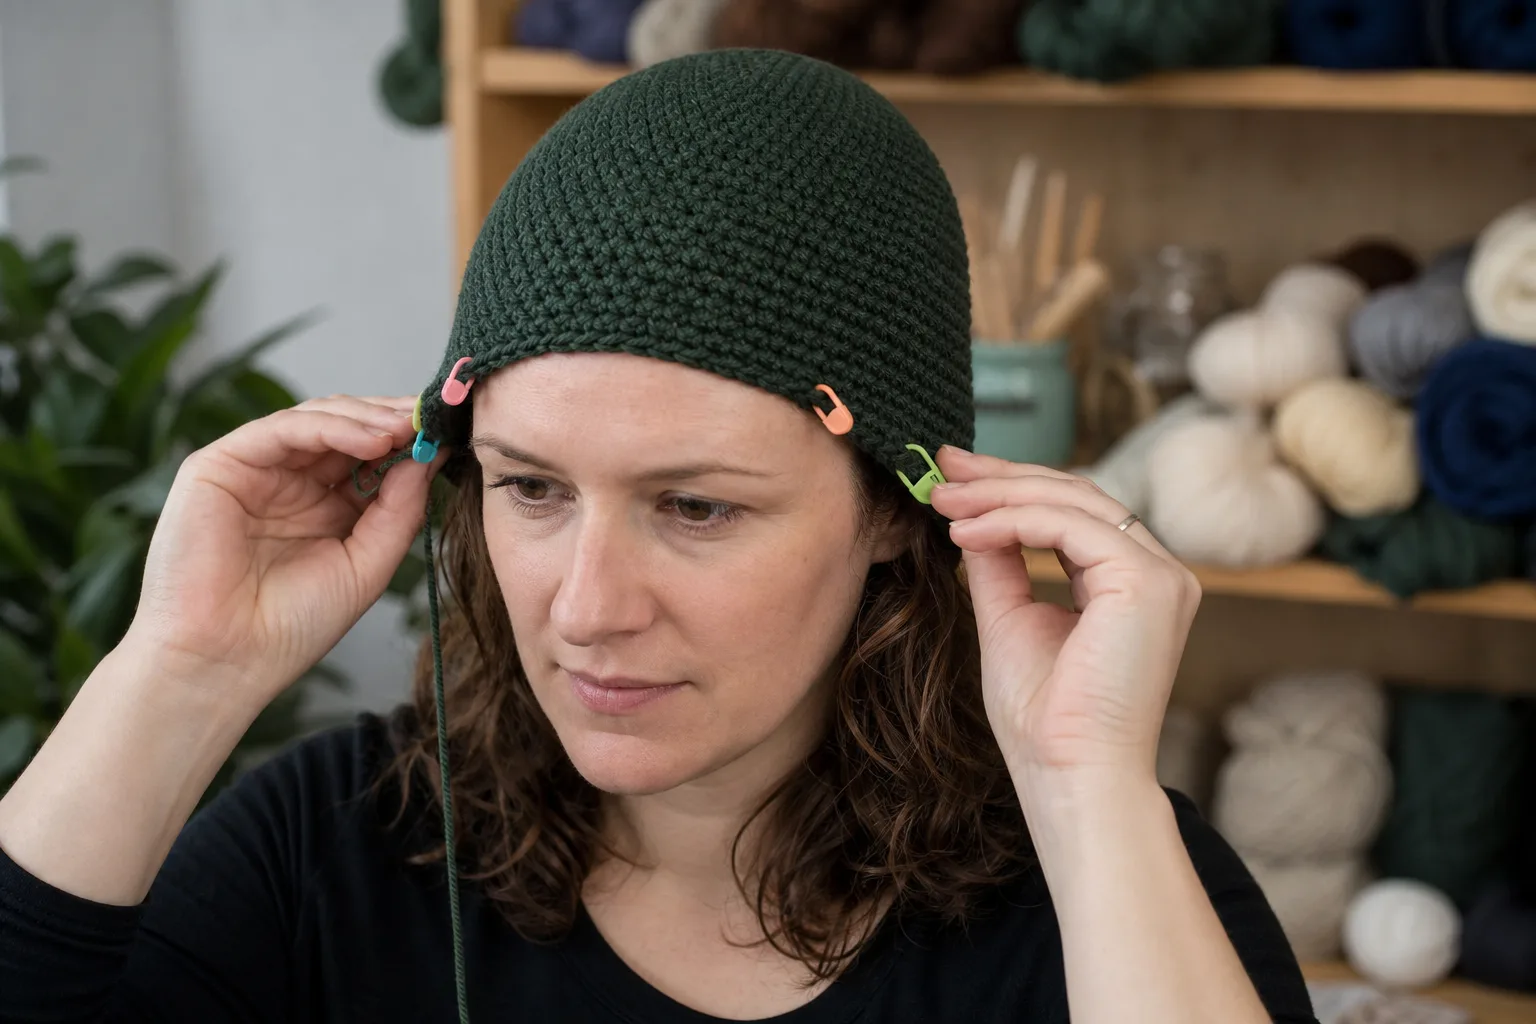
The original four-region edge map
Put the completed close-fitting hat on the wearer. Mark the intended front edge of each future earflap. Measure along the hat’s wear line from the left front boundary to the right front boundary across the forehead. This is the front clear arc. It is not half the head by rule; it is a measurement chosen on the wearer.
Choose the top coverage width of one flap by measuring along the same wear line from slightly in front of the ear to the desired rear boundary. The flap should cover the ear area without intruding into the eye or cheek area. Record the physical width.
The worked calculation converts both measurements using the washed edge stitch gauge:
For a symmetric plan, the front gap and total count need compatible parity so the front can be split evenly around center front. The method chooses an odd flap count so the flap has one identifiable center stitch. The back gap is then the remainder:
No region is hidden. If the requested widths leave too little space at the back, the worked calculation warns before the maker attaches yarn.
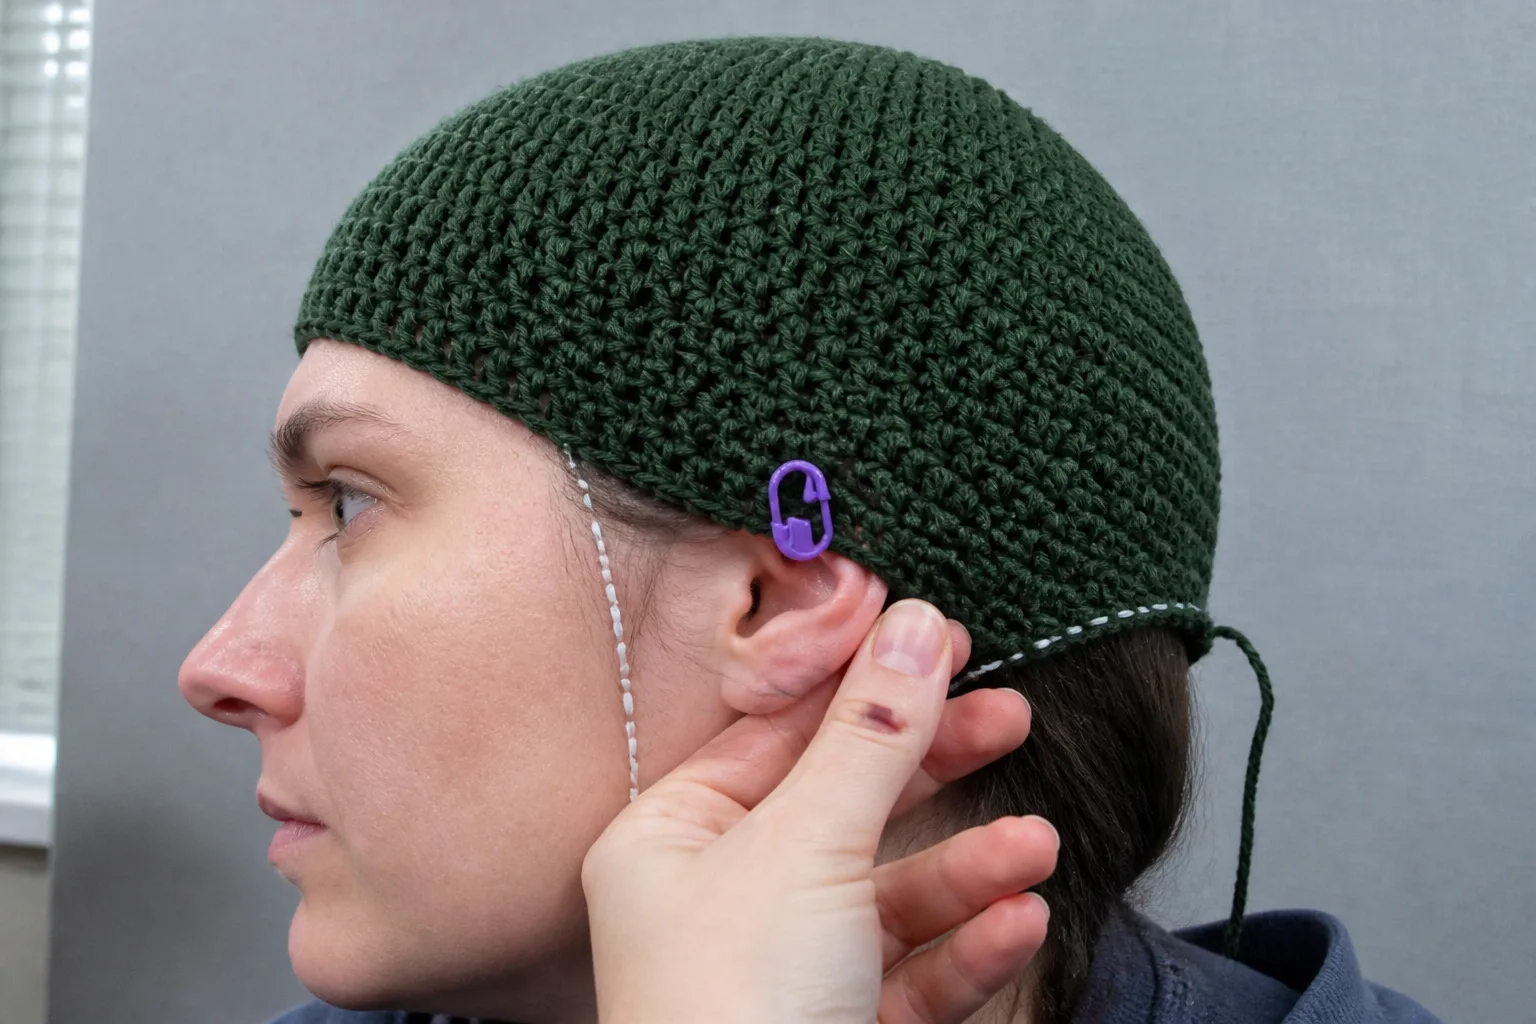
Pattern symmetry and wearer symmetry are different
A mathematically mirrored hat places equal numbers of stitches on both sides of center front and center back. A real wearer may not hold the hat perfectly level, may have different hair volume on the two sides, or may prefer one flap shifted for glasses or a hearing device.
Build the first plan symmetrically. Then perform the wearer checkpoint with four boundary markers and two ear-center markers. If one center marker does not sit over the ear, move the complete flap zone—not only one boundary—by one stitch and try again. Record that intentional offset before crocheting either flap.
Do not correct a misplaced flap by making one side wider. Width and placement are separate variables. Move the whole 11-stitch zone to change position; change the count only when the physical coverage width is wrong.
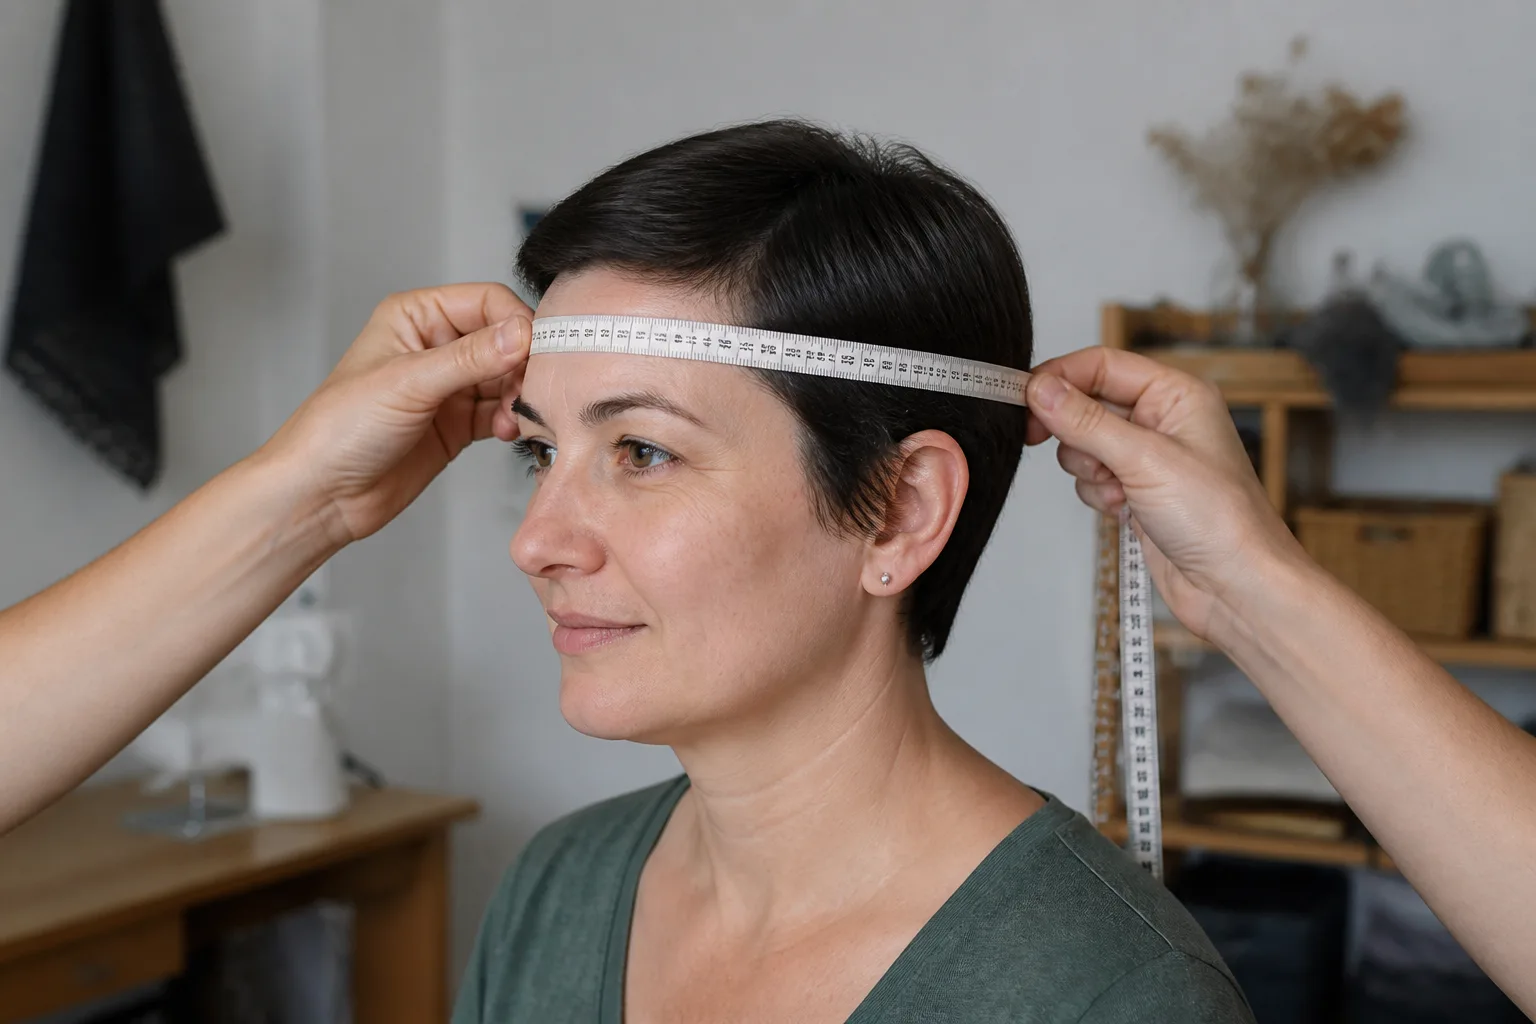
Measure the wearer and the intended coverage
Use a soft tape to measure actual head circumference at the intended lower-edge line. Keep the tape level around the forehead and fullest part at the back. It should touch without compressing the skin or hair. Repeat the measurement and use the larger careful result as the planning input.
Measure close-hat depth from crown center, following the head surface to the intended lower edge. The example uses 8.25 inches / 21.0 cm. This is the beanie depth before the flaps are added.
After the close-fitting hat is worn in the correct position, measure vertically along the head surface from the hat’s lower edge at ear center to the desired bottom of the flap. This is the required flap drop. The example uses 3.25 inches / 8.3 cm. If the lower hat edge already covers part of the ear, the required drop can be shorter. If it sits higher, the drop must be longer.
Finally, measure the front clear arc across the forehead and the top width of one ear-coverage zone as described above. These are wearer decisions, not age-chart values.
The example records:
- head circumference: 22 inches / 55.9 cm;
- close-hat depth: 8.25 inches / 21.0 cm;
- front clear arc: 10.5 inches / 26.7 cm;
- flap-top width: 3.5 inches / 8.9 cm;
- flap drop: 3.25 inches / 8.3 cm.
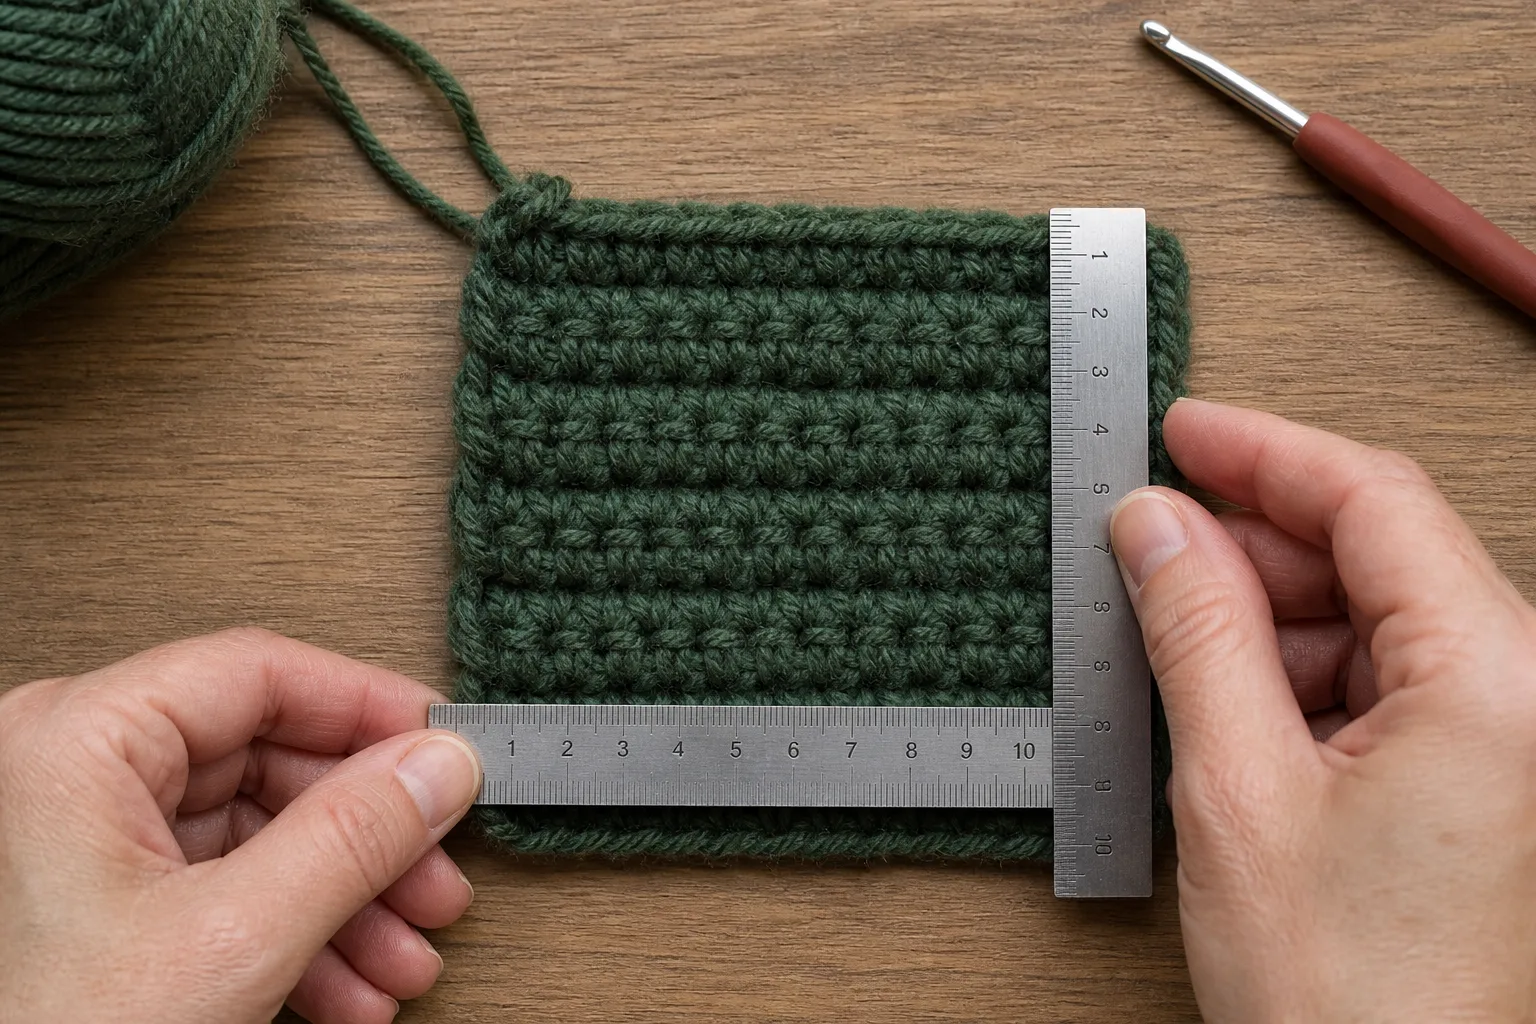
Make and wash two useful swatches
Use the exact yarn, hook, HDC method and finishing plan. Make the swatches large enough to measure away from edges, then wash and dry them as the hat will be cared for.
Body gauge
Measure HDC stitches across width and rounds across height. The example measures 12 stitches and 9 rounds per 4 inches / 10 cm:
The yarn category and recommended hook are starting references. The Craft Yarn Council identifies its yarn-weight gauge ranges as guidelines; the exact washed pattern gauge controls this hat.
Flap row gauge
Earflaps are turned rows attached to the lower edge. Their vertical behavior may differ slightly from body rounds. Work a small HDC row swatch or measure a wide first flap section before committing to both flaps. The example uses 10 HDC rows per 4 inches / 10 cm, or 2.5 rows per inch.
If the flap-row gauge changes after edging, measure the unedged flap first and let the edging stabilize rather than lengthen it. A dense edging pulled tightly can shorten or curl the flap.
Run the stretch-and-recovery gate
The edge must stretch over the widest part of the head and return to the wear line. On the washed body swatch, mark a horizontal span and record:
- A: relaxed length;
- B: comfortably stretched length, not maximum force;
- C: length after release and a short rest.
Calculate:
The example begins at 4 inches, stretches comfortably to 4.8 inches and recovers to 4.1 inches. Available stretch is 20%; residual growth is 2.5%. The selected 64-stitch edge measures about 21.33 inches, producing approximately 3.0% negative ease on a 22-inch head. The remaining reserve is about 17 percentage points.
As a conservative maker’s checkpoint, keep at least five percentage points of reserve. Residual growth up to about 3% is a stable starting result, 3%–5% deserves closer monitoring, and more than 5% suggests another washed swatch or less negative ease. These are transparent project heuristics, not textile standards. The physical lower-edge try-on has the final word.
Calculate the 64-stitch close-fitting hat
Begin with target circumference:
Convert to stitches:
This top-down example uses eight increases in each crown increase round, so the method selects the nearest multiple of eight: 64 stitches.
The count is not “the adult count.” It belongs to this head, ease preference and washed gauge. A different wearer or gauge produces another answer. If adding flaps to an existing correctly fitting hat, select existing-hat mode and use its actual lower-edge count; the landmark portion of the worked calculation works without rebuilding the crown.
Calculate the four edge regions
The example front clear arc converts to:
The worked example selects 32 front stitches so an even 64-stitch edge can be split equally around center front.
The desired top width per flap converts to:
The worked example selects 11 stitches, an odd count with a sixth center stitch.
The remaining back gap is:
The full map is therefore:
In physical units, the calculated front gap is about 10.67 inches / 27.1 cm, each flap top is about 3.67 inches / 9.3 cm and the back gap is about 3.33 inches / 8.5 cm.
Calculate flap rows and distribute decreases
Convert required drop to rows:
The method selects eight rows, producing a calculated unedged drop of 3.2 inches / 8.1 cm.
An 11-stitch top tapering to three bottom stitches must lose eight stitches. Decreasing once at each edge removes two stitches from a decrease row:
Those four decrease rows are spread through eight total rows: rows 2, 4, 6 and 8. The row counts are:
Width, length and taper are now independent decisions. If the wearer needs a longer flap at the same width, use a greater physical drop; the method adds plain rows between the necessary decreases. If the drop is too short to hold the required decrease rows, it issues a revision warning rather than silently creating an impossible schedule.
Apply the Earflap Landmark Method
It returns:
- target, raw and selected lower-edge counts;
- estimated circumference, negative ease and stretch reserve;
- front gap, two flap widths and the remaining back gap;
- the exact number of stitches from center front to each flap boundary;
- the center stitch that must align over each ear;
- physical flap width, back clearance and calculated drop;
- the total flap rows, decrease-row positions and row-by-row stitch counts;
- pass/revise messages when the requested regions do not fit on the edge.
Complete worked example
| Decision | Example result | Physical meaning |
|---|---|---|
| Actual head circumference | 22 in / 55.9 cm | Personal wear-line measurement |
| Intended negative ease | 4% | Starting preference |
| Washed body gauge | 12 sts and 9 rnds per 4 in | Controls count and crown behavior |
| Selected lower-edge count | 64 sts | Nearest eight-sector count |
| Estimated circumference | 21.33 in / 54.2 cm | About 3.0% negative ease |
| Close-hat depth | 8.25 in / 21.0 cm | Crown center to lower edge |
| Front clear gap | 32 sts / 10.67 in | 16 stitches on each side of center front |
| Each flap top | 11 sts / 3.67 in | Sixth stitch is flap center |
| Back clear gap | 10 sts / 3.33 in | Five stitches on each side of center back |
| Required flap drop | 3.25 in / 8.3 cm | Wearer-selected coverage point |
| Flap row gauge | 10 rows per 4 in | Converts drop to rows |
| Flap plan | 8 rows, 11→3 sts | Decrease rows 2, 4, 6 and 8 |
Materials
- Category 4 medium / worsted yarn or another yarn that produces the entered washed HDC fabric.
- Hook that produced the selected washed gauge.
- Eight locking stitch markers for center front, center back, two flap centers and four boundaries; extra markers make the map easier to inspect.
- Flexible measuring tape and ruler.
- Yarn needle and scissors.
Yardage depends on head size, yarn density, hat depth, flap dimensions and edging. Weigh a measured swatch or track the first skein rather than assuming a universal amount.
Abbreviations and stitch method
- ch: chain
- st(s): stitch(es)
- sl st: slip stitch
- HDC: half double crochet
- HDC2tog: half double crochet two together
- SC: single crochet
- rnd: round
HDC: yarn over, insert the hook into the next stitch, yarn over and draw up a loop, yarn over and draw through all three loops.
HDC2tog: yarn over, insert into the next stitch and draw up a loop; yarn over, insert into the following stitch and draw up a loop; yarn over and draw through all five loops.
The starting chain does not count as a stitch. The body is worked in joined rounds for clear landmarks. Join to the first HDC and move the beginning marker every round.
Part 1: crochet the eight-sector crown
Make an adjustable ring. The example increases eight stitches per round.
- Round 1: chain 1, work 8 HDC in the ring, join—8 stitches.
- Round 2: chain 1, 2 HDC in every stitch, join—16 stitches.
- Round 3: chain 1, repeat HDC in next stitch, 2 HDC in next stitch, join—24 stitches.
- Round 4: chain 1, repeat HDC in next 2 stitches, 2 HDC in next stitch, join—32 stitches.
- Round 5: chain 1, repeat HDC in next 3 stitches, 2 HDC in next stitch, join—40 stitches.
- Round 6: chain 1, repeat HDC in next 4 stitches, 2 HDC in next stitch, join—48 stitches.
- Round 7: chain 1, repeat HDC in next 5 stitches, 2 HDC in next stitch, join—56 stitches.
- Round 8: chain 1, repeat HDC in next 6 stitches, 2 HDC in next stitch, join—64 stitches.
Lay the crown naturally. At the example gauge its calculated outer circumference is about 21.33 inches, corresponding to a diameter near 6.79 inches if perfectly circular, but crochet crowns and heads are not perfect circles. Check that the crown is not cupping tightly or rippling deeply. If the fabric disagrees with the calculation, correct gauge before working the body.
Part 2: work to the personal close-hat depth
Continue HDC evenly around—64 stitches per round. Measure from crown center along the outer surface to the lower edge. Stop when the hat reaches 8.25 inches / 21.0 cm for the example.
The washed round gauge suggests approximately 19 total rounds, but the physical depth controls. Top-down crown rounds spread outward as well as downward, so a round-count estimate is not a replacement for measurement.
Try the close-fitting hat on. The lower edge should be level at the chosen wear line, pass comfortably over the head and stay without pressure. Correct circumference or depth now. Earflaps cannot repair a beanie that is too shallow, too loose or twisted.
Part 3: mark center front and center back
Place the hat on the wearer with the joining line at the intended back. Mark center front at the middle of the forehead and center back at the middle of the nape. On a 64-stitch edge, these centers fall between stitches, 32 stitches apart.
Remove the hat without moving the markers. Count both paths from center front to center back. Each side must contain 32 stitches. If not, recount before adding any other marker.
These two anchors replace vague language such as “find the back.” Every following location is measured from a named center.
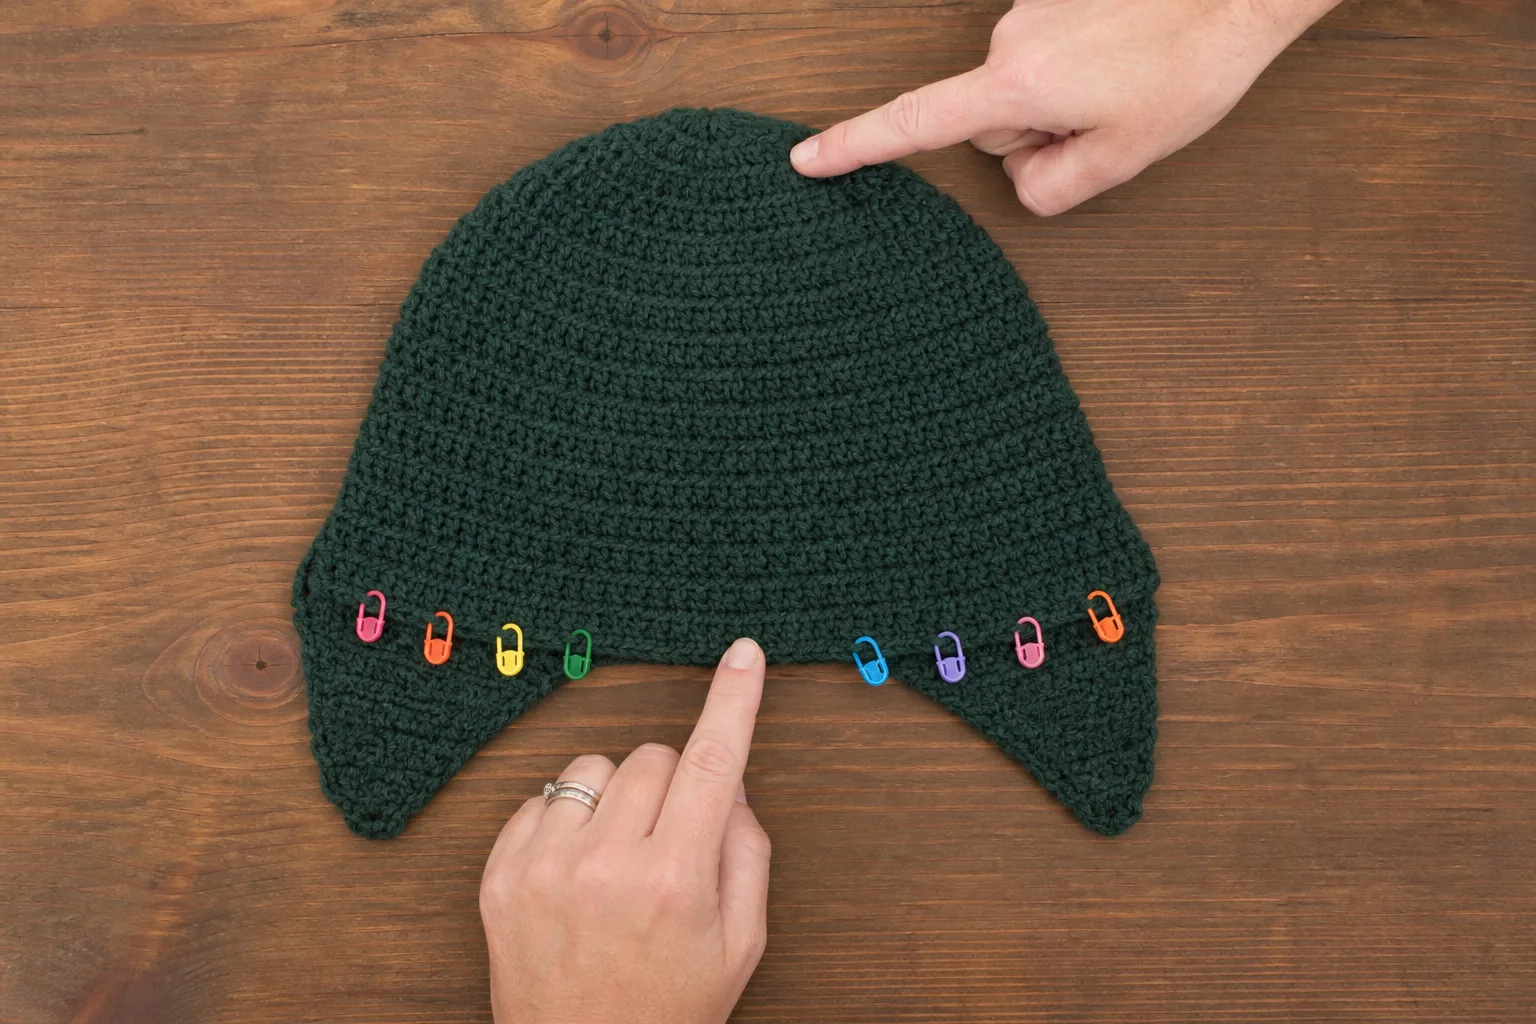
Part 4: transfer the mirrored flap landmarks
From center front, count 16 lower-edge stitches toward the wearer’s left and place the left-front boundary marker. Count the same 16 stitches toward the wearer’s right and place the right-front boundary marker.
From each front boundary, count 11 stitches toward center back. Mark each back boundary. Ten stitches should remain across the back: five from the left flap to center back and five from center back to the right flap.
Within each 11-stitch flap zone, mark the sixth stitch. Put the hat back on. Each sixth stitch must sit over the center of the corresponding ear. Confirm that the front boundaries stay clear of the temples and that the rear boundaries cover the intended back edge of the ears.
If both centers sit too far forward, move both complete 11-stitch zones toward the back by the same number of stitches. If only one side needs a one-stitch accommodation, record it as an intentional wearer adjustment. Do not begin the first flap until all six landmarks are accepted.
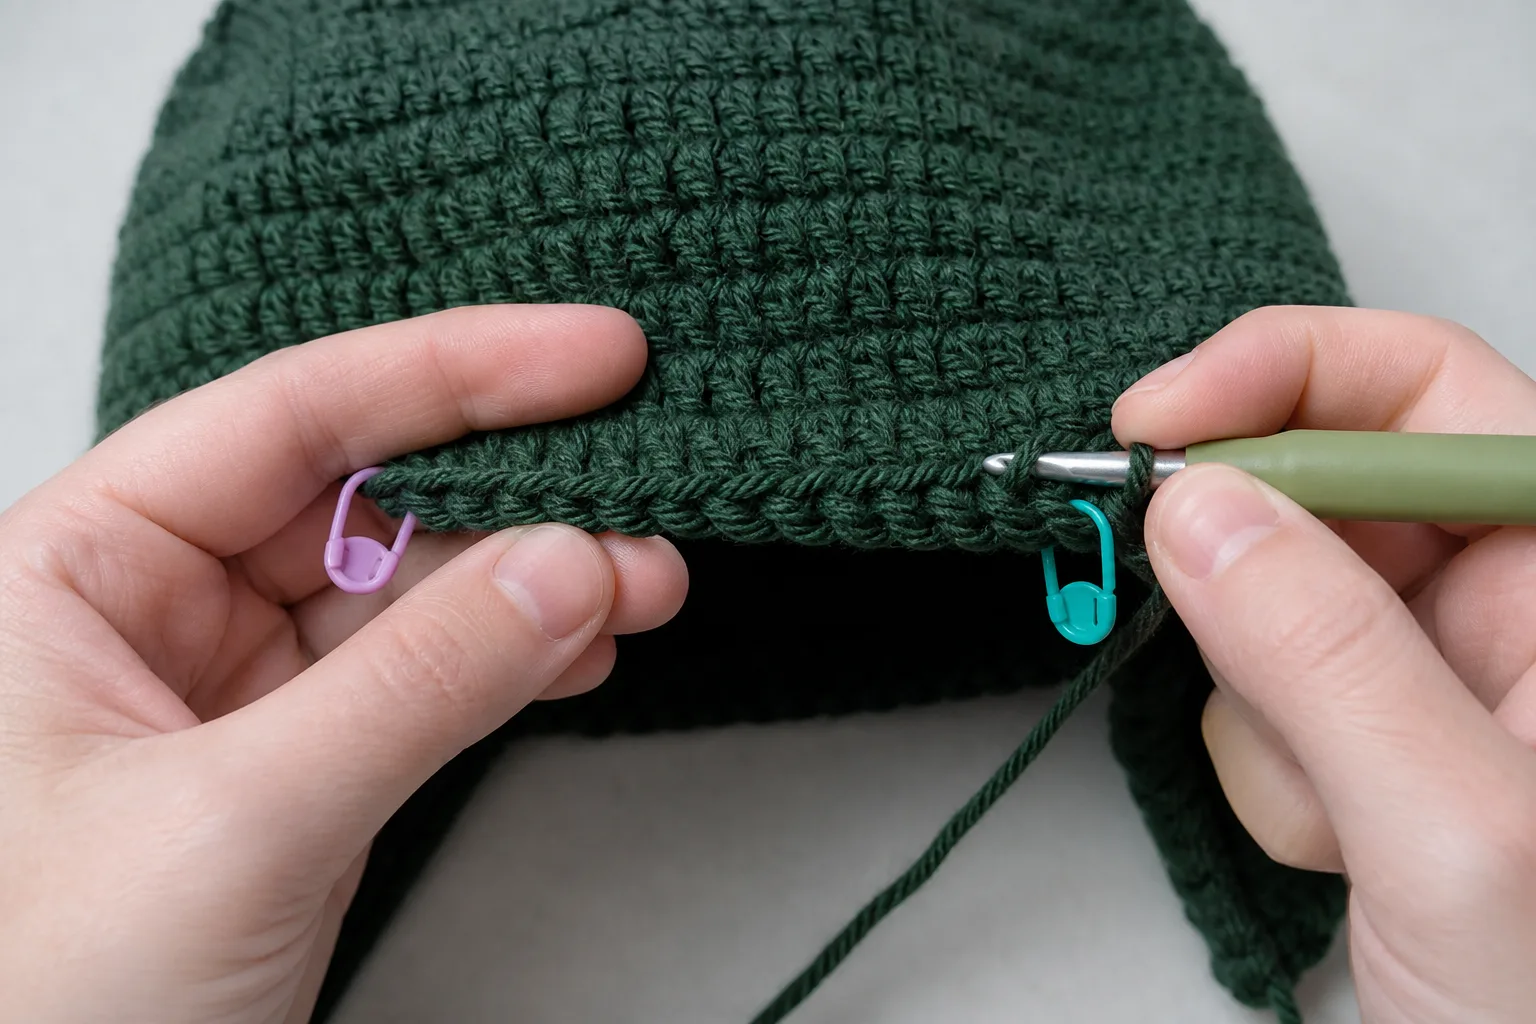
Part 5: crochet the first eight-row flap
With the right side facing, join yarn at the first marked stitch of the left flap. Work only across the marked 11-stitch zone.
- Row 1: chain 1, HDC in all 11 marked stitches, turn—11 stitches.
- Row 2: chain 1, HDC2tog, HDC in next 7 stitches, HDC2tog, turn—9 stitches.
- Row 3: chain 1, HDC across, turn—9 stitches.
- Row 4: chain 1, HDC2tog, HDC in next 5 stitches, HDC2tog, turn—7 stitches.
- Row 5: chain 1, HDC across, turn—7 stitches.
- Row 6: chain 1, HDC2tog, HDC in next 3 stitches, HDC2tog, turn—5 stitches.
- Row 7: chain 1, HDC across, turn—5 stitches.
- Row 8: chain 1, HDC2tog, HDC in next stitch, HDC2tog—3 stitches. Fasten off.
Measure from the hat edge to the bottom of the unedged flap. The example target is approximately 3.2 inches / 8.1 cm. If it is materially short or long, verify row gauge before repeating the same error on the other side.
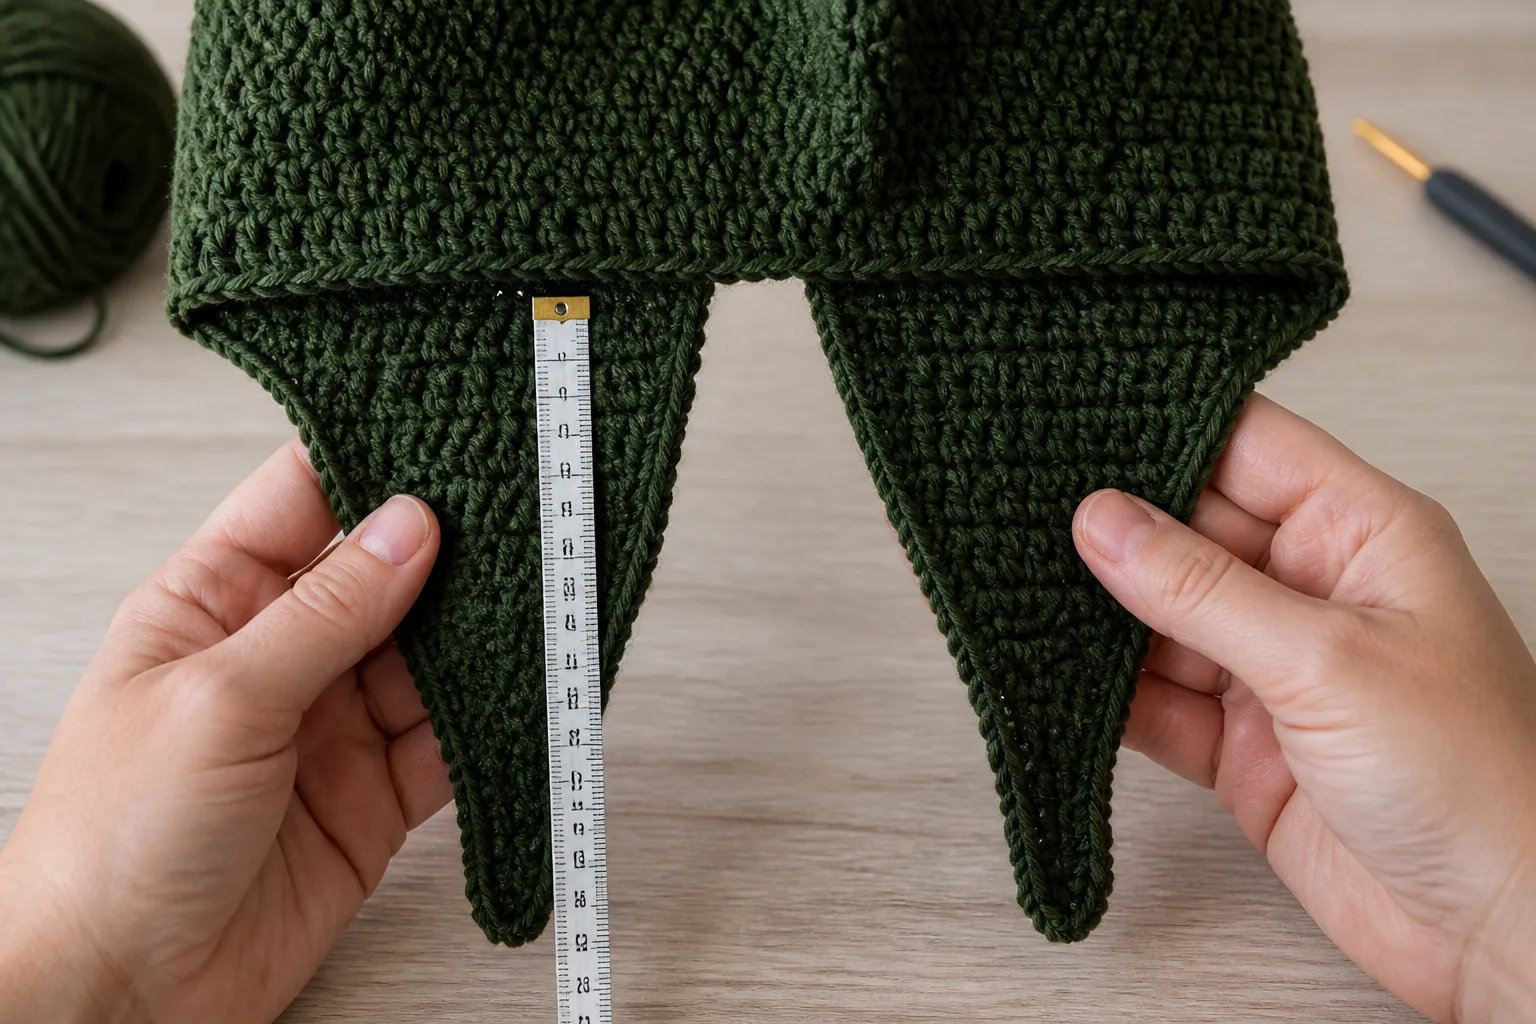
Part 6: crochet the mirrored second flap
Do not locate the second flap by counting from the end of the first. Return to the previously accepted right-front and right-back boundary markers. Join at the first stitch of that 11-stitch zone and repeat rows 1–8 exactly.
After every row, compare its count with the first flap’s recorded count. Lay the flaps together without stretching after rows 4 and 8. The bottom edges should align and the decrease ridges should mirror.
If one flap is shorter despite equal row counts, tension changed. Rework the mismatched flap before edging. Edging can smooth small visual irregularities; it cannot reliably correct a significant length difference.
Part 7: edge without shortening the flaps
Join yarn at center back. Work SC evenly around the lower hat edge, down the first flap, across its three-stitch bottom, up its other side, across the front, around the second flap and back to center back.
Use the measured row gauge to guide side pickups rather than forcing one SC into every visible gap. Pause after the first flap. It should lie flat without cupping inward or flaring outward.
- If the edge cups and shortens the flap, there are too few pickups or the edging tension is too tight.
- If it ruffles, there are too many pickups.
- At the two corners where each flap meets the hat, use enough stitches to turn smoothly without making a bulky cluster.
This adult example finishes without long ties. The tapered three-stitch bottom remains comfortable under outerwear and avoids making a cord the only way the flap stays over the ear.
The six physical checkpoints
- Washed-fabric gate: body and flap row gauges are measured from the selected fabric, and recovery leaves usable stretch reserve.
- Close-hat gate: circumference and crown-to-edge depth fit before any flap is attached.
- Four-boundary gate: front, both flap zones and back add exactly to the lower-edge count.
- Ear-center gate: the center stitch of each flap zone sits over the corresponding ear while worn.
- First-flap depth gate: the first unedged flap reaches the chosen coverage point before the second is made.
- Mirror-and-edge gate: both finished flaps have equal row counts and relaxed depth, and the edging does not pull them upward.
These checkpoints prevent a late discovery that the second flap begins in the wrong region or that both flaps are beautifully shaped but miss the ears.
Troubleshooting by symptom
I do not know where the second earflap starts
Stop counting from the first flap. Find center front and center back. Divide the calculated front and back gaps equally around those centers, then use the two accepted boundary markers for the second 11-stitch zone. In the example, its front edge is exactly 16 stitches from center front and its back edge is five stitches from center back.
Both flaps sit too far forward
The zones are symmetrical but the landmark choice is wrong for the wearer. Move both full zones toward center back by the same number of stitches. Keep each zone 11 stitches wide unless physical width is also wrong.
Both flaps sit behind the ears
Move both full zones toward center front. Recheck the clear forehead arc and verify that the hat itself is not rotating because it is loose.
One flap covers the ear and the other misses
Confirm center-front and center-back markers, then count both 32-stitch side paths. Check whether the hat is worn level. If anatomy or a device creates a real difference, shift only the affected complete zone by one stitch and record the intentional offset. Do not create unmatched flap widths without a coverage reason.
The earflaps are too short
Measure actual row gauge and compare the required physical drop. Add plain rows within a recalculated decrease schedule; do not simply append rows after reaching three stitches, which creates a narrow cord-like tail. If the close hat is too shallow, fix the hat depth instead of making unusually long flaps compensate.
The flaps are long enough but become narrow too quickly
The decrease rows are concentrated too early. Spread the necessary paired decreases across the total row count. For the example, plain rows alternate with decrease rows. A longer flap at the same 11-to-3 width needs more plain rows between those four reductions.
The flaps look wide and rectangular
Check whether the scheduled decrease rows were skipped. Also verify that HDC2tog removes exactly one stitch at each edge. An added turning-chain stitch can preserve width accidentally.
The two flaps have different lengths
Compare row counts, individual row stitch counts and relaxed row gauge. Mark every completed row on a small counter or checklist. If counts match but lengths differ, tension changed; remake the inconsistent flap before edging.
The lower edge stretches but the front becomes loose
The entire hat may have too little negative ease, or the edging may have added circumference. Measure the finished front gap relaxed. Do not tighten only the forehead with a rigid edge that cannot pass over the head. Revisit the body count or use an elastic finishing round.
The edging makes the flaps curl
Too few side pickups or tight edging tension shortens the perimeter. Remove the edging, mark side sections and distribute pickups more evenly. If the edge ruffles, reduce pickups. Steam or wet blocking cannot reliably undo a structurally incorrect pickup count.
The crown is correct but the close hat is too short
Work more even body rounds before mapping the flaps. The close-hat depth and flap drop are separate. Earflaps should extend coverage below a correctly placed edge, not replace missing body height.
Adapting the system to another wearer
Different head circumference
Use the actual head measurement, intended ease and washed gauge. The method selects a nearby multiple of eight for this crown. Verify the physical lower edge. Then remeasure front arc, flap width and required drop on that wearer.
Existing correctly fitting hat
Choose existing-hat mode and use the lower-edge stitch count. Measure its actual edge gauge rather than using the original pattern gauge. The method will divide that count into compatible front, flap, back and flap regions.
Different yarn or hook
Make and wash another swatch. A new stitch gauge changes all horizontal counts; a new flap row gauge changes the taper schedule. Do not keep the example’s 32/11/10/11 map after changing gauge.
Wider ear coverage
Increase the physical flap-top width input. The worked calculation will show whether the requested front and two flaps still leave a viable back gap. If not, reduce the front clear arc only if the wearer accepts the new front boundary; do not force overlapping regions.
Hearing devices or glasses
Mark the device location while the wearer has it in the normal position. Shift or widen the zone only after checking comfort and access. Avoid a hard edging or bulky seam pressing against the device. The wearer’s feedback overrides a visually perfect mirror.
Ties, cords and child adaptations
This complete example is an adult hat without long ties. If adapting any headwear for a child, treat cords near the head and neck as a safety decision, not a decorative default. The U.S. Consumer Product Safety Commission documents serious entanglement hazards from hood and neck drawstrings in children’s outerwear. That rule addresses outerwear drawstrings rather than defining this crochet hat, but the hazard is relevant enough that this tutorial does not prescribe long ties for child versions.
For babies, hats are for appropriate awake use and conditions, not indoor sleep. The American Academy of Pediatrics’ HealthyChildren guidance advises against hats on babies indoors after leaving the hospital and discusses overheating within safe-sleep guidance. A handmade pattern does not replace current caregiver, product-safety or medical guidance.
Care and fit recheck
Wash and dry the completed hat using the swatch method. Let it rest, then remeasure circumference, close-hat depth, flap width and flap drop. Put it on the intended wearer and confirm the six checkpoints again.
Store the hat flat or loosely folded, not hanging by one flap. Inspect the attachment corners and center-bottom stitches for wear. If one flap begins to stretch longer, compare its edging and row recovery rather than pulling the other flap to match.
Frequently asked questions
How many stitches should an adult crochet earflap have?
There is no universal count. The example uses 11 stitches because a 3.5-inch desired width at 3 stitches per inch converts to 10.5 and the method selects an odd 11-stitch zone. Another edge gauge or wearer width produces another count.
Why is the front gap larger than the back gap?
Earflaps generally sit to the sides and slightly toward the back, leaving a broad clear forehead and a smaller nape section. The exact difference comes from wearer landmarks. The worked calculation warns when the entered measurements reverse that relationship so the maker can verify intent.
Must the flap count be odd?
No, but an odd count provides a single center stitch that is easy to align with the ear and a compatible odd bottom width for paired edge decreases. An even plan can work if its two center stitches are marked consistently.
Can I decrease every row?
Only if the resulting physical length matches the required drop. With 11 top stitches and a three-stitch bottom, four paired decrease rows remove the needed eight stitches. Using those decreases in four consecutive rows creates a much shorter flap than distributing them across eight rows.
Should I make the first flap and then count across the back?
Mark all regions first. Otherwise, the maker can confuse the front gap with the back gap or discover too late that the remainder cannot be mirrored. Center-front and center-back anchors make both flaps independently locatable.
Why does the first flap measure correctly but the second is shorter?
Equal row counts do not guarantee equal physical length when tension changes. Compare row gauge, turning chains, skipped edge stitches and edging pickups. Work the two flaps in the same session when possible and compare after rows 4 and 8.
Can the calculation add flaps to any beanie?
It can map the lower edge of an existing correctly fitting hat when its stitch count and actual edge gauge are entered. Strong ribbing, textured repeats, seams or colorwork may restrict attachment positions. Preserve the existing pattern repeat and verify the markers on the wearer.
What makes this tutorial different
This article does not present earflaps as two triangles attached after a generic adult beanie. It treats placement as a four-region circumference problem and coverage as a separate vertical problem. Every stitch belongs to the front gap, one flap or the back gap; the total is checked before the hook is inserted.
The second flap is located from center-front and center-back landmarks, not from an unexplained skip count. Each odd-width flap has a center stitch that is checked directly over the wearer’s ear. The taper length comes from washed row gauge, and the required paired decreases are distributed through that physical height.
References
- Craft Yarn Council: Standard Yarn Weight System
- U.S. Consumer Product Safety Commission: Drawstrings in Children’s Outerwear
- American Academy of Pediatrics: Safe Sleep Guidance