
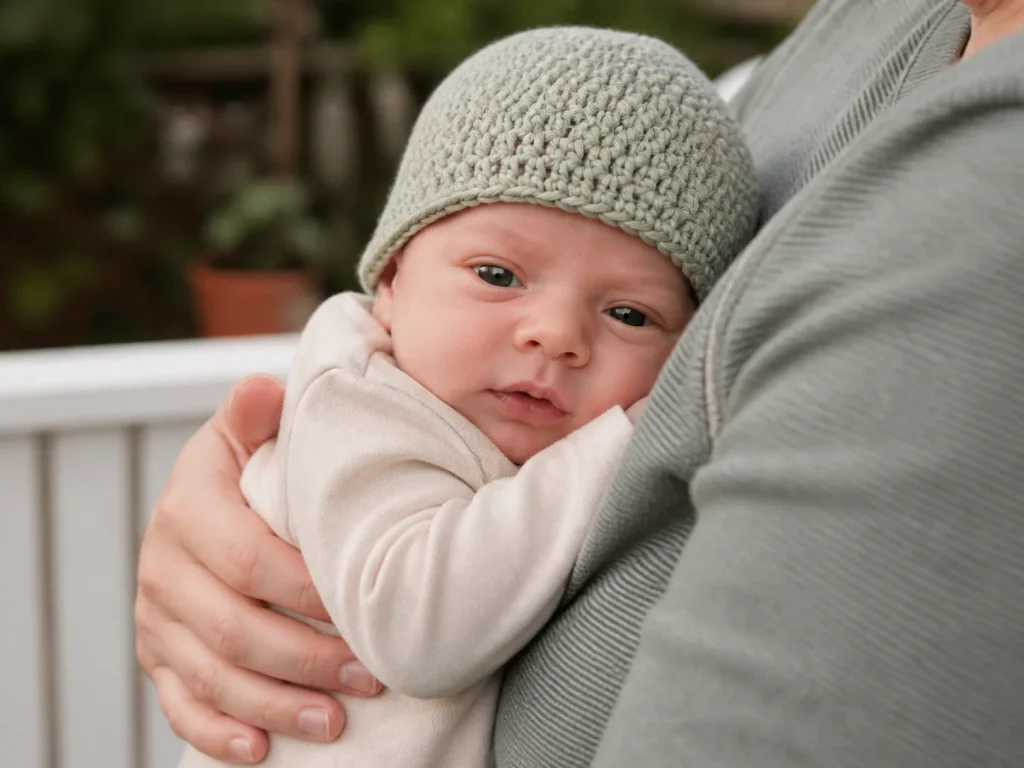
Make a plain newborn beanie from the top down in half double crochet. The free pattern below follows a 51-stitch calculation example: six-sector crown rounds, a three-increase bridge, an even body, and a plain edge. Match the assumed gauge and measurements or calculate your own count first. Preemie and donation projects must follow the caregiver’s or receiving program’s requirements.
Start with the 51-stitch calculation example
Assume a 13.25 in head, 4% planned negative ease, 16 HDC per 4 in (10.16 cm), and a target depth of 5 in. The calculation selects 51 stitches and predicts a relaxed circumference of 12.75 in. These are planning inputs and outputs, not a measured finished hat.
- Check the materials and your own washed gauge; calculate another count if the inputs differ.
- Work crown Rounds 1–8 once to reach 48 stitches, then the three-increase bridge once to reach 51.
- Continue with the complete pattern, keeping 51 HDC in the even body. Check width and depth, then finish the edge and tails.
For a donation, confirm the receiving program’s current requirements before choosing yarn or making the hat.
Important use note before choosing yarn
NICHD Safe to Sleep guidance says to keep a baby’s head and face uncovered during sleep and notes that hats worn indoors can contribute to overheating. Treat this hat as an awake, supervised, temperature-appropriate accessory. Remove it for sleep and when the caregiver or healthcare team says it is not needed.
Do not add chin ties, neck cords, drawstrings, bells, beads, buttons, snaps, gems, or detachable pieces. Keep the lower edge away from the eyes and check that no hard knot or loose loop presses against the head.
First choose the project path
Path A: a personal gift or family hat
Use the baby’s actual head circumference if it is available. If the baby has not arrived, use the planned wear time and a starting range, then give the finished measurements to the caregiver. A hat that is slightly too large may become useful later; a tight lower edge should not be forced onto the head.
Path B: a hospital, NICU, charity, or clinical recipient
Stop before selecting the yarn. Ask the receiving program whether it currently accepts handmade hats and request its written rules for:
- accepted item type and current need;
- finished circumference, stretch, depth, and closure;
- yarn fiber, weight, color, and washability;
- smoke, fragrance, pet-hair, laundering, and packaging requirements;
- seams, holes, knots, ties, and decorations.
Receiving programs do not use one universal standard. One hospital may publish a 13-inch crochet cap, another may request a 16-inch stretched circumference, and another may no longer accept NICU hats. The receiving program’s current instructions override every general number on this page.
Materials for the plain low-bulk version
- light, smooth DK or light worsted yarn that is soft against the neck and can be cared for by the recipient;
- a hook that creates a flexible, closed-enough HDC fabric at your own tension;
- a second hook one size smaller only if the final edge flares;
- flexible measuring tape;
- locking stitch markers in two colors;
- blunt yarn needle and scissors.
For a personal gift, choose fiber from the caregiver’s care preferences and known sensitivities. For a donation, do not substitute your favorite “baby yarn” for the receiving program’s fiber and weight rules.
Abbreviations and pattern notes
- ch = chain
- hdc = half double crochet
- inc = work 2 HDC in the same stitch
- sl st = slip stitch
- st / sts = stitch / stitches
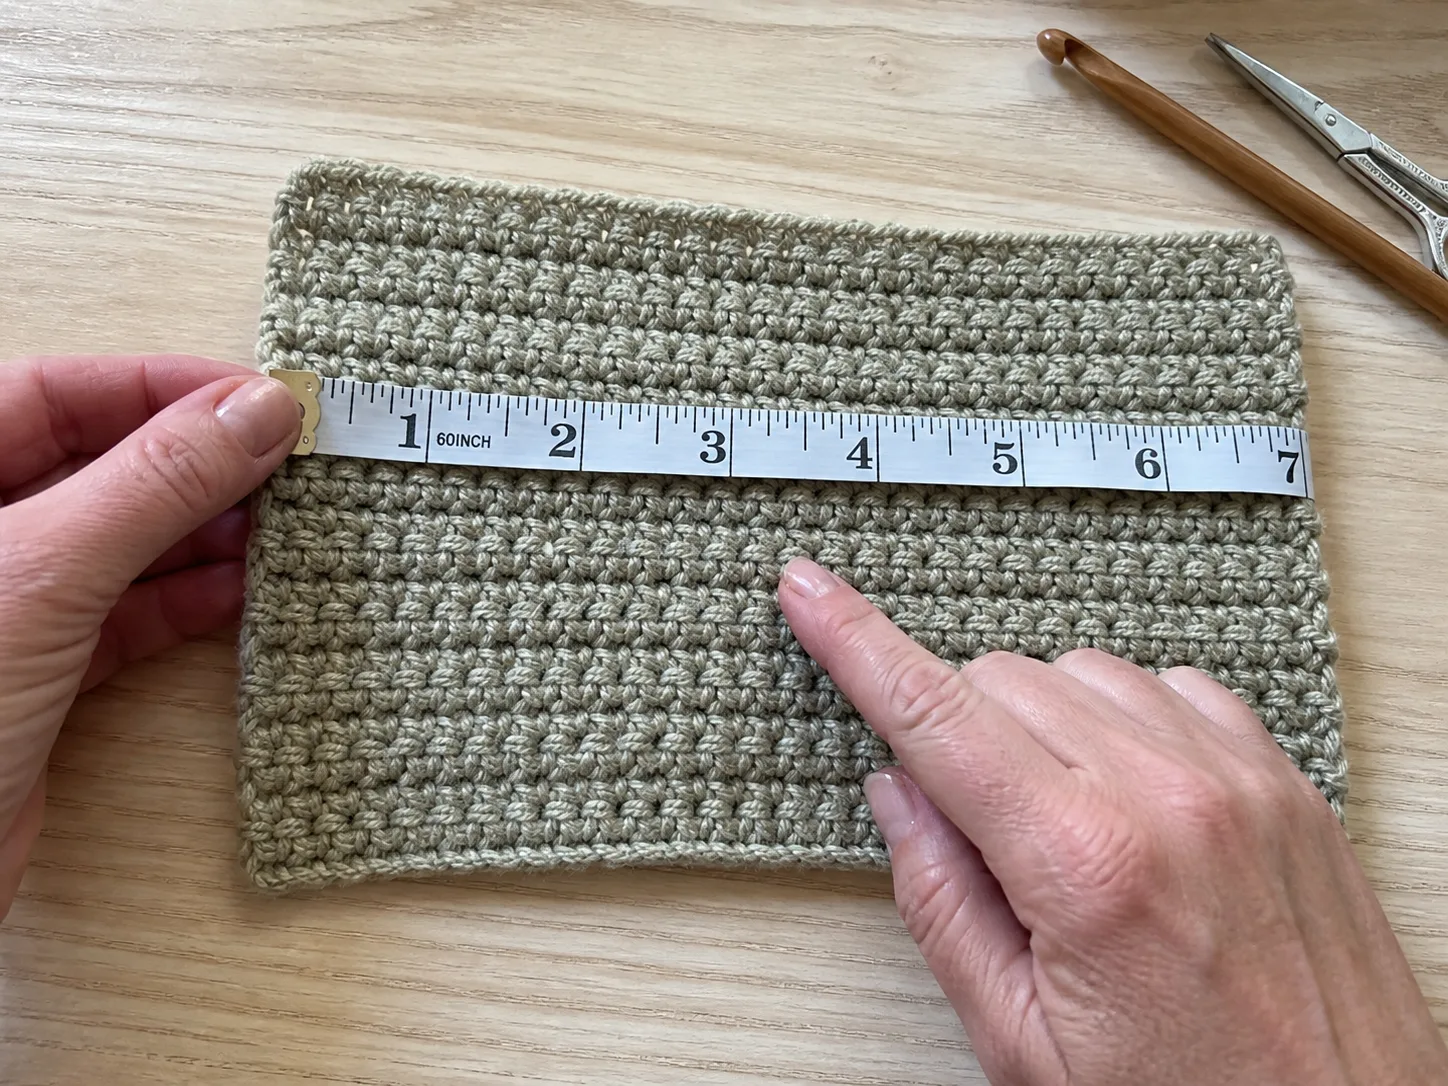
Use US crochet terms. Work in a continuous spiral unless a section says otherwise. The first marker identifies the beginning of the round. A second color marks the increase sectors. Count every round; do not judge a very small crown by appearance alone.
Step 1: start with a low-profile adjustable center
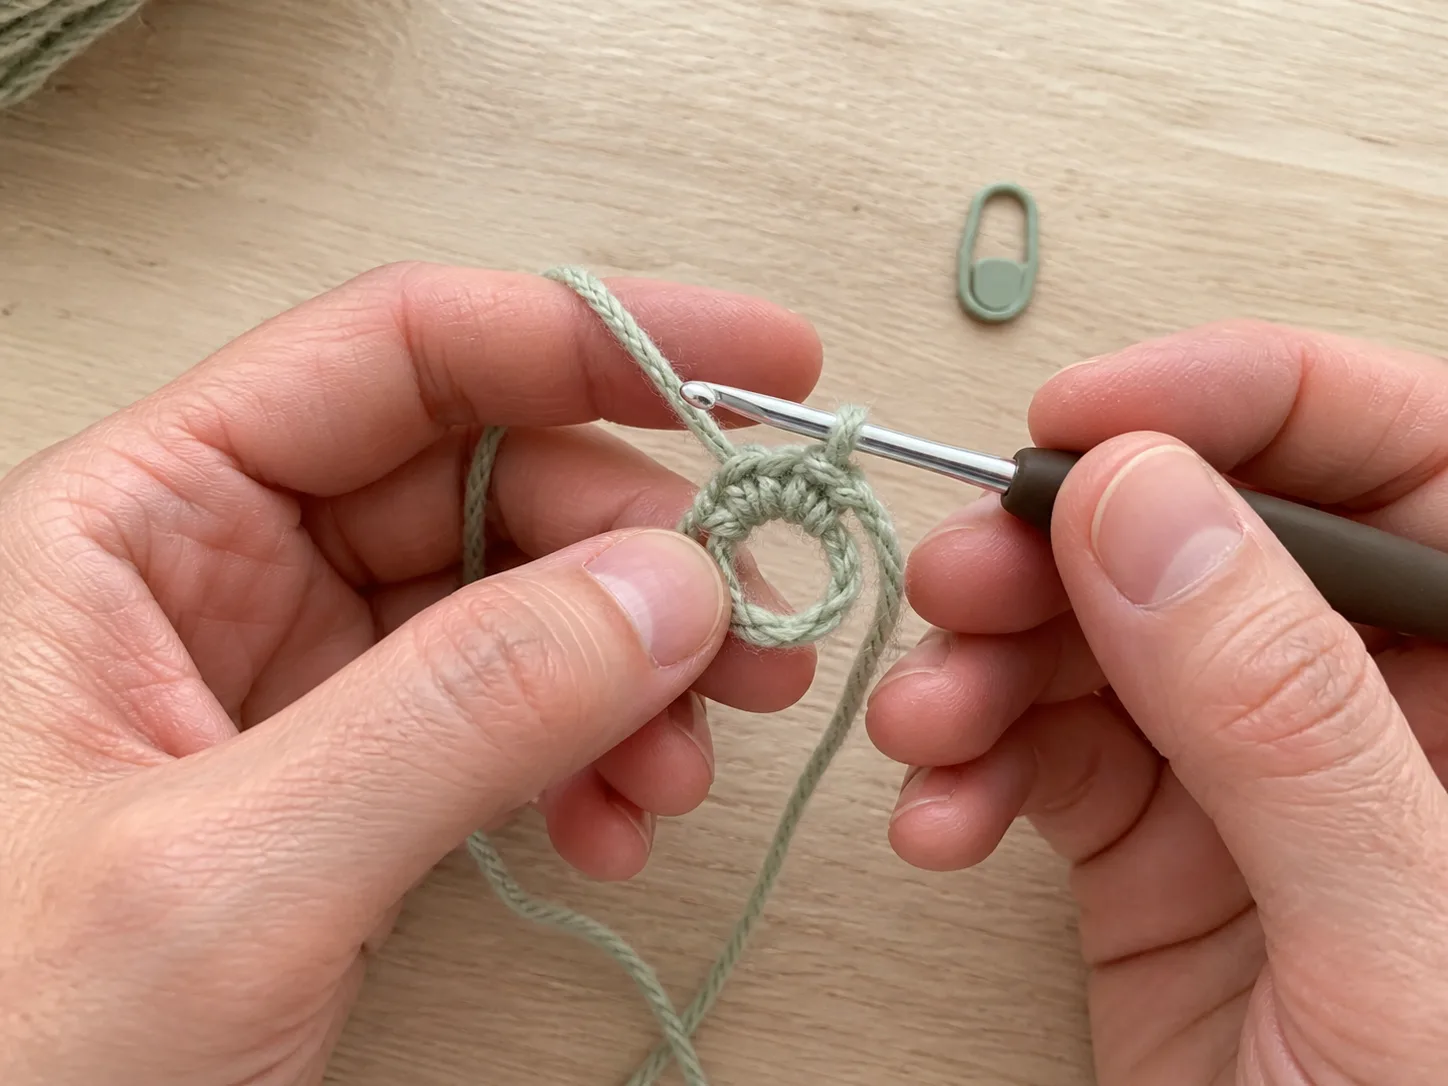
Make an adjustable ring, ch 1 without counting it as a stitch, and work 6 HDC into the ring. Place the beginning marker in the first HDC. Pull the center closed enough to remove the hole, but do not cut the tail or tie a hard knot yet.
If adjustable rings are difficult, ch 2 and work 6 HDC into the second chain from the hook. Keep the center small and flat.
Step 2: work the six-sector crown
The 6 HDC made in Step 1 are Round 1 below. Count them once, then continue with Round 2; do not work a second 6-stitch starting round.
Each full increase round adds six stitches. Move the beginning marker after every round.
- Round 1: 6 HDC in the center. (6)
- Round 2: inc in each stitch around. (12)
- Round 3: [HDC in next st, inc in next st] six times. (18)
- Round 4: [HDC in next 2 sts, inc in next st] six times. (24)
- Round 5: [HDC in next 3 sts, inc in next st] six times. (30)
- Round 6: [HDC in next 4 sts, inc in next st] six times. (36)
- Round 7: [HDC in next 5 sts, inc in next st] six times. (42)
- Round 8: [HDC in next 6 sts, inc in next st] six times. (48)
Stop when you reach the last full six-stitch count below or equal to the worked example’s selected count. If the selected count is exactly divisible by six, skip the bridge section.
Step 3: add the optional three-increase bridge
Use this round only when the selected count is three more than the last full six-sector count.
For the 51-stitch example, begin with 48 stitches:
Bridge round: [HDC in next 15 sts, inc in next st] three times. (51)
For another count, divide the current full-round count by three. That number is one bridge sector. Work one increase at the end of each of the three equal sectors.
Examples:
| Begin bridge with | One sector contains | Bridge instruction | End with |
|---|---|---|---|
| 36 sts | 12 sts | [HDC 11, inc] 3 times | 39 sts |
| 42 sts | 14 sts | [HDC 13, inc] 3 times | 45 sts |
| 48 sts | 16 sts | [HDC 15, inc] 3 times | 51 sts |
| 54 sts | 18 sts | [HDC 17, inc] 3 times | 57 sts |
Use the stated measurement range, washed gauge, low-bulk construction checks and recipient rules together. The complete example demonstrates the arithmetic without presenting one number as a universal newborn size.
Checkpoint 1: count and crown diameter
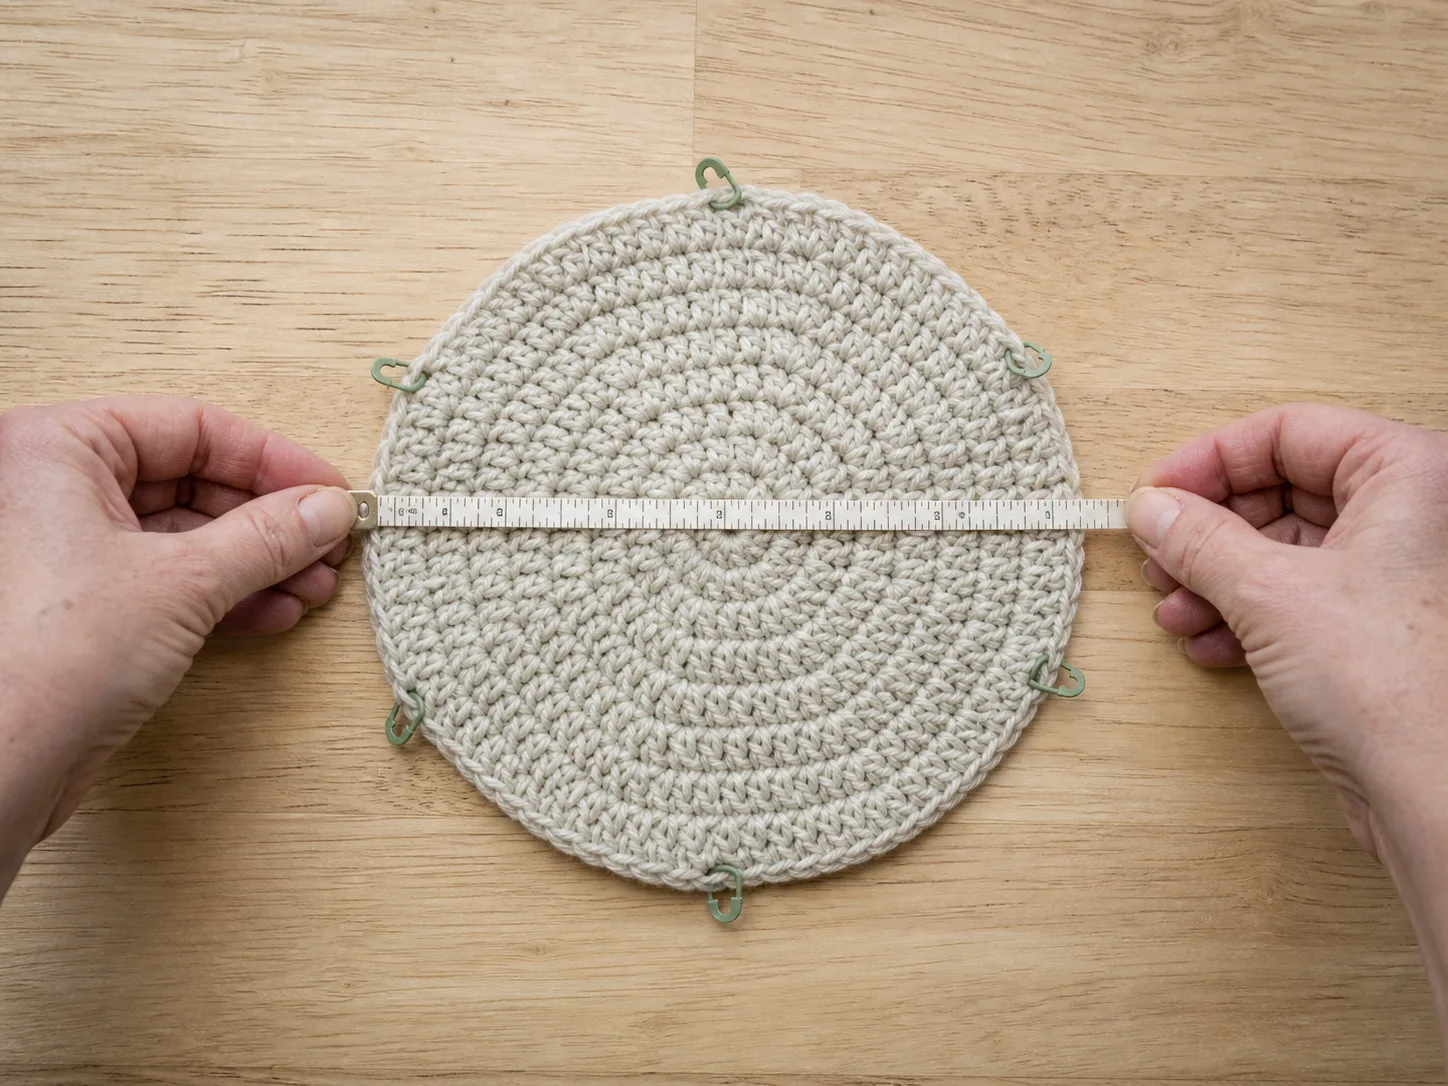
After the final increase round, count the stitches before measuring. Lay the circle flat without stretching and measure straight across the widest point.
For the example, confirm 51 stitches and approximately 4.06 in / 10.3 cm across. A small difference can come from the crown’s texture and measuring position; a large difference means the gauge or count needs attention.
The crown should lie reasonably flat. A slight cup after the bridge can settle during the first even rounds. Strong ruffling usually means too many increases, while a tight bowl before the even section usually means too few increases or a much tighter gauge.
Step 4: change from crown growth to the hat body
Work HDC in every stitch with no increases. Continue in a spiral and keep the beginning marker moving. After two even rounds, the edge should begin turning downward instead of expanding as a larger flat circle.
Do not add increases because the opening “looks small.” First compare the count, relaxed flat width, and swatch gauge with the calculated targets.
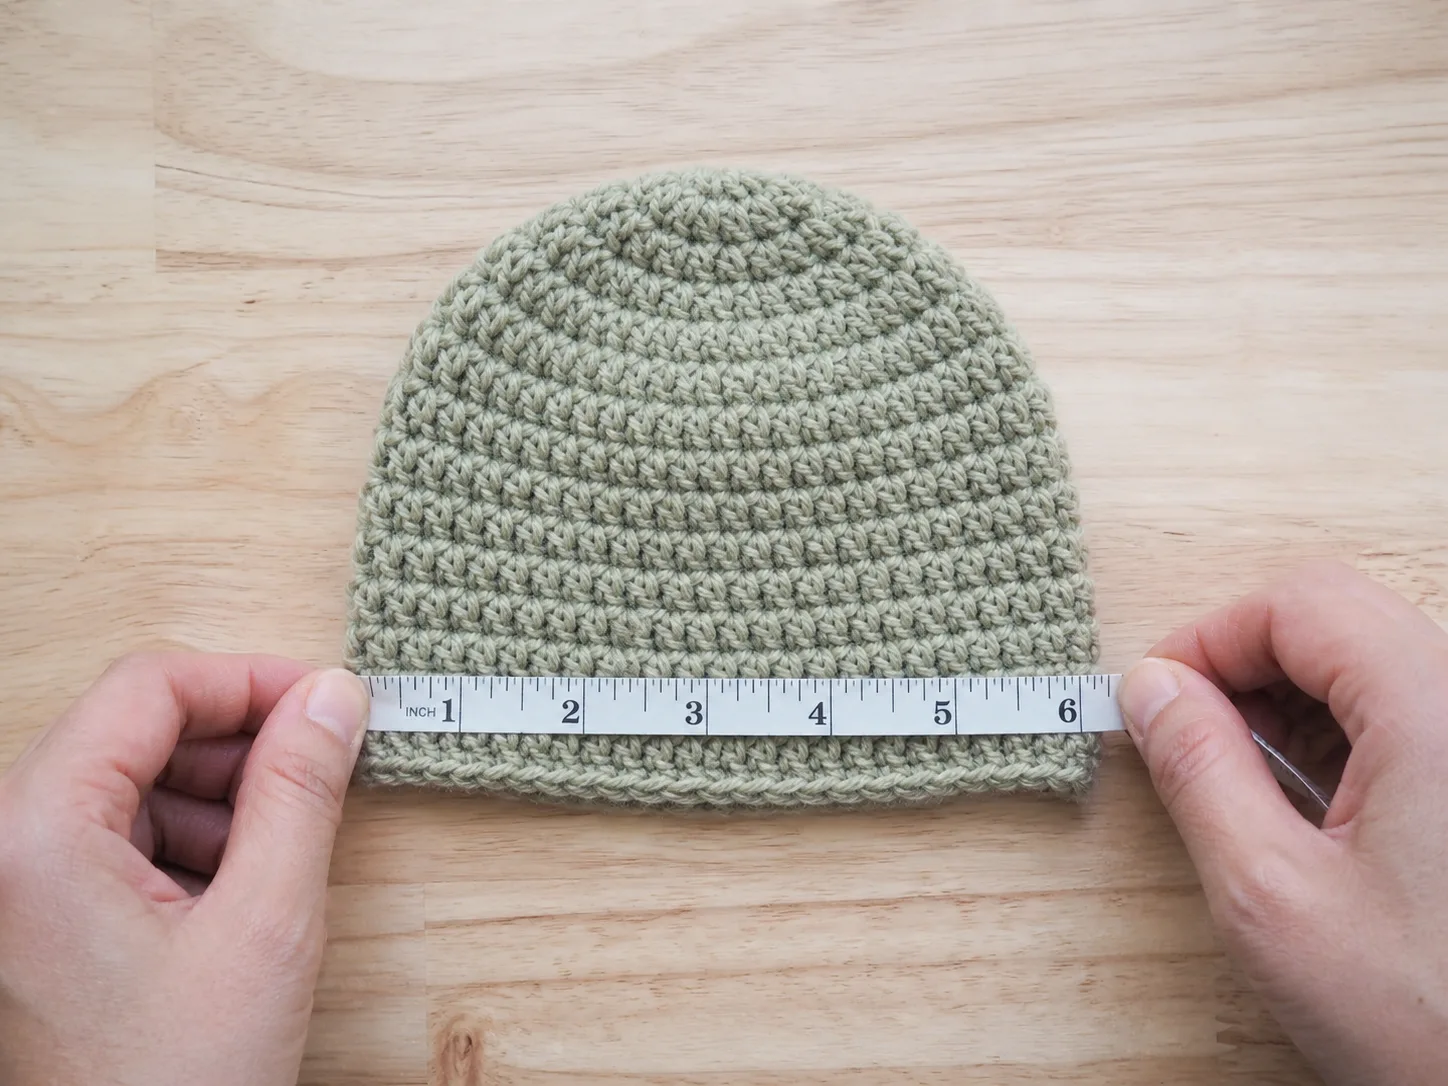
Checkpoint 2: relaxed flat width after two even rounds
Let the work rest for a minute, fold it gently with the opening aligned, and measure straight across without stretching.
The 51-stitch example targets approximately 6.38 in / 16.2 cm flat. If the width is substantially smaller even though the count is correct, your working gauge is tighter than the washed swatch. If it is larger, the working gauge is looser or the fabric has already relaxed.
This checkpoint answers the width question. It does not determine the final depth.
Checkpoint 3: stop at the chosen wear line
Measure from the center top down one side to the working edge. Do not measure over the top and down both sides.
For the example, continue even until the piece is about 4.75 in / 12.1 cm deep, then reserve approximately 0.25 in / 0.6 cm for the final edge round. Stop sooner or later if the actual measured wear line or recipient instruction requires it.
The finished edge should sit near the intended brow and ear line without drifting toward the eyes. Width and depth are independent: adding more body rounds fixes a short hat but does not fix a tight opening.
Finish the lower edge without making a hard band
Work one HDC in every stitch for the final round. Slip stitch into the next stitch, cut a long tail, and pull it through.
If the edge flares, redo only the final round with the smaller hook or distribute up to three decreases evenly. If the edge feels markedly tighter than the body, remove the round and use the same hook with deliberately relaxed tension. Do not add an elastic cord or drawstring.
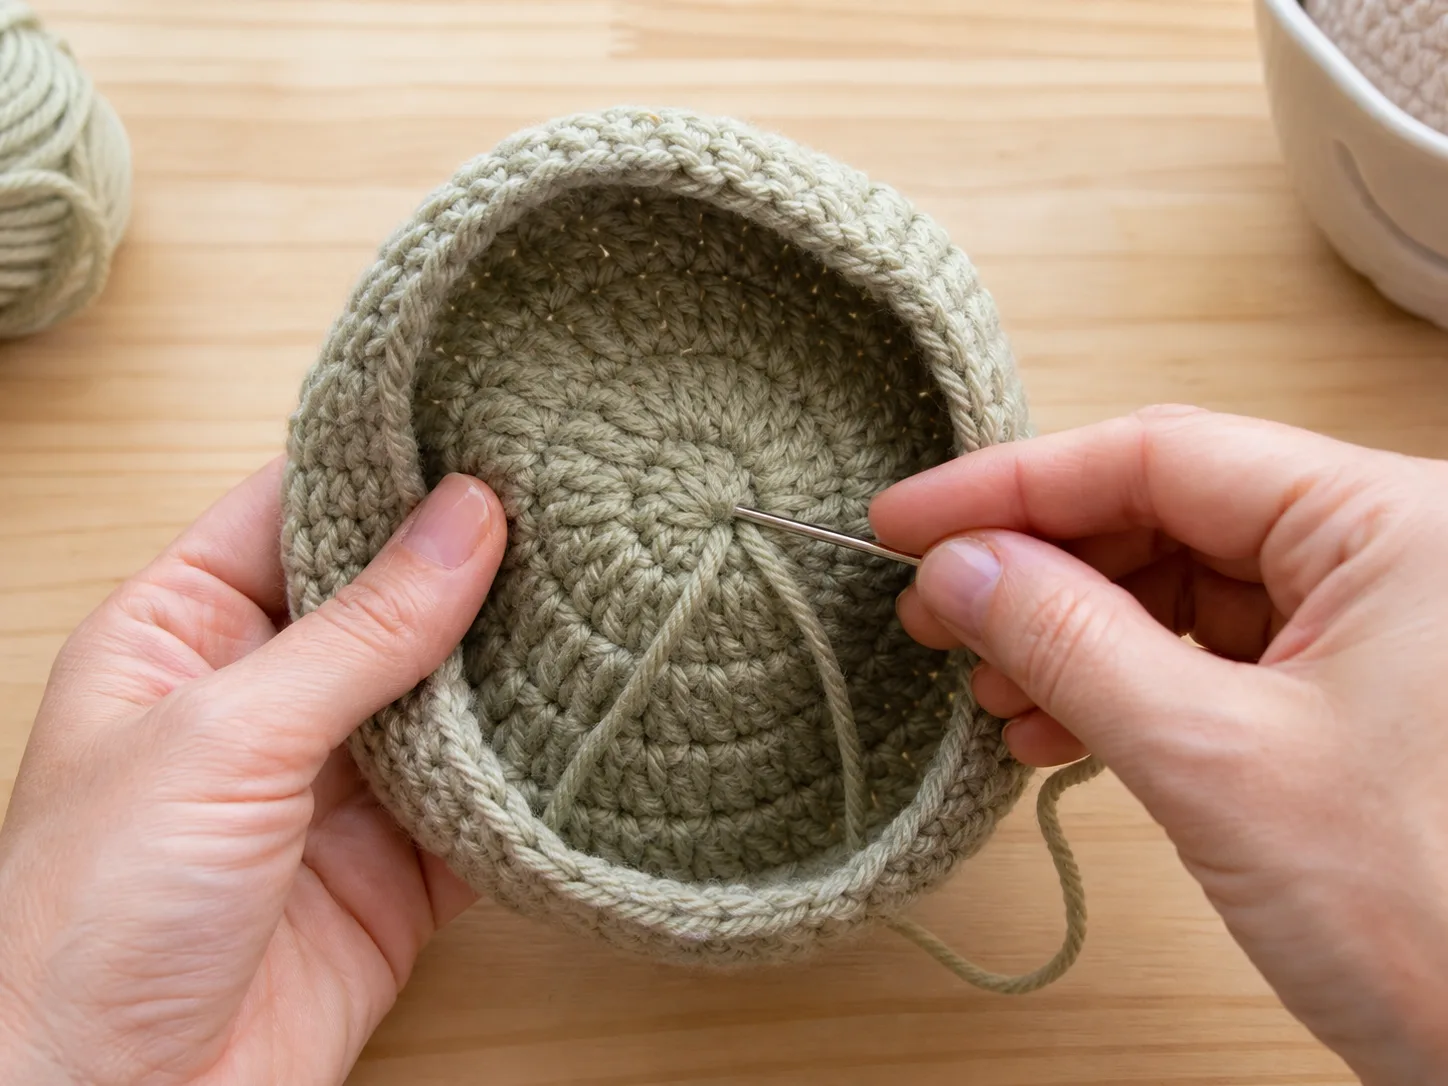
Secure the center and yarn tails with low bulk
Turn the hat inside out. Thread the center tail onto a blunt needle, follow the center stitches for at least two changes of direction, and gently close any remaining opening. Spread the securing path across several stitches instead of building one hard knot.
Weave the final edge tail in three directions through the inside of the fabric. Trim only after gently stretching the area and confirming the end does not pull free. Run a fingertip over the inside to find sharp fibers, hard lumps, long floats, or loose loops.
Choose your own newborn measurements and count
This newborn crochet hat pattern does not ask you to trust one age label or one universal stitch count. Measure the head when you can. When you cannot, begin with a clearly labeled planning range, make a washed half-double-crochet swatch, and let the newborn fit and acceptance method convert your gauge into a nearby usable count.
The pattern grows the crown in six sectors. A normal crown round adds six stitches; an optional bridge round adds only three. That smaller step matters on a newborn hat, where an eight-stitch jump can change the relaxed circumference by roughly 1.5-2 inches at common gauges.
The complete example assumes a 13.25 in head (33.655 cm, about 33.7 cm), 4% planned negative ease, and 16 HDC across 4 in (10.16 cm). The calculation selects 51 stitches and predicts a relaxed circumference of 12.75 in / 32.4 cm, a flat width of 6.38 in / 16.2 cm, and a crown diameter of 4.06 in / 10.3 cm.
This is a plain, decoration-free hat for supervised awake wear. It is not a promise that a hospital or NICU will accept the item. If the project is a donation, obtain the receiving program’s current written requirements before choosing the yarn or beginning the hat.
Why this pattern is different from the 0-12 month baby hat
The baby-hat guide covers 0-12 months and uses four-stitch choices around an eight-sector crown. This page has a narrower job:
- term-newborn proportions and broad preemie planning references;
- smaller three-stitch sizing choices around a six-sector crown;
- a shorter crown-to-edge depth range;
- low-bulk center, edge, and yarn-tail finishing;
- a no-baby verification path for gifts made before birth;
- a separate acceptance gate for donation or clinical recipients.
Do not shrink the older-baby pattern by removing an arbitrary number of rounds. Width, crown diameter, depth, lower-edge stretch, and receiving-program rules all need their own decision.
Newborn and preemie measurements are ranges, not identities
Craft Yarn Council lists a broad preemie head reference of 9-12 in / 23-30.5 cm and a broad baby reference of 14-16 in / 35.5-40.5 cm. Real newborns do not all fall neatly on one boundary, and hospital definitions may be based on clinical need rather than a craft chart.
Use the following only to start the decision. The actual head or recipient specification wins.
| Starting label | Head-circumference planning range | Crown-to-edge depth starting range | Best use |
|---|---|---|---|
| Preemie reference | 9-12 in / 23-30.5 cm | 4-4.5 in / 10-11.5 cm | Planning only; obtain caregiver or program direction |
| Term newborn | 13-14 in / 33-35.5 cm | 5-5.5 in / 12.5-14 cm | Personal gift or measured newborn starting point |
| 0-3 months | 14-15 in / 35.5-38 cm | 5.5-6 in / 14-15 cm | Use the separate 0-12 month baby-hat pattern |
There is no universal count for “newborn.” A 51-stitch hat at 4 stitches per inch is not the same size as a 51-stitch hat at 4.5 stitches per inch.
Name the four measurements before you compare numbers
Many sizing mistakes begin because “13 inches” is copied without saying what was measured.
- Head circumference: around the intended wear line on the person.
- Relaxed hat circumference: around the finished hat without stretching it.
- Flat width: the relaxed hat laid flat, measured straight across; approximately half the circumference.
- Crown-to-edge depth: from the center top to the lower edge along one side, not over the top and down both sides.
Crown diameter is a fifth construction checkpoint. It is the straight line across the widest part of the flat circle after the increase section. It helps catch a counting or gauge error before the body becomes long.
Make the swatch answer three questions
Work an HDC swatch larger than 4 in / 10 cm, wash and dry it as the finished hat will be cared for, and measure in the center.
- Stitch gauge: how many HDC span a known width?
- Comfortable stretch: can the lower-edge fabric expand without becoming hard or widely open?
- Recovery: after ten seconds of gentle stretch, does the fabric return close to its relaxed width?
Do not pull the swatch to its maximum. A newborn fit calculation should use relaxed gauge and a modest planned ease, then confirm comfortable stretch separately.
If the fabric is stiff, changing only the stitch count will not make it soft. Change the hook, yarn, or stitch choice, wash another swatch, and measure again.
Apply the Newborn Fit And Acceptance Method
Use the stated measurement range, washed gauge, low-bulk construction checks and recipient rules together. The complete example demonstrates the arithmetic without presenting one number as a universal newborn size.
Choose a starting point or enter the actual head measurement. Then enter the negative ease, HDC stitch gauge, swatch width, and desired finished depth. The worked method shows the selected three-stitch count, predicted relaxed size, flat width, crown diameter, crown plan, and recipient-acceptance status.
For a personal project, the calculation is a fit plan. For a donation project, the calculation remains provisional until current written recipient requirements are confirmed.
Newborn Hat Fit Acceptance Gate
Open the tool in a separate page. The article also retains the manual formulas and worked checks.
JavaScript is optional: use the manual calculation method and worked examples in the article.
The calculation behind the worked method
Let H be actual head circumference, E the negative-ease percentage written as a decimal, S the stitches counted in the swatch, and W the measured swatch width.
Round the raw count to nearby multiples of three. Compare both choices rather than automatically taking the larger one.
The formula predicts size from the washed swatch. It cannot predict a specific baby’s comfort, a yarn’s long-term recovery, or a receiving program’s acceptance.
Complete worked example: 51-stitch term-newborn hat
This is a calculation example with assumed head and gauge inputs, not a measurement of a hat made by this site.
| Input or result | Inches | Centimeters (converted from inch inputs) |
|---|---|---|
| Assumed head circumference | 13.25 in | 33.655 cm (about 33.7 cm) |
| Planned negative ease | 4% | 4% |
| Assumed washed HDC gauge | 16 sts in 4 in | 16 sts in 10.16 cm |
| Target relaxed circumference | 12.72 in | 32.3 cm |
| Raw calculated count | 50.88 sts | 50.88 sts |
| Selected usable count | 51 sts | 51 sts |
| Predicted relaxed circumference | 12.75 in | 32.4 cm |
| Effective negative ease | 3.8% | 3.8% |
| Relaxed flat width | 6.38 in | 16.2 cm |
| Crown-diameter checkpoint | 4.06 in | 10.3 cm |
| Crown-to-edge depth | 5 in | 12.7 cm |
The 51-stitch crown uses eight total crown rounds to reach 48 stitches: Round 1 starts with 6 HDC, and Rounds 2–8 each add 6. Then one three-increase bridge round reaches 51. That is seven full increase rounds after the starting round, followed by the bridge.
Pattern snapshot
Construction: seamless top-down HDC spiral.
Example input: assume a 13.25 in head (33.655 cm, approximately 33.7 cm).
Example gauge input: assume 16 HDC across 4 in (10.16 cm); measure your own washed swatch.
Example count: 51 HDC.
Example finished targets: 12.75 in / 32.4 cm relaxed circumference, 6.38 in / 16.2 cm flat width, 4.06 in / 10.3 cm crown diameter, and 5 in / 12.7 cm crown-to-edge depth.
Adjustability: use the worked calculation and the crown-plan section for another measured head or swatch.
Four checks when no baby is available
1. The label check
Write down what every number represents: relaxed circumference, flat width, crown diameter, and crown-to-edge depth. Do not compare a flat width with a circumference chart.
2. The flat-object check
Confirm the relaxed flat width and depth on a table. For the worked example, that is 6.38 in / 16.2 cm wide and 5 in / 12.7 cm deep.
3. The gentle-stretch-and-recovery check
Stretch the opening only to the intended head circumference, hold for ten seconds, release, and let it rest. The edge should recover near its earlier width and should not feel like a rigid cord.
4. The handoff check
Give the caregiver the relaxed circumference, intended head range, fiber, washing method, and use note. Ask them to stop using the hat if it leaves pressure marks, slides toward the eyes, becomes damaged, or no longer suits the temperature.
Donation acceptance is a separate result from fit
A mathematically correct hat can still be rejected by a receiving program. Before making a batch, confirm a sample against the current written requirements.
| Acceptance question | Why it matters |
|---|---|
| Does the program currently accept hats? | Some NICUs no longer accept them or accept them only during specific drives |
| Which sizes are requested now? | “Newborn” and “preemie” may not match the program’s categories |
| Which fibers and yarn weights are allowed? | Published rules currently range from fine acrylic to worsted yarn; some reject wool or cotton |
| Are holes, seams, decorations, or ties restricted? | Requirements differ, and loose parts can be a hazard |
| How must the item be cleaned and packaged? | Smoke, fragrance, pet hair, laundering, bagging, and labeling rules vary |
Troubleshooting by symptom
The crown ruffles before the body begins
Recount the last two rounds. Ruffling usually means an extra increase, an accidental seventh sector, or a looser gauge than the swatch. Remove the incorrect round rather than trying to hide excess fabric in the body.
The crown becomes a deep bowl too early
Confirm that every full crown round contains six evenly spaced increases. A missed increase or a tighter working gauge reduces diameter. If counts are correct, compare the measured diameter with the worked calculation before changing the hook.
The correct count produces the wrong width
Count is only half the equation. Divide the count by the actual stitches-per-inch gauge in the hat. If that result does not match the target circumference, the working fabric differs from the swatch. Recalculate from the fabric you are actually making.
The lower edge is tight but the body fits
The final round was worked more tightly, a smaller hook changed the edge too much, or a slip-stitch finish created a cord. Redo the edge with relaxed HDC tension. Do not compensate by making the entire body wider.
The hat looks too long
Verify that depth was measured from center top to one lower edge. Remove even rounds until the intended wear-line depth is reached. Do not change the circumference unless the width is also wrong.
The center feels hard
Remove a bulky securing knot and reweave the tail through several stitches and directions. The center should close securely without a compact lump against the head.
Changing yarn or hook without guessing
Changing yarn or hook changes both scale and fabric behavior. Make and wash another swatch, then use the new gauge in the worked calculation.
If the new yarn produces fewer stitches per inch, the same 51 stitches make a larger hat. If it produces more stitches per inch, the same count makes a smaller hat. Do not preserve the old count for sentimental or pattern-matching reasons.
Also reconsider the fabric:
- very bulky yarn can make a small hat thick and inflexible;
- loose tall stitches can create larger openings;
- dense cotton may have less recovery than an elastic blend;
- brushed or novelty fibers can hide stitches and complicate inspection;
- a recipient program may prohibit an otherwise comfortable fiber.
Washing, reshaping, and final measurement
Follow the yarn label and the recipient’s instructions. Support the wet hat rather than hanging it. Reshape it to the calculated flat width and depth, let it dry fully, and measure again.
Record the final relaxed circumference, flat width, depth, fiber, and care method. If washing changes the size enough to leave the intended range, revise the count or fabric before gifting or donating.
Before gifting or donating the hat
- I chose personal use or recipient-directed donation before selecting materials.
- I used an actual head measurement or clearly labeled planning range.
- I measured a washed HDC swatch instead of relying on the hook label.
- I compared both nearby three-stitch counts.
- I confirmed stitch count and crown diameter after increases.
- I confirmed flat width after two even rounds.
- I measured crown-to-edge depth on one side.
- The lower edge stretches comfortably and recovers.
- The inside has no hard knots, loose loops, cords, or detachable pieces.
- For donation, I have the current written receiving requirements.
- The caregiver knows the hat is removed for sleep and inappropriate indoor warmth.
Frequently asked questions
What size should a newborn crochet hat be?
There is no single size that fits every newborn. A 13-14 in / 33-35.5 cm head range is a useful term-newborn starting reference for this page, but the actual head circumference or receiving-program specification should decide the fit. Always distinguish head size from relaxed hat size.
How many stitches do I need for a newborn crochet hat?
The worked example selects 51 HDC from assumed inputs: a 13.25 in head (33.655 cm, about 33.7 cm), 4% negative ease, and 16 stitches across 4 in (10.16 cm). Use your own washed gauge and head measurement to calculate another count.
Can I make this as a preemie crochet hat?
The worked calculation can show a small-size planning result, but a preemie or NICU project needs caregiver or receiving-program direction. Very small or medically supported infants may have needs that a general web pattern cannot determine.
Why does the pattern use a three-increase bridge?
A full six-sector crown round adds six stitches. The bridge adds one increase in each of three equal sectors, creating an intermediate count. On a small hat, this reduces the jump between available circumferences.
Can I use double crochet instead of half double crochet?
You can build a different fabric, but do not keep this round plan automatically. Double crochet changes row height, holes, crown behavior, and finishing depth. Swatch it, use its actual gauge, and inspect whether the fabric suits the wearer or recipient.
Should a newborn hat have a pom-pom, bow, ears, or ties?
This base pattern intentionally has none. Receiving-program rules differ, and loose or detachable additions are unnecessary for the fit lesson. Keep the base plain unless the caregiver or recipient explicitly approves a safe alternative.
Can a baby sleep in the finished hat?
No. NICHD guidance says the head and face should remain uncovered during sleep and that indoor hats can contribute to overheating. Remove the hat for sleep.
How do I know whether a hospital will accept it?
Ask the hospital or charity’s volunteer services for current written requirements before making the item. A pattern found on a hospital website does not prove that every location—or even the same program at a later date—is currently accepting that item.
References
- Craft Yarn Council: Head Circumference Standards
- NICHD Safe to Sleep: Ways to Reduce a Baby’s Risk
- CAMC: Baby Hat Guidelines